
Go dig through your yarn stash right now. You know that gorgeous skein of cream cotton you’ve been saving for something special? This is the project.
Get the Ad-Free PDF Pattern
You can find the free pattern below, or you can purchase the ad-free printable PDF from my shop.
Get the Printable PDF →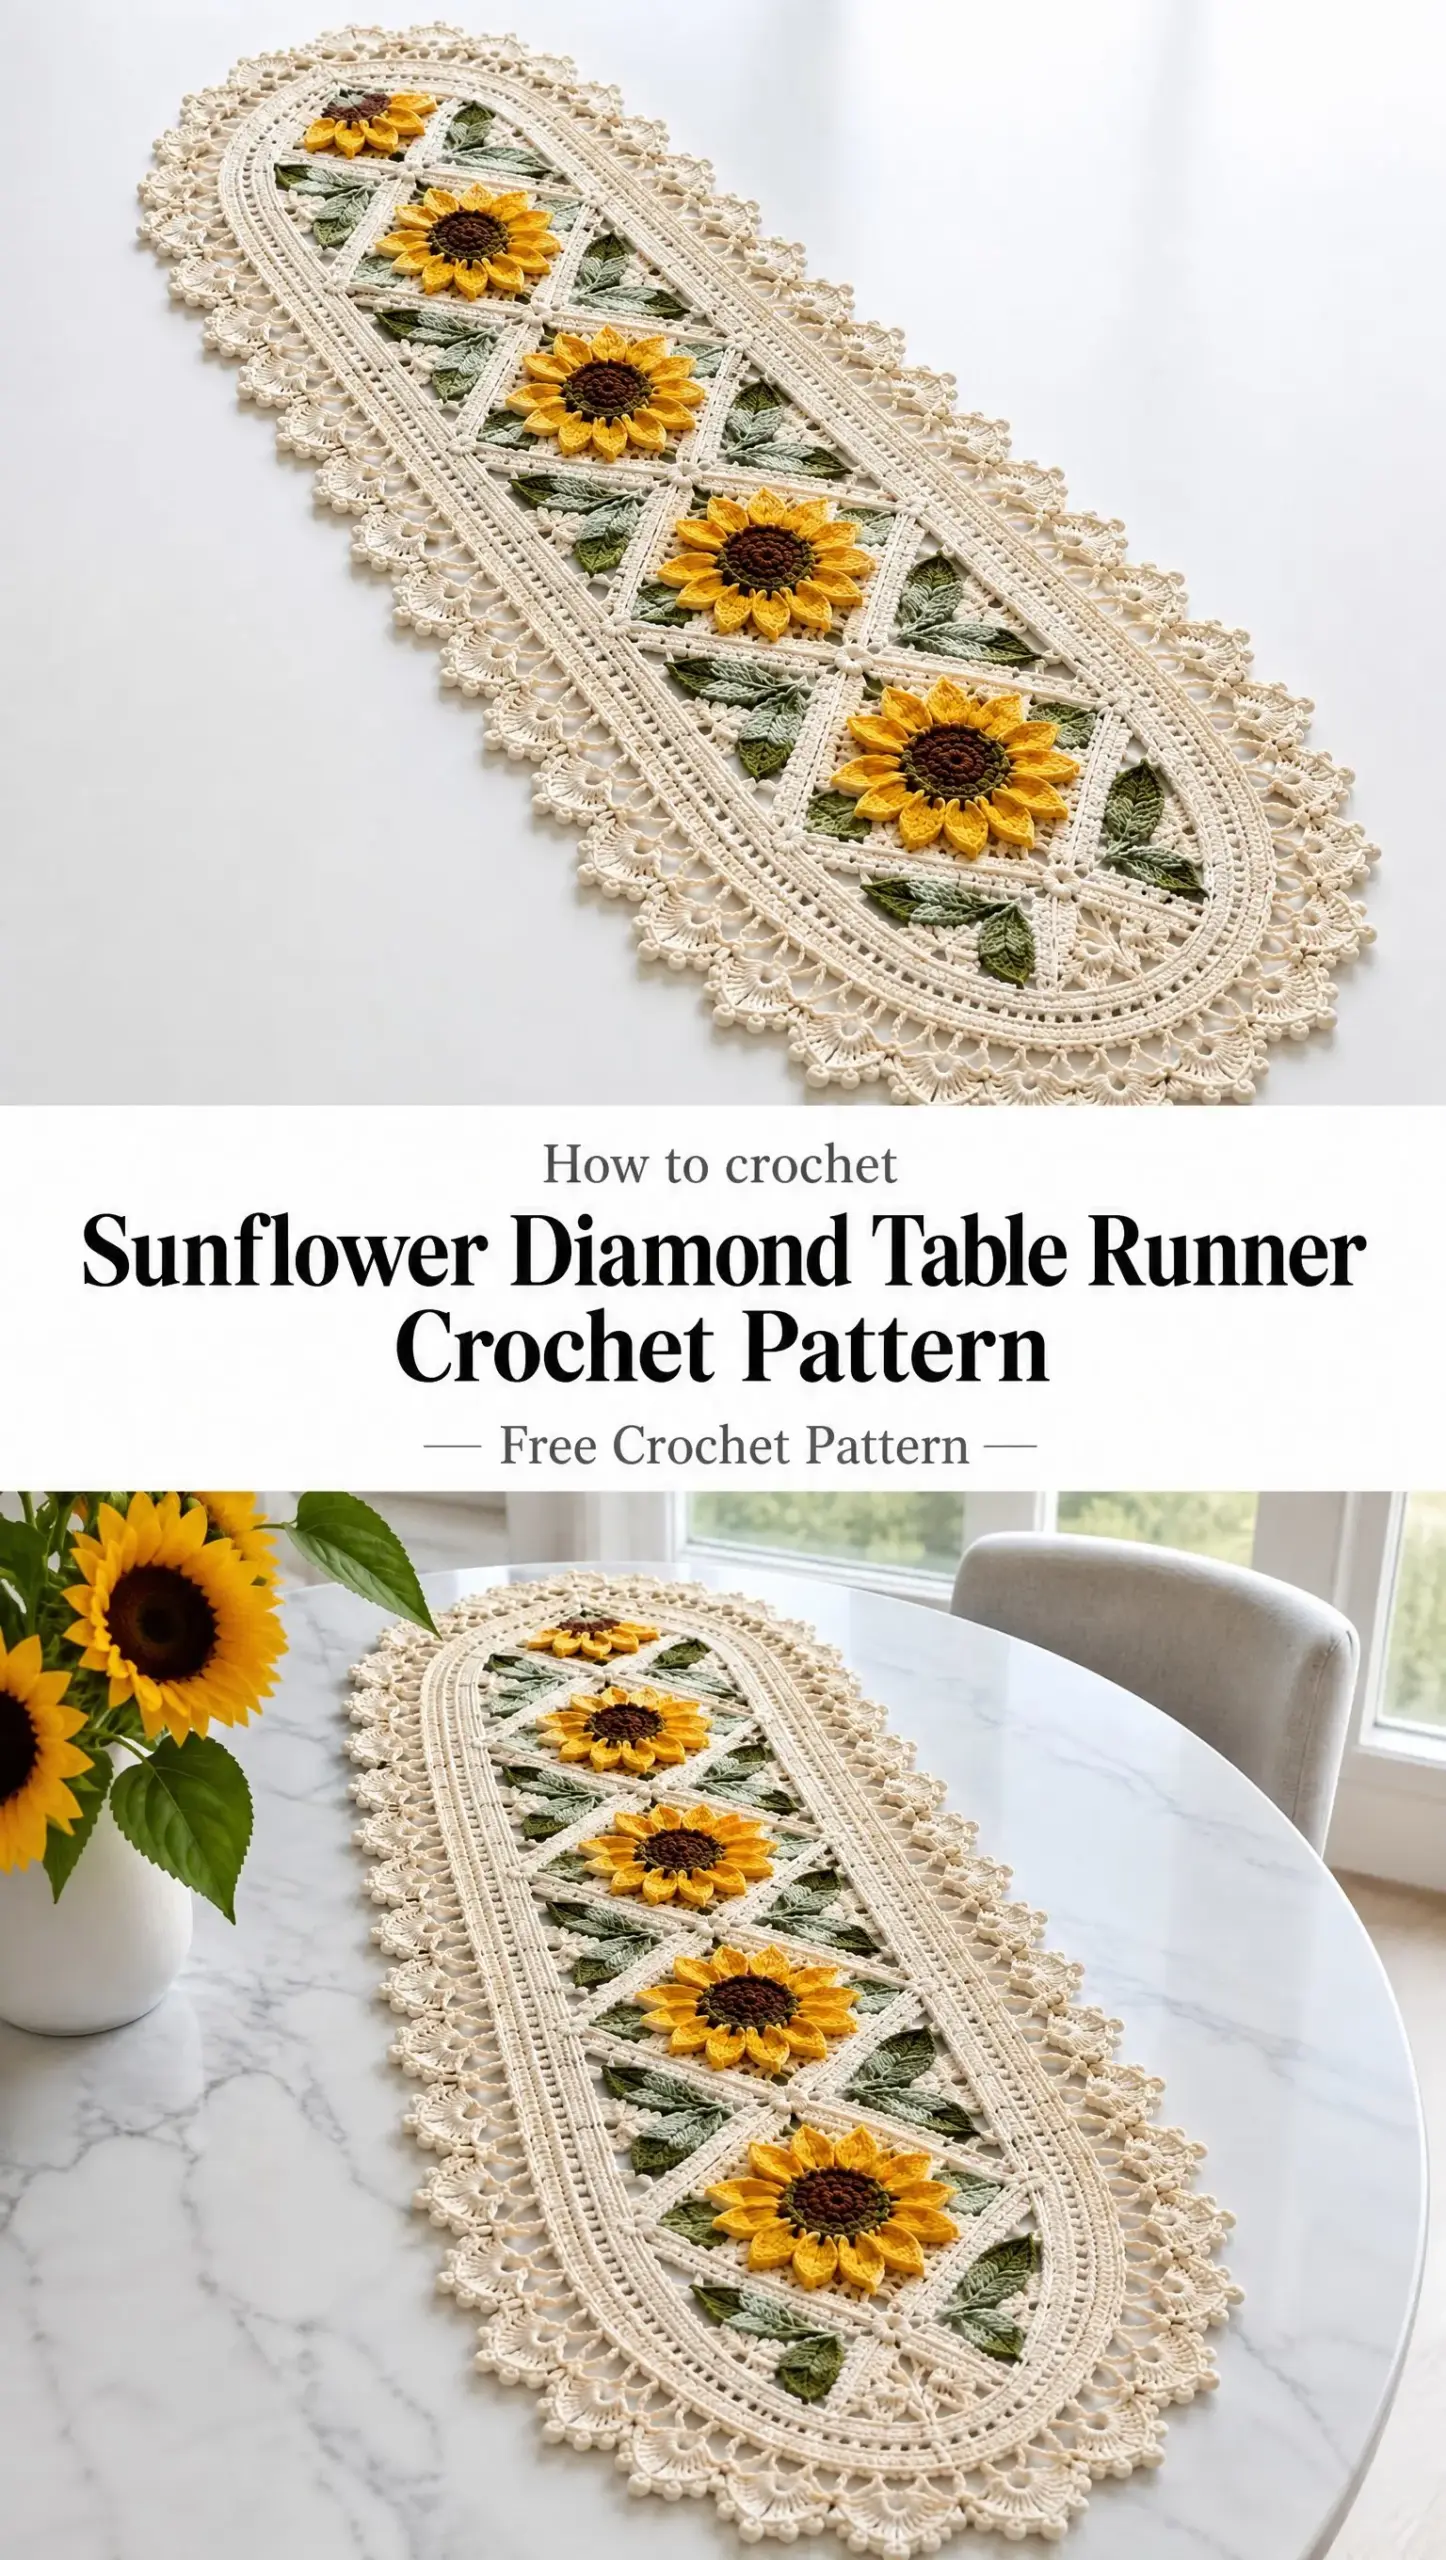
This Sunflower Diamond Table Runner combines motif construction with join-as-you-go techniques to create something truly stunning for your dining table. The raised sunflower centers pop against the cream lattice background, and those little green leaves add just the right touch of dimension. Fair warning: this one sits at an intermediate skill level. You’ll be working in the round, joining motifs, and creating a multi-round border with scallops and picots.
But here’s what I love about this construction. Each diamond motif is self-contained, so you can work on them anywhere. Waiting at the doctor’s office? Make a sunflower center. Watching TV? Finish a few petals. The whole runner comes together piece by piece, which makes it way less overwhelming than it looks in the finished photos.
Why This Table Runner Works So Well
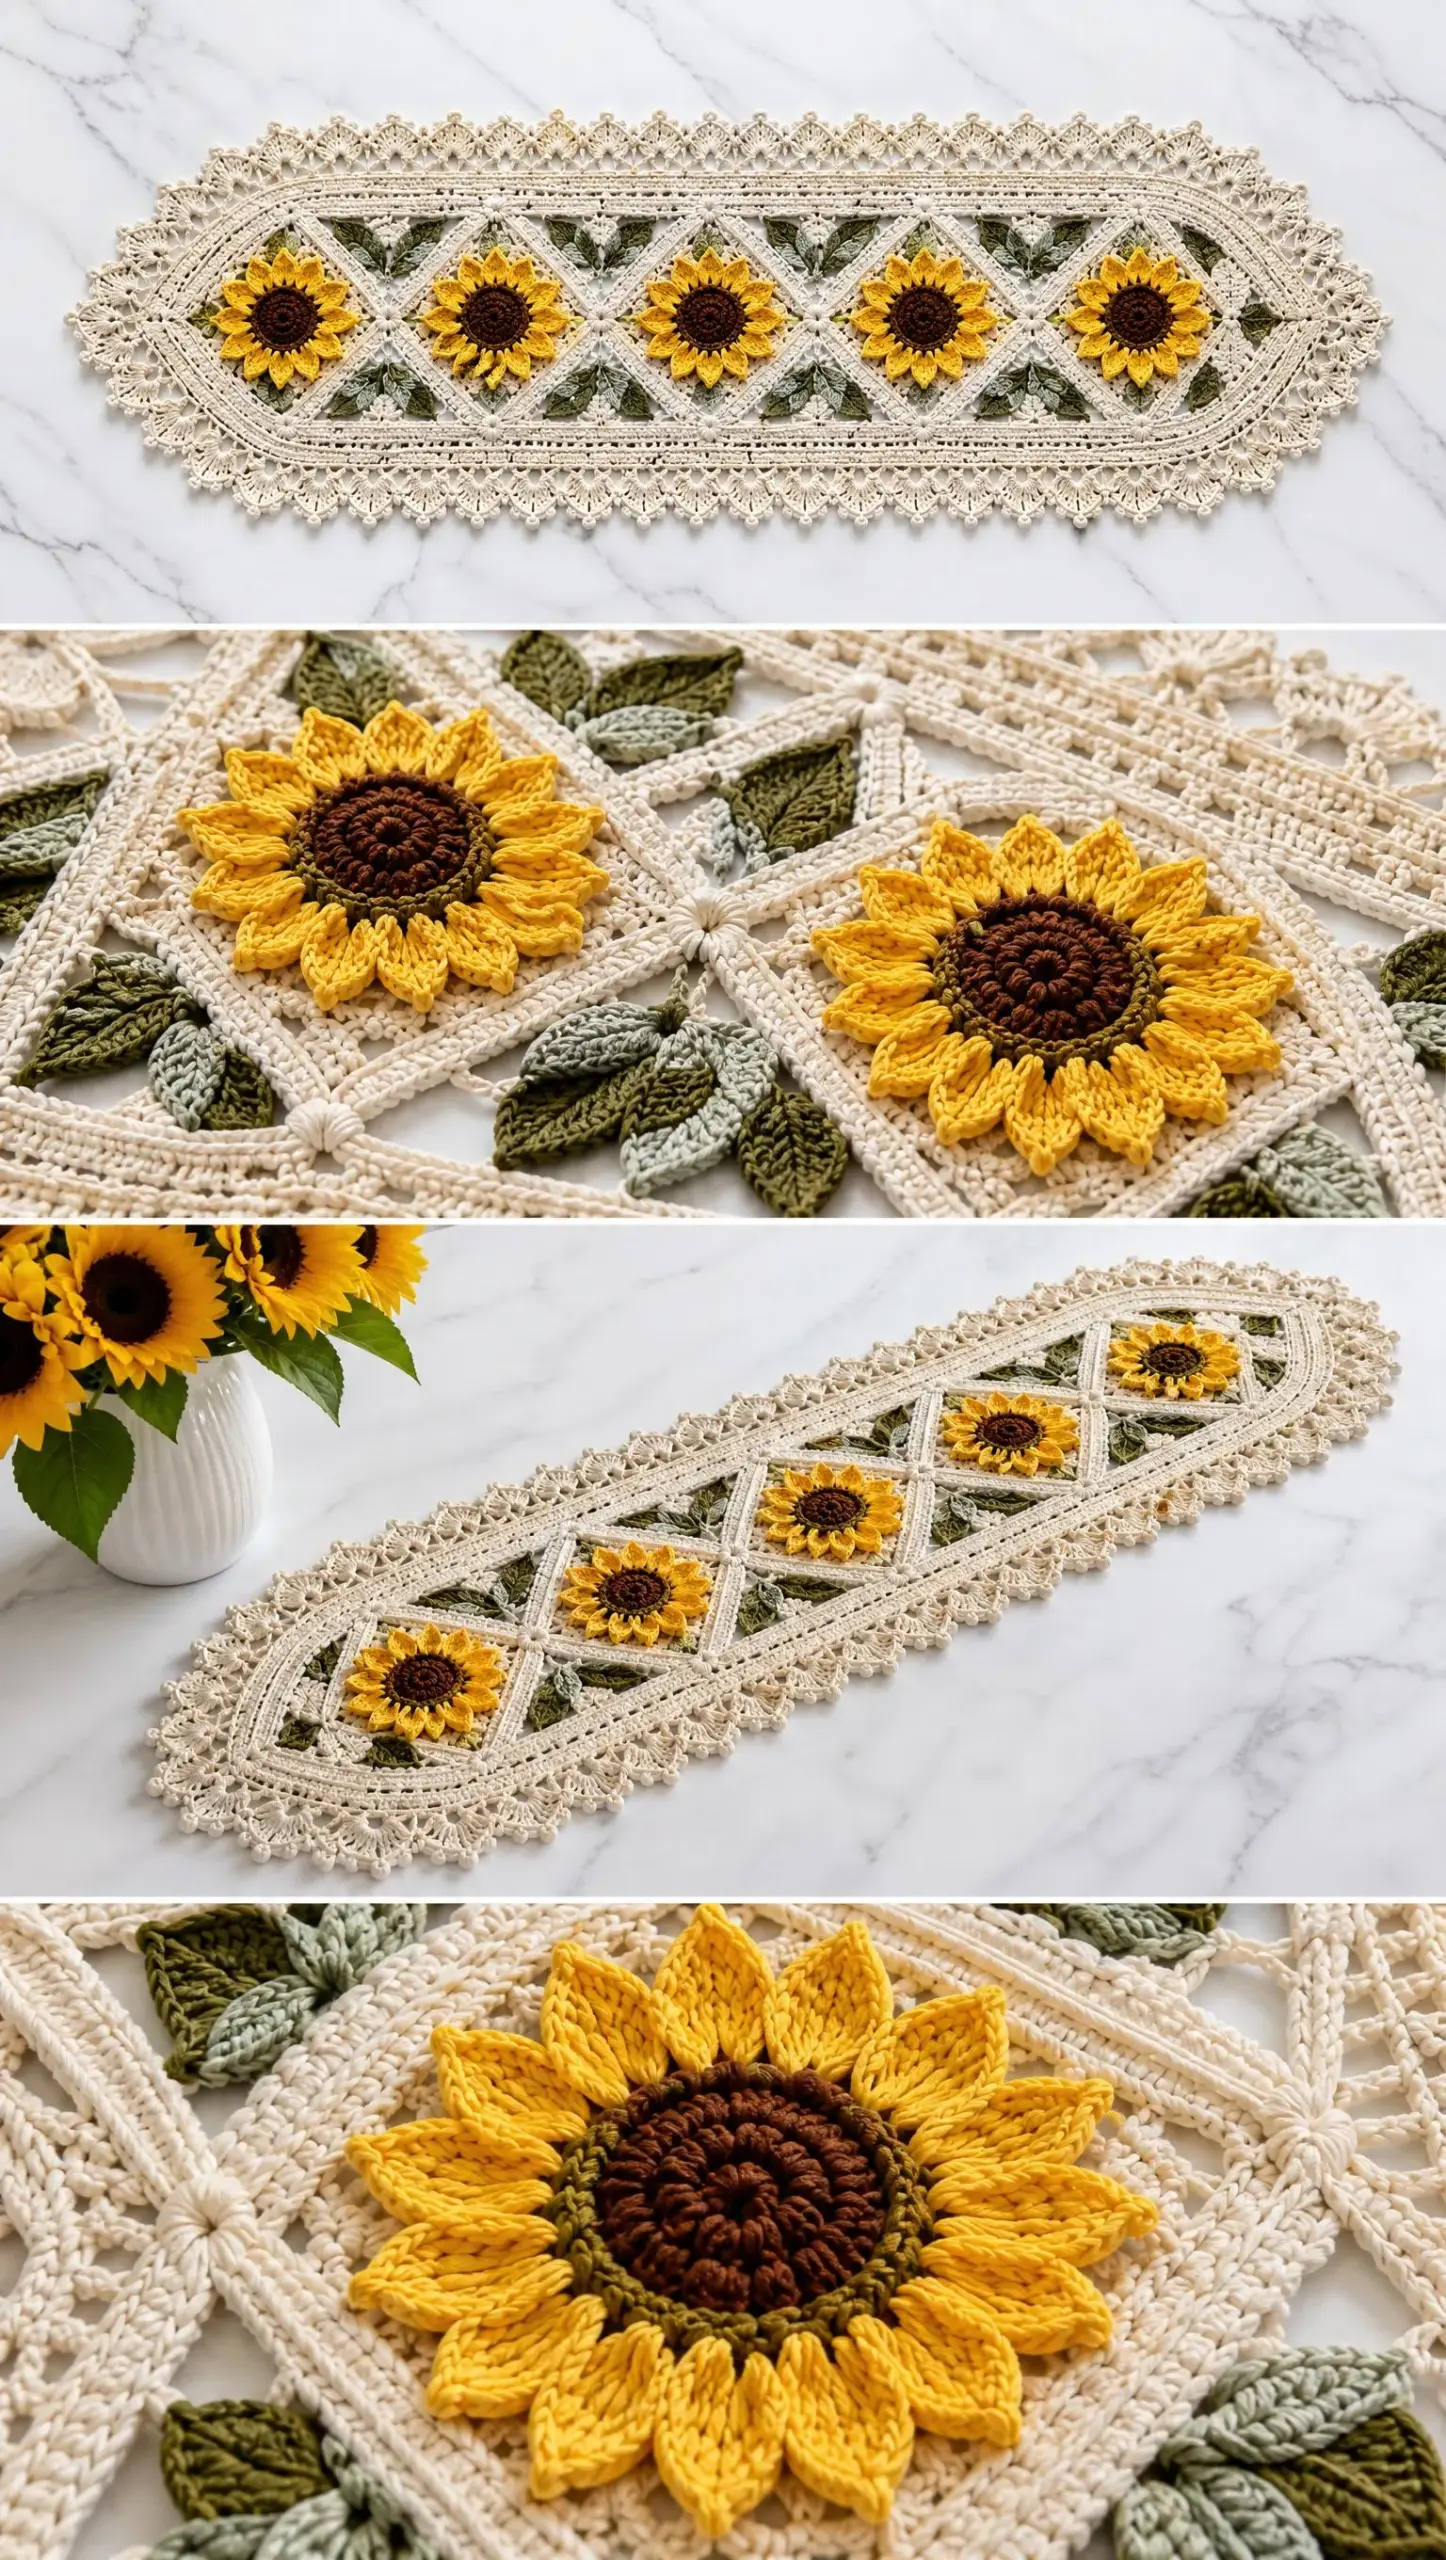
The diamond lattice layout creates visual interest without being fussy. Each motif measures approximately 4 inches across, and when you join them together in a long formation, you get that beautiful 14 x 48 inch runner shown in the pattern. The oval-ended rectangular shape means it sits perfectly centered on most dining tables.
What really makes this design sing is the color combination. The sunflower yellow petals against brown centers look incredibly realistic, and the olive green leaves ground everything nicely. Then the cream lattice and scalloped border tie it all together with that classic cottage aesthetic.
Materials You’ll Need
Yarn:
Tools:
Cotton yarn is essential here. It gives the runner structure, blocks beautifully, and holds up to washing. I’d recommend a quality worsted weight cotton like Lily Sugar’n Cream or similar. The cream will be your main color since it forms the diamond frames and entire border.
Stitch Abbreviations and Definitions
Before we dive in, let’s make sure you’re comfortable with every stitch in this pattern:
ch (chain): The foundation stitch. Yarn over, pull through the loop on your hook. That’s one chain.
sl st (slip stitch): Insert hook, yarn over, pull through both the stitch and the loop on your hook in one motion. Used for joining and moving across stitches invisibly.
sc (single crochet): Insert hook into stitch, yarn over and pull up a loop (2 loops on hook), yarn over and pull through both loops.
hdc (half double crochet): Yarn over, insert hook into stitch, yarn over and pull up a loop (3 loops on hook), yarn over and pull through all 3 loops at once.
dc (double crochet): Yarn over, insert hook into stitch, yarn over and pull up a loop (3 loops on hook), yarn over and pull through 2 loops, yarn over and pull through remaining 2 loops. This is your main stitch throughout.
tr (treble crochet): Yarn over twice, insert hook into stitch, yarn over and pull up a loop (4 loops on hook), [yarn over and pull through 2 loops] 3 times.
sp (space): Refers to the gap created by chain stitches in the previous row or round.
sk (skip): Pass over the indicated number of stitches without working into them.
st (stitch): A single unit of work.
Gauge
One finished diamond motif should measure approximately 4 inches across. This is important because your motifs need to match up when you join them. If your motifs are coming out larger, try going down a hook size. Smaller? Go up a hook size. The goal is a firm but flexible fabric that will lay flat on your table.
Step 1: Sunflower Center
Let’s start with the heart of each motif. Grab your brown yarn (or dusty rust if you prefer a more vintage look).
Round 1: Make a magic ring. Chain 2, then work 12 double crochet (dc) into the ring. Slip stitch (sl st) to join to the top of your starting chain 2.
If magic rings intimidate you, you can chain 4 and slip stitch to form a ring instead. The magic ring just gives you a tighter center with no hole.
Round 2: Chain 2. Work 2 dc in each stitch around. This doubles your stitch count to 24 stitches. Join with a slip stitch and fasten off.
You should have a nice little brown circle that looks like the center of a sunflower. Weave in your brown tail or leave it for now if you prefer to weave everything in at the end.
Step 2: Sunflower Petals
Now for the fun part. Attach your sunflower yellow yarn with a slip stitch to any stitch from Round 2.
Round 3: Chain 3. In each stitch around, work (dc, ch 2, dc) to create petal spaces. This creates little V-shaped openings where your petals will sit. Join and prepare for the next round.
Round 4: In each chain 2 space from the previous round, work 5 dc for rounded petals. These clusters fan out beautifully and create that classic sunflower petal shape. Join with a slip stitch and fasten off.
Your sunflower should be taking shape now. The yellow petals should radiate out from that brown center just like the real thing.
Step 3: Leaf Sections
Attach your olive green yarn around opposite sides of the flower. You’ll be creating four leaves total, positioned at what will become the corners of your diamond.
For each leaf: Chain 5, then work: sc in second chain from hook, hdc, dc, hdc, sc.
This creates a simple pointed leaf shape. Repeat this process to create four leaves evenly spaced around the flower. The leaves should sit between the petal sections, pointing outward toward what will become the four corners of your diamond motif.
Fasten off your green yarn when all four leaves are complete.
Step 4: Diamond Motif Frame
This is where everything comes together. Grab your cream yarn because it’s time to build the diamond frame around your sunflower.
Round 1: Crochet around the sunflower and leaves with evenly spaced dc stitches. You’re essentially encasing the flower in a round of cream double crochet.
Round 2: Increase at four corners to create a diamond shape. Work 2 dc in each corner stitch to start shaping that diamond.
Rounds 3 through 6: Continue working dc rounds, increasing at each corner until the motif reaches desired size. Your increases at the corners are what transform the round shape into a diamond.
Fasten off when your motif measures approximately 4 inches across.
How Many Motifs Do You Need?
For the standard 14 x 48 inch runner, you’ll need approximately 12 motifs arranged in a long formation. The pattern notes mention the size is adjustable, so if you have a longer table, simply make more motifs. For a shorter runner or a centerpiece style, make fewer.
I’d recommend making all your motifs first before joining. This lets you check that your gauge is consistent across all pieces and ensures everything will line up properly.
Step 5: Joining Motifs
Arrange your motifs in a long runner formation on a flat surface. Take a photo so you remember your layout.
Join with cream yarn using slip stitch or mattress-style joining. The slip stitch method is faster: hold two motifs with wrong sides facing each other, insert your hook through corresponding stitches on both motifs, and slip stitch across. The mattress stitch method creates an invisible seam: use your yarn needle to weave back and forth between the two motifs.
Keep joins flat and even. If your seams are puckering, you may be pulling too tightly.
Step 6: Lattice Accent Rows
Once your motifs are joined, work cream dc rows between the motifs to reinforce the structure and create that diamond lattice appearance.
Add chain spaces between groups of stitches. For example, you might work (3 dc, ch 2, skip 2) across. These chain spaces create the airy lattice look visible in the finished runner.
Step 7: Border
Now let’s frame your beautiful work with a proper border.
Round 1: Work sc evenly around the entire runner. Count your stitches and make sure you have an even number for the next rounds.
Round 2: Work dc groups with chain spaces along the edges. This creates the foundation for your scallops.
Round 3 (Scallops): In each border space, work: 5 dc, skip 2 stitches, slip stitch. Repeat around all sides. The 5-dc clusters create those lovely shell-shaped scallops you see edging the runner.
Step 8: Picot Finish
For that delicate, lacy edge that really makes this runner special:
Work sc around the final round. Every few stitches, create a picot by chaining 3, then slip stitching into the first chain. This creates tiny decorative points along the entire edge.
The picots add a refined finish that elevates the whole piece from nice to heirloom quality.
Finishing Your Table Runner
Weave in all yarn ends. You’ll have quite a few color changes, so take your time with this step. Weave each tail through at least 2 inches of stitches, then trim close.
Blocking is absolutely essential for this project. Wet your runner thoroughly in cool water, gently squeeze out excess water (don’t wring), and lay flat on a blocking mat or clean towels. Shape the diamonds and scallops evenly while damp. Pin if needed. Allow to dry completely before moving.
Blocking transforms your work from good to gorgeous. Those diamonds will become crisp and even, and the scalloped border will lay perfectly flat.
Care Instructions
Hand wash gently in cool water. Cotton can handle machine washing, but handwashing preserves the dimensional flowers and delicate border.
Lay flat to dry. Hanging can stretch out your careful shaping.
Avoid high heat to preserve cotton texture. No hot dryers.
Customization Ideas
The pattern mentions several ways to make this your own:
Add more motifs for a longer table runner, perfect for farmhouse tables or holiday gatherings.
Change sunflower colors for seasonal designs. Try orange and burgundy for fall, or white petals with gold centers for an elegant look.
Use mercerized cotton for a brighter lace effect. Mercerized cotton has a slight sheen that catches light beautifully.
Tips for Success
Work your first motif as a gauge swatch. This lets you check your sizing before committing to a dozen motifs.
Use stitch markers at your corner increases. It’s easy to lose track of where your corners are, especially in the early rounds.
Block each motif individually if your pieces aren’t laying flat. Sometimes blocking before joining makes the assembly much easier.
Take photos of your layout before joining. Trust me on this one.
I really hope you love making this Sunflower Diamond Table Runner as much as I loved putting together this pattern. It’s the kind of project that looks so impressive on your table, and every time someone compliments it, you get to say "I made that."
If this pattern caught your eye, go ahead and save it to your Pinterest boards so you can find it when you’re ready to start. And please, leave a comment below when you finish yours. I’d absolutely love to see your color choices and how it looks on your table!
Want a Quick & Easy Printable Version?
Get a clean, beautifully formatted PDF of this pattern — easy to follow step by step, ready to print or save on any device. No scrolling, no distractions, just the pattern.
Get the Printable PDF →