
I have been dreaming about creating an heirloom-quality table set for ages. Something that looks like it belongs in a vintage tea room but still feels fresh and modern. When I finally sat down to design this Pink Rose Table Set, I wanted layered textures, delicate gold accents, and a dimensional rose that would make people do a double take.
Get the Ad-Free PDF Pattern
You can find the free pattern below, or you can purchase the ad-free printable PDF from my shop.
Get the Printable PDF →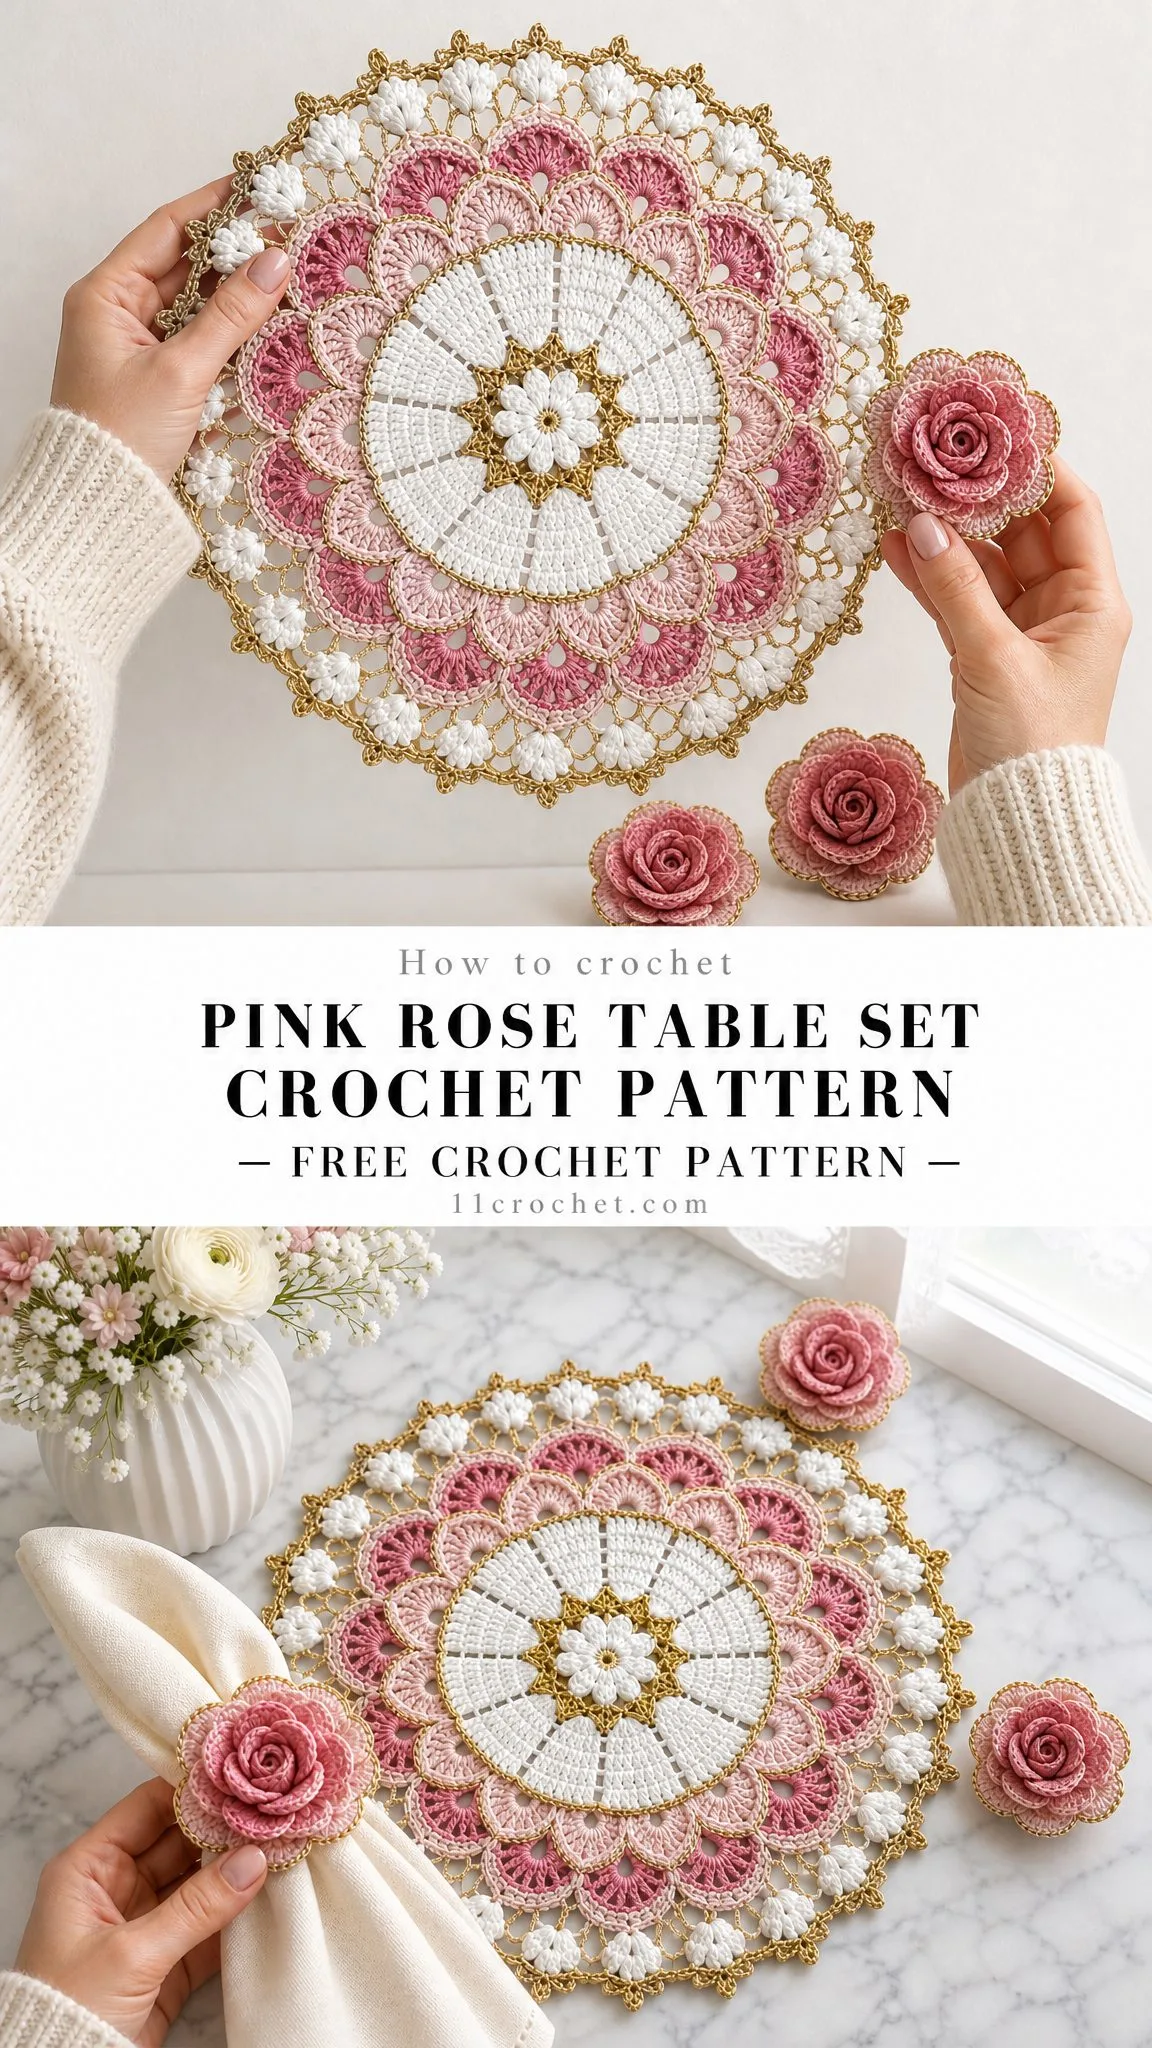
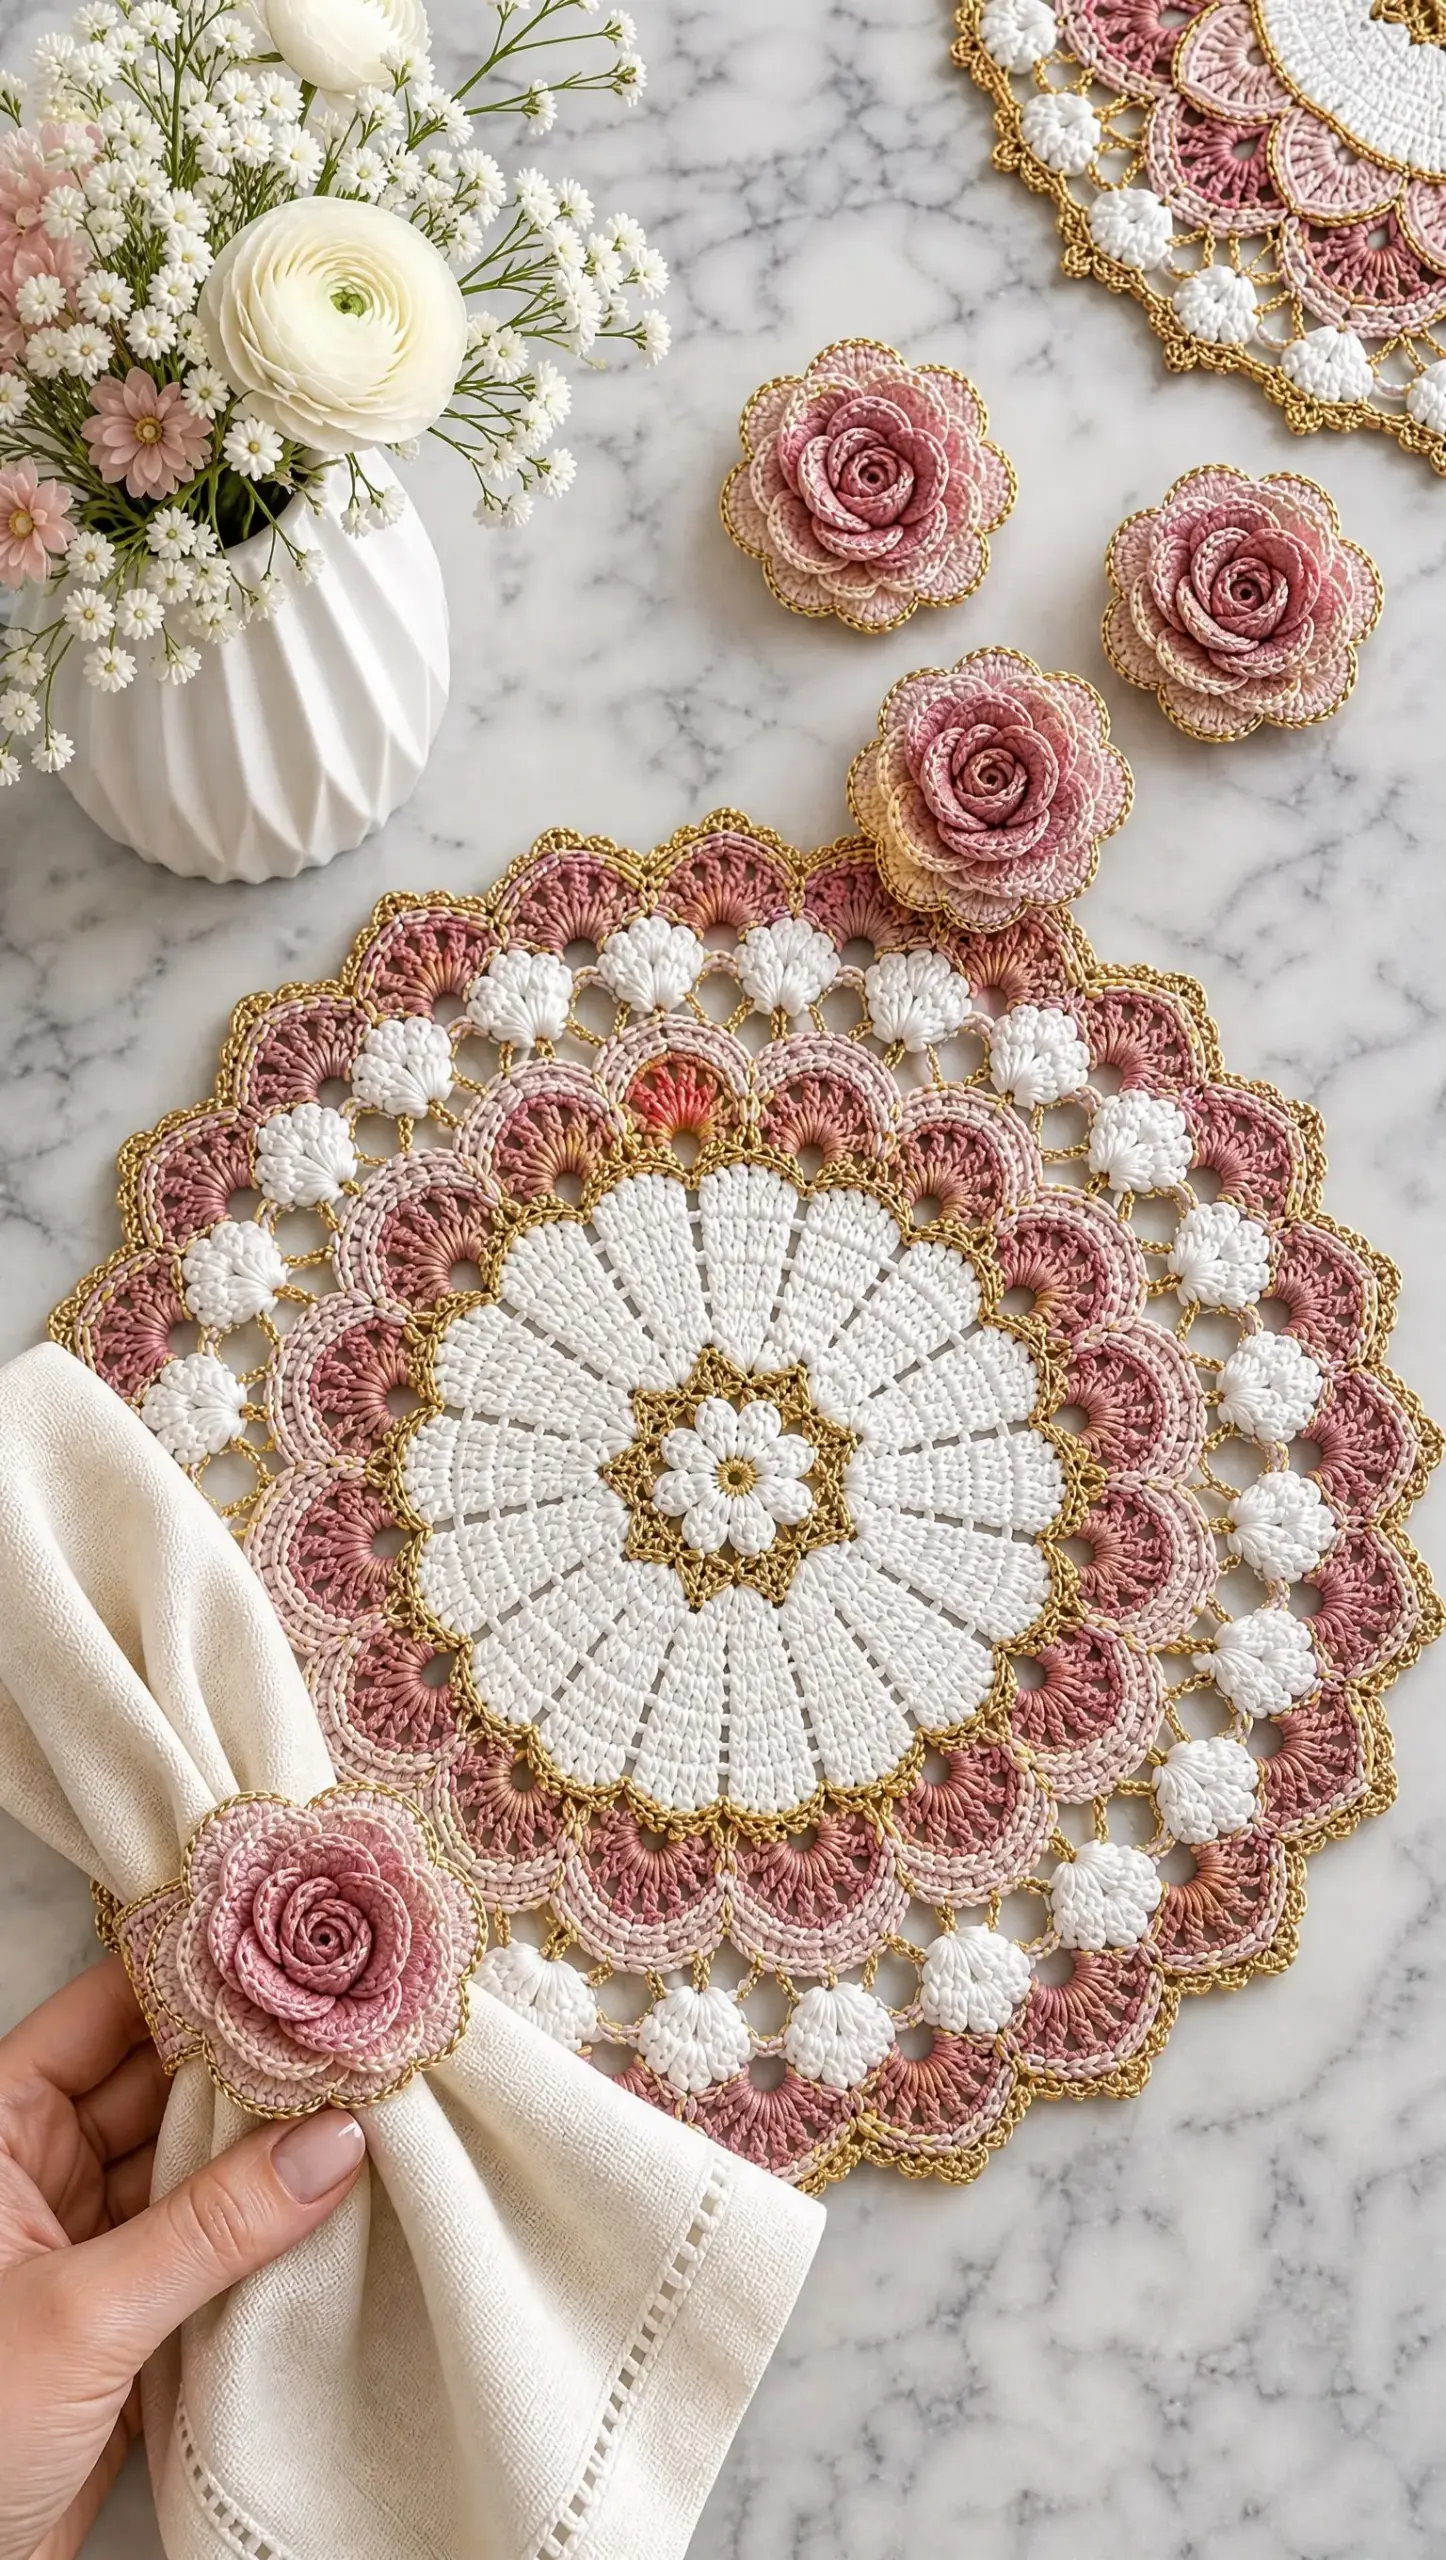
The decisions were fun to make. An eight-spoke center for visual interest. Two rings of overlapping shells in blush and rose pink. Surface crochet in metallic gold to frame everything without overwhelming the cotton. And that rose? It rolls up from a single graduated strip into the most realistic crocheted bloom I have ever made.
I am SO pleased with how this turned out. Every detail came together exactly as I pictured, and I cannot wait to walk you through the entire process.
About This Pattern
This Pink Rose Table Set includes a circular lace placemat and a matching dimensional rose napkin ring. The placemat measures approximately 14 inches (35.5 cm) in diameter after blocking. The rose spans 3.5 to 4 inches (9 to 10 cm) across. The napkin band fits a folded napkin bundle with a circumference of about 4 to 5 inches (10 to 13 cm).
Skill Level: Intermediate
Estimated Time: 8 to 12 hours for one placemat plus one napkin ring
The placemat is worked in the round from the center out. You will establish eight eyelet spokes early on that create those beautiful radial wedges visible in the finished piece. Two concentric rings of fan shells follow in pale blush and medium pink. The gold metallic detailing is added afterward using surface slip stitch, which keeps the cotton fabric from distorting.
The rose is made separately as a long graduated petal strip. You roll it up, stitch it secure, and attach it to a simple band worked flat in single crochet.
Materials You Will Need
Yarn:
Hooks:
Notions:
Yarn Substitutions: Scheepjes Catona, Hobbii Rainbow Cotton 8/4, DROPS Safran, or another smooth cotton that gives crisp stitch definition will work beautifully. If using a thicker DK cotton, move to a 3.5 mm hook and expect a larger finished placemat. For the gold, choose a soft metallic crochet thread rather than stiff cord.
Gauge
Approximately 20 double crochet stitches by 10 rows equals 4 inches (10 cm) in an unblocked swatch. Round gauge matters more than row gauge for this project. Measure your work after Rounds 10, 16, and 21. Adjust your hook size if the fabric cups or ripples.
Abbreviations (US Terms)
Special Stitches
2-dc cluster (2dc-cl): Yarn over, insert hook in indicated stitch or space, yarn over and pull up a loop, yarn over and pull through 2 loops. Repeat once in the same stitch or space. Yarn over and pull through all 3 loops on hook.
3-dc cluster (3dc-cl): Work three partial double crochets into the same stitch or space, leaving the last loop of each on the hook. Yarn over and pull through all 4 loops.
Puff-like cluster: [Yarn over, insert hook in space, pull up a tall loop] 4 times. Yarn over and pull through 8 loops. Yarn over and pull through the last 2 loops. Chain 1 to close.
Fan shell: 7 double crochets in the indicated chain space unless another number is stated.
Gold surface slip stitch: Hold metallic thread on the wrong side. Insert hook from front through fabric, catch thread and bring up a loop. Insert hook at the next point along the curve, catch thread and pull through fabric and loop. Keep every loop relaxed so the mat remains flat.
Pointed picot: Chain 3, slip stitch in the first chain. For a sharper point, chain 4 instead of 3 on every fourth picot.
Color Map
| Section | Color |
|---|---|
| Center and radial wedge field | White |
| Star and outlined shell edges | Metallic gold |
| First fan-shell ring | Pale blush |
| Second fan-shell ring | Medium pink |
| Outer clusters | White |
| Outer picot scallop | Metallic gold |
Placemat Pattern Instructions
Important Notes: Join rounds with a slip stitch unless instructed otherwise. Chain 3 at the beginning of a dc round counts as 1 dc. Place a marker at the first stitch and move it up each round. The eight narrow eyelet spokes are established in Round 5 and preserved through Round 10.
Rounds 1 Through 4: Center Foundation
Round 1 (White): Make a magic ring. Chain 3, work 15 dc into ring. Join with sl st to top of ch-3. 16 dc.
Round 2: Chain 3, dc in same st, 2 dc in each remaining st around. Join. 32 dc.
Round 3: Chain 3, 2 dc in next st, dc in next st, 2 dc in next st; rep from around. Join. 48 dc.
Round 4: Chain 3, dc in next st, 2 dc in next st, dc in next 2 sts, 2 dc in next st; rep from around. Join. 64 dc.
Rounds 5 Through 10: Eyelet Spoke Section
Round 5 (establish 8 eyelet spokes): Chain 3, dc in next 6 sts, ch 1, sk 1 st; dc in next 7 sts, ch 1, sk 1 st; rep from 7 times. Join. 56 dc + 8 ch-1 sps.
Round 6: Chain 3, 2 dc in next st, dc in next 5 sts, ch 1 over ch-1 sp; dc in next st, 2 dc in next st, dc in next 5 sts, ch 1; rep from around. Join. 64 dc + 8 eyelets.
Round 7: Chain 3, dc in next 2 sts, 2 dc in next st, dc in next 4 sts, ch 1; dc in next 3 sts, 2 dc in next st, dc in next 4 sts, ch 1; rep from around. Join. 72 dc + 8 eyelets.
Round 8: Chain 3, dc in next 4 sts, 2 dc in next st, dc in next 3 sts, ch 1; dc in next 5 sts, 2 dc in next st, dc in next 3 sts, ch 1; rep from around. Join. 80 dc + 8 eyelets.
Round 9: Chain 3, dc in next 6 sts, 2 dc in next st, dc in next 2 sts, ch 1; dc in next 7 sts, 2 dc in next st, dc in next 2 sts, ch 1; rep from around. Join. 88 dc + 8 eyelets.
Round 10: Chain 3, dc in next 8 sts, 2 dc in next st, dc in next st, ch 1; dc in next 9 sts, 2 dc in next st, dc in next st, ch 1; rep from around. Join. 96 dc + 8 eyelets.
Your piece should measure approximately 7 to 7.5 inches (18 to 19 cm) in diameter before blocking. This is a good checkpoint to make sure your gauge is on track.
Rounds 11 Through 15: Transition and Blush Shell Ring
Round 11 (transition): Chain 1, sc in same st, *ch 4, sk 2 dc, sc in next dc; rep around, adjusting the final skip by 1 st if needed so the round closes evenly. Aim for 32 ch-4 arches. Join to first sc.
Round 12 (Pale blush): Slip stitch into first ch-4 sp. Chain 3, 6 dc in same sp; sc in next ch-4 sp, *7 dc in next sp, sc in next sp; rep around. Join to top of ch-3. 16 pale-blush fan shells.
Round 13 (Pale blush): Slip stitch to center dc of first shell. *Ch 5, sc in center dc of next shell; rep around. Join. 16 ch-5 arches.
Round 14: Slip stitch into first arch, ch 3, 8 dc in same arch, *9 dc in next arch; rep around. Join. 16 broad shells of 9 dc.
Round 15 (Gold outline setup): With blush still attached, ch 1, sc in same st, *ch 3, sk 2 dc, sc in next dc; work evenly around the shell tops, placing 3 small arches across each shell. Join. Fasten off blush.
Rounds 16 Through 21: Pink Shell Ring and Outer Border
Round 16 (Medium pink): Join pink in a ch-3 arch positioned between two blush shell centers. Chain 3, 6 dc in same arch, sc in next arch, 7 dc in next arch, sc in next arch; continue alternating 7-dc shells and sc anchors around so 24 pink fan shells form a slightly offset overlapping ring. Join.
Round 17 (Pink): Slip stitch to center dc of first pink shell. *Ch 4, sc in center dc of next shell; rep around. Join. 24 ch-4 arches.
Round 18 (White): Join white in any ch-4 arch. Chain 1, sc in same arch, *ch 4, sc in next arch; rep around. Join. 24 ch-4 arches.
Round 19 (White clusters): Slip stitch into first arch. Chain 1, work 1 puff-like cluster in arch, ch 3, *puff-like cluster in next arch, ch 3; rep around. Join. 24 clusters + 24 ch-3 arches.
Round 20 (White): Chain 1, sc in top of first cluster, *5 dc in next ch-3 arch, sc in next cluster; rep around. Join. 24 white scallops.
Round 21 (Gold border): Join gold with smaller hook in any sc between scallops. *Sc in sc, ch 2, sc in first dc, [ch 3, sl st in first ch, sc in next dc] 5 times across scallop, ch 2; rep around. Join. Fasten off. This creates a pointed picot edge.
Block to approximately 14 inches (35.5 cm) diameter.
Gold Star and Shell Outlining
The metallic detailing is added after the mat is crocheted so it stays crisp and does not distort the cotton fabric.
Center gold star: With the mat right side facing and the smaller hook, bring gold thread up at the outer edge of Round 2. Surface-slip-stitch in a zigzag path that touches eight evenly spaced points around Round 3, returning to Round 2 between points. This creates an 8-point star framing the small center. Keep the thread relaxed and do not pull the points inward.
Daisy center (optional): If you want the center to read more strongly as a flower, embroider 8 short detached-chain petals in white over Round 1. Alternatively, crochet the optional daisy appliqué: With white, make a magic ring. Ch 5, 2 tr in ring, ch 5, sl st in ring; rep from 7 more times. Tighten ring. Add a tiny gold French knot or 6 wrapped stitches at the center. Sew flat over Rounds 1 and 2.
Shell tracing: Using gold, surface-slip-stitch along the outer curved edge of every blush shell in Round 14 and every pink shell in Round 16. Work one surface slip stitch into or just beneath each dc top. At each shell valley, take one small anchoring stitch before continuing. If the mat starts to pucker, undo a few stitches and remake them more loosely.
Dimensional Pink Rose Pattern
The rose is made from one long graduated petal strip that naturally coils from small center petals to broad outer petals. The strip is then rolled and stitched into shape.
Finished size: 3.5 to 4 inches (9 to 10 cm) across with sport cotton and 3.0 mm hook.
Foundation: With medium pink, chain 72.
Row 1: Sc in 2nd ch from hook and in each ch across. 71 sc. Turn.
Row 2 (petal bases): Chain 1, sc in first st. Ch 2, sk 1 st, sc in next st; rep from across. You should have 35 ch-2 spaces. Turn.
Row 3 (graduated petals): Work petals into successive ch-2 spaces as follows:
Slip stitch in each sc between spaces. Fasten off, leaving a 24-inch (60 cm) sewing tail.
Optional blush outer tier: Join pale blush at the beginning of the last 15 large petals and work one loose round of surface sc along the outer curves, placing 1 sc in each dc and 2 sc in the top of the center dc. This softens the outer petals and gives a two-tone blush edge.
Optional gold highlight: With metallic gold and smaller hook, surface-slip-stitch only around the outermost 8 to 10 petals. Keep this subtle so the rose remains predominantly pink.
Rolling and Sewing the Rose
1. Start at the end with the smallest petals. Roll the first 3 to 4 petals tightly to make the spiral center.
2. Continue rolling, letting each new petal overlap the gap between the two petals beneath it. Rotate the strip slightly outward as the petals grow larger.
3. Every 2 to 3 petals, use the long tail to take firm stitches through the foundation edge only. Do not sew through the upper petal surfaces.
4. When all petals are arranged, spread the large outer petals into a shallow cup and stitch the final foundation edge securely to the underside.
5. For a flatter back, crochet a backing disc: magic ring, 10 dc; next round 2 dc in each st = 20 dc. Fasten off and sew the disc to the underside of the rose.
Napkin Band
With pale blush or white: Chain 9.
Row 1: Sc in 2nd ch from hook and across. 8 sc.
Rows 2 through 24: Chain 1, turn, sc BLO across.
The strip should measure about 4.5 inches (11.5 cm) unstretched. Adjust by adding or removing rows.
Bring short ends together and slip stitch or whipstitch to form a ring. Position the seam under the rose. Sew the rose backing disc firmly to the band with 8 to 10 small stitches distributed around the disc.
Fit note: The ring should hold a gathered cloth napkin without crushing it. For very thick linen, extend the band to 5 to 5.5 inches (12.5 to 14 cm) before joining.
Blocking the Placemat
1. Wet block the cotton portion before adding metallic surface crochet if your metallic thread is heat-sensitive.
2. After finishing all gold work, mist lightly rather than soaking if the thread manufacturer recommends it.
3. Pin the center first, then pin at 8 opposite compass points, then pin the remaining scallop points evenly.
4. Measure from center to edge repeatedly. Target radius is about 7 inches (17.8 cm).
5. Allow to dry completely before removing pins. Never stretch the gold surface stitches independently from the cotton beneath.
Stitch-Math Checkpoints
| Checkpoint | Expected Result | What to Correct If Wrong |
|---|---|---|
| After R4 | 64 dc | Count back to the first increase error; every repeat is 4 sts wide |
| After R10 | 96 dc + 8 eyelets | There should be 12 dc allocated per wedge section including its increase pattern, plus 1 eyelet between wedges |
| After R12 | 16 blush fans | Each fan uses one arch and is separated by one anchoring arch |
| After R16 | 24 pink fans | Distribute evenly; use the transition arches to avoid crowding |
| After R19 | 24 white clusters | One cluster per ch-4 arch |
| After R21 | 24 scalloped border units | Each unit aligns with one white scallop below |
Troubleshooting Tips
The mat cups upward: Your tension is tight or the circumference needs more stitches. Move up 0.25 to 0.5 mm in hook size for the next round, or add an extra dc to every 4th shell or arch distribution point.
The mat ruffles: Too much circumference has been added. Use a smaller hook or reduce the frequency of increases. Mild ruffling can usually be corrected during blocking. Deep waves cannot.
Gold surface crochet puckers: The metallic slip stitches are too tight. Undo that section and remake the loops visibly looser.
Rose looks flat: Roll the first petals tighter and tilt later petals outward. Stitch through the foundation edge rather than through the petal faces.
Rose is too bulky for the napkin: Use fingering cotton or stop the strip after 28 to 30 petal spaces.
Outer border will not lie flat: Before R21, block lightly and verify R20 has 24 scallops. Work the gold border with a slightly larger hook if the metallic thread is stiff.
Care Instructions
Hand wash gently in cool water with mild detergent. Do not wring. Roll in a towel to remove excess moisture, reshape and dry flat. Avoid high heat and strong steam on metallic thread. Store flat when possible, or roll the placemat loosely around acid-free tissue to protect the picot edge.
Making a Full Table Set
Repeat the placemat pattern for each place setting. For the loose decorative flowers visible in the styling photos, make extra roses using the same rose instructions but omit the napkin band. For a smaller decorative bloom, stop the petal strip after 24 to 28 ch-2 spaces.
You can also create matching coasters by stopping after Round 10, adding one round of sc, then a simplified gold picot border. Block to about 7.5 inches (19 cm) or stop earlier for a smaller coaster.
Final Thoughts
This Pink Rose Table Set crochet pattern is absolutely worth the time investment. Every element works together to create something that looks professionally designed but is completely achievable at home. The layered shells, delicate gold tracing, and that gorgeous dimensional rose will make your dining table unforgettable.
Thank you so much for choosing this pattern. I hope you love making it as much as I loved designing it. If you give this project a try, I would absolutely love to see your finished pieces. Tag me on Instagram or share a photo in my Facebook group. Your makes always brighten my day.
Do not forget to save this Pink Rose Table Set pattern to your Pinterest boards so you can find it when you are ready to start. And please leave a comment below if you make one. I read every single message and genuinely love hearing how your projects turn out.
Want a Quick & Easy Printable Version?
Get a clean, beautifully formatted PDF of this pattern — easy to follow step by step, ready to print or save on any device. No scrolling, no distractions, just the pattern.
Get the Printable PDF →