
Last summer, my niece called me in a panic three days before her vintage-themed birthday party. She had found the perfect retro dress online, but it was sold out in her size and wildly overpriced anyway. I told her to calm down, send me a photo, and give me a week. That photo showed a gorgeous striped dress with a fitted bodice and a skirt that swirled when she spun around. I knew immediately I could make something even better.
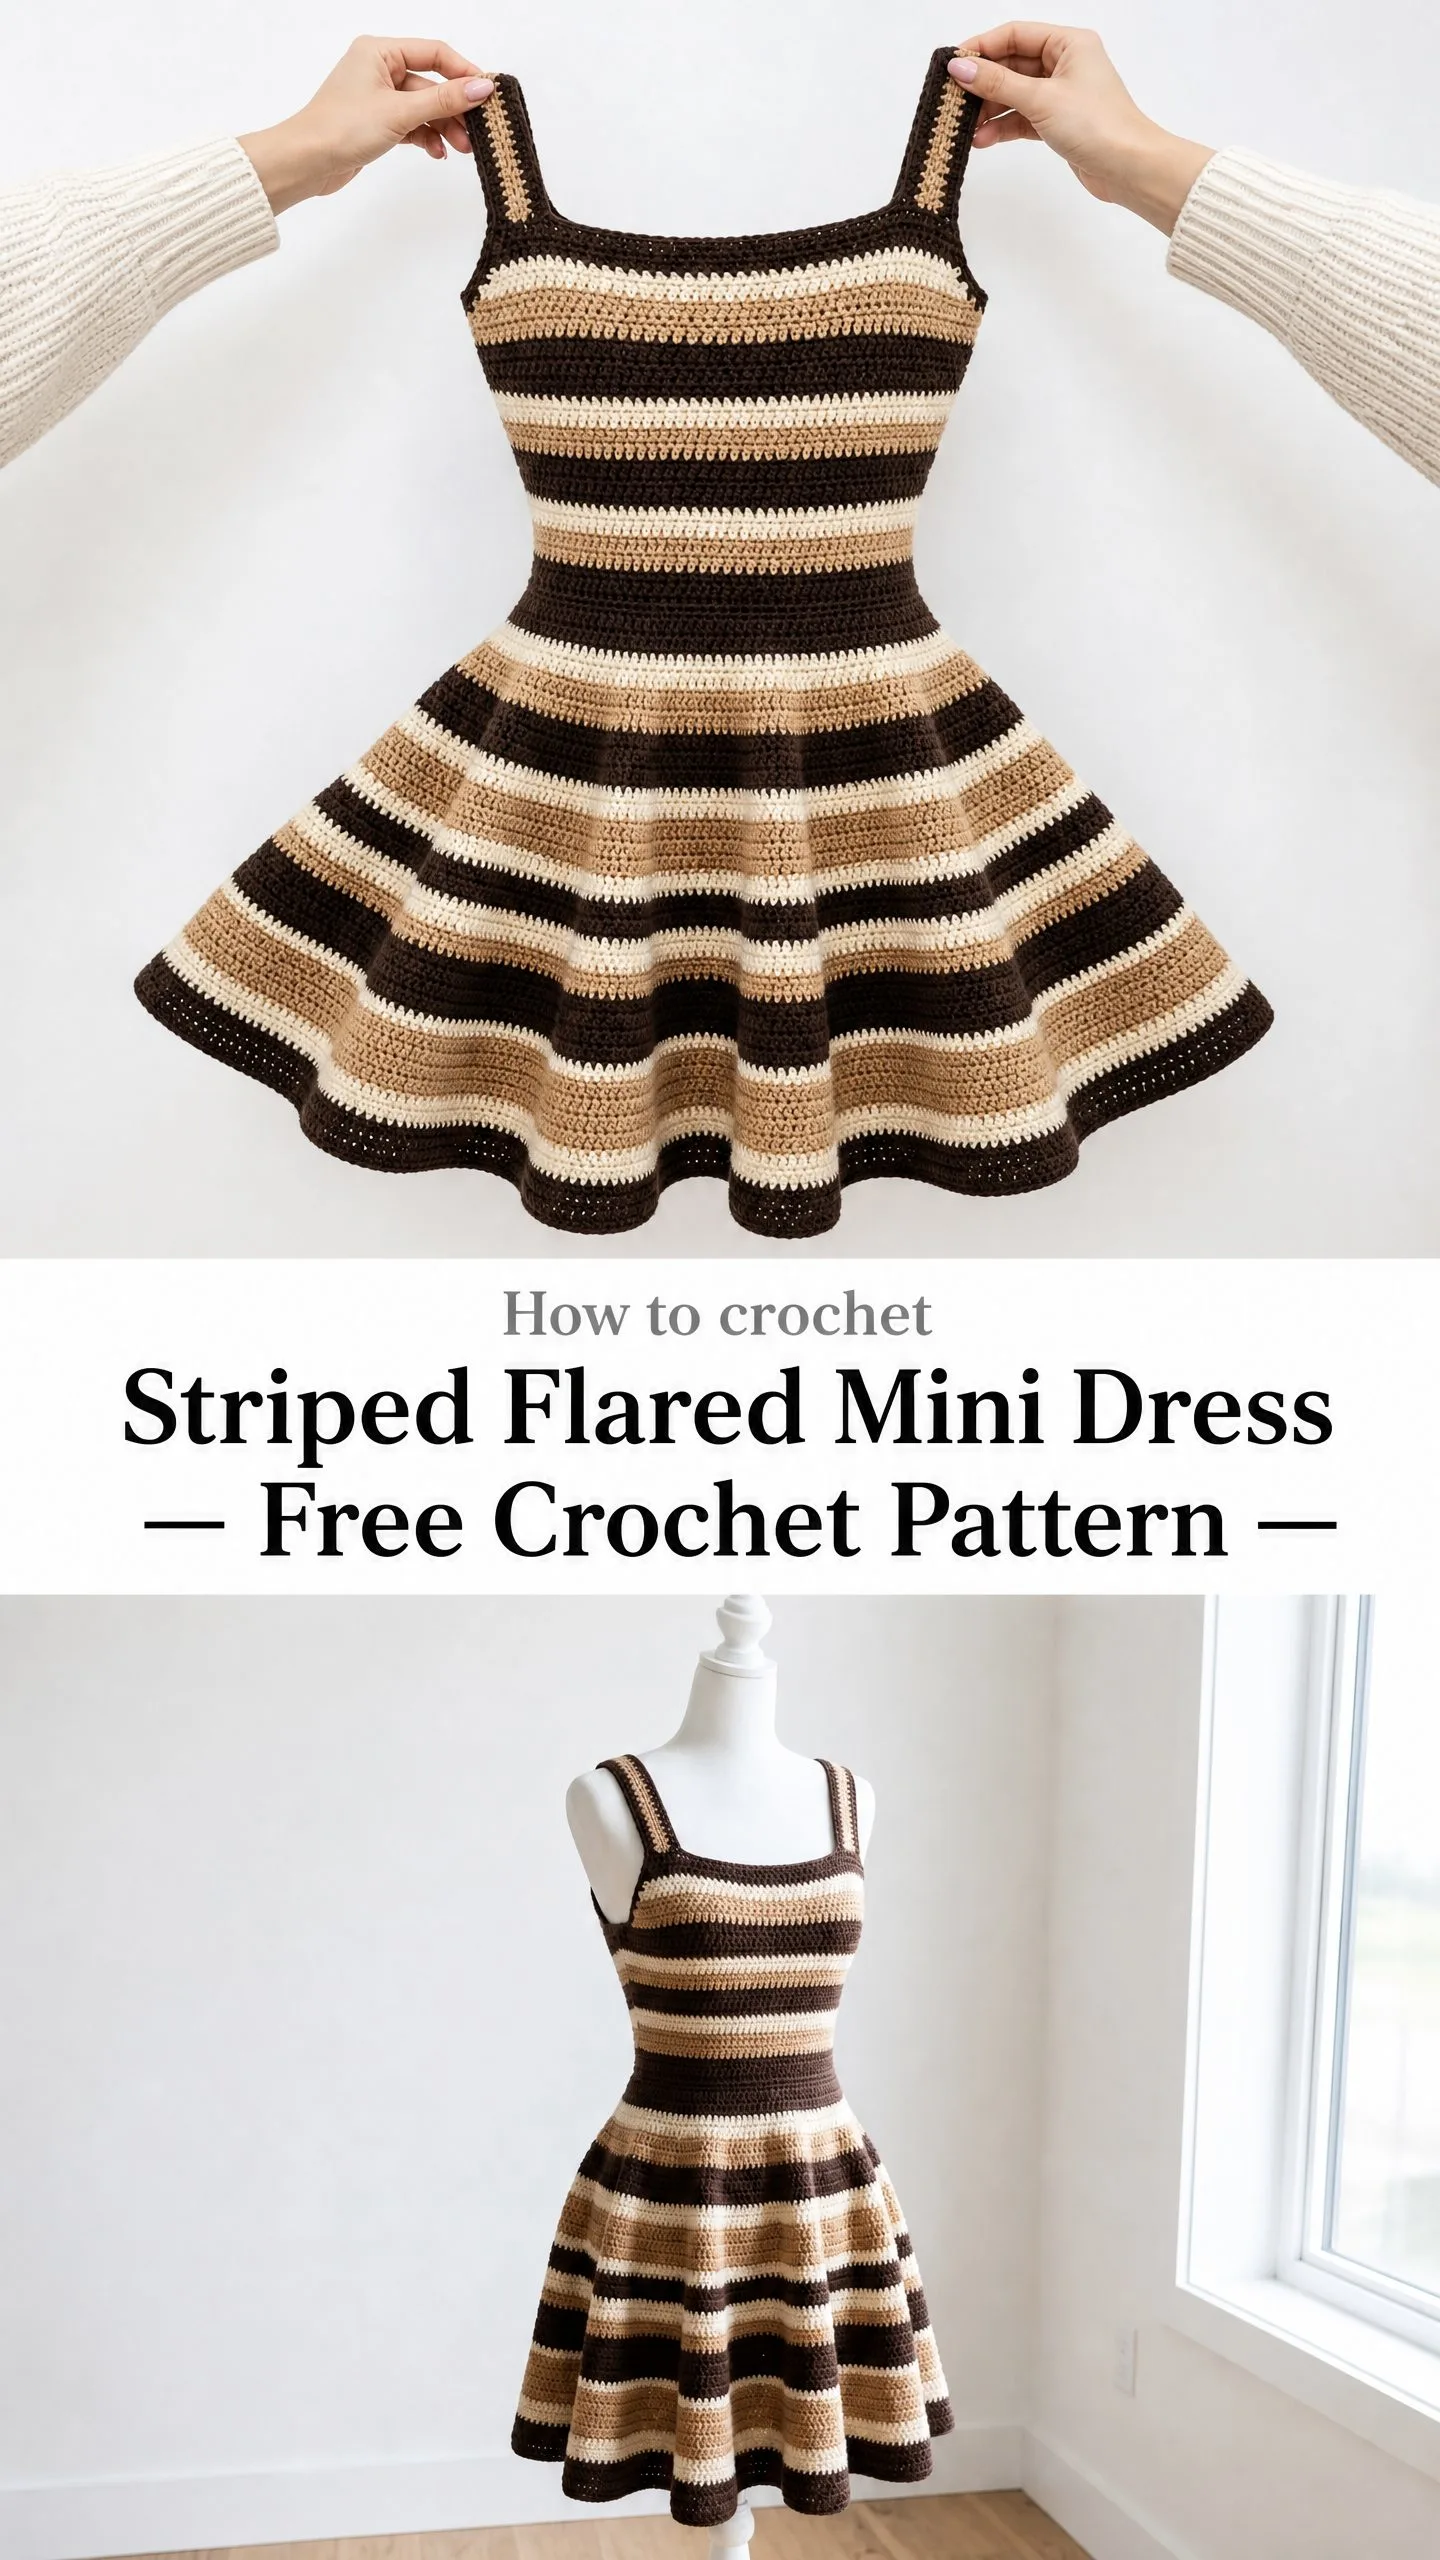
What started as a frantic favor turned into one of my favorite designs. I spent hours getting the waist shaping just right, testing different increase schedules until the skirt flared perfectly without bunching at the top. The stripe sequence took some tweaking too. I wanted those horizontal lines to flow seamlessly from bodice to skirt without any awkward breaks.
The dress you see here is the result of all that trial and error. My niece wore it to her party, twirled around the dance floor all night, and got so many compliments she made me promise to write down the pattern. So here we are. This crochet tutorial walks you through every single stitch, from those wide shoulder straps down to the swinging hem.
About This Striped Flared Mini Dress Crochet Pattern
This dress features a fitted bodice with a square neckline, a defined waistband that cinches at the smallest part of your torso, and a dramatically flared circle-style skirt. The whole thing is worked in horizontal stripes of dark chocolate brown, warm tan, and cream. Think 1960s mod fashion meets cozy handmade charm.
The bodice uses single crochet (sc) throughout for a dense, structured fabric that holds its shape beautifully. The waistband is worked in back loop only stitches to create those visible horizontal ridges that define your waist. Then the skirt transitions to half double crochet (hdc) for a softer, drapier fabric with strategic increases that create the full swing.
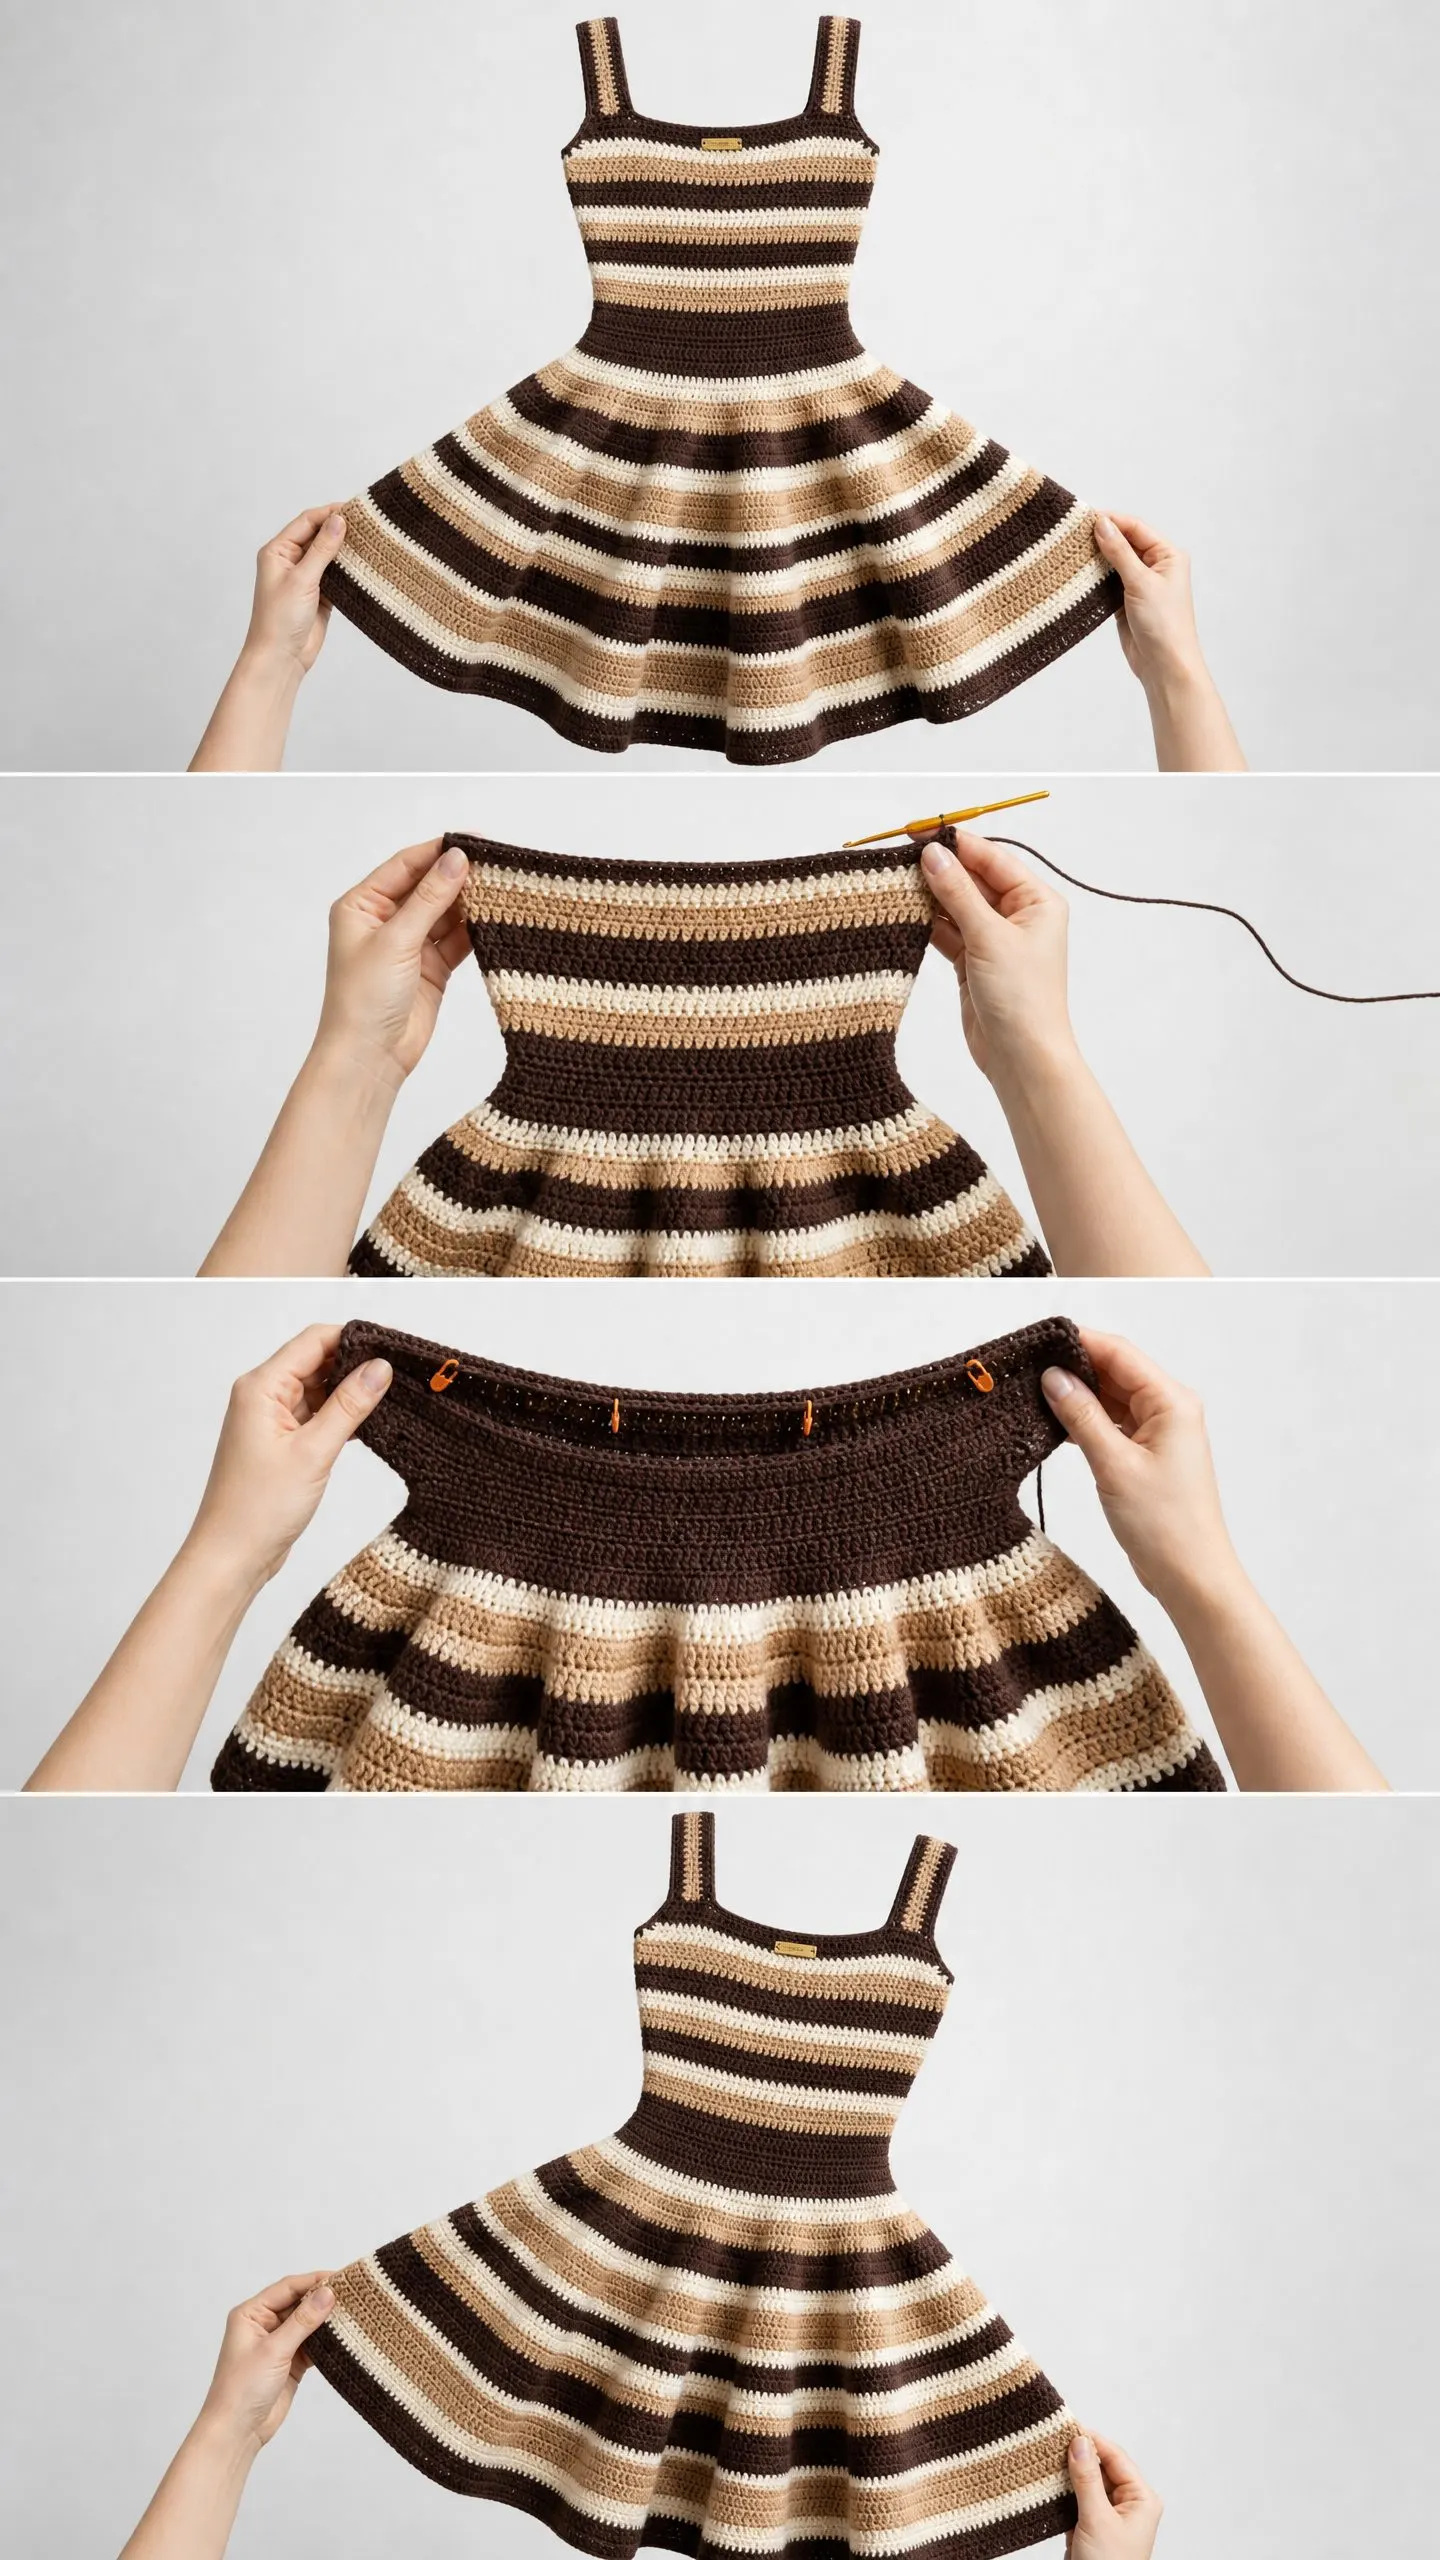
Here is the best part. The entire dress is constructed in the round from the top down. No seams except for two tiny ones where the straps meet at the shoulders. You start at the strap joins, shape through the bust and waist, then flare outward through the skirt. The three-color stripe sequence repeats continuously from neckline to hem for that cohesive retro look.
Skill Level
This pattern sits at an intermediate level. You will need to be comfortable working in continuous rounds, changing colors at the end of rounds, increasing evenly across rounds, and keeping track of stitch counts. There are no complex stitch patterns here, just basic stitches with thoughtful shaping.
If you have completed a few smaller projects and understand basic shaping, you can absolutely tackle this. Just take your time with the increase rounds and count your stitches carefully.
Time Estimate
Plan for approximately 25 to 35 hours of work for a size medium. The bodice takes roughly 8 to 10 hours. The skirt, with its expanding stitch counts, takes 15 to 22 hours. Finishing and blocking add another 2 to 3 hours.
Finished Measurements
The pattern is written for size Small (S), with changes for Medium (M) and Large (L) in parentheses formatted as S (M, L).
This dress is designed with approximately 2 inches of negative ease at the bust and waist. That means it fits snugly. Choose your size based on your actual body measurements, not the finished garment measurements.
Materials You Will Need
Yarn
You will need worsted weight yarn (CYCA 4) in three colors:
Total yarn needed: approximately 1200 (1375, 1550) yards / 1097 (1257, 1417) meters
Recommended Yarn Options
Lion Brand Wool-Ease works beautifully here. The blend of 80% acrylic and 20% wool gives excellent stitch definition and blocks like a dream. Purchase 3 (3, 4) skeins of Color A, 2 (3, 3) skeins of Color B, and 2 (3, 3) skeins of Color C.
Cascade 220 Superwash is another excellent choice if you want something machine washable. The merino gives outstanding stitch definition and luxurious drape in the skirt.
Avoid fuzzy or heavily textured yarns. You want those clean stripe lines to pop.
Hooks
Notions
Gauge
Getting gauge right is essential for this dress. The fit depends entirely on it.
Using J-10 / 6.0 mm hook in single crochet:
16 stitches and 18 rows = 4 inches / 10 cm
Using J-10 / 6.0 mm hook in half double crochet:
14 stitches and 12 rows = 4 inches / 10 cm
Make a gauge swatch before you start. Chain 20, work 22 rows in sc (or hdc), fasten off, and block before measuring. If your gauge is loose, go down a hook size. If it is tight, go up. Even half a stitch difference per inch will change the finished bust by more than an inch.
Abbreviations
Special Techniques
Color Change at End of Round
Work the last stitch until 2 loops remain on your hook. Drop the current color to the wrong side. Pick up the new color and yarn over with it, drawing through both loops to complete the stitch. Carry unused colors loosely up the inside, catching them every 3 to 4 rounds to avoid excessive ends.
Back Loop Only Single Crochet (blo-sc)
Insert your hook into only the back loop of the stitch (the loop farthest from you). Complete the single crochet as normal. This creates visible horizontal ridges on the right side.
Stripe Sequence
Throughout the entire dress, you will work: 2 rounds Color A, 2 rounds Color B, 2 rounds Color C, repeat.
Step-by-Step Crochet Pattern Instructions
Straps (Make 2)
The straps are worked flat in rows using Color A only.
Using I-9 / 5.5 mm hook and Color A, ch 10.
Row 1 (RS): Sc in second ch from hook and in each ch across. Turn. (9 sc)
Row 2: Ch 1, sc in each st across. Turn. (9 sc)
Repeat Row 2 until strap measures 5 inches / 13 cm from beginning, ending after a WS row.
Do not fasten off the first strap. Leave a long tail on the second strap for seaming later. Set both straps aside.
Joining Straps and Beginning the Bodice
This step creates the square neckline by connecting the two straps with chain stitches at the front and back.
Step 1: With RS of both straps facing, hold the first strap (the one with live yarn). Using J-10 / 6.0 mm hook, ch 44 (52, 60). This chain spans the front neckline.
Step 2: Sl st into the first stitch of the second strap to join.
Step 3: Sc across the 9 stitches along the top edge of the second strap. (9 sc)
Step 4: Ch 44 (52, 60) for the back.
Step 5: Sl st into the first stitch of the original strap to join. Sc across those 9 stitches.
Step 6: Sc across the 44 (52, 60) front chain stitches. Sc across 9 stitches of the second strap top. Sc across the 44 (52, 60) back chain stitches. Sc across 9 stitches of the first strap top.
Place a stitch marker at the first stitch.
Total stitch count: 124 (140, 156) sts
Double-check this count before moving on. The top opening should measure approximately 16 (18, 20) inches in circumference.
Bodice
The bodice is worked in sc in the round using the stripe sequence. Begin with Color A.
Bodice Setup Round (Round 1): Sc in each st around. (124, 140, 156 sts)
Rounds 1 through 4: Sc in each st around. (124, 140, 156 sts)
Round 5 (S and M only): Sc2tog evenly 4 times spaced around, sc in all other sts. S: (120 sts). M: (136 sts). L: skip this round and sc plain. (156 sts)
Rounds 6 through 8: Sc in each st around. (120, 136, 156 sts)
Round 9 (S and M only): Sc2tog evenly 4 times around. S: (116 sts). M: (132 sts). L: sc plain. (156 sts)
Rounds 10 through 12: Sc in each st around. (116, 132, 156 sts)
Round 13 (S and M only): Sc2tog evenly 4 times around. S: (112 sts). M: (128 sts). L: sc plain. (156 sts)
Rounds 14 through 16: Sc in each st around. (112, 128, 156 sts)
Round 17 (S only): Sc2tog evenly 4 times around. (108 sts). M and L: sc plain. (128, 156 sts)
Rounds 18 through 20: Sc in each st around. (108, 128, 156 sts)
After Round 20, the bodice should measure approximately 4.5 inches from the strap join.
Rounds 21 through 28: Sc in each st around, no shaping. (108, 128, 156 sts)
After Round 28, the bodice should measure approximately 6.5 inches from the strap join.
Waistband
Switch to I-9 / 5.5 mm hook. Work all waistband rounds in Color A only.
Waistband Rounds 1 through 6: Blo-sc in each st around. (108, 128, 156 sts)
The waistband should measure approximately 1.25 to 1.5 inches tall. Those blo ridges should be clearly visible.
Switch back to J-10 / 6.0 mm hook for the skirt.
Skirt Transition Round
This increase round kicks off the dramatic flare.
Skirt Transition Round: Working in both loops, sc in each st AND work 1 additional sc in every 3rd stitch around.
Switch to hdc for all remaining skirt rounds.
Skirt
Continue working in the stripe sequence using hdc.
Rounds 1 through 4: Hdc in each st around. (144, 160, 208 sts)
Round 5 (Increase Round):
Rounds 6 through 8: Hdc in each st around. (160, 176, 224 sts)
Round 9 (Increase Round):
Rounds 10 through 12: Hdc in each st around. (176, 192, 240 sts)
Round 13 (Increase Round):
Rounds 14 through 16: Hdc in each st around. (192, 208, 256 sts)
Round 17 (Increase Round):
Rounds 18 through 20: Hdc in each st around. (208, 224, 272 sts)
Round 21 (Increase Round):
Rounds 22 through 24: Hdc in each st around. (224, 240, 288 sts)
Round 25 (Increase Round):
Rounds 26 through 28: Hdc in each st around. (240, 256, 304 sts)
Round 29 (Increase Round):
Rounds 30 through 32: Hdc in each st around. (256, 272, 320 sts)
Round 33 (Increase Round):
Rounds 34 through 36: Hdc in each st around. (272, 288, 336 sts)
Hem Border
Switch to I-9 / 5.5 mm hook.
Hem Round 1: Using Color A, sl st in each hdc around. (272, 288, 336 sts)
Fasten off and weave in end.
Strap Finishing
Seam the short cast-on edge of each strap to the corresponding position at the back neckline. Use mattress stitch or whip stitch through both layers for each of the 9 stitches. Try the dress on before permanently seaming the second strap to confirm placement.
Blocking and Finishing
Weave in all yarn ends on the wrong side, working each tail in two directions to prevent them from coming loose.
Wet blocking is essential for this dress. Soak the dress in cool water with a bit of wool wash for 15 to 20 minutes. Gently press out excess water without wringing. Lay flat on blocking mats, shape the bodice to measurements, and spread the skirt in a full circle. Pin the hem every 2 to 3 inches. Allow to dry completely, which may take 24 to 48 hours.
Size Customization Tips
To lengthen the bodice, add plain rounds in pairs before the waistband. To shorten it, remove rounds from the middle bodice section. For a longer skirt, continue the increase pattern after Round 36. For a shorter skirt, stop increases at Round 25 and finish with a few plain rounds.
Care Instructions
Turn the dress inside out before washing. Hand wash in cool water or machine wash on delicate in a mesh bag if using superwash or acrylic yarn. Lay flat to dry. Never hang this dress while wet, or the skirt will stretch and distort.
I hope this striped flared mini dress crochet pattern brings you as much joy to make as it brought my niece to wear. Thank you so much for choosing this project. If you create one, I would absolutely love to see it! Tag me on Instagram or share a photo on Facebook.
If you loved this pattern, go ahead and pin it to your Pinterest boards so you can find it when you are ready to start. And please drop a comment below if you make one. I genuinely love hearing how your projects turn out, what colors you chose, and who you made it for. Happy crocheting!
