
THIS is the dress pattern you’ve been waiting for. I’m not exaggerating when I say this pastel ombre peplum dress is one of the most stunning garments you’ll ever crochet. Yes, it takes time. Yes, it requires some focus. But the result? Absolutely showstopping.
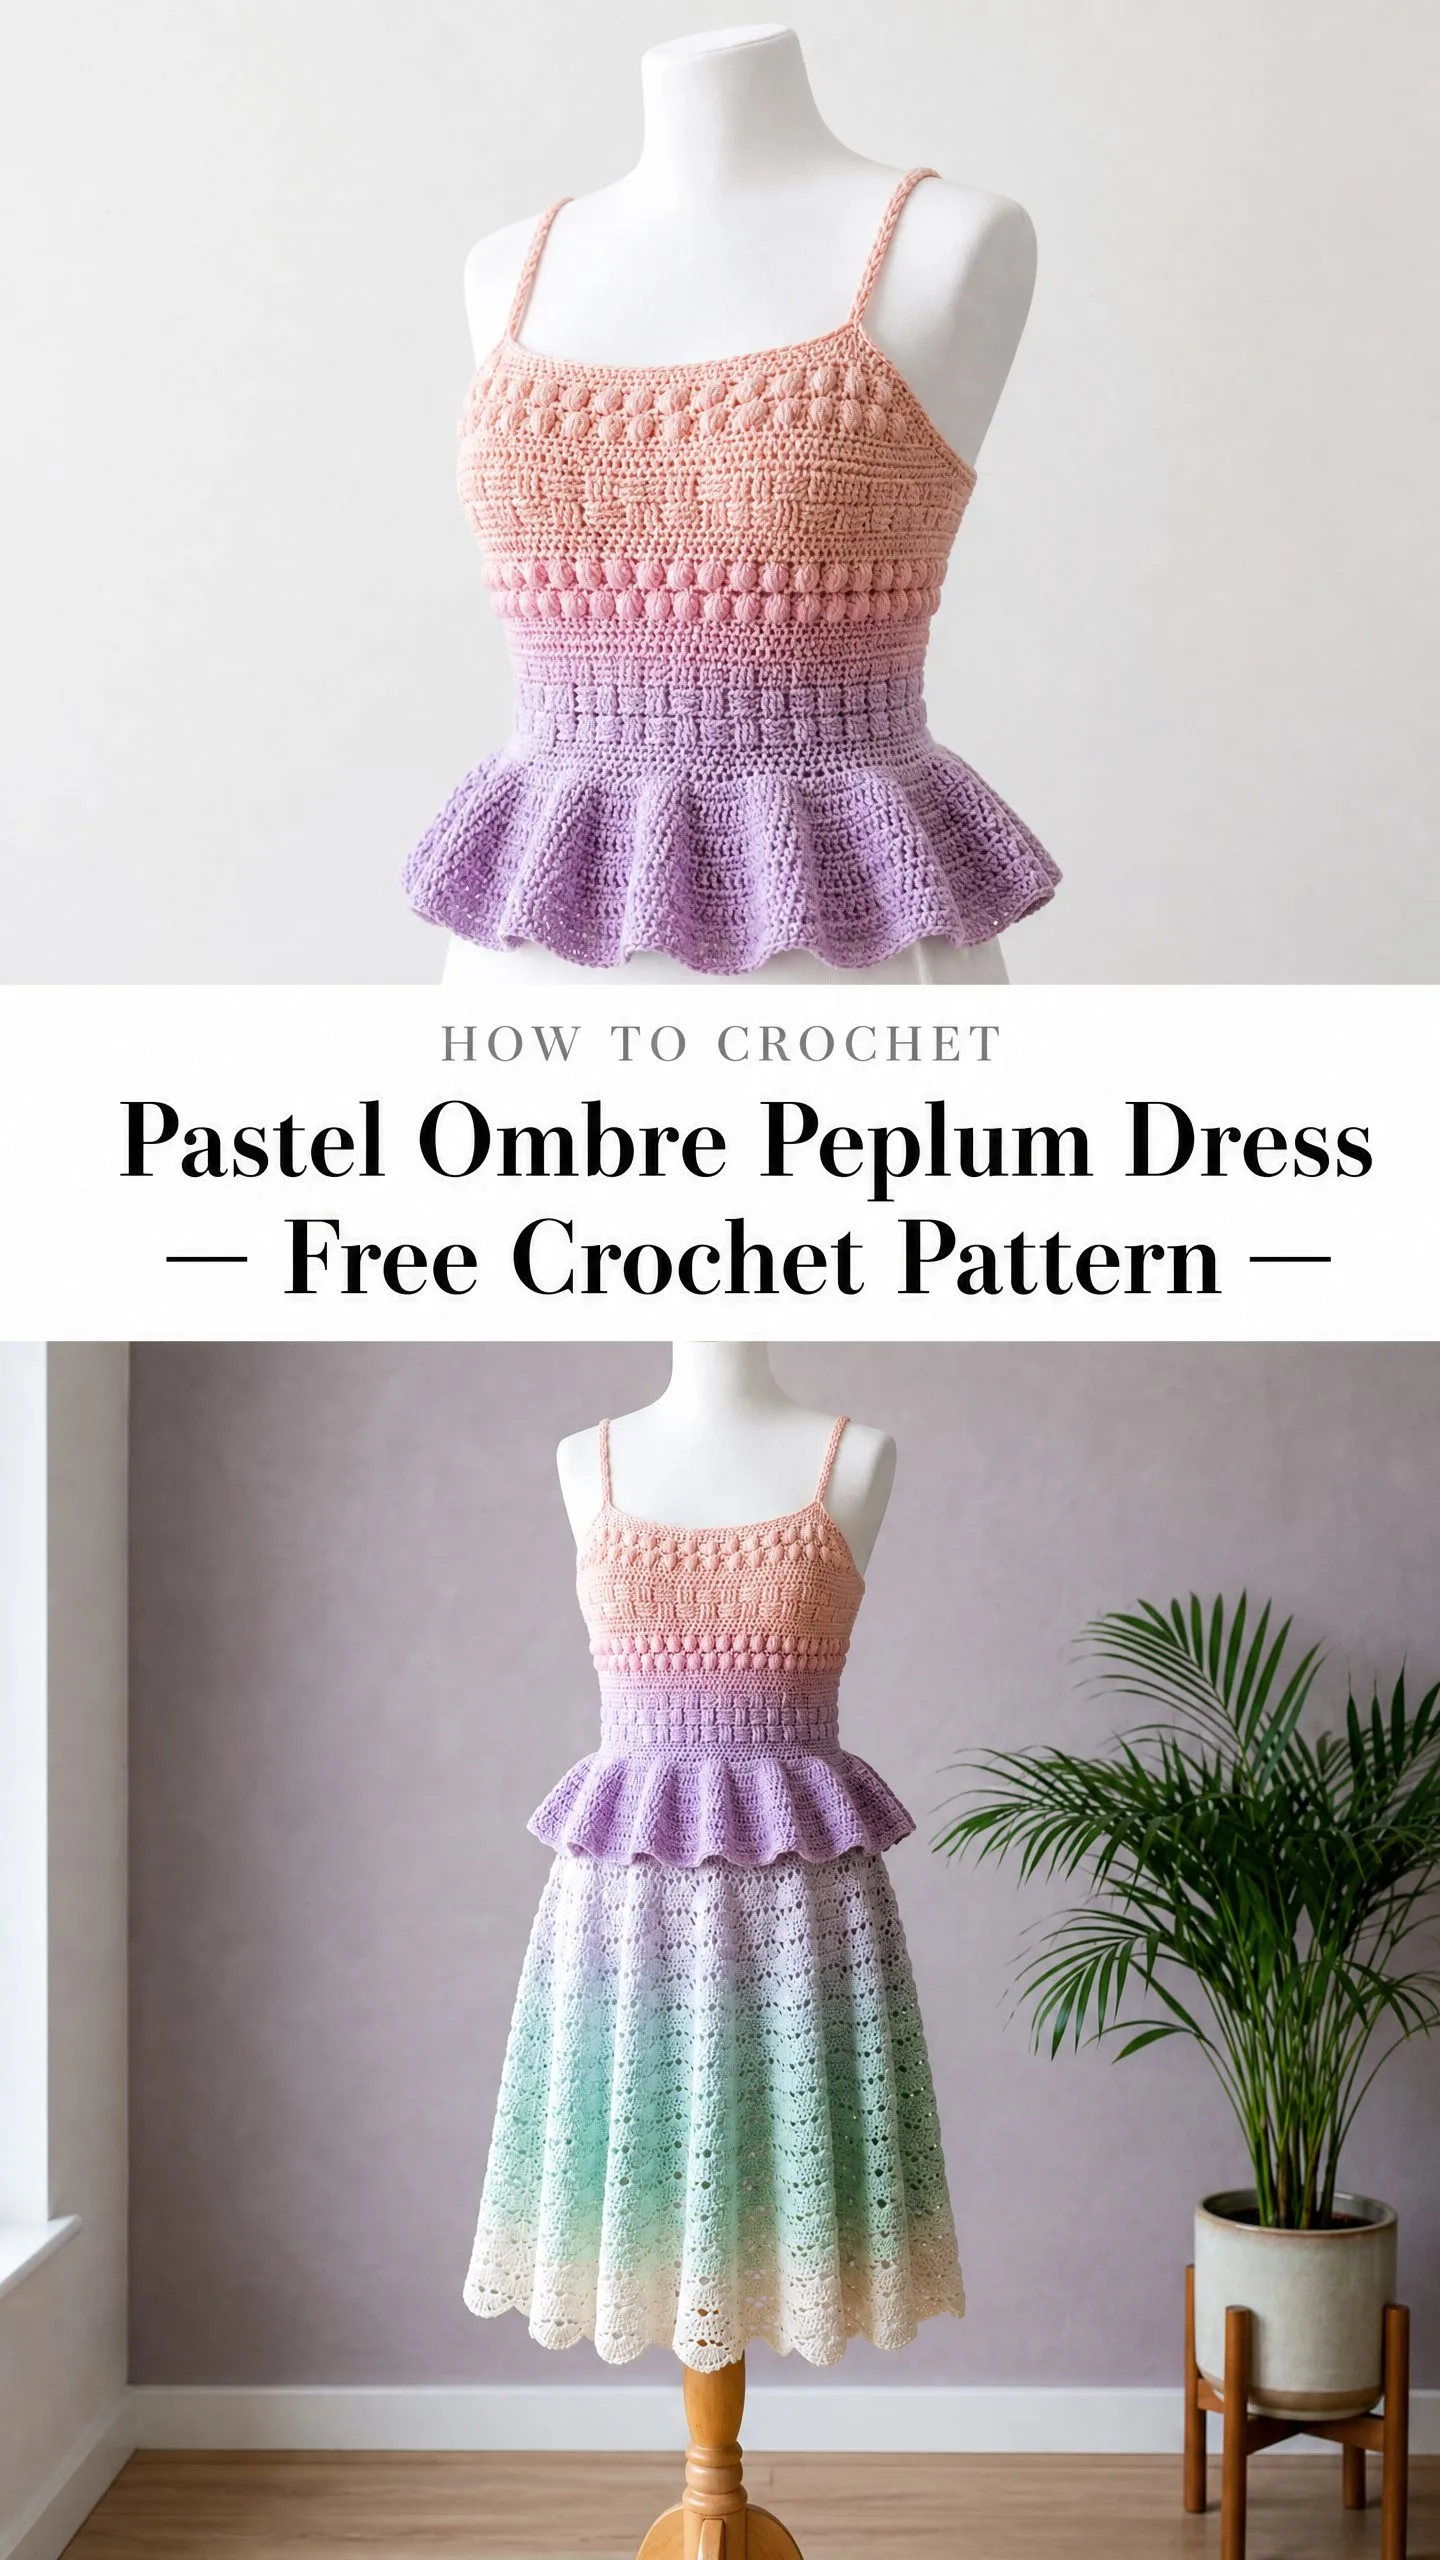
We’re talking a fitted bodice with gorgeous bobble and basket weave texture, a flirty peplum ruffle at the waist, and a flowing lace skirt that practically floats when you walk. The dreamy color gradient from blush pink through lavender, mint, and cream makes this dress look like something straight off a runway.
Expect to spend around 40 to 60 hours on this beauty, depending on your pace and size. That’s a commitment, sure. But every single hour is worth it when you slip this dress over your head and see the magic in the mirror. Let’s dive into everything you need to know to make your own.
About This Pastel Ombre Dress Crochet Pattern
This dress is constructed in four main sections worked primarily in the round. You’ll start with the spaghetti straps, then work the bodice from top to bottom, add the peplum ruffle at the waist, and finish with the gorgeous lace skirt worked downward.
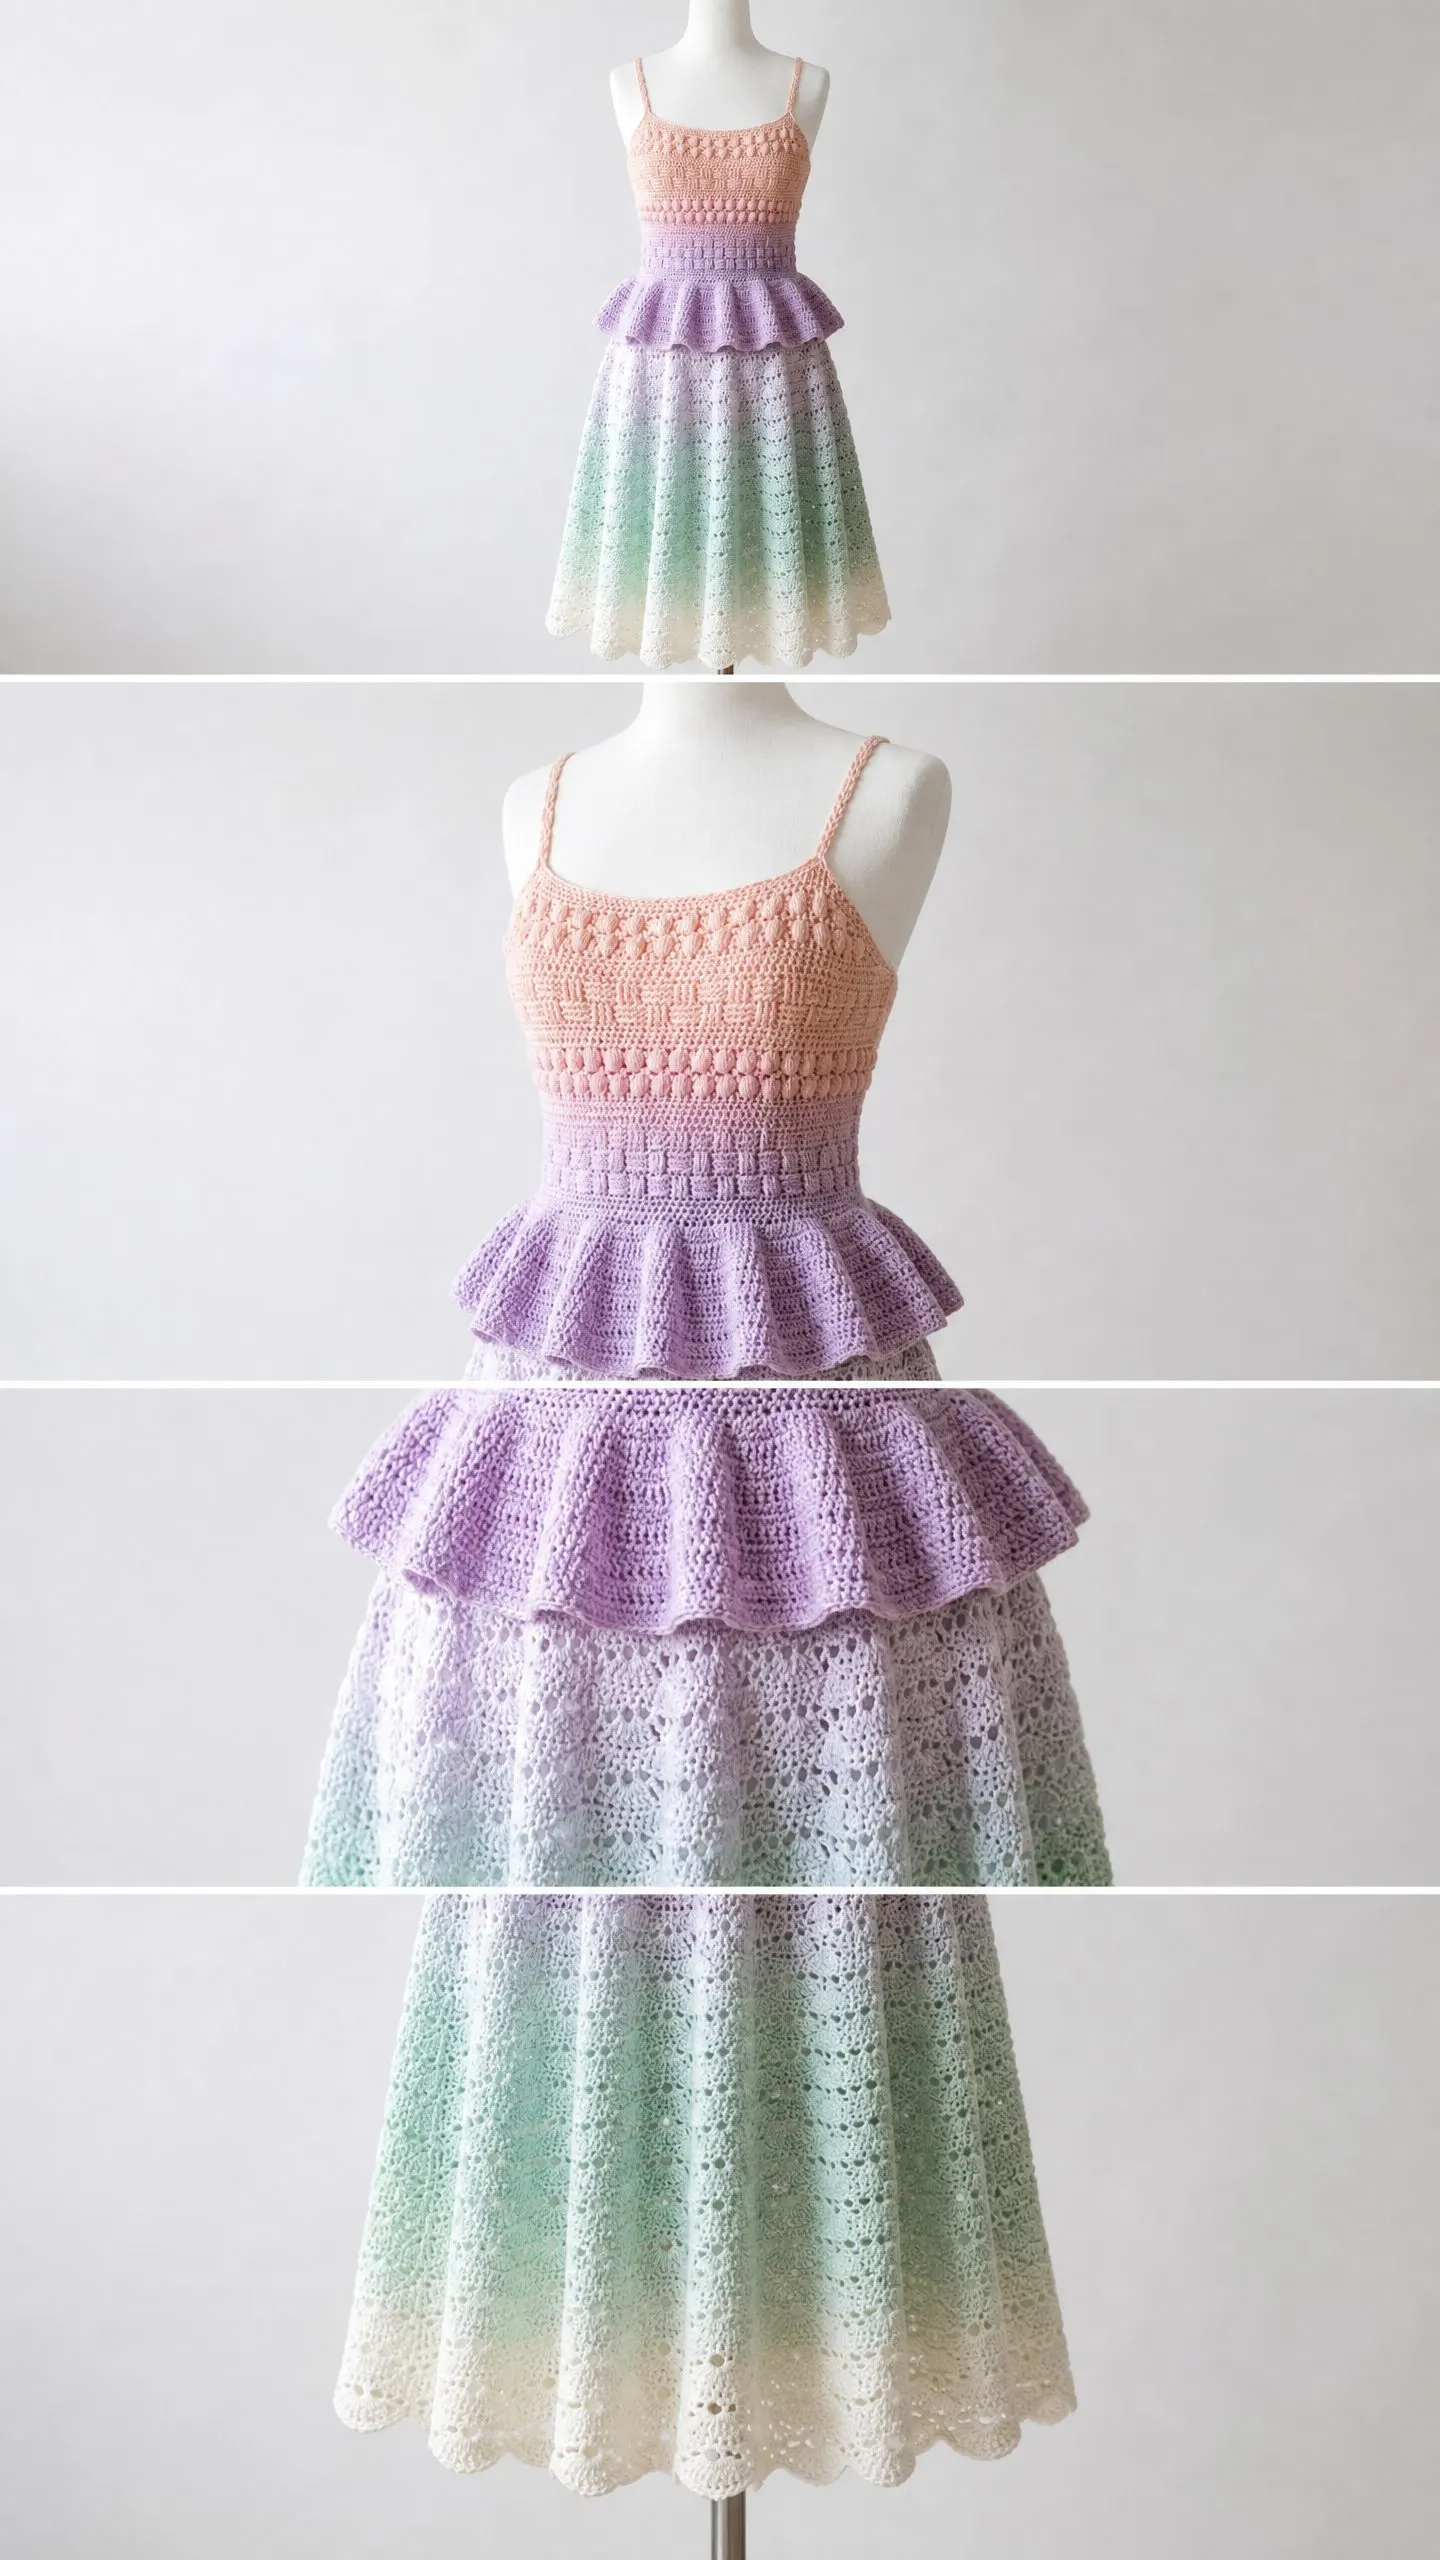
The bodice features a textured bobble and basket weave pattern that creates those beautiful horizontal bands you see in the finished piece. The peplum gets its lovely ruffle by doubling the stitch count, which naturally creates that flared effect. And the skirt? It uses an open fan lace stitch that creates scalloped edges at the hem without any additional finishing work.
The entire dress uses a gradient yarn or strategic color changes to achieve that stunning ombre effect. The color flows from blush pink at the bust through lilac at the waist and peplum, then lavender fading into mint, and finally cream at the hem.
Skill Level
This pattern is designed for advanced beginner to intermediate crocheters. The bodice uses bobble stitches and a basket weave texture that requires familiarity with front post and back post double crochets. Don’t worry if these sound intimidating. I’ll explain each special stitch in detail below.
The skirt lace repeat is straightforward once you get it established. The trickiest part is following stitch counts carefully during garment shaping and working increases at regular intervals.
Finished Measurements
The pattern is written for size Small with changes for Medium and Large in parentheses throughout.
Bust: 32 (36, 40) inches / 81 (91, 102) cm
Waist: 28 (32, 36) inches / 71 (81, 91) cm
Hip/Skirt Hem Circumference: 60 (66, 72) inches / 152 (167, 183) cm
Total Length (shoulder strap to hem): approximately 38 (39, 40) inches / 97 (99, 102) cm
Bodice Length (below strap join to waist): 11 (11.5, 12) inches / 28 (29, 30) cm
Peplum Depth: 3 inches / 7.5 cm
Skirt Length (waist to hem): 24 (24.5, 25) inches / 61 (62, 63) cm
Materials Needed
Yarn: 1,200 (1,400, 1,600) yards / 1,097 (1,280, 1,463) meters of DK weight yarn (light weight, CYCA #3) in a gradient or ombre colorway that transitions from blush pink through lilac, lavender, mint, and cream. You can also purchase separate skeins in each color and change manually.
Hooks:
Notions:
Yarn Suggestions
Lion Brand Mandala (gradient, 590 yards per cake, DK weight, acrylic). Purchase 2 (3, 3) cakes in a pastel colorway such as Fairy or Gnome. This yarn handles the full gradient automatically.
Paintbox Yarns Simply DK (solid, 137 yards per ball, DK weight, 100% acrylic). Purchase 2 balls each of Blush Pink, Lilac, Pale Lavender, Spearmint Green, and Champagne White. This option gives precise color placement control.
Scheepjes Whirl (ombre gradient, 1,094 yards per ball, DK weight, 60% cotton / 40% acrylic). Purchase 1 (1, 2) balls in a pastel ombre colorway. This yarn adds drape and a slight sheen that enhances the lace skirt beautifully.
Substitution note: Any smooth DK weight yarn with good stitch definition will work. Avoid overly fluffy or hairy yarns as they will obscure the bobble and basket weave texture in the bodice. Cotton-acrylic blends are recommended for breathability. Always swatch to confirm gauge before beginning.
Gauge
Getting gauge right is critical for a fitted garment like this. Please take the time to swatch!
Bodice (using E-4 / 3.5 mm hook):
20 stitches and 22 rows = 4 inches / 10 cm in single crochet
Bobble texture swatch:
18 stitches and 14 rows = 4 inches / 10 cm in bobble-basket pattern
Skirt (using F-5 / 3.75 mm hook):
One 12-stitch fan lace repeat = 2.5 inches / 6.4 cm wide
6 rows of fan lace = 2 inches / 5 cm tall
Work a 6-inch swatch in each stitch pattern, wash and block it before measuring. Adjust hook size as needed to match gauge.
Abbreviations (US Terms)
Let me walk you through each abbreviation you’ll encounter. I’m defining them all upfront so you can reference this section whenever needed.
ch = chain (wrap yarn over hook and pull through loop on hook)
sl st = slip stitch (insert hook, yarn over, pull through stitch and loop on hook in one motion)
sc = single crochet (insert hook, yarn over, pull up loop, yarn over, pull through both loops)
hdc = half double crochet (yarn over, insert hook, pull up loop, yarn over, pull through all 3 loops)
dc = double crochet (yarn over, insert hook, pull up loop, yarn over, pull through 2 loops twice)
tr = treble crochet (yarn over twice, insert hook, pull up loop, yarn over, pull through 2 loops three times)
FPdc = front post double crochet (explained in special stitches below)
BPdc = back post double crochet (explained in special stitches below)
bob = bobble stitch (explained in special stitches below)
sk = skip
sp = space
st(s) = stitch(es)
rep = repeat
pm = place marker
rem = remaining
RS = right side
WS = wrong side
beg = beginning
cont = continue
inc = increase (work 2 stitches in same stitch)
dec = decrease (sc2tog or dc2tog as specified)
sc2tog = single crochet 2 together (insert hook in first st, pull up loop, insert hook in next st, pull up loop, yarn over, pull through all 3 loops)
dc2tog = double crochet 2 together
yo = yarn over
rnd = round
t-ch = turning chain
[ ] = work bracketed instructions the number of times indicated
Special Stitches
Bobble Stitch (bob)
This creates those lovely textured bumps on the bodice. Here’s how to work it:
Yarn over, insert hook into stitch, pull up a loop, yarn over, pull through 2 loops. You now have 1 incomplete double crochet on your hook.
Yarn over, insert hook into the same stitch, pull up a loop, yarn over, pull through 2 loops. You now have 2 incomplete double crochets on your hook.
Yarn over, insert hook into the same stitch again, pull up a loop, yarn over, pull through 2 loops. You now have 3 incomplete double crochets on your hook.
Yarn over and pull through all 4 loops on hook. One bobble made!
Important: Always push the bobble to the right side (away from you) when working on wrong side rows, or toward you when working on right side rows. This ensures all bobbles face outward on the finished garment.
Front Post Double Crochet (FPdc)
Yarn over, insert hook from front to back to front around the post (that’s the vertical bar) of the stitch in the row below. Yarn over and pull up a loop, then yarn over and pull through 2 loops twice. One FPdc made.
Back Post Double Crochet (BPdc)
Yarn over, insert hook from back to front to back around the post of the stitch in the row below. Yarn over and pull up a loop, then yarn over and pull through 2 loops twice. One BPdc made.
Basket Weave Pattern (worked over a multiple of 4 stitches)
Row 1 (RS): Ch 3 (counts as dc), dc in each st across.
Row 2 (WS): Ch 3, [FPdc over next 2 sts, BPdc over next 2 sts] across, dc in top of t-ch.
Row 3 (RS): Ch 3, [BPdc over next 2 sts, FPdc over next 2 sts] across, dc in top of t-ch.
Rows 2 and 3 form the basket weave pattern. Repeat them for the pattern.
Pattern Notes Before You Begin
1. The bodice is worked flat in two pieces (front and back) then seamed at the sides. Instructions are written for flat construction seamed at both sides.
2. Straps are worked first as long chains and set aside, then joined to the bodice top edge.
3. Color changes: If using a self-striping gradient yarn, simply work continuously and the gradient will occur naturally. If using separate colors, change yarn at the end of the last stitch of each section as follows: Blush Pink for bodice rows 1 through 18, Lilac for bodice rows 19 through 26 and all peplum rows, Pale Lavender for skirt rounds 1 through 8, Mint for skirt rounds 9 through 20, Cream for skirt rounds 21 through final round.
4. The peplum is created by working into the waist edge of the completed bodice and immediately doubling the stitch count. The ruffle forms naturally from the increased density.
5. The skirt is worked in the round from the waist down, attached to the lower edge of the peplum foundation row.
6. The lace fan stitch is worked with the larger hook for drape and openness. Switch hooks at the start of the peplum.
7. Stitch markers should be placed at each side seam point during bodice construction.
8. The dress has a square neckline. The top edge of the bodice remains straight across, and the spaghetti straps create the visual of the square neckline.
9. All turning chains are counted as stitches only where specified.
Step by Step Crochet Pattern Instructions
Straps (Make 2)
Using E-4 hook and blush pink yarn, ch 100 (105, 110). Fasten off, leaving a 12-inch tail for seaming. Set straps aside.
The strap chain, when attached and stretched slightly, will measure approximately 18 (19, 20) inches / 45 (48, 51) cm. This is the working length. The extra chain length allows for adjustability. Trim and re-fasten after fitting if needed.
Bodice Front
The bodice front is worked flat from top to bottom.
Using E-4 hook and blush pink yarn, ch 81 (91, 101). Note that the ch-1 at start is not counted. The working chain creates 80 (90, 100) working stitches.
Foundation Row (WS): Sc in 2nd ch from hook and in each ch across. Turn. (80, 90, 100 sc)
Row 1 (RS): Ch 1, sc in each st across. Turn. (80, 90, 100 sc)
Row 2 (WS): Work the bobble row as follows:
Row 3 (RS): Ch 1, sc in each st across. Turn. (80, 90, 100 sc)
Row 4 (WS): Repeat Row 2. (80, 90, 100 sts)
Row 5 (RS): Ch 1, sc in each st across. Turn. (80, 90, 100 sc)
Row 6 (WS): Repeat Row 2. (80, 90, 100 sts)
Rows 1 through 6 create the upper bobble band of the bodice. You have worked 3 bobble rows separated by sc rows.
Row 7 (RS): Ch 3 (counts as dc here and throughout basket weave section), dc in each st across. Turn. (80, 90, 100 dc)
Transition Row (WS, after Row 6):
Row 7 (RS, begin basket weave): Ch 3 (counts as dc), dc in each st across. Turn. (80, 92, 100 dc)
Row 8 (WS): Ch 3 (counts as dc), [FPdc over next 2 sts, BPdc over next 2 sts] across to last st, dc in top of t-ch. Turn. (80, 92, 100 sts)
Row 9 (RS): Ch 3, [BPdc over next 2 sts, FPdc over next 2 sts] across to last st, dc in top of t-ch. Turn. (80, 92, 100 sts)
Rows 10 through 16: Continue alternating Rows 8 and 9 (Row 10 repeats Row 8, Row 11 repeats Row 9, and so on). (80, 92, 100 sts)
Rows 7 through 16 create the basket weave section of the bodice.
Return to Bobble Band (Lower Bodice)
Transition Row (RS): Ch 1, sc in each st across, working into tops of dc. Adjust by working sc2tog as needed to achieve 80 (90, 100) sts. Turn. (80, 90, 100 sc)
Row 17 (WS): Work Row 2 bobble row. (80, 90, 100 sts)
Row 18 (RS): Ch 1, sc in each st across. Turn. (80, 90, 100 sc)
Row 19 (WS): Work Row 2 bobble row. (80, 90, 100 sts)
Row 20 (RS): Ch 1, sc in each st across. Turn. (80, 90, 100 sc)
Row 21 (WS): Work Row 2 bobble row. (80, 90, 100 sts)
Row 22 (RS): Ch 1, sc in each st across. This is the lower edge/waist edge of the front bodice panel. Fasten off. (80, 90, 100 sc)
Color note: If working with separate colors, join Lilac at Row 19 or at the transition row between basket weave and lower bobble section.
Checkpoint: After completing the bodice front, the piece should measure approximately 11 (11.5, 12) inches / 28 (29, 30) cm tall and 16 (18, 20) inches / 41 (46, 51) cm wide. The top 6 rows are bobble texture, the middle 10 rows are basket weave, and the lower 6 rows are bobble texture.
Bodice Back
Work exactly as bodice front from Foundation Row through Row 22. Fasten off. (80, 90, 100 sc at completion)
Assembling the Bodice
With RS together, align front and back panels. Using yarn needle and matching color, seam both side seams using a whip stitch or mattress stitch through approximately 22 rows on each side. Leave the top edge and bottom edge open. Turn RS out.
The joined bodice tube should measure approximately 32 (36, 40) inches / 81 (91, 102) cm around at the bust.
Strap attachment: With RS facing, identify the center 40 (45, 50) sts of the front top edge and back top edge. The outer edge sts on each side will form the side shoulders. Pin one strap end to the front top edge, approximately 4 (4.5, 5) inches / 10 (11, 13) cm from the center, on each side. Pin the other end of each strap to the back top edge at corresponding positions. Try on or measure against a dress form to confirm strap length, then seam straps to bodice top edges securely using yarn needle.
Peplum Ruffle
The peplum is worked from the bottom edge of the bodice (Row 22 edge) and worked downward. Switch to F-5 hook and Lilac yarn.
Join yarn with sl st at any side seam point of the bottom bodice edge.
Setup Rnd (foundation for peplum): Ch 1, work 160 (180, 200) sc evenly around the bottom edge of the bodice. This doubles the 80, 90, 100 st count by working 2 sc into each st around. Join with sl st to first sc. (160, 180, 200 sc)
Peplum Rnd 1: Ch 3 (counts as dc), dc in each st around. Join with sl st to top of beg ch-3. (160, 180, 200 dc)
Peplum Rnd 2: Ch 3, [FPdc over next 2 sts, BPdc over next 2 sts] around to last 3 sts, FPdc over next 2 sts, dc in top of beg ch-3. Join. (160, 180, 200 sts)
Peplum Rnd 3: Ch 3, [BPdc over next 2 sts, FPdc over next 2 sts] around to last 3 sts, BPdc over next 2 sts, dc in top of beg ch-3. Join. (160, 180, 200 sts)
Peplum Rnd 4: Repeat Peplum Rnd 2. (160, 180, 200 sts)
Peplum Rnd 5: Ch 1, sc in each st around. Join with sl st to first sc. This is the lower peplum edge and the attachment row for the skirt. Do not fasten off. (160, 180, 200 sc)
Checkpoint: The peplum should measure approximately 3 inches / 7.5 cm deep from the bodice join. The ruffle should flare outward noticeably due to the doubled stitch count.
Skirt
The skirt is worked in the round downward from the peplum lower edge, using the F-5 hook. The fan lace stitch requires a stitch count that is a multiple of 12.
Skirt Setup Rnd: Without cutting yarn, ch 1, sc around adjusting as follows:
Skirt Rnd 1: Ch 1, sc in first st. Ch 3, sk 2 sts, sc in next st. Rep from * around. Join to first sc. This creates ch-3 arches around as a transition row. (52, 60, 64 ch-3 spaces)
Skirt Rnd 2 (fan foundation): Sl st to center of first ch-3 sp. Ch 3 (counts as dc), 4 dc in same ch-3 sp (first fan). Sc in next ch-3 sp, ch 3, sc in same ch-3 sp (v-stitch valley), 5 dc in next ch-3 sp (fan). Rep from * around ending with sc in last ch-3 sp, ch 3, sc in same sp. Join to top of beg ch-3. (26, 30, 32 fans)
Skirt Rnd 3: Sl st to top of 5-dc fan (center dc), ch 1, sc in center dc of fan. Ch 3, sc in ch-3 valley sp, ch 3, sc in center dc of next fan. Rep from * around. Join to first sc. (52, 60, 64 ch-3 spaces)
Skirt Rnd 4: Sl st to first ch-3 sp. Ch 3, 4 dc in same ch-3 sp. Sc in next ch-3 sp, ch 3, sc in same sp, 5 dc in next ch-3 sp. Rep around, end sc in last ch-3 sp, ch 3, sc in same sp. Join. (26, 30, 32 fans)
Skirt Rnds 5, 7, 9: Repeat Rnd 3. (52, 60, 64 ch-3 spaces)
Skirt Rnds 6, 8, 10: Repeat Rnd 4. (26, 30, 32 fans)
Checkpoint: After Round 10, the skirt should measure approximately 8 inches / 20 cm from the peplum join. Change to Mint color yarn if using separate colors.
Skirt Rnd 11: Repeat Rnd 3. (52, 60, 64 ch-3 spaces)
Skirt Rnd 12: Repeat Rnd 4 with the following expansion: In place of each single 5-dc fan, work 6 dc to add width. (26, 30, 32 fans with 6 dc each)
Continue alternating Rnds 3 and 4 (with 6-dc fans from Rnd 12 onward) through Rnd 20. Change to Cream color at Rnd 21 if using separate colors.
Continue the fan lace pattern through the final round of the skirt. The scalloped hem forms naturally from the fan pattern without additional finishing.
Fasten off and weave in all ends.
Finishing
Block your completed dress according to your yarn’s care instructions. For cotton-blend yarns, wet blocking works beautifully. Pin the dress to blocking mats, shaping the peplum ruffle and lace skirt fans to open up fully.
If desired, thread the optional elastic through the waist seam between the bodice and peplum for additional support.
Try on your dress and adjust strap length if needed. Trim excess chain and secure ends.
Tips for Success
Take your time with the bobble stitches. They look complicated but become rhythmic once you get the hang of them. Practice a few on a scrap piece first if you’re new to bobbles.
Count your stitches regularly. This fitted garment requires accurate stitch counts, especially during the basket weave section where the post stitches can throw off your count if you’re not careful.
Use stitch markers liberally. Mark the beginning of each round in the skirt section and mark side seam positions during bodice construction.
Block aggressively. The lace skirt especially benefits from thorough blocking. Those fan stitches will really open up and show their beauty.
I hope you absolutely love making this dress as much as I loved writing up this tutorial for you. There’s something incredibly satisfying about creating a wearable garment that looks this polished and professional.
If you make this pastel ombre peplum dress, I would love to see it! Tag me on Instagram or share a photo in my Facebook group. Seeing your finished projects truly makes my day.
Be sure to save this crochet pattern to your Pinterest boards so you can find it whenever you’re ready to start. And if you make this gorgeous dress, please drop a comment below and let me know how it turned out! I love hearing from you.
