
Time to dig into your stash and pull out that gorgeous burgundy yarn you have been saving for something special. This is the project it has been waiting for. This fitted mini dress combines a structured bodice with delicate fan lace work in the skirt, creating a showstopper piece that looks far more complicated than it actually is.
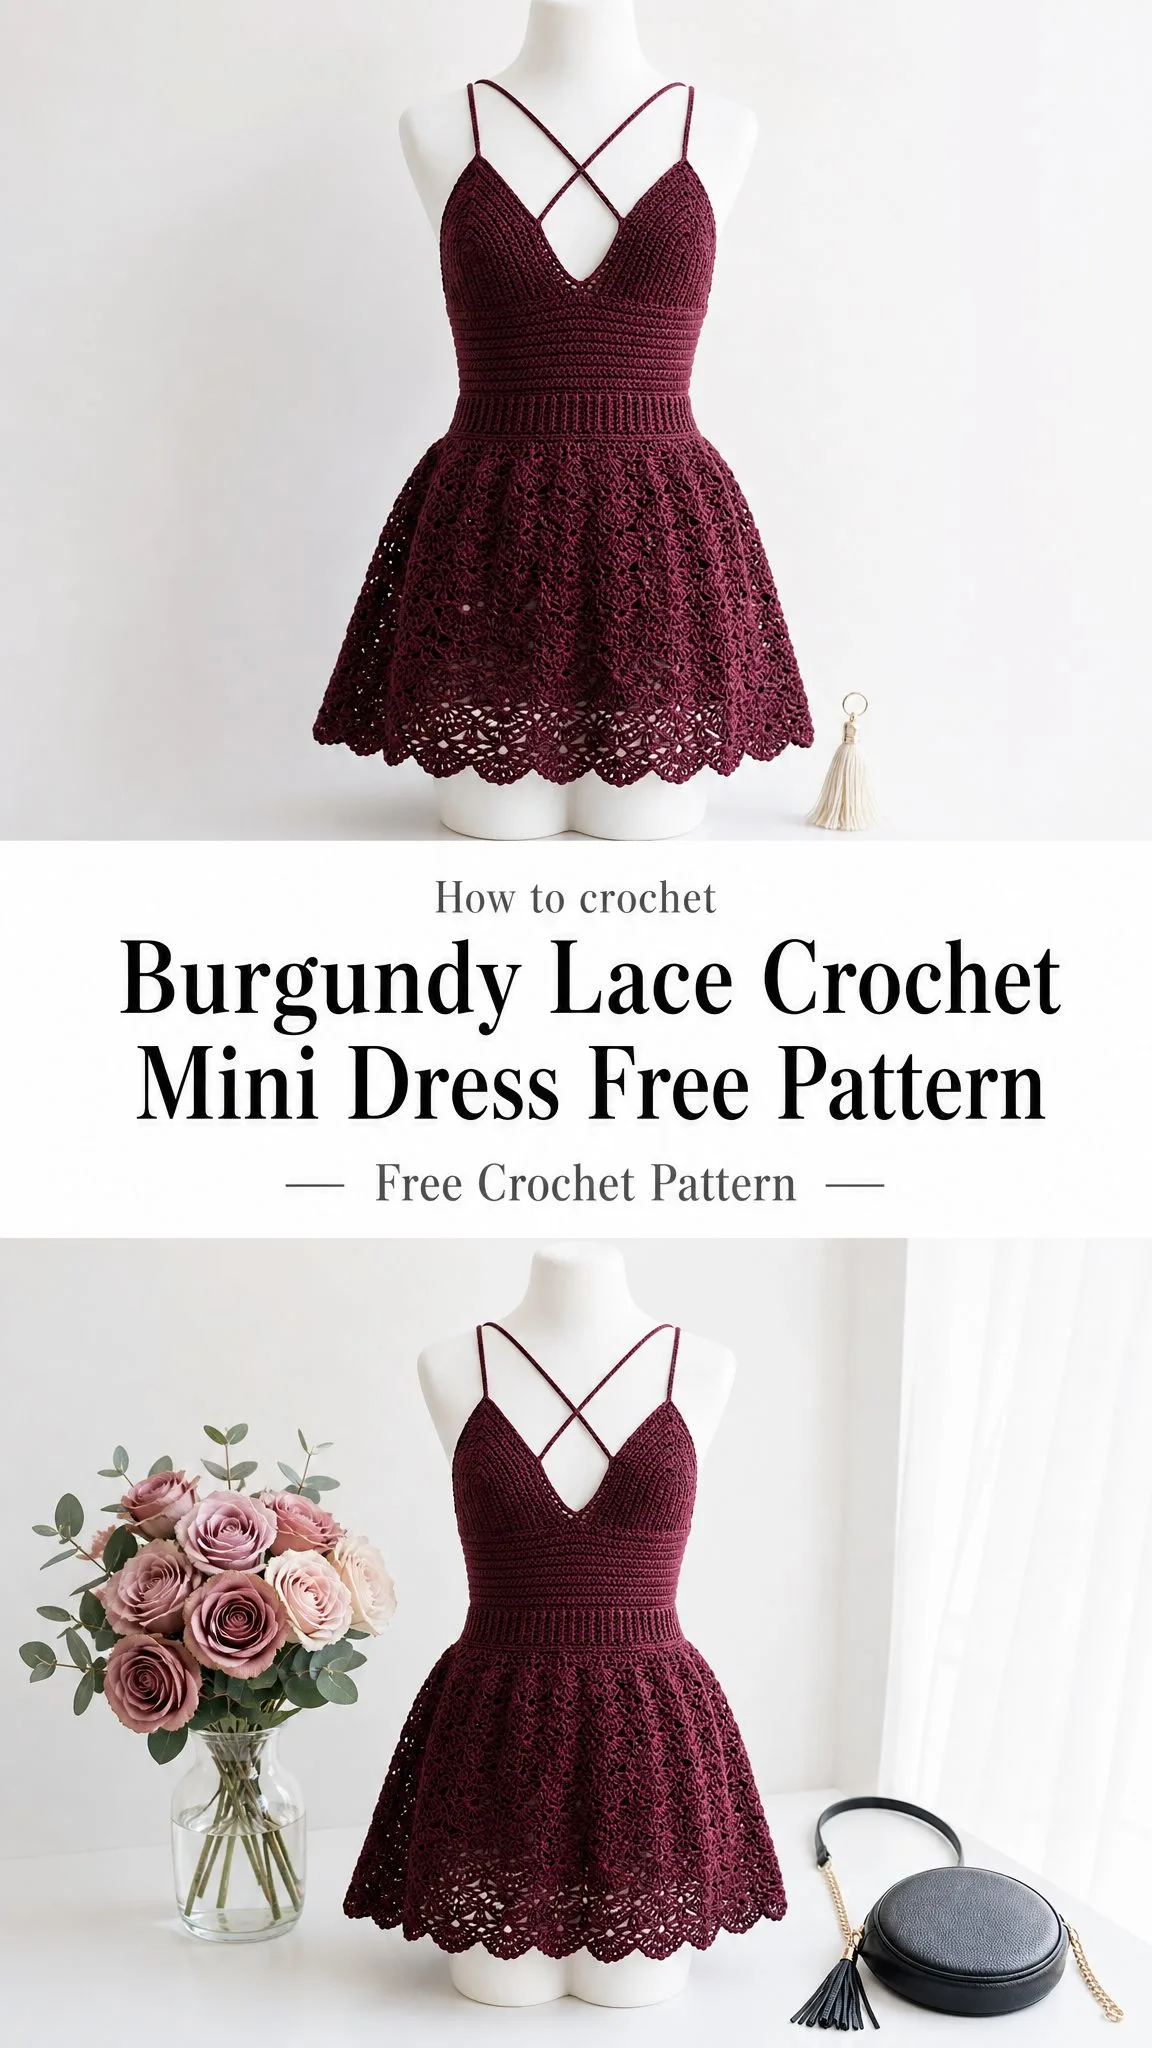
I will be honest with you. This is an advanced pattern. You need confidence working garment shaping in the round, experience with lace repeats, and patience for the finishing details. But if you have made a few garments before and you are ready to level up, this dress will teach you so much while giving you something truly beautiful to wear.
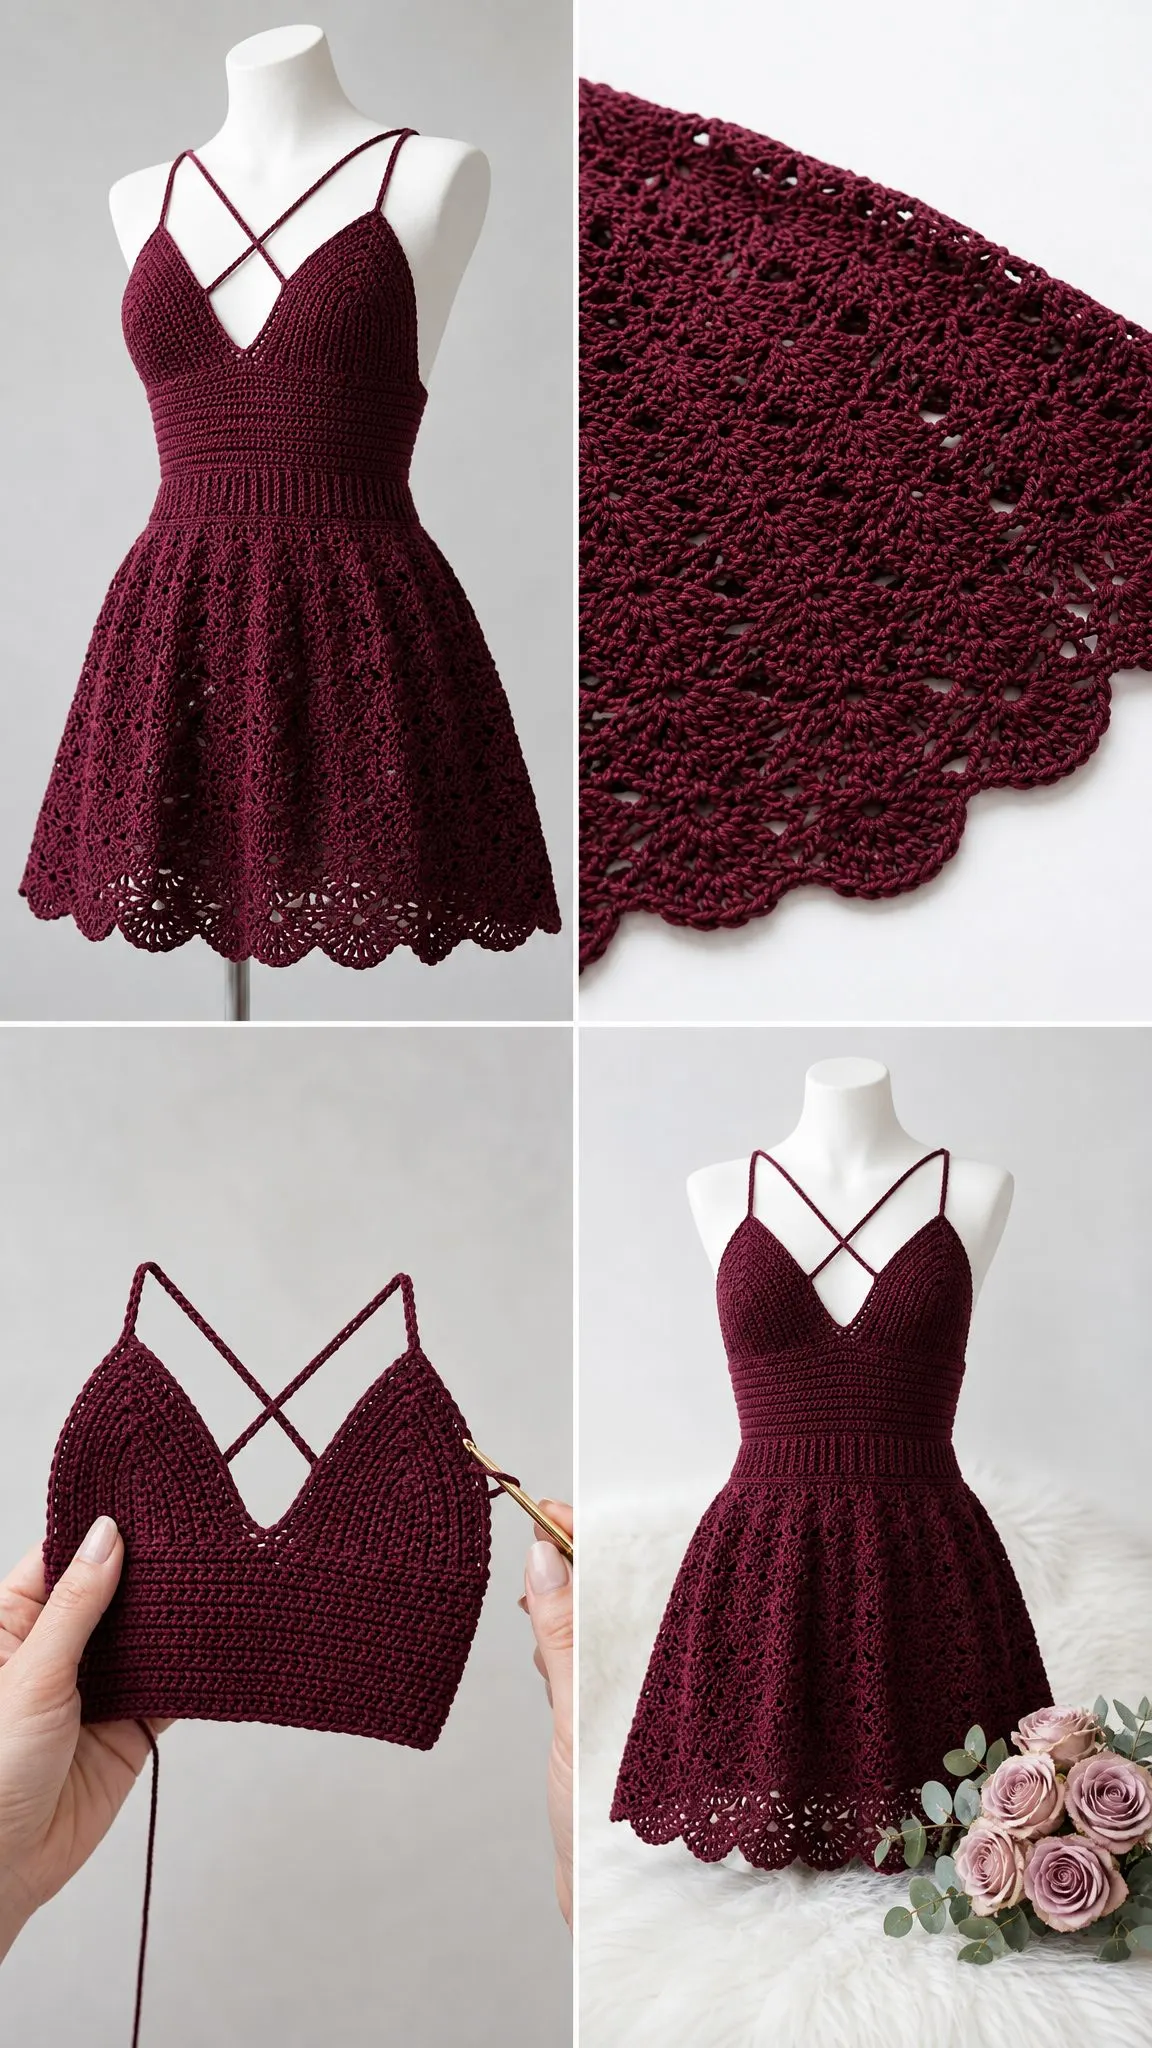
The construction is interesting too. You work the bodice from the bust down to the waist, shape a flattering V-neckline by working flat sections, then add a ribbed waistband before the skirt flares out in gorgeous fan stitch repeats. Those criss-cross spaghetti straps? Simple chains attached at the end. Let me walk you through everything.
Why This Burgundy Lace Crochet Dress Pattern Works
The deep wine color in this crochet mini dress pattern photographs beautifully and works across seasons. Wear it to a summer wedding, a fall dinner party, or a special photoshoot. The fitted bodice provides structure while the lace skirt moves and flows with every step.
What makes this design special is the combination of textures. The solid single crochet bodice creates a smooth, fitted look. The back loop only waistband adds stretch and a subtle ribbed texture. Then the skirt opens up into an airy fan stitch pattern that finishes with a sweet scalloped hem.
Skill Level and Time Commitment
This is an advanced crochet pattern. You should feel comfortable with garment construction, working increases and decreases to shape fabric, and maintaining consistent stitch counts across lace repeats.
Plan for approximately 40 to 55 hours of work. The bodice takes about 12 to 15 hours, the waistband 3 to 4 hours, and the skirt 20 to 25 hours. Finishing, blocking, and strap attachment add another 3 to 5 hours. This is not a weekend project, but it is absolutely worth the time investment.
Finished Measurements
Size Small as written:
Size customization tips are included at the end of this crochet tutorial.
Materials Needed
Yarn: Approximately 1,200 to 1,400 yards / 1,097 to 1,280 meters of DK weight yarn (CYCA 3 Light) in deep burgundy or wine. Add 150 to 200 yards per size up from Small.
Recommended Yarn Options:
Option 1: Paintbox Yarns Cotton DK (100% cotton, 273 yards per 100g skein). This gives excellent stitch definition for lace and holds its shape after blocking. You will need 5 skeins.
Option 2: Lion Brand 24/7 Cotton in Burgundy (100% mercerized cotton, 186 yards per 100g skein). The mercerized finish adds subtle sheen perfect for a dressy garment. You will need 7 skeins.
Option 3: WeCrochet Shine Sport held double (53% pima cotton / 47% modal, 110 yards per 50g skein). This creates the softest drape of all three options. Purchase 12 to 13 small skeins.
Important substitution note: Choose yarn with low stretch like cotton, cotton-modal blends, or linen. Avoid superwash wool or acrylic that stretches significantly. The fitted bodice relies on stable fabric to maintain its shape.
Hooks:
Notions:
Gauge (Do Not Skip This)
Bodice gauge with E-4 / 3.5 mm hook:
18 sc = 4 inches / 10 cm
20 rows = 4 inches / 10 cm in single crochet worked in the round
Skirt gauge with F-5 / 3.75 mm hook:
One full fan repeat (12 stitches wide) = 2.5 inches / 6.35 cm
4 rows of fan pattern = 2 inches / 5 cm
Gauge is mandatory for a garment. Swatch in the round for the bodice section. Swatch flat for the fan repeat, then measure the repeat width and row height. Adjust hook size up or down as needed before starting. A garment worked at incorrect gauge will not fit. I know swatching feels tedious, but trust me on this one.
Abbreviations
Special Stitches for This Crochet Dress Pattern
Fan Stitch
The fan stitch creates a shell of 5 double crochets fanned into a single stitch or chain space. Here is how it works:
1. Work 1 sc into the chain-2 space or designated anchor stitch between fans.
2. Chain 2.
3. Work 5 dc into the next designated center stitch or chain-2 space. This forms the fan.
4. Chain 2.
5. Work 1 sc into the next chain-2 space or designated anchor position.
6. Repeat steps 2 through 5 across or around.
Each complete fan unit occupies 12 stitches of the foundation and produces a 2.5 inch wide motif at gauge.
Scallop Edging
This creates the beautiful border at the bottom of the skirt:
1. Slip stitch into the first stitch of the round to anchor.
2. Chain 3 (counts as 1 dc).
3. Work 4 more dc into the same stitch (5 dc total in same stitch).
4. Skip 2 stitches.
5. Slip stitch into the next stitch.
6. Skip 2 stitches.
7. Repeat steps 2 through 6 around.
The scallop edging requires a stitch count divisible by 6. The pattern prepares for this automatically.
Ribbed Waistband Stitch
Working in BLO (back loop only) for every round of the waistband creates a stretchy ribbed texture. Simply insert your hook under only the back loop instead of both loops when working each single crochet.
V-Neck Shaping Decrease
At the V-neck point, work sc2tog using the last stitch before the center marker and the first stitch after the center marker. This consumes 2 stitches and pulls the center point downward, creating the V-shape.
Pattern Notes Before You Begin
1. The dress is constructed in three main sections: the bodice (worked in rounds from the bust downward to the waist), the waistband (a short ribbed section), and the skirt (worked in rounds from the waist downward with fan motif increases).
2. The bodice begins at the underarm/bust line and is worked downward. The V-neckline is shaped by working flat across the front for a portion of construction, then joining back into rounds after shaping is established.
3. The dress opens at the back with a small gap secured by the strap tie system for ease of entry.
4. All rounds are worked with RS facing unless otherwise stated. Join each round with a slip stitch to the first stitch, then chain up as specified.
5. Stitch markers are essential. Place markers at: center front V-neck point, center back, left underarm, right underarm, and at each repeat boundary in the skirt lace sections.
6. When working skirt lace rounds, do not count chain spaces as stitches. Stitch counts refer to double crochets and single crochets only.
7. The straps are simple chains attached during finishing.
8. Block the finished dress before wearing. Wet blocking cotton yarn dramatically opens the lace motifs.
9. Right side and left side references refer to the wearer’s right and left, not the observer’s.
Step by Step Crochet Pattern Instructions
Section 1: Bodice
The bodice is worked in rounds from the bust line downward to the waist. The V-neck shaping is worked during the first several rounds by working flat across the front in two separate sections, then joining back into a full round once the V shaping is deep enough.
Foundation Chain:
Using the E-4 / 3.5 mm hook, chain 144. Take care not to twist. Slip stitch into the first chain to form a ring.
The foundation ring of 144 chains represents the full bust circumference. 144 stitches divided by 18 stitches per 4 inches equals 32 inches circumference. Markers divide the ring: 72 stitches for the front panel, 72 stitches for the back panel.
Round 1 (Setup):
Place a stitch marker in the first chain to mark left underarm (start of round). Work 1 sc in each of the next 36 ch (right back panel). Place marker at the 36th stitch (center back). Work 1 sc in each of the next 36 ch (left back panel, ending at right underarm). Place marker. Work 1 sc in each of the next 36 ch (right front panel). Place marker at the 36th stitch from the right underarm (this is the center front V-neck point). Work 1 sc in each of the next 36 ch (left front panel, ending at left underarm / start of round). Slip stitch to join to the first sc. (144 sc)
Rounds 2 through 5:
Ch 1, sc in each st around. Sl st to join. (144 sc each round)
After Round 5 the front bust fabric is established. Now begin V-neck shaping by splitting the front panel.
V-Neck Shaping (Worked Flat on Front Panels)
The front panel (72 stitches) is split at the center front marker into two halves of 36 stitches each. Each half is worked flat for 12 rows to create the V-neck depth before rejoining.
Right Front Panel Shaping:
Locate the center front marker. The right front panel consists of the 36 stitches to the right of center front.
Row 1 (RS): Join yarn at the right underarm marker. Ch 1, sc in each of the next 36 sc across the right front panel. Turn. (36 sc)
Row 2 (WS): Ch 1, sc in each sc across. Turn. (36 sc)
Row 3 (RS): Ch 1, sc in each sc to the last 2 sts of the row. Sc2tog. Turn. (35 sc)
Row 4 (WS): Ch 1, sc in each sc across. Turn. (35 sc)
Row 5 (RS): Ch 1, sc in each sc to the last 2 sts. Sc2tog. Turn. (34 sc)
Row 6 (WS): Ch 1, sc in each sc across. Turn. (34 sc)
Row 7 (RS): Ch 1, sc in each sc to the last 2 sts. Sc2tog. Turn. (33 sc)
Row 8 (WS): Ch 1, sc in each sc across. Turn. (33 sc)
Row 9 (RS): Ch 1, sc in each sc to the last 2 sts. Sc2tog. Turn. (32 sc)
Row 10 (WS): Ch 1, sc in each sc across. Turn. (32 sc)
Row 11 (RS): Ch 1, sc in each sc to the last 2 sts. Sc2tog. Turn. (31 sc)
Row 12 (WS): Ch 1, sc in each sc across. Do not turn. Fasten off leaving a 6-inch tail. (31 sc)
Left Front Panel Shaping:
The left front panel consists of the 36 stitches to the left of center front.
Row 1 (RS): Join yarn at the center front marker. Ch 1, sc2tog (using the center front st and the next st to the left). Sc in each remaining sc across to the left underarm marker. Turn. (35 sc)
Row 2 (WS): Ch 1, sc in each sc across. Turn. (35 sc)
Row 3 (RS): Ch 1, sc2tog. Sc in each remaining sc across. Turn. (34 sc)
Row 4 (WS): Ch 1, sc in each sc across. Turn. (34 sc)
Row 5 (RS): Ch 1, sc2tog. Sc in each remaining sc across. Turn. (33 sc)
Row 6 (WS): Ch 1, sc in each sc across. Turn. (33 sc)
Row 7 (RS): Ch 1, sc2tog. Sc in each remaining sc across. Turn. (32 sc)
Row 8 (WS): Ch 1, sc in each sc across. Turn. (32 sc)
Row 9 (RS): Ch 1, sc2tog. Sc in each remaining sc across. Turn. (31 sc)
Row 10 (WS): Ch 1, sc in each sc across. Turn. (31 sc)
Row 11 (RS): Ch 1, sc2tog. Sc in each remaining sc across. Turn. (30 sc)
Row 12 (WS): Ch 1, sc in each sc across. Do not turn. Fasten off leaving a 6-inch tail. (30 sc)
The V-neck depth of 12 shaping rows equals approximately 2.4 inches of depth from the initial bust line.
Joining Front and Back Into Rounds
The back panel has remained unworked at 72 stitches. With RS facing, rejoin yarn at the left underarm position.
Round 1 (Joining Round): Ch 1. Sc in each of the 30 left front panel sts. Ch 2 (bridging the V-neck gap at center front). Sc in each of the 31 right front panel sts. Sc in each of the 72 back panel sts. Sl st to join to first sc. (133 sc plus 2 ch = 135 working sts)
Treat the 2-ch bridge as 2 stitches going forward. The working count becomes 135 stitches.
Round 2: Ch 1, sc in each st and ch-sp around. Sl st to join. (135 sc)
Round 3: Ch 1, sc2tog, sc in each st to 2 sts before center back marker, sc2tog, sc in each st to end. Sl st to join. (133 sc)
Round 4: Ch 1, sc in each st around. Sl st to join. (133 sc)
Round 5: Ch 1, sc2tog at left underarm, sc in each st to 2 sts before right underarm marker, sc2tog, sc in each st to end. Sl st to join. (131 sc)
Round 6: Ch 1, sc in each st around. Sl st to join. (131 sc)
Round 7: Ch 1, sc2tog at center front region, sc in each st to center back, sc2tog in center back area, sc in each st to end. Sl st to join. (129 sc)
Round 8: Ch 1, sc in each st around. Sl st to join. (129 sc)
Round 9: Ch 1, sc2tog at left side, sc to right side, sc2tog at right side, sc to end. Sl st to join. (127 sc)
Round 10: Ch 1, sc in each st around. Sl st to join. (127 sc)
Round 11: Ch 1, sc2tog, sc to center, sc2tog, sc to end. Sl st to join. (125 sc)
Round 12: Ch 1, sc in each st around. Sl st to join. (125 sc)
Round 13: Ch 1, sc2tog, sc to 2 before opposite side decrease, sc2tog, sc to end. Sl st to join. (123 sc)
Round 14: Ch 1, sc in each st around. Sl st to join. (123 sc)
Round 15: Ch 1, sc2tog, sc across, sc2tog, sc to end. Sl st to join. (121 sc)
Round 16: Ch 1, sc in each st around. Sl st to join. (121 sc)
Round 17: Ch 1, sc2tog, sc to end. Sl st to join. (120 sc)
Round 18: Ch 1, sc2tog, sc to end. Sl st to join. (119 sc)
Round 19: Ch 1, sc in each st to last 2 sts, sc2tog. Sl st to join. (118 sc)
Round 20: Ch 1, sc2tog, sc to end. Sl st to join. (117 sc)
Checkpoint: After Round 20, the piece should measure approximately 10 to 11 inches from the top of the bust foundation, and the circumference should measure 26 inches. This is the waist level.
Section 2: Waistband
The waistband is worked in BLO single crochet for 6 rounds. Continue with the E-4 / 3.5 mm hook.
Rounds 1 through 6 (BLO): Ch 1, sc in BLO of each st around. Sl st to join. (117 sc each round)
Round 7 (Increase Round): Ch 1, work sc around, placing 3 evenly spaced increases at approximately every 39th stitch. Sl st to join. (120 sc)
117 plus 3 increases equals 120. 120 divided by 12 equals 10 fan repeats around the skirt.
Checkpoint: After the waistband, your piece should measure approximately 12 to 13 inches from the bust foundation line. The waistband section should be approximately 1.25 inches tall.
Section 3: Skirt
Switch to the F-5 / 3.75 mm hook for this section.
Skirt Setup Round (Round 1):
Ch 3 (counts as first dc). In the same stitch work 2 more dc (3 dc total in first st). Skip 2 sts. Sc in next st. Ch 2. Skip 2 sts. 5 dc in next st (fan). Ch 2. Skip 2 sts. Rep from to 9 more times (10 fans total). Sc in next st. Ch 2. Sl st to the top of the beginning ch-3 to join. (10 fans of 5 dc = 50 dc; 10 sc; 20 ch-2 spaces)
Skirt Round 2 (Increase Round):
Sl st into the ch-2 space to the right of the first sc. Ch 1. Sc in ch-2 sp. Ch 2. In next sc work (3 dc, ch 2, 3 dc). Ch 2. Rep from to around. Sl st to join. (10 expanded shell units)
Skirt Round 3:
Sl st to first ch-2 sp. Ch 1. Sc in ch-2 sp. Ch 2. In ch-2 sp at center of expanded shell work 5 dc. Ch 2. Rep around. Sl st to join. (10 fans of 5 dc; 10 sc; 20 ch-2 sps)
Skirt Round 4:
Sl st to first ch-2 sp. Ch 1. Sc in ch-2 sp. Ch 2. 5 dc into next sc. Ch 2. Rep around. Sl st to join. (10 fans; 10 sc; 20 ch-2 sps)
Skirt Round 5 (Increase Round):
Sl st to ch-2 sp. Ch 1. Sc in ch-2 sp. Ch 2. In the center (3rd) dc of the next fan work (2 dc, ch 2, 2 dc). Ch 1. Sc in same ch-2 sp as previous sc anchor. Ch 1. 5 dc in next sc. Ch 2. Rep around. Sl st to join.
This introduces a split-fan increase that doubles fan positions from 10 to 20 over the following rounds.
Skirt Rounds 6 through 12:
Work the standard fan repeat across all 20 fan positions: Sc in ch-2 sp. Ch 2. 5 dc in next sc (or center position). Ch 2. Rep 20 times around. Sl st to join each round. (20 fans; 20 sc; 40 ch-2 sps each round)
Skirt Round 13 (Increase Round):
Sl st to ch-2 sp. Ch 1. Sc in ch-2 sp. Ch 2. In center (3rd) dc of fan work (dc, ch 1, dc). Ch 2. Sc in next ch-2 sp. Ch 2. 7 dc in next sc. Ch 2. Rep 10 times. Sl st to join. (10 fans of 7 dc; 10 fans of standard size; 20 sc)
Skirt Rounds 14 through 26:
Work all fans as 5-dc fans: Sc in ch-2 sp. Ch 2. 5 dc in next anchor position. Ch 2. Rep 20 times. Sl st to join each round. (20 fans per round)
Checkpoint: After Round 24, the skirt should measure approximately 14 inches from the waistband.
Hem Preparation Round (Round 27):
Work 1 sc in each ch-2 sp, 1 sc in each dc of each fan, and 1 sc in each sc anchor around. (180 sc)
180 is divisible by 6, which is required for the scallop edging.
Scallop Hem Edging (Round 28):
Sl st to first sc of Round 27. Ch 3 (counts as 1 dc). Work 4 more dc into the same stitch (5 dc total). Skip 2 stitches. Sl st into next stitch. Skip 2 stitches. Rep around. Fasten off and weave in ends.
Finishing: Straps
The criss-cross spaghetti straps are simple chains. Using the E-4 / 3.5 mm hook, chain approximately 80 to 90 chains per strap. Adjust length based on your torso measurement and desired fit.
Make 4 strap chains total. Attach at the front bust corners and cross at the back, attaching to the opposite back corners. Use your tapestry needle and coordinating thread to reinforce the attachment points.
Blocking Your Finished Dress
Wet blocking is essential for this crochet dress pattern. Soak the finished dress in lukewarm water for 15 to 20 minutes. Gently squeeze out excess water without wringing. Lay flat on blocking mats or a dress form. Pin out the scalloped hem and fan motifs to open the lace work fully. Allow to dry completely before wearing.
Tips for Making This Dress in Other Sizes
To adjust the foundation chain for other sizes, use this formula: desired bust measurement in inches multiplied by 18 (your gauge) divided by 4 equals your foundation chain count. Round to the nearest even number.
For example, for a 36-inch bust: 36 x 18 = 648, then 648 / 4 = 162 chains.
Adjust waist shaping rounds proportionally. Add or remove decrease rounds to reach your target waist measurement using the same gauge calculation.
For the skirt, ensure your final waistband stitch count is divisible by 12 for the fan repeat to work correctly.
I hope this pattern brings you so much joy to make. This burgundy lace crochet dress really is a stunner, and every stitch is worth it. If you make one, I would absolutely love to see it.
Save this pattern to your Pinterest boards so you can find it when you are ready to start. And please leave a comment below if you give it a try. I love hearing how your projects turn out and seeing your color choices. Happy crocheting!
