
I don’t know about you, but I have been searching for years for the perfect crochet sundress pattern. Something feminine without being fussy. Something that looks like it belongs in a boutique window but actually fits a real human body.
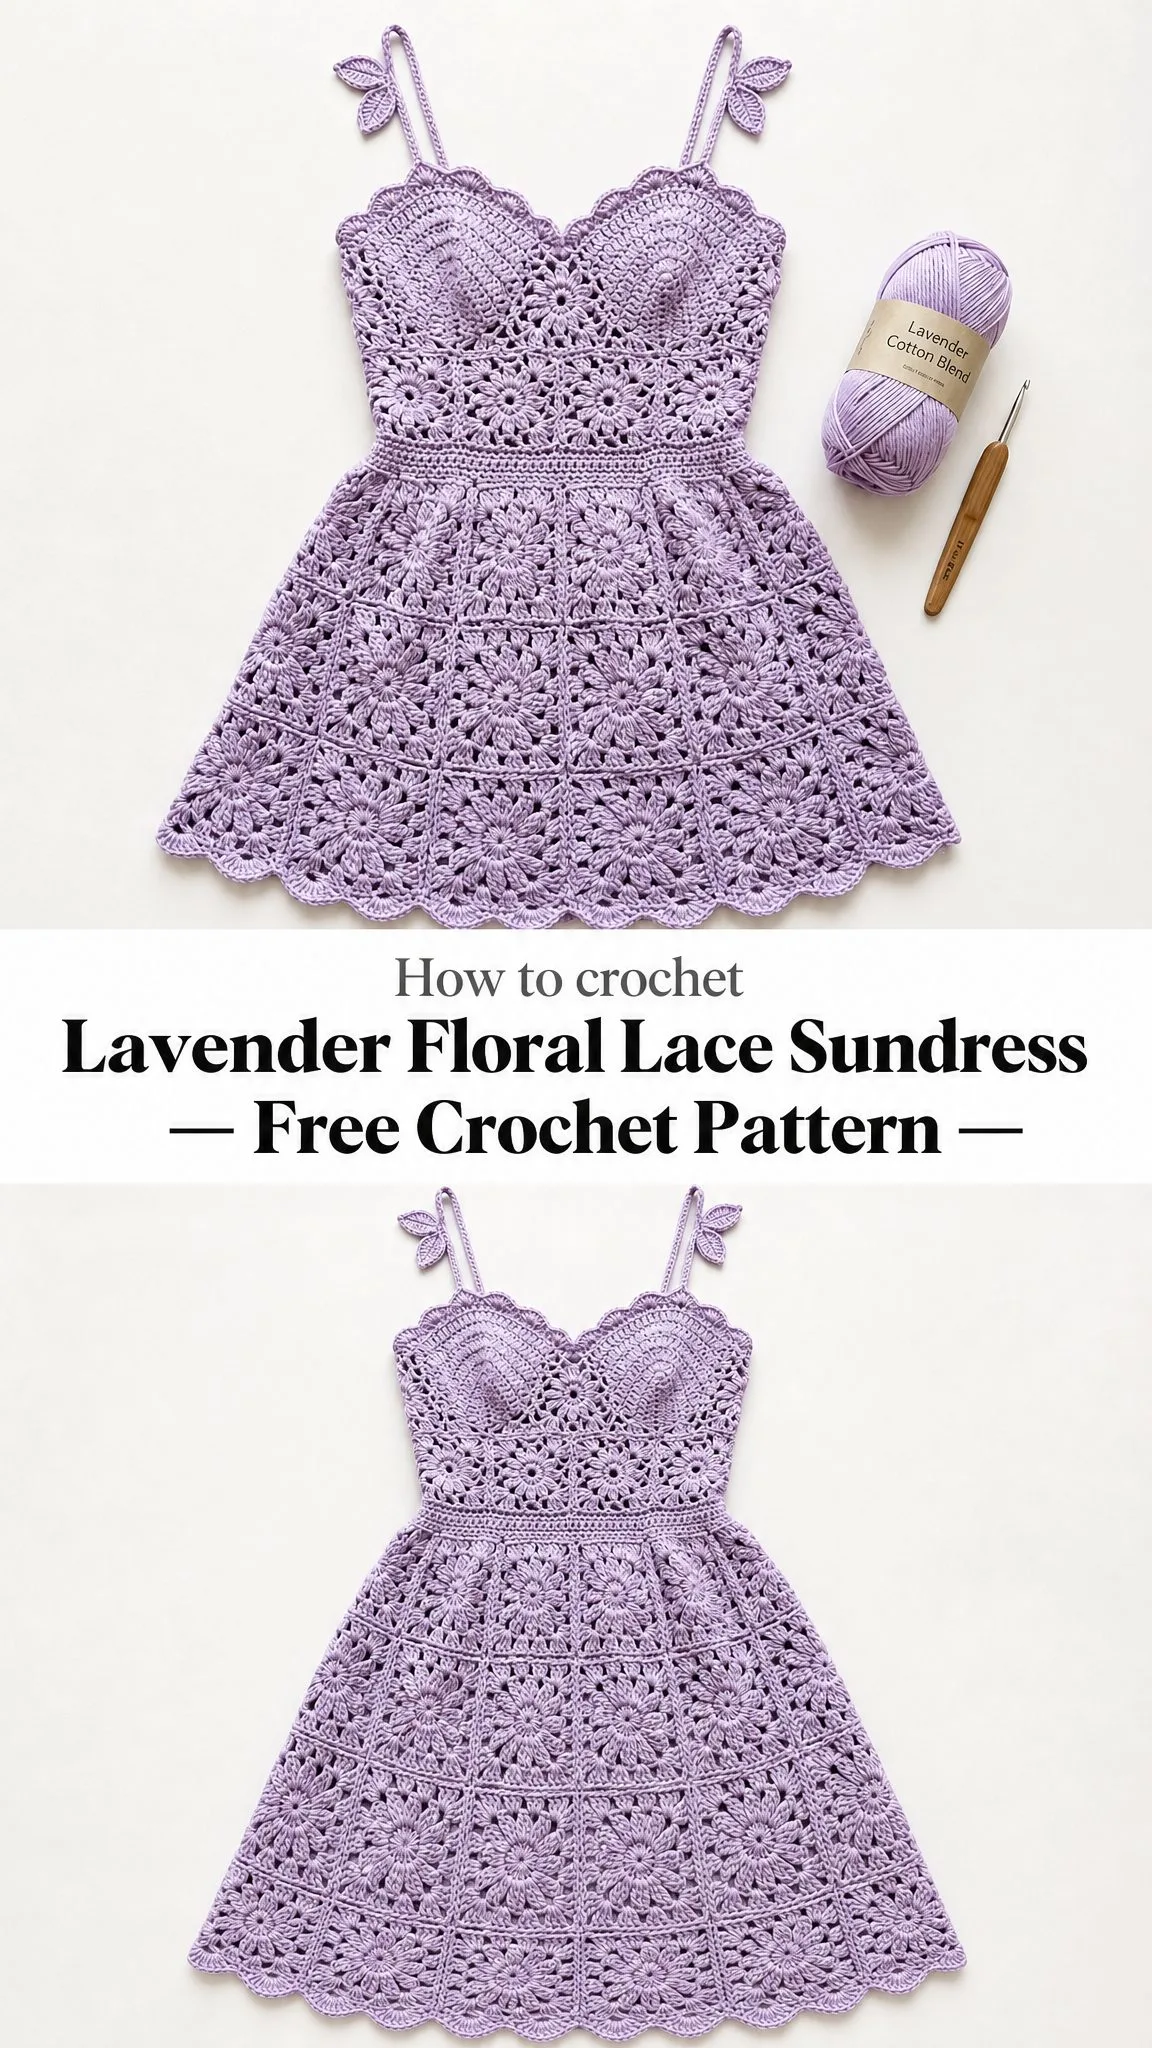
This lavender floral lace sundress is everything I wanted and more. The sweetheart neckline flatters beautifully, the granny square skirt flares just right, and those little tie-bow straps at the shoulders add the sweetest finishing touch. When I first saw it finished, I actually gasped.
If you have been hesitant about crocheting garments, let me tell you something. This pattern breaks everything down into manageable pieces. You make squares. You join squares. You build it section by section. Before you know it, you have a showstopping dress hanging in your closet.
About This Crochet Sundress Pattern
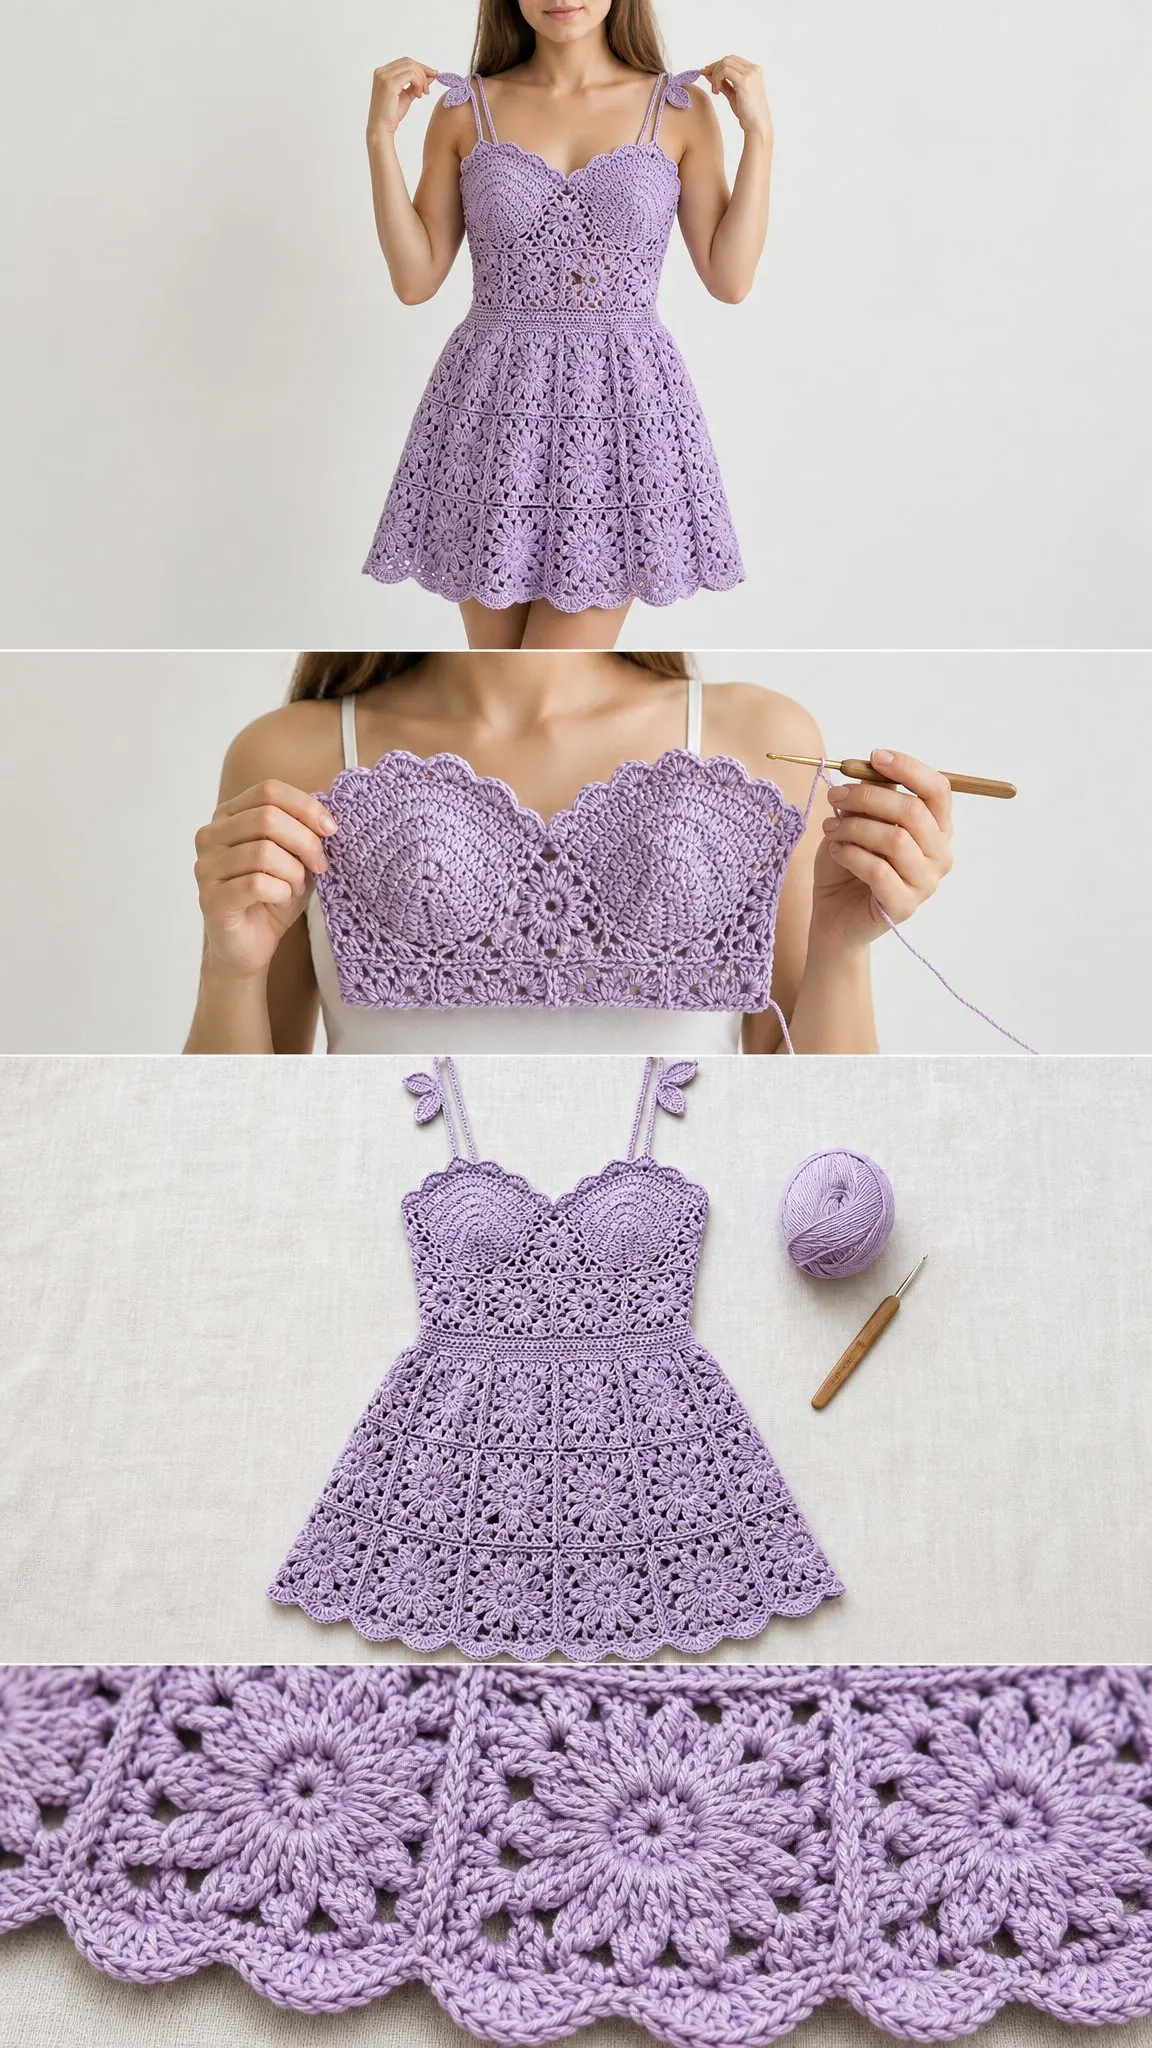
This stunning sundress features a structured sweetheart bodice worked in joined rounds with shaped cups. The fitted waist section uses classic granny squares, and the A-line skirt is built from progressively larger granny squares arranged in three tiers. Tie straps at the shoulders finish with small decorative bows. A delicate scallop edging frames the neckline, armholes, and hem.
The entire dress uses a single soft lavender color in a DK-weight cotton blend yarn. The construction moves from the bodice downward. You work the sweetheart cup sections first as two mirrored flat pieces, join them at center front, then work the bodice band in rounds around the joined unit. The waist panel comes next, assembled from granny squares and attached to the lower bodice. The skirt builds in three tiers of granny squares, with each tier seamed and attached to the one above. Scallop edging goes on last.
Skill Level
This pattern is rated Advanced Beginner to Intermediate. You will need comfort with working granny squares, joining motifs, working in both rows and rounds, and basic shaping. The sweetheart cup shaping uses short rows and decreases that require attention to detail, but every single step is written out fully.
If you have completed at least one garment and feel comfortable with assembly, you can absolutely make this dress. Take your time with the cup shaping sections and you will be fine.
Time Estimate
Plan for approximately 40 to 55 hours for a size Small/Medium, depending on your working pace. Motif assembly and finishing account for roughly 10 of those hours. This is a project to savor over several weeks rather than rush through in a weekend.
Finished Measurements
This pattern is written for size Small (US 4 to 6), with notes for adjusting to Medium (US 8 to 10) and Large (US 12 to 14) throughout.
Small: Bust 32 to 34 inches (81 to 86 cm), Waist 26 to 28 inches (66 to 71 cm), Hip 35 to 37 inches (89 to 94 cm), Total length from center front neckline to hem approximately 26 inches (66 cm).
Medium: Bust 36 to 38 inches (91 to 97 cm), Waist 30 to 32 inches (76 to 81 cm), Hip 39 to 41 inches (99 to 104 cm), Total length approximately 27 inches (69 cm).
Large: Bust 40 to 42 inches (102 to 107 cm), Waist 34 to 36 inches (86 to 91 cm), Hip 43 to 45 inches (109 to 114 cm), Total length approximately 28 inches (71 cm).
Materials Needed
Yarn: DK-weight soft cotton blend in soft lavender. You will need approximately 1,400 yards (1,280 meters) for size Small, 1,600 yards (1,463 meters) for Medium, and 1,800 yards (1,646 meters) for Large.
Hooks: US Size G-6 (4.0 mm) for bodice and granny squares. US Size F-5 (3.75 mm) for edgings and straps.
Notions:
Yarn Suggestions
Suggestion 1: Lion Brand 24/7 Cotton in Lavender. 100 percent mercerized cotton, 186 yards per 3.5 oz (100 g) skein. You will need 8 skeins for Small, 9 for Medium, 10 for Large. This yarn has excellent stitch definition and a slight sheen that highlights the floral motif centers beautifully.
Suggestion 2: Paintbox Yarns Simply DK in Pale Lilac. 100 percent cotton, 137 yards per 1.75 oz (50 g) ball. You will need 11 balls for Small, 12 for Medium, 13 for Large. Slightly softer hand than mercerized cotton with good drape.
Suggestion 3: Drops Safran in color 30 (Lavender). 100 percent Egyptian cotton, 175 yards per 1.75 oz (50 g) ball. You will need 9 balls for Small, 10 for Medium, 11 for Large. Excellent for stitch clarity and blocking.
Substitution Note: Choose any DK-weight cotton or cotton-blend yarn that achieves the stated gauge. Avoid yarns with high elasticity such as wool blends, as the granny square motifs require a stable, non-stretchy fiber to hold their shape. Always swatch before beginning.
Gauge
Gauge is critical for a fitted garment. Please measure your gauge before starting.
With G-6 (4.0 mm) hook: One completed granny square as written equals 3.75 inches by 3.75 inches (9.5 cm by 9.5 cm) after blocking. Additionally, 18 single crochet (sc) stitches by 20 rows equals 4 inches by 4 inches (10 cm by 10 cm) in single crochet fabric.
If your square measures larger than 3.75 inches, try a smaller hook. If it measures smaller, try a larger hook. Do not proceed without matching gauge, as the entire construction depends on the square dimensions.
Abbreviations
Let me walk you through every abbreviation you will encounter in this pattern. I have included plain-English definitions so nothing feels mysterious.
Special Stitches
Granny Square (GS): This is the primary motif. Each square is worked in four rounds from a center ring. Full instructions are given below.
Shell Stitch: Work 5 dc into the same stitch or space.
Scallop Edge: Sl st into next st, ch 1, 5 dc into same st, sk 2 sts, sl st into next st. This creates one scallop.
Picot: Ch 3, sl st into the first of those 3 chains. Used in strap bow details.
Sc2tog (single crochet two together): Insert hook into first st, yo, pull up loop (2 loops on hook), insert hook into next st, yo, pull up loop (3 loops on hook), yo, draw through all 3 loops. One decrease made.
Dc2tog (double crochet two together): Yo, insert hook into first st, yo, pull up loop, yo, draw through 2 loops (2 loops on hook). Yo, insert hook into next st, yo, pull up loop, yo, draw through 2 loops (3 loops on hook). Yo, draw through all 3 loops. One decrease made.
Granny Square Instructions
This square is used for the waist panel, all three skirt tiers, and is referenced any time GS appears in the pattern. The center of each square forms a visible flower-like cluster due to the radiating rounds from the center ring. This creates the beautiful floral texture you see throughout the dress.
Foundation Ring: Ch 4, sl st into first ch to form ring.
Round 1: Ch 3 (counts as first dc here and throughout), 2 dc into ring, ch 2, [3 dc into ring, ch 2] 3 times, sl st into top of beg ch-3 to join. (4 clusters of 3 dc, 4 ch-2 corner spaces)
Round 2: Sl st into next 2 dc and into ch-2 corner sp, ch 3, 2 dc into same corner sp, ch 2, 3 dc into same corner sp (first corner made), ch 1, [3 dc, ch 2, 3 dc] into next ch-2 sp (corner), ch 1. Rep from [ ] 2 more times, sl st into top of beg ch-3. (8 clusters of 3 dc, 4 ch-2 corner spaces, 4 ch-1 side spaces)
Round 3: Sl st into next 2 dc and into ch-2 corner sp, ch 3, 2 dc into same corner sp, ch 2, 3 dc into same corner sp (corner made), ch 1, 3 dc into next ch-1 side sp, ch 1, [3 dc, ch 2, 3 dc] into next ch-2 corner sp, ch 1, 3 dc into next ch-1 sp, ch 1. Rep from [ ] 2 more times, sl st into top of beg ch-3. (12 clusters of 3 dc, 4 ch-2 corner spaces, 8 ch-1 side spaces)
Round 4: Sl st into next 2 dc and into ch-2 corner sp, ch 3, 2 dc into same corner sp, ch 2, 3 dc into same corner sp (corner made), [ch 1, 3 dc into next ch-1 sp] twice, ch 1, [3 dc, ch 2, 3 dc] into next ch-2 corner sp. Rep from [ ] twice, [ch 1, 3 dc into next ch-1 sp] twice, ch 1, sl st into top of beg ch-3. (16 clusters of 3 dc, 4 ch-2 corner spaces, 12 ch-1 side spaces)
Fasten off. Weave in ends. Block to 3.75 inches by 3.75 inches (9.5 cm by 9.5 cm).
Pattern Notes Before You Begin
1. The dress is constructed in this order: right cup, left cup, cup join and bodice band, waist panel (4 GS joined), skirt tier 1 (6 GS), skirt tier 2 (8 GS), skirt tier 3 (10 GS), straps, all edgings.
2. The bodice cups are worked flat in rows with decreases to shape the curve. They are mirrored pieces.
3. Joining of motifs is done with a flat join using sl sts through both layers with wrong sides together. Alternatively, use a sc join on the right side for a visible ridge. The visible sc join ridge is placed at the inside seam of the dress.
4. All rounds are joined rounds unless otherwise stated. Always join with sl st to the top of the beginning ch or first st of that round, then ch as instructed to begin the next round.
5. Turning chains count as the first stitch in double crochet rows (ch 3 = 1 dc). They do not count as a stitch in single crochet rows.
6. Block all granny squares before assembling. This ensures even seams and correct finished dimensions.
Step-by-Step Crochet Pattern Instructions
Section 1: Right Bodice Cup
The right cup is worked flat in rows, beginning at the lower point of the sweetheart neckline and shaping upward and outward to form the right half of the bustline.
With G-6 hook, ch 2.
Row 1 (RS): 3 sc into second ch from hook. Turn. (3 sc)
Row 2 (WS): Ch 1, 2 sc into first st, sc to last st, 2 sc into last st. Turn. (5 sc)
Row 3: Ch 1, 2 sc into first st, sc to last st, 2 sc into last st. Turn. (7 sc)
Row 4: Ch 1, 2 sc into first st, sc to last st, 2 sc into last st. Turn. (9 sc)
Row 5: Ch 1, 2 sc into first st, sc to last st, 2 sc into last st. Turn. (11 sc)
Row 6: Ch 1, 2 sc into first st, sc to last st, 2 sc into last st. Turn. (13 sc)
Row 7: Ch 1, 2 sc into first st, sc to last st, 2 sc into last st. Turn. (15 sc)
Row 8: Ch 1, 2 sc into first st, sc to last st, 2 sc into last st. Turn. (17 sc)
Row 9: Ch 1, 2 sc into first st, sc to last st, 2 sc into last st. Turn. (19 sc)
Row 10: Ch 1, 2 sc into first st, sc to last st, 2 sc into last st. Turn. (21 sc)
Row 11: Ch 1, 2 sc into first st, sc to last st, 2 sc into last st. Turn. (23 sc)
Row 12: Ch 1, 2 sc into first st, sc to last st, 2 sc into last st. Turn. (25 sc)
At row 12, the piece should measure approximately 4.5 inches (11.5 cm) across at its widest point.
Now shape the outer curve of the cup by increasing only on the outer (right) edge. The right cup’s inner edge (center front) is on the left as you look at the RS. The outer (underarm) edge is on the right as you look at the RS.
Row 13: Ch 1, sc across to last st, 2 sc into last st (outer edge increase). Turn. (26 sc)
Row 14: Ch 1, sc across to last st, 2 sc into last st. Turn. (27 sc)
Row 15: Ch 1, sc across to last st, 2 sc into last st. Turn. (28 sc)
Row 16: Ch 1, sc across. Turn. (28 sc)
Row 17: Ch 1, sc across. Turn. (28 sc)
Do not fasten off. Set aside with a stitch marker in the working loop. Cup should measure approximately 4.5 inches (11.5 cm) wide and 5 inches (12.5 cm) tall at completion.
Section 2: Left Bodice Cup
Work exactly as Right Bodice Cup through Row 12. Then work the shaping rows with the increase at the beginning of the row instead of the end.
Row 13: Ch 1, 2 sc into first st, sc to end. Turn. (26 sc)
Row 14: Ch 1, 2 sc into first st, sc to end. Turn. (27 sc)
Row 15: Ch 1, 2 sc into first st, sc to end. Turn. (28 sc)
Rows 16 and 17: Ch 1, sc across. Turn. (28 sc)
Fasten off left cup. Weave in ends.
Section 3: Joining Cups and Working Bodice Band
Place both cups with RS facing up, inner straight edges touching at center front. The point where they meet is the center bottom of the sweetheart neckline.
Join yarn at bottom center point of left cup inner edge.
Joining Row: Working across the lower edge of the left cup then across the lower edge of the right cup, sc evenly across the bottom of both cups. Pick up approximately 4 sc for every 5 rows along any straight edge. For the two cup pieces: pick up 28 sc along left cup bottom, 28 sc along right cup bottom. (56 sc total across joined lower edge)
Back Bodice Panel
The back panel is a simple rectangle worked in rows of sc, matching the front bodice height.
With G-6 hook, ch 89. (88 sc working stitches plus 1 turning ch)
Row 1 (WS): Sc in second ch from hook and each ch across. Turn. (88 sc)
Row 2 through Row 17: Ch 1, sc across. Turn. (88 sc)
Fasten off. Block lightly. The back panel is 88 sc wide and 17 rows tall, measuring approximately 19.5 inches (49.5 cm) wide and 4.25 inches (10.8 cm) tall.
Joining Bodice Front to Back
Align the left side edge of the front (outer edge of right cup) with the right side edge of the back panel. With WS together, sc or sl st through both layers to seam. Align the right side edge of the front (outer edge of left cup) with the left side edge of the back panel. Seam.
You now have a bodice tube measuring approximately 32 inches (81 cm) in circumference at the bust.
Work the neckline edging by picking up sc evenly around the top edge (sweetheart curve plus back straight edge). Work 1 rnd of sc evenly around the neckline, adjusting as needed to keep it flat. Join with sl st. Fasten off. Mark with a stitch marker for later finishing.
Section 4: Waist Panel (Granny Square Band)
The waist panel is a band of granny squares that sits between the bodice and the skirt. It is 4 squares wide across the front and 4 squares wide across the back, for 8 squares total.
Make 8 granny squares following the GS instructions above. Block each to 3.75 inches by 3.75 inches.
Lay 4 squares in a horizontal row. Join squares together along their side edges with WS together, using sl st through the corresponding stitches of both squares along the joining edge. Repeat to join all 4 squares into a front strip. Make a second strip of 4 squares for the back.
Join front strip to back strip at both side seams to form a rectangular tube. The waist tube should measure approximately 30 inches (76 cm) in circumference and 3.75 inches (9.5 cm) tall.
Attach waist tube to bottom of bodice with RS facing. Work a single round of sc through both layers, easing gently to connect.
Section 5: Skirt Tier 1
Make 6 granny squares. Block each to 3.75 inches by 3.75 inches.
Arrange 6 squares in a horizontal row and join side to side. Join the row into a ring. You now have a tier 1 ring that is 3.75 inches (9.5 cm) tall and approximately 45 inches (114 cm) in circumference.
Pin tier 1 top edge to waist panel lower edge, spacing evenly. There will be gentle gathering to distribute the width difference. Seam or sc join through both layers all the way around.
Section 6: Skirt Tier 2
Make 8 granny squares. Block each to 3.75 inches by 3.75 inches.
Join squares in a horizontal row and close into a ring. Total circumference of tier 2 equals 60 inches (152 cm).
Attach to the bottom of tier 1, distributing the excess width evenly around the ring.
Section 7: Skirt Tier 3
Make 10 granny squares. Block each to 3.75 inches by 3.75 inches.
Join squares in a horizontal row and close into a ring. Total circumference of tier 3 equals 75 inches (190 cm).
Attach to the bottom of tier 2, distributing width evenly.
Section 8: Hem Edging
With F-5 (3.75 mm) hook, join yarn to any stitch along the bottom edge of tier 3.
Round 1: Ch 1, sc evenly around the entire bottom edge of tier 3. Work 1 sc into each dc and 1 sc into each ch-1 sp along the bottom edge of each square. Adjust to achieve a stitch count divisible by 4. Aim for approximately 132 sc. Join with sl st to first sc. (132 sc)
Round 2 (Scallop Round): Ch 1, sl st into first st, ch 1, 5 dc into same st (shell made), sk 2 sts, sl st into next st, sk 2 sts. Rep [5 dc into next st, sk 2 sts, sl st into next st, sk 2 sts] around. Join with sl st. Fasten off. (33 scallops)
Section 9: Neckline Edging
With F-5 hook, join yarn to the center bottom point of the sweetheart neckline.
Pick up and work 1 sc per stitch across the top of the right cup, across the back neckline, and across the left cup. Pick up 28 sc (right cup) + 44 sc (back) + 28 sc (left cup) = 100 sc total.
Round 1: Work 1 sc into each picked-up stitch around. At center front point, sc2tog to preserve the inward V. At each outer corner where cup meets strap, place 2 sc for outward turn. Join. (approximately 100 sc)
Round 2 (Scallop): Work as Scallop Round for hem. 100 sc divided by 4 = 25 scallops. Join and fasten off.
Section 10: Armhole Edging
With F-5 hook, join yarn at underarm seam point.
Round 1: Sc evenly around the armhole opening. Aim for 24 sc. (24 sc)
Round 2 (Scallop): Work 6 scallops around. Fasten off.
Repeat for other armhole.
Section 11: Straps
With F-5 hook, join yarn at the top outer corner of the right cup.
Chain 80.
Row 1: Sl st back into each chain all the way back to the attachment point. (80 sl sts)
This creates a firm doubled cord. Fasten off, leaving a 6-inch tail to secure.
To form the bow: Thread the strap cord up and over the shoulder. Tie in a bow at the top of the shoulder. The crochet chain cord naturally forms the bow shape.
Optional Bow Center Loop: Ch 8, sl st into first ch to form a small ring. Work 12 sc into ring. Join. Fasten off. Place the ring at the fold of the strap and wrap the tail around the center 3 times. Secure and fasten off.
Make second strap and bow for left cup. Secure straps to cup corners using tapestry needle.
Size Customization Tips
For Medium (US 8 to 10): Add 2 more squares to each cup foundation to yield cups 32 sc wide at Row 17. Work back panel with ch 101 (100 sc). Waist panel becomes 5 squares front plus 5 squares back (10 total). Skirt tiers become 8 (tier 1), 10 (tier 2), 12 (tier 3) squares.
For Large (US 12 to 14): Cups yield 36 sc wide at Row 17. Back panel ch 113 (112 sc). Waist panel 6 squares front plus 6 squares back (12 total). Skirt tiers become 10, 12, 14 squares.
For length adjustment: Each additional tier row adds approximately 3.75 inches to the dress length.
Final Thoughts on This Lavender Sundress Crochet Pattern
This dress is truly a labor of love. Take your time with blocking each granny square before assembly. Trust the process as you join the tiers and watch that beautiful A-line silhouette emerge. The scalloped edges and tie-bow straps transform simple stitches into something genuinely special.
I would love to see your finished lavender sundress. Tag me on Instagram or share in my Facebook group so I can celebrate your work with you.
If this crochet pattern caught your eye, go ahead and save it to your Pinterest boards so you can find it when you are ready to start. And please leave a comment below if you make one. I genuinely love hearing how your projects turn out and seeing the color variations you choose.
