
Last summer, I found myself standing in a farmer’s market with arms full of fresh produce and absolutely no way to carry it all. My flimsy paper bag was already tearing at the handles, and I remember thinking, "I literally crochet for a living, and I don’t have a single handmade bag with me right now." That moment stuck with me.
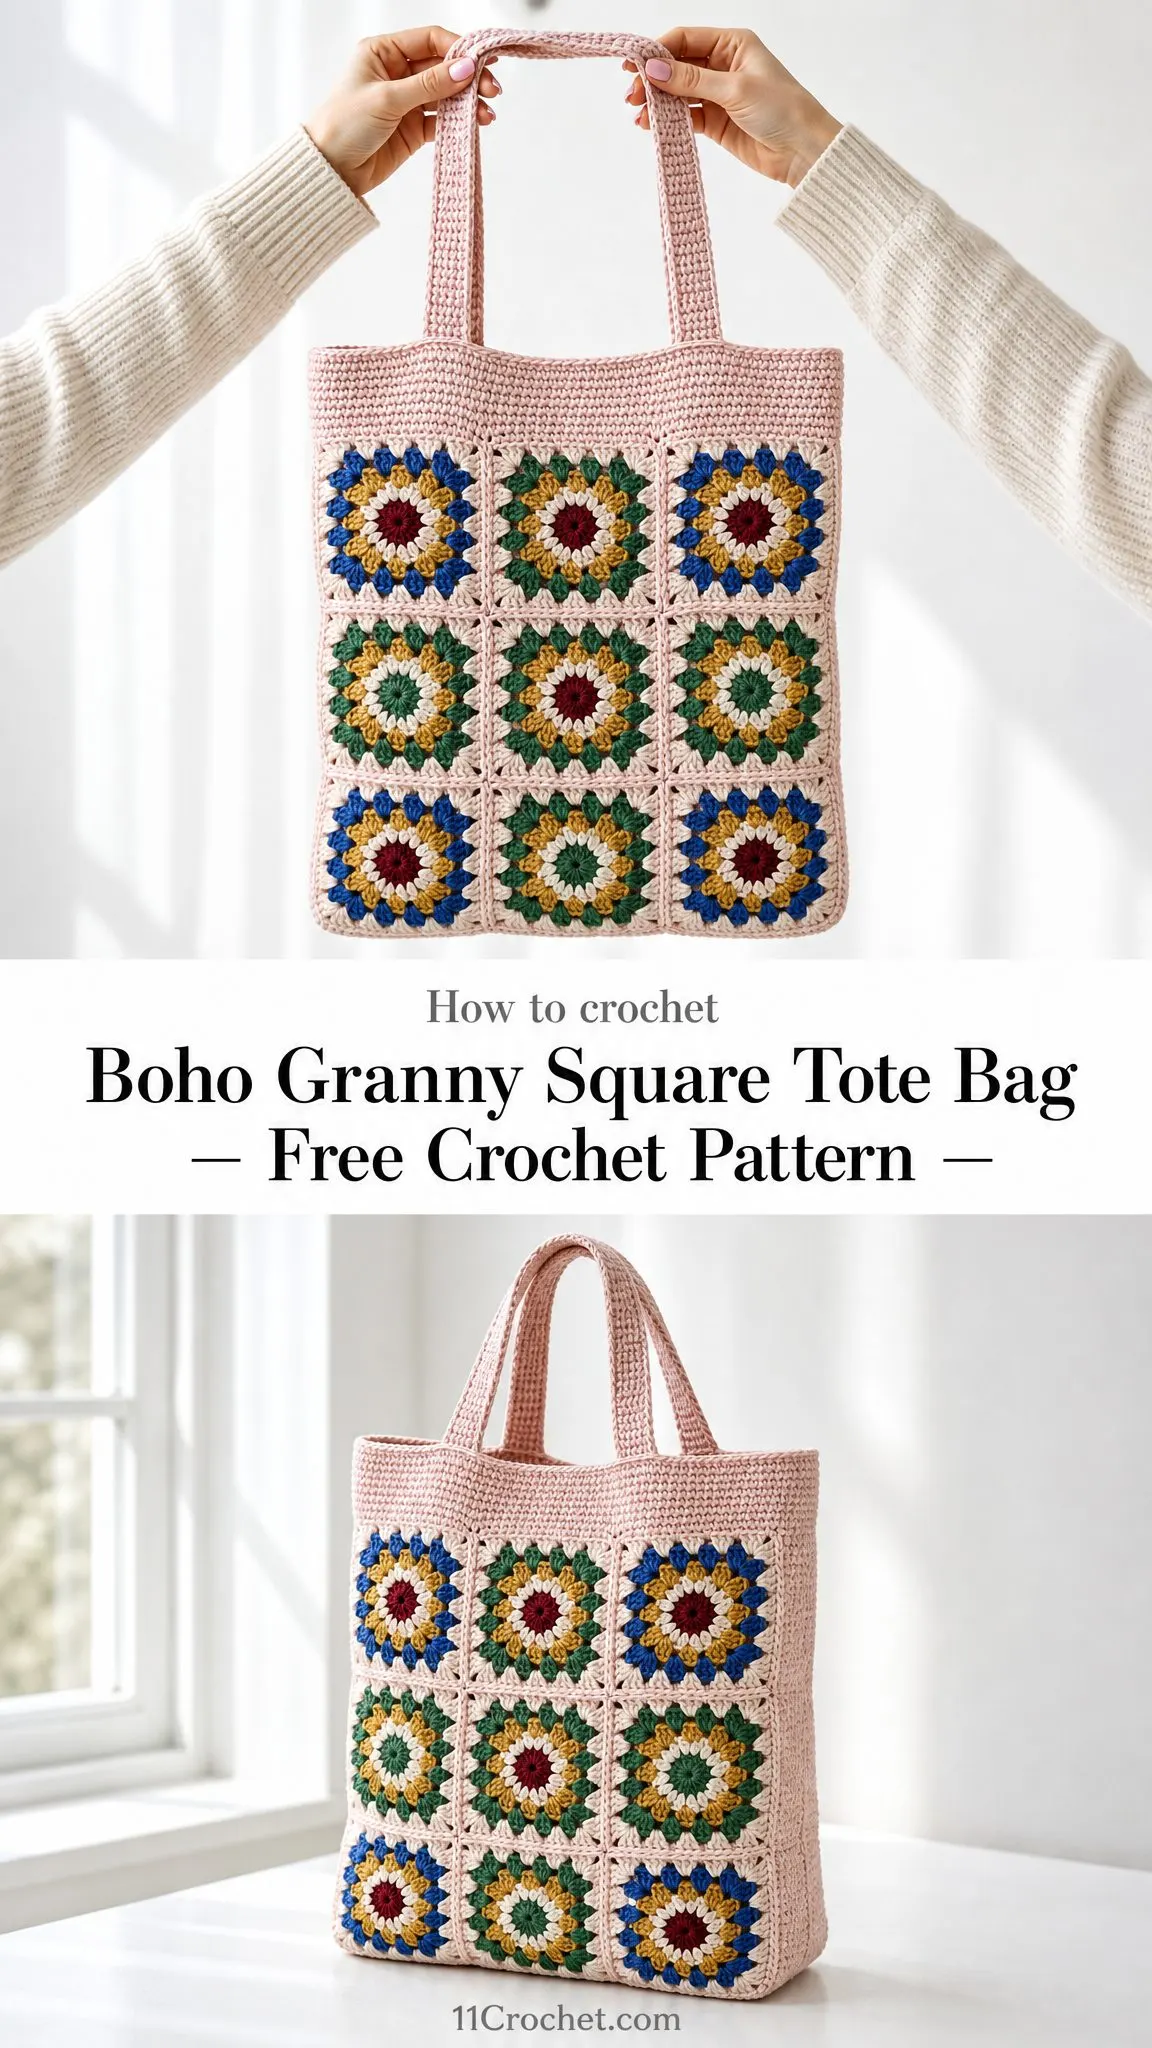
So I went home and designed exactly what I needed. A sturdy cotton tote with enough room for market hauls, beach days, or just tossing in my current project and a good book. The kind of bag that looks like you collected it from some charming vintage shop but actually came straight off your own hook.
This is The Cotswold Granny Tote, and I’m genuinely proud of how it turned out. Eighteen sunburst granny squares in a boho color palette, joined with blush pink and finished with roomy shoulder straps. It’s relaxing, repeatable, and perfect for using up those cotton scraps you’ve been hoarding.
Why You’ll Love This Granny Square Tote Bag Pattern
This crochet tote bag pattern hits that sweet spot between interesting enough to keep you engaged and simple enough to work on while watching TV. Each granny square only has four rounds, so you get that satisfying "finished something" feeling over and over again. Before you know it, you’ve got eighteen squares ready to become a bag.
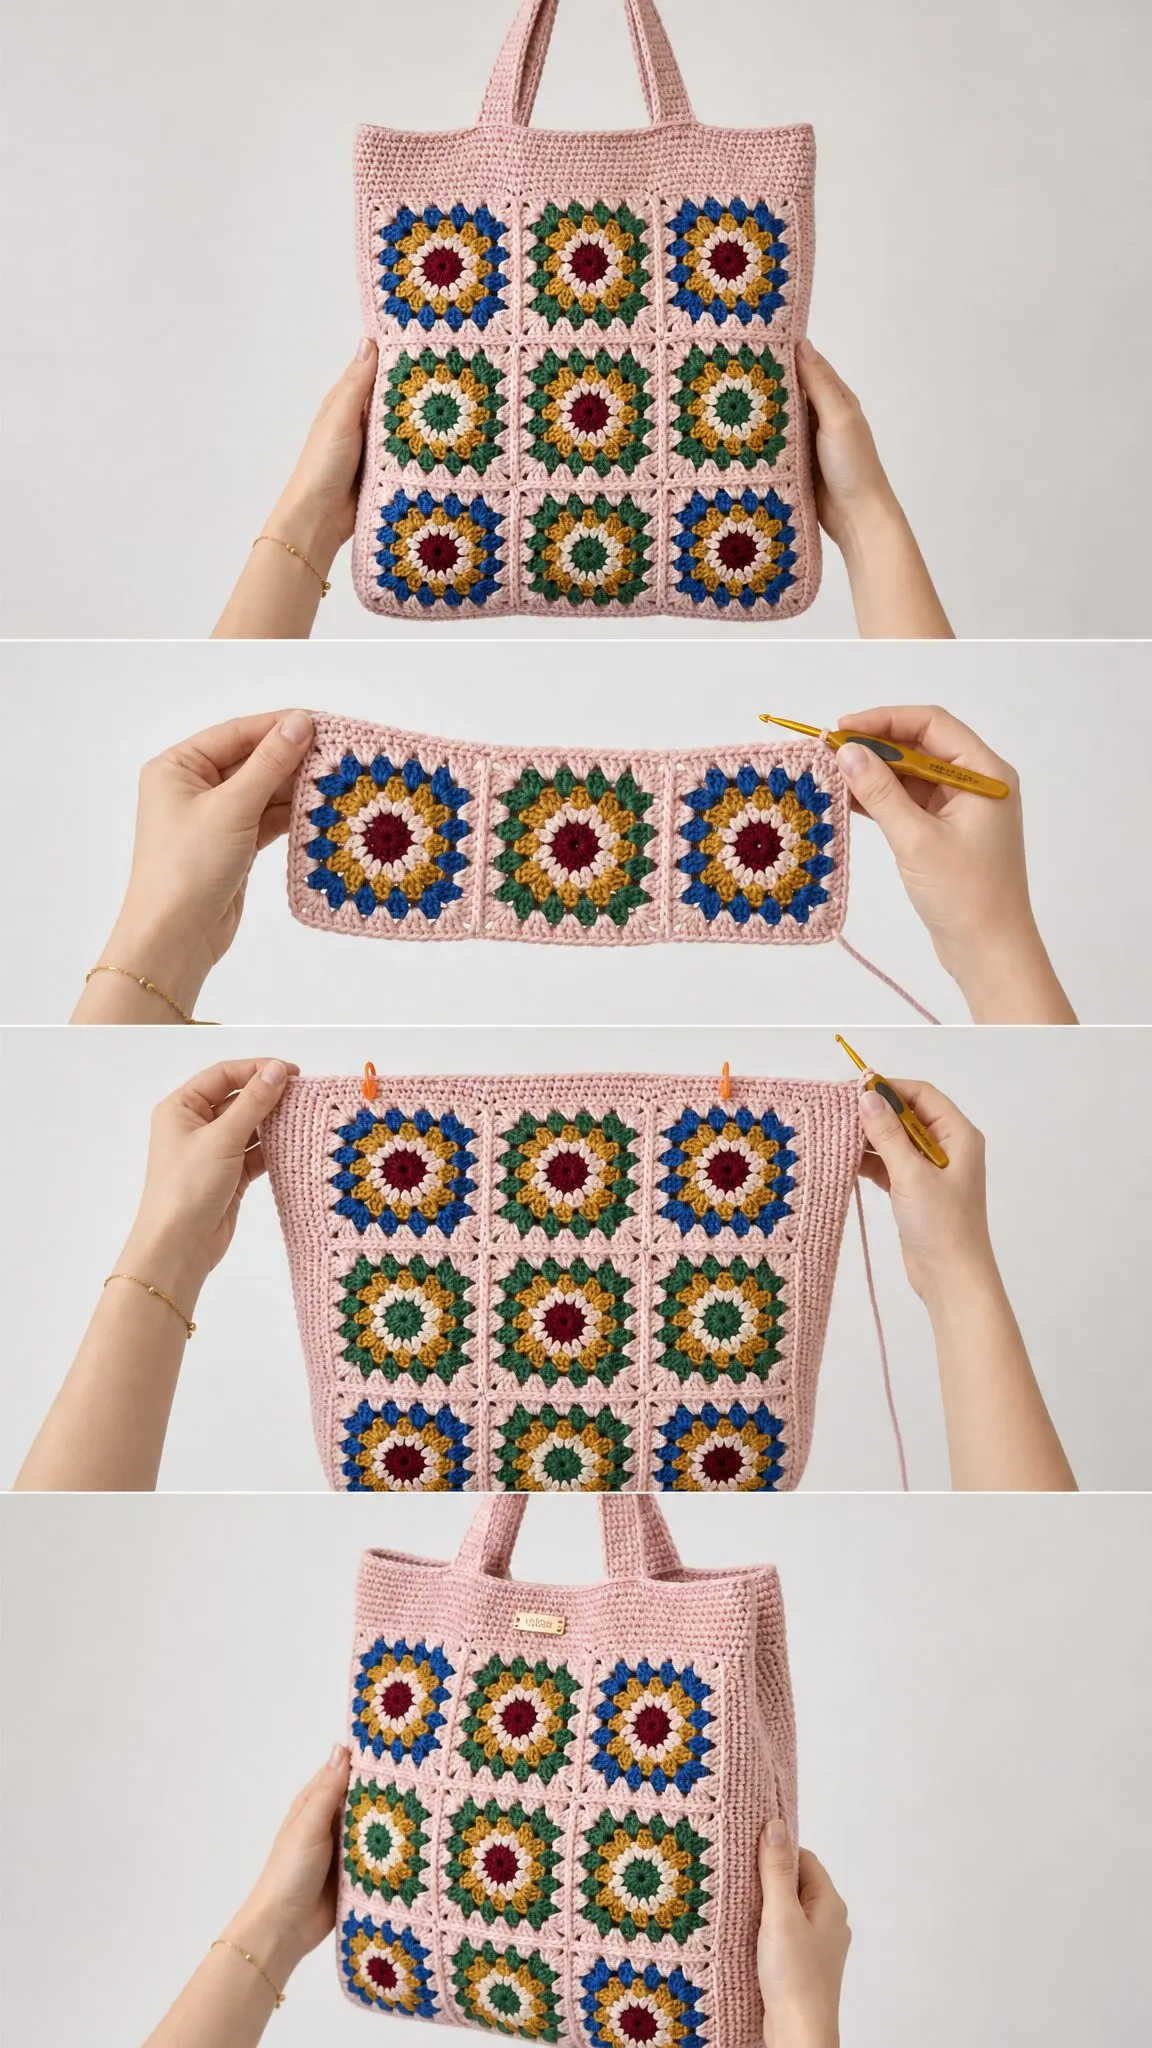
The construction is straightforward too. You’ll make two panels of nine squares each, add a solid single crochet band to the top for structure, then seam them together. The whole thing comes together in about 12 to 16 hours, which makes it a realistic weekend project if you’re dedicated or a lovely slow make over a few weeks.
Cotton yarn gives this bag its structure and durability. Unlike acrylic, cotton holds its shape beautifully and gets softer with washing without stretching out of recognition. It’s also machine washable, which matters when you’re using a bag for groceries, the beach, or everyday life.
Materials You’ll Need
Before you start, gather everything so you’re not hunting for your tapestry needle mid-project. Here’s the complete list pulled directly from the pattern:
Yarn (Worsted/Aran Weight #4 Cotton):
Recommended Yarns:
Tools:
This pattern is wonderfully scrappy-friendly. The accent colors only need small amounts, so raid your stash for those partial skeins you’ve been saving. Just keep the blush and cream consistent across all squares for a cohesive look.
Finished Measurements
Your completed tote bag will measure:
The granny panel itself is 12 inches by 12 inches, topped by a 3-inch blush band. Cotton does relax and stretch a little with use, which is completely normal and expected.
Gauge
Getting gauge right ensures your bag turns out the correct size. Here’s what to aim for:
Gauge is fairly forgiving with this project, but matching the square size keeps your panel measurements accurate. If your squares are coming out too large, try going down a hook size. Too small? Go up a hook size.
Abbreviations and Special Stitches
This pattern uses US crochet terminology. If you typically work from UK patterns, remember that US single crochet (sc) equals UK double crochet (dc), US half double crochet (hdc) equals UK half treble (htr), and US double crochet (dc) equals UK treble (tr).
| Abbreviation | Meaning |
|---|---|
| ch | chain |
| sl st | slip stitch |
| sc | single crochet |
| hdc | half double crochet |
| dc | double crochet |
| sp(s) | space(s) |
| st(s) | stitch(es) |
| rep | repeat |
| MR | magic ring |
| [ ] | repeat instructions in brackets |
Special Stitches Explained:
3-dc cluster: Work 3 double crochet stitches into the same stitch or space. This is the building block of every granny round and creates those classic granny square "puffs."
Corner: Work (3 dc, ch 2, 3 dc) all into one corner space. This creates the distinctive corner points that make your squares lie flat and square.
Magic ring (MR): An adjustable loop that lets you cinch the center closed for a tidy, hole-free middle. If you’re not comfortable with magic rings, you can chain 4 and slip stitch to form a ring instead.
Pattern Notes Before You Begin
A few things to keep in mind as you work:
How the Bag Comes Together
Understanding the construction before you start helps everything make sense:
1. Make 18 squares. Nine for the front panel, nine for the back, each worked in 4 colored rounds.
2. Join into two 3×3 panels. Use blush yarn so the seams blend into the body.
3. Add the blush top band. Worked in single crochet up from each panel.
4. Seam the sides and base to form the tote, then make and attach two handles.
Pro tip: Lay your finished squares out in a 3×3 grid before joining and snap a photo. This locks in your color arrangement so a stray square doesn’t sneak into the wrong spot during assembly.
The Sunburst Granny Square Pattern
Make 18 squares total. Each square has four rounds: a colored center, two blooming color rounds, and a cream border that squares off the corners.
Round 1: Center (Color A)
With Color A, make a magic ring (MR). Ch 3 (counts as first dc), 2 dc in ring, ch 2, [3 dc in ring, ch 2] 3 times. Join with sl st to top of beginning ch-3. Fasten off.
Stitch count: 12 dc, 4 corner spaces
Round 2: First Bloom (Color B)
Join Color B in any ch-2 corner space. Ch 3, (2 dc, ch 2, 3 dc) in same sp, ch 1, [(3 dc, ch 2, 3 dc) in next corner sp, ch 1] 3 times. Join to top of ch-3. Fasten off.
Stitch count: 24 dc, 4 corners
Round 3: Second Bloom (Color C)
Join Color C in any corner space. Ch 3, (2 dc, ch 2, 3 dc) in same sp, [ch 1, 3 dc in next ch-1 sp, ch 1, (3 dc, ch 2, 3 dc) in next corner sp] 3 times, ch 1, 3 dc in last ch-1 sp, ch 1. Join to top of ch-3. Fasten off.
Stitch count: 36 dc, 4 corners
Round 4: Cream Border (Color D)
Join Cream in any corner space. Ch 3, (2 dc, ch 2, 3 dc) in same sp, [ch 1, 3 dc in each ch-1 sp to corner with ch 1 between, (3 dc, ch 2, 3 dc) in corner sp] 3 times, ch 1, 3 dc in each ch-1 sp to end with ch 1 between, ch 1. Join to top of ch-3. Fasten off.
Stitch count: 48 dc, 4 corners
After Round 4, each side of your finished square will have 4 three-dc clusters plus corner spaces. This even edge makes joining painless. Block each square to 4 inches (10cm) before moving on.
Color Recipes for Your Squares
Keep Round 4 cream on every square for consistency. Mix up the inner three rounds for that collected-over-time boho look. Here are three reliable recipes to repeat across your 18 squares:
Wine Sunburst:
Garden Bloom:
Meadow:
Feel free to mix and match. The beauty of this design is that no two squares need to be identical.
Joining the Squares
Arrange nine squares in a 3×3 grid for the front panel. Repeat for the back panel.
With blush (MC) and right sides together, join with sc through the back loops of both squares. Work one sc per stitch and one sc into each corner space along the seam. You’ll have 14 sc per seam.
Join all vertical seams first, then the horizontal seams. Treat the seam intersections as a single stitch.
Step-by-step:
1. Join squares into three rows of three.
2. Join the three rows together to complete one 12×12 inch panel.
3. Repeat for the second panel. You now have a front and a back.
Prefer a flatter join? A flat whip stitch through outer loops with blush yarn also disappears neatly and lies flatter, which is especially nice if you plan to add a lining.
The Blush Top Band
The solid band gives the tote its structure and a clean upper edge. Work it on the front panel and back panel separately.
Worked on Each Panel (Make 2)
Row 1 (Foundation Row):
With right side facing and blush (MC), join in the top-right corner of the panel. Work 14 sc evenly across the top edge of each square. You’ll have 42 sc total across the panel. Ch 1, turn.
Rows 2-12 (Build the Band):
Sc in each st across. Ch 1, turn. Repeat for a total of 12 rows (about 3 inches/7.5cm). Do not fasten off on the final panel if you plan to seam directly.
Stitch count: 42 sc each row
Want a taller bag? Add rows here in pairs. Every 2 extra rows adds roughly ½ inch (1.3cm) of height without touching the square count.
Assembling the Bag
With both panels made and their bands complete, you’re ready to build the tote shape.
1. Stack the panels with right sides together, matching squares and band rows edge to edge.
2. Seam the base. With blush, sc across the bottom edge through both panels, one sc per stitch. (42 sc)
3. Seam both sides. Sc up each side edge through both panels, from base to the top of the band. Work 1 sc per row-end along the band and 1 sc per stitch along the squares. (Approximately 54 sc per side)
4. Turn right side out and gently push the corners into shape.
For a flat base: At each bottom corner, pinch the seam and whip stitch a small 1 inch (2.5cm) triangle gusset. This lets the tote stand upright and hold more.
Straps (Make 2)
Row 1 (Foundation):
With blush, ch 72. Sc in 2nd ch from hook and in each ch across. Ch 1, turn.
Stitch count: 71 sc
Rows 2-5 (Strap Body):
Sc in each st across. Ch 1, turn. Repeat to a total of 5 rows for a sturdy 1 inch (2.5cm) wide strap. Fasten off, leaving a long tail for sewing.
Stitch count: 71 sc each row
Attaching the Handles and Finishing
1. Pin each strap end to the inside of the band, about 3 inches (7.5cm) in from each side seam. Position the strap ends sitting about an inch below the top edge.
2. Stitch each end down firmly in a square-and-cross pattern for strength. This reinforcement matters because cotton bags get heavy when loaded. Repeat for the second strap on the back panel.
3. Weave in all remaining ends on the wrong side and trim.
4. Block the finished tote by misting with water, shaping to measurements, and letting it dry flat.
Optional Lining
Adding a lining makes your tote more durable and hides the back of your colorwork. Cut two cotton fabric rectangles measuring 13×16 inches (33×41cm), seam them into a pouch shape, and hand-stitch the lining inside the band. You can also add a magnetic snap closure at this stage if you want your bag to close securely.
Care Instructions
Hand wash in cool water with a gentle detergent. Do not wring. Instead, press water out and reshape flat to dry, away from direct heat or sunlight. Cotton softens beautifully with washing.
If your colors are deeply saturated (especially the burgundy and denim), wash separately the first time to guard against any bleeding onto the cream and blush sections.
Size Customization Options
Bigger tote: Use a 4×4 grid (16 squares per side) for a roomy beach bag measuring about 16 inches (40cm) wide.
Smaller pouch: A 2×2 grid makes a sweet mini bag perfect for evenings out.
Taller or shorter: Add or remove band rows in pairs. Each pair adds or subtracts roughly ½ inch (1.3cm) of height. Lengthen or shorten the strap foundation chain to match your preferred shoulder drop.
Quick Reference Chart
| Element | Count | Finished Size |
|---|---|---|
| Granny square | 4 rounds, 48 dc | 4 in / 10 cm |
| Panel | 9 squares (3×3) | 12×12 in / 30 cm |
| Top band | 42 sc × 12 rows | 3 in / 7.5 cm |
| Strap | 71 sc × 5 rows | ≈20 in / 51 cm |
| Finished bag | — | 12.5×15 in / 32×38 cm |
You Did It!
I hope this boho granny square tote bag becomes your new favorite carry-all. Whether you’re headed to the farmer’s market, the beach, or just running errands around town, this sturdy little bag has you covered. The best part? Every time someone compliments it (and they will), you get to say, "Thanks, I made it."
Thank you so much for choosing this pattern! If you make your own Cotswold Granny Tote, I would absolutely love to see it. Save this pattern to your Pinterest boards so you can find it when you’re ready to start, and please drop a comment below if you give it a try. Seeing your color combinations truly makes my day!
