
I’ve been looking for the perfect market tote pattern for ages, and this one finally checks every box. The retro sunburst squares, the warm bamboo handles, the structured shape that actually stands up on its own. This is my favourite kind of project: satisfying to make, gorgeous to carry, and practical enough for everyday use.
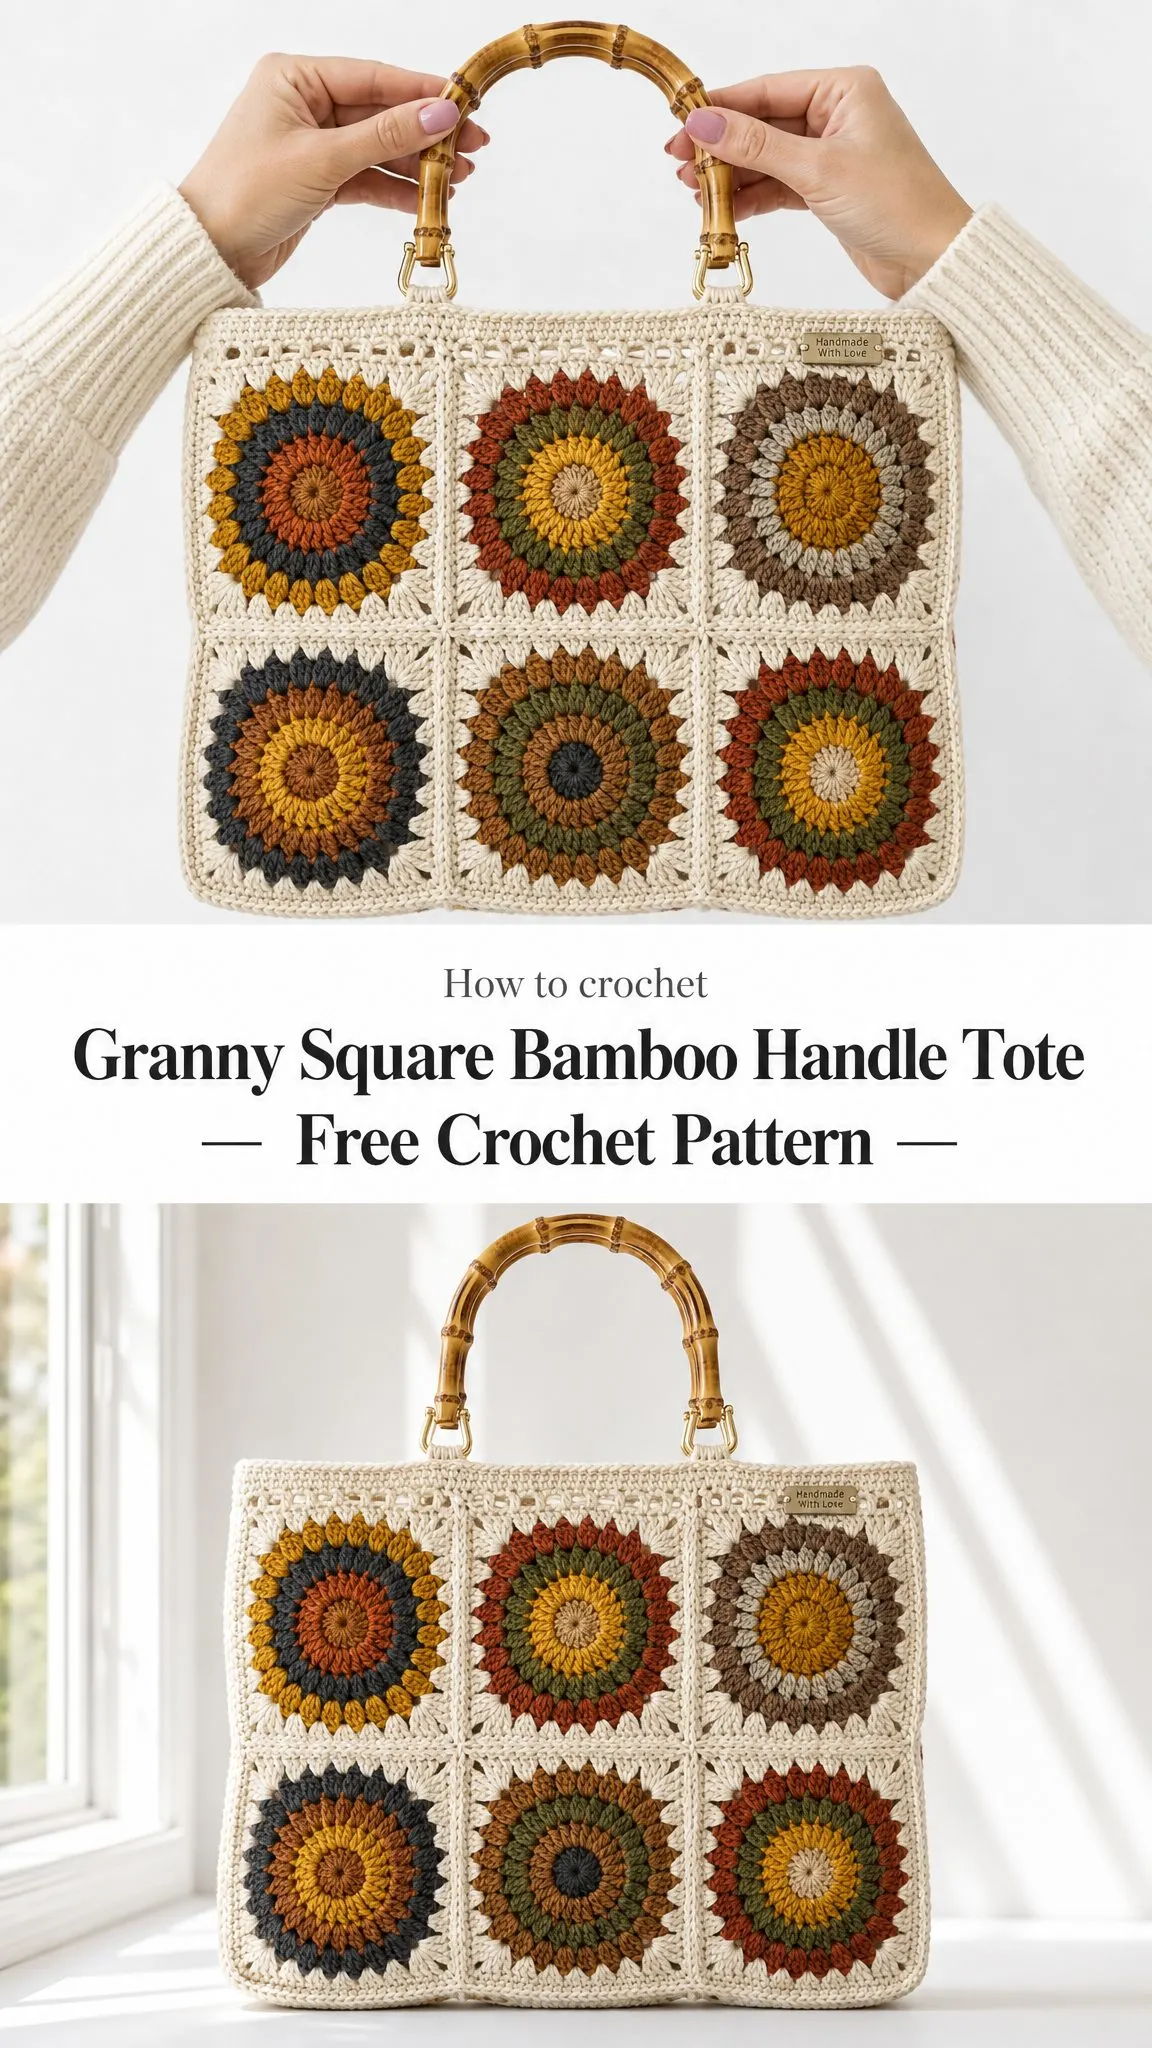
If you love granny squares but want something a little more modern, you’re going to adore this bag. The sunburst motif gives you that vintage vibe while the clean ecru border keeps everything looking polished and unified. Plus, it’s scrap friendly, so you can finally use up those partial skeins you’ve been hoarding.
I’m walking you through every step today, from making your first square to attaching those beautiful bamboo handles. Let’s get started.
What Makes This Tote Special
This tote is built entirely from one repeating motif: a sunburst circle set into a cream square. You’ll make 19 of these squares total, then join them into a roomy box shape with a flat front and back, gusseted sides, and a sturdy three square base.
The construction is modular, which means you can work on squares anywhere. Waiting rooms, car rides, lunch breaks. Then you assemble everything at the end. The lacy eyelet round and picot trim around the opening give it that finished, boutique quality look. And those bamboo handles? They add warmth and sophistication that you just don’t get from crocheted straps.
Finished size: 13.5 × 9 × 4.5 inches (34 × 23 × 11.5 cm), width by height by depth. Handles add extra height.
Skill level: Intermediate. You should be comfortable with working in circles, changing colors, and seaming pieces together.
Time estimate: 18 to 25 hours, worked over several relaxed sittings.
Materials You’ll Need
Before you start, gather everything so you can crochet uninterrupted.
Hook: 4.0 mm (US G/6). You can also use a 3.5 mm hook for tighter handle tabs if you prefer.
Yarn: Worsted weight or aran weight cotton, Craft Yarn Council weight 4.
Bamboo handles: One pair of D shaped bamboo handles, 5 to 6 inches (13 to 15 cm) wide.
Also needed: Tapestry needle, stitch markers, scissors.
Optional for structure: Fabric lining, magnetic snap, and a cut to fit base board or plastic canvas.
Yarn Suggestions
Lily Sugar’n Cream in worsted cotton works beautifully here. It’s budget friendly and holds the box shape well. Use Ecru as your main color.
Paintbox Yarns Cotton Aran has a huge retro friendly palette that’s perfect for your six accent shades.
Scheepjes Catona held in pairs, or Cotton DK, will give you a slightly finer, drapier tote if that’s your preference.
This project is scrap friendly, so don’t stress about matching the exact colors shown. The six accent shades lean warm and retro, but you can swap freely as long as the cream border ties every square together.
Gauge
One finished sunburst square should measure 4.5 inches (11.5 cm) square after light blocking.
In double crochet (dc): 16 stitches × 8 rows = 4 inches (10 cm).
The motif size matters more than row gauge here. Adjust your hook size until your square measures 4.5 inches. If your squares are too big, go down a hook size. Too small? Go up.
Abbreviations and Stitches
Here are all the abbreviations used in this pattern with plain English definitions.
Note for UK crocheters: US single crochet (sc) equals UK double crochet (dc). US double crochet (dc) equals UK treble (tr). This pattern uses US terms throughout, so convert as you go.
Special Stitches
Picot: Chain 3, then slip stitch into the first chain to form a small decorative bump.
Corner: Work (3 dc, ch 2, 3 dc) all into one space.
Standing dc: Begin a new color with a double crochet instead of a turning chain for a seamless join. If you’re not comfortable with this technique, you can substitute chain 3.
Pattern Notes Before You Begin
Read through these tips before starting. They’ll save you time and frustration.
The square is worked in joined rounds with the right side always facing. Do not turn your work.
Each round uses a fresh color. Fasten off and rejoin, or carry loosely up the back if shades repeat.
The first 3 rounds form the colorful sunburst. Rounds 4 and 5 are always Ecru to square it off and unify all the panels.
Weave in ends as you go. Trust me on this one. 19 squares means a lot of tails at the end otherwise.
Block each square to a true 4.5 inches (11.5 cm) before joining for crisp, even seams.
Color Plan
Rounds 1 through 3 are your three changing accent colors. Call them A, B, and C. Mix the six shades across your 19 squares so no two neighbors match exactly. That scrappy, gathered look is the charm of this bag.
Your six accent colors are: mustard, rust, slate blue, olive, taupe, and golden ochre. Ecru is used for Rounds 4 and 5 on every square.
Lay out your finished squares before joining to make sure the colors are well shuffled.
The Sunburst Square Pattern
Make 19 squares total. Each square has five rounds: three sunburst rounds in your accent colors, then two Ecru rounds. Finished size is 4.5 inches (11.5 cm).
Sunburst Center (Rounds 1 to 3)
Round 1 (Color A): Make a magic ring. Chain 3 (this counts as a double crochet here and throughout). Work 15 dc into the ring. Slip stitch to the top of the beginning chain 3 to join. (16 dc)
Round 2 (Color B): Join in any stitch with a standing dc. Chain 1. Double crochet in the next stitch, chain 1. Repeat from to around. Slip stitch to the first dc to join. (16 dc, 16 ch-1 spaces)
Round 3 (Color C): Join with a slip stitch in any ch-1 space. Chain 1. Work (sc, ch 3) in each ch-1 space around. Slip stitch to the first sc to join. (16 petals)
The 16 little chain 3 points are the radiating sunburst rays. Keep them loose and even for the best effect.
Petal count check: 16 petals split as 4 corners plus four sides of 3 petals each (4 + 12 = 16). If your math drifts, recount Round 3 before squaring off.
Squaring the Circle (Rounds 4 to 5)
Round 4 (Ecru): Slip stitch into any petal loop. This becomes a corner. Chain 3, then work (2 dc, ch 2, 3 dc) in the same loop. Work 3 dc in each of the next 3 loops. Work (3 dc, ch 2, 3 dc) in the next loop. Repeat from to twice more. Work 3 dc in each of the last 3 loops. Slip stitch to the top of the beginning chain 3 to join. (60 dc, 4 corner spaces)
Round 5 (Ecru): Chain 1. Single crochet in each of the next 15 dc. Work (sc, ch 2, sc) in the corner ch-2 space. Repeat from to around. Slip stitch to the first sc to join. (68 sc, 4 corner spaces)
After Round 5, each side has 15 sc plus a shared corner stitch at each end. That even count makes joining painless.
Building Your Stack
Once you’ve made all 19 squares, sort them into five groups for assembly:
Square tally: 6 front + 6 back + 4 sides + 3 base = 19 squares
Joining the Panels
Join with Ecru using a flat whip stitch through the back loops of matching stitches, corner to corner. Work each flat panel first, then build the box.
Step 1: Flat Panels
Whip stitch squares into the five groups listed above. Match all 17 stitches along each joined edge (15 side stitches + 2 corners). (5 panels)
You can join with right sides together for an invisible seam, or wrong sides together if you want a raised ridge on the outside for a decorative effect.
Step 2: Build the Base
Join one long edge of the base row to the lower edge of the front panel. Join the other long edge to the lower edge of the back panel. (3 seams set)
Join each short end of the base row to the lower edge of a side panel. (base boxed)
Step 3: Close the Sides
Stand the piece up. Whip stitch each vertical side edge of the front and back panels to the side panels, working from top to bottom. (4 corner seams)
You now have an open topped box. Press the seams with your fingers so the corners stand square.
Structure Tip
For a tote that stands on its own, cut a piece of plastic canvas or a base board to 13.5 × 4.5 inches (34 × 11.5 cm) and drop it into the bottom before lining. A fabric lining with a magnetic snap turns this into an everyday bag.
Top Edge and Handles
The opening is trimmed with an eyelet round and a picot edge, then bamboo handles hang from four crocheted tabs. Work the top rounds in Ecru with the right side facing.
Top Border
Round 1: Join Ecru at a back corner. Single crochet evenly around the whole opening, working 17 sc across each square width and 1 sc in each seam. Slip stitch to the first sc to join. (136 sc)
Round 2 (eyelets): Chain 4 (counts as dc, ch 1). Skip 1 stitch, dc in the next stitch, ch 1. Repeat from to around. Slip stitch to the 3rd chain of the beginning ch-4 to join. (68 dc, 68 ch-1 spaces)
Round 3: Chain 1. Work 2 sc in each ch-1 space around. Slip stitch to the first sc to join. (136 sc)
Round 4 (picot): Chain 1. Single crochet in each of the next 3 stitches, picot. Repeat from to around. Slip stitch to the first sc to join. (136 sc, 34 picots)
The number 136 divides evenly by 2 (for the eyelets) and by 4 (for the picots), so every round closes cleanly.
Handle Tabs (Make 4)
Tab: Chain 7. Single crochet in the 2nd chain from hook and across. Turn. Work 8 rows of single crochet. (6 sc per row)
Placement: Mark two points over the front about 3.5 inches (9 cm) apart, centered. Mirror on the back for four tab points total. (4 positions)
Attachment: Thread each tab through a bamboo handle ring, fold in half, and sew both short ends firmly to the inside of the top border. (2 tabs per handle)
Sew tabs with doubled yarn and go around twice. This is the one spot that carries all the weight, so make it secure.
Finishing and Care
Finishing Steps
Weave in every remaining tail on the wrong side and trim close.
Give the whole bag a gentle steam or spray block. Square up the corners by hand.
Optional lining: Cut fabric to each panel plus 0.5 inch (1.5 cm) seam allowance, sew into a box, and hand stitch inside below the eyelet round.
Optional snap: Fit a magnetic snap to the lining center front and back before inserting.
Care Instructions
Wash: Hand wash cool with mild detergent. Never wet the bamboo handles. Remove or wrap them first.
Dry: Press out water in a towel, reshape, and lay flat to dry. Reinsert any base board only once fully dry.
Store: Stuff lightly with tissue to hold the box shape between uses.
Avoid: Wringing, tumble drying, and direct heat, which can warp cotton and bamboo.
Customizing the Size
Because the tote is modular, resizing is just a matter of adding or removing squares. Keep the base width equal to the front width and the side equal to the depth.
Bigger Beach Tote
Go 4 wide × 2 tall on front and back (8 squares each). Keep 2 square sides. Base becomes 4 squares. (26 squares total)
Finished width grows to about 18 inches (46 cm). Top border becomes 12 square widths. (204 sc in Round 1)
Mini Day Bag
Go 2 wide × 2 tall on front and back (4 squares each). Use single square sides and a 2 square base. (14 squares total)
Finished width is about 9 inches (23 cm). Use shorter 4 inch (10 cm) handles.
Quick formula: Front squares across × 4.5 inches = bag width. Squares tall × 4.5 inches = bag height. Side squares × 4.5 inches = depth. Always recalculate the top border as (square widths × 17) sc.
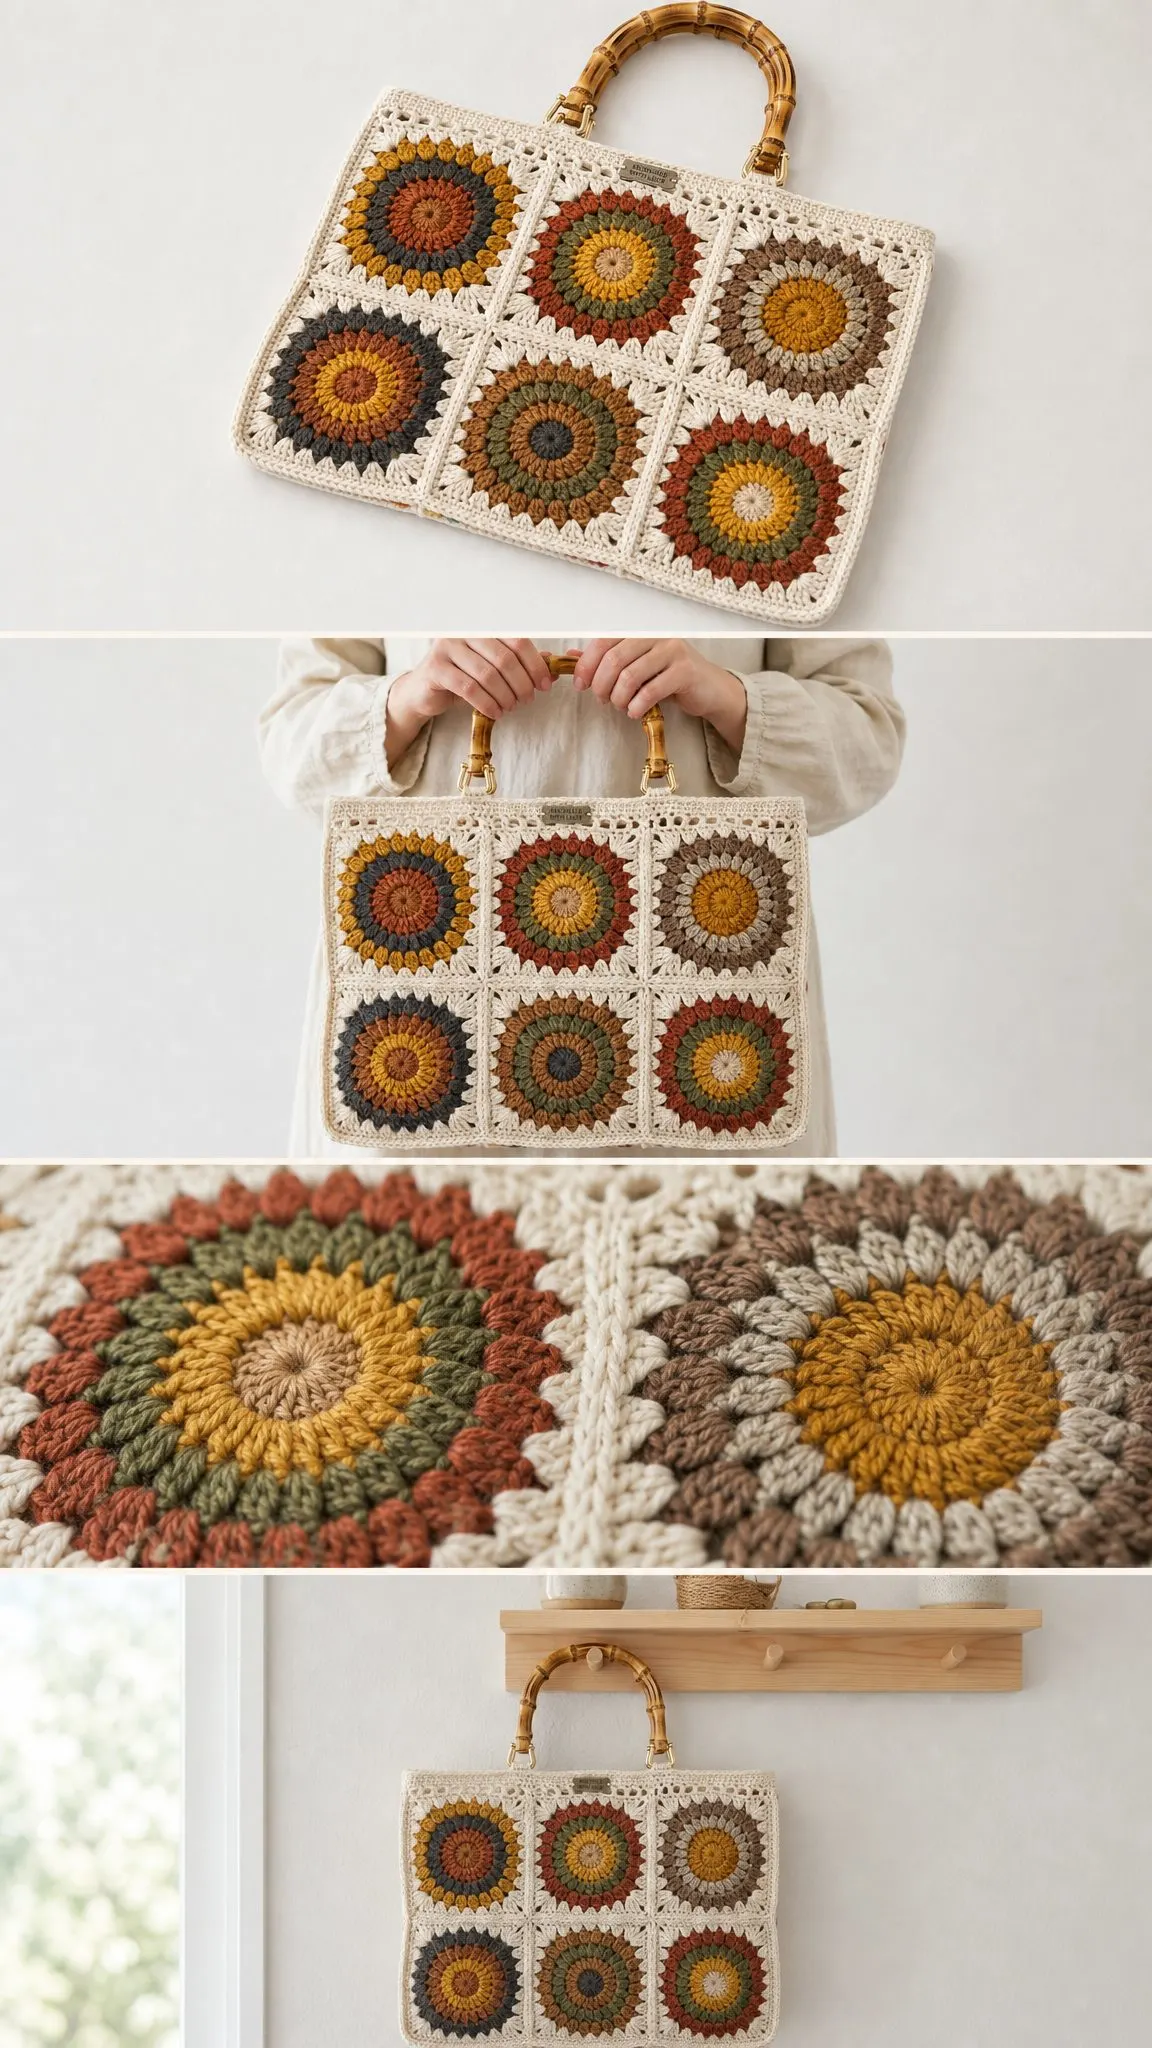
You Did It!
Thank you so much for making this granny square bamboo handle tote with me. I hope you love carrying it as much as I loved designing it. There’s something so satisfying about turning a stack of colorful squares into a structured, useful bag.
If you make this tote, I’d absolutely love to see it! Share your photos on Instagram or Facebook and tag me so I can cheer you on. Seeing your color combinations is one of my favorite parts of sharing patterns.
Save this pattern to your Pinterest boards so you can find it when you’re ready to start, and leave a comment below if you make one. I love hearing which colors you chose and how your tote turned out!
