
A floor-length crochet dress sounds intimidating, right? All those stitches, all that shaping, all those opportunities for something to go wrong. Let’s clear that up right now: this Sunflower Fan Lace Maxi Dress breaks down into manageable flat panels, uses a repeating four-row lace cycle, and builds one logical section at a time.
Get the Ad-Free PDF Pattern
Scroll down for the full pattern, or get the ad-free printable PDF from the shop.
Get the Printable PDF →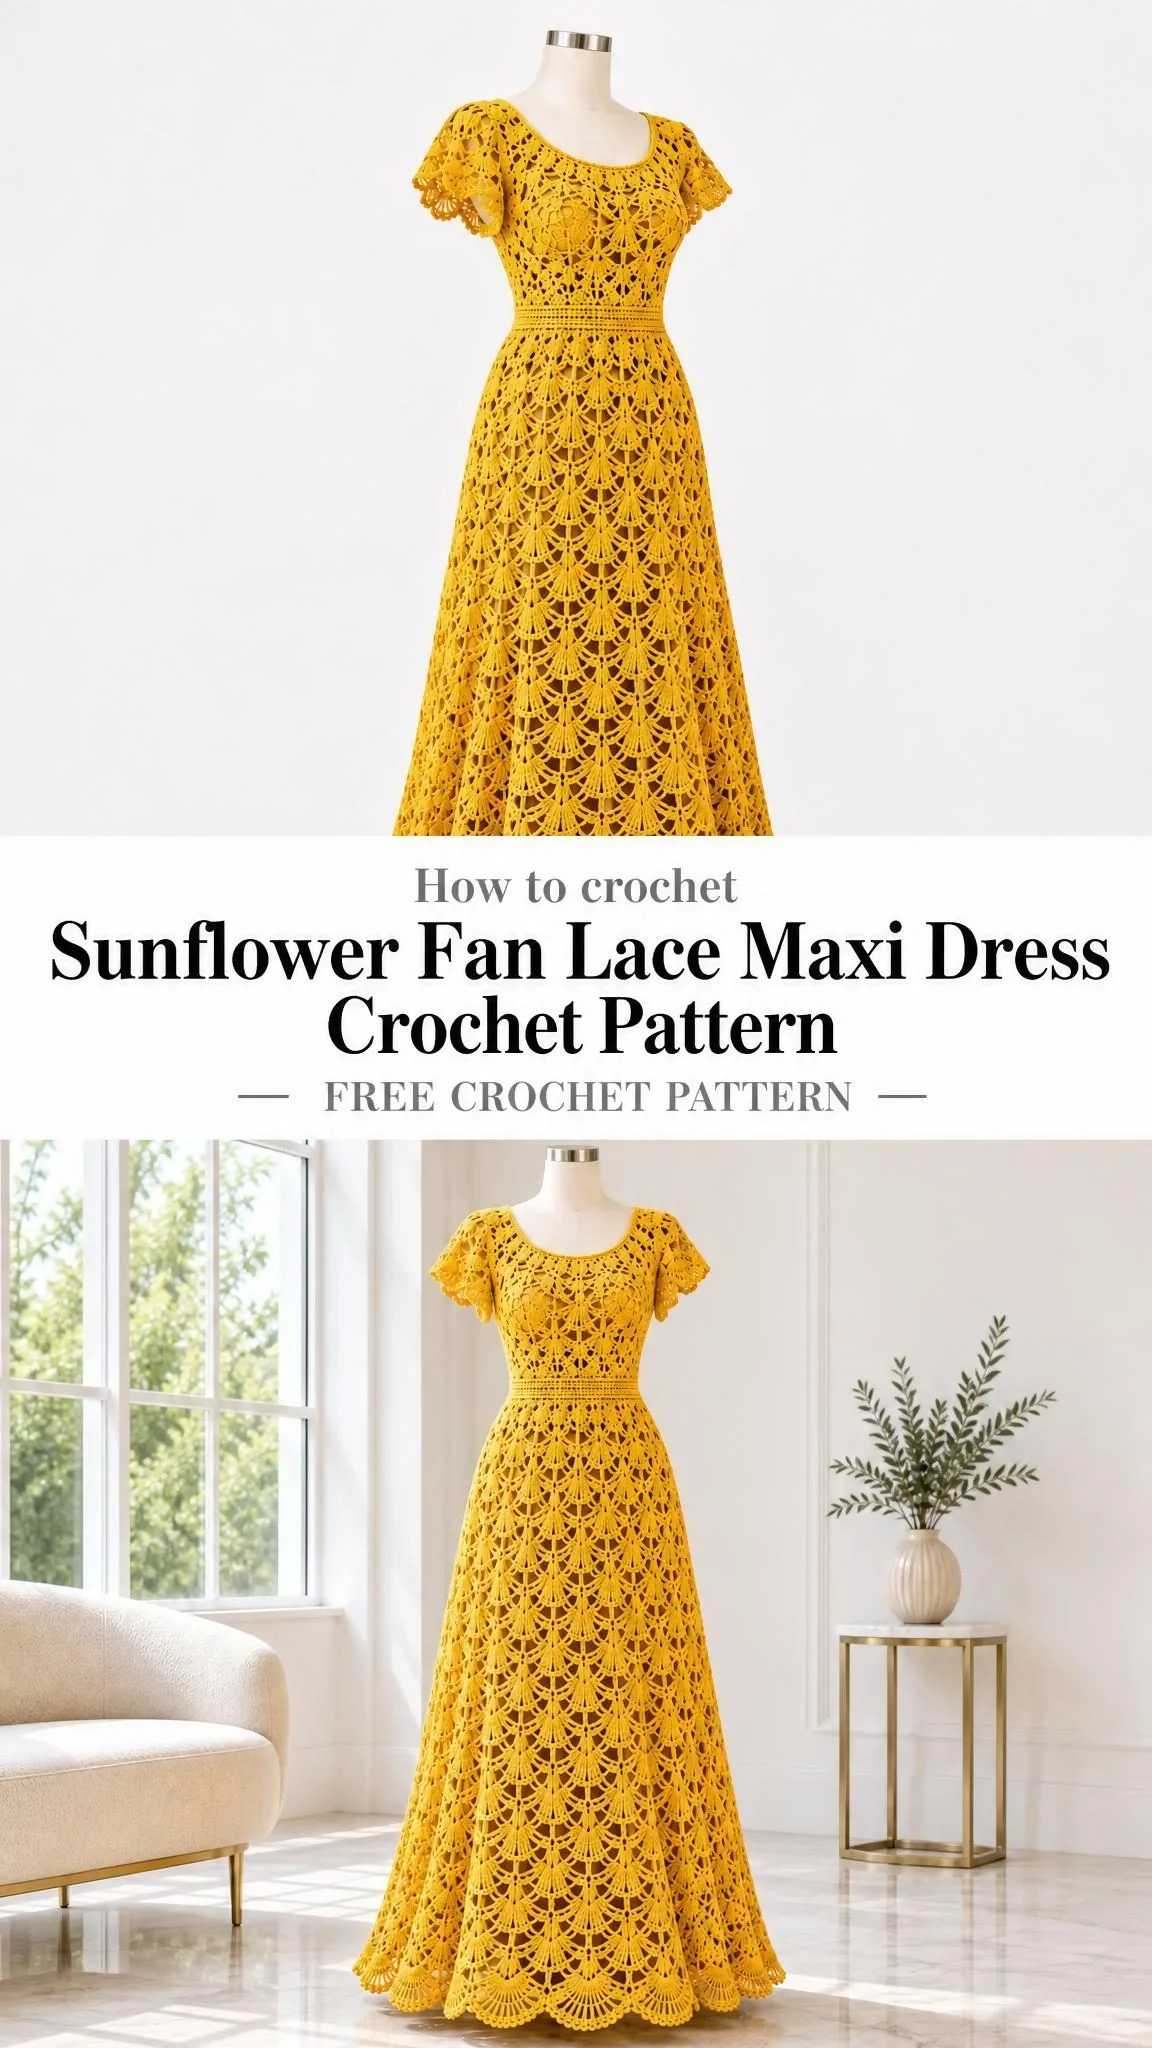
If you can work a double crochet and count to ten, you can absolutely make this dress. The fan lace pattern looks intricate, but once you complete one cycle, your hands will remember the rhythm. The bodice, skirt, and sleeves all use the same shared lace instructions, so you’re essentially learning one stitch pattern and applying it everywhere.
Whether you’re an intermediate crocheter ready to tackle your first garment or an advanced maker looking for a stunning statement piece, this pattern meets you where you are. The construction is straightforward, the math has been checked, and every checkpoint along the way helps you catch mistakes before they compound.
Why This Design Works
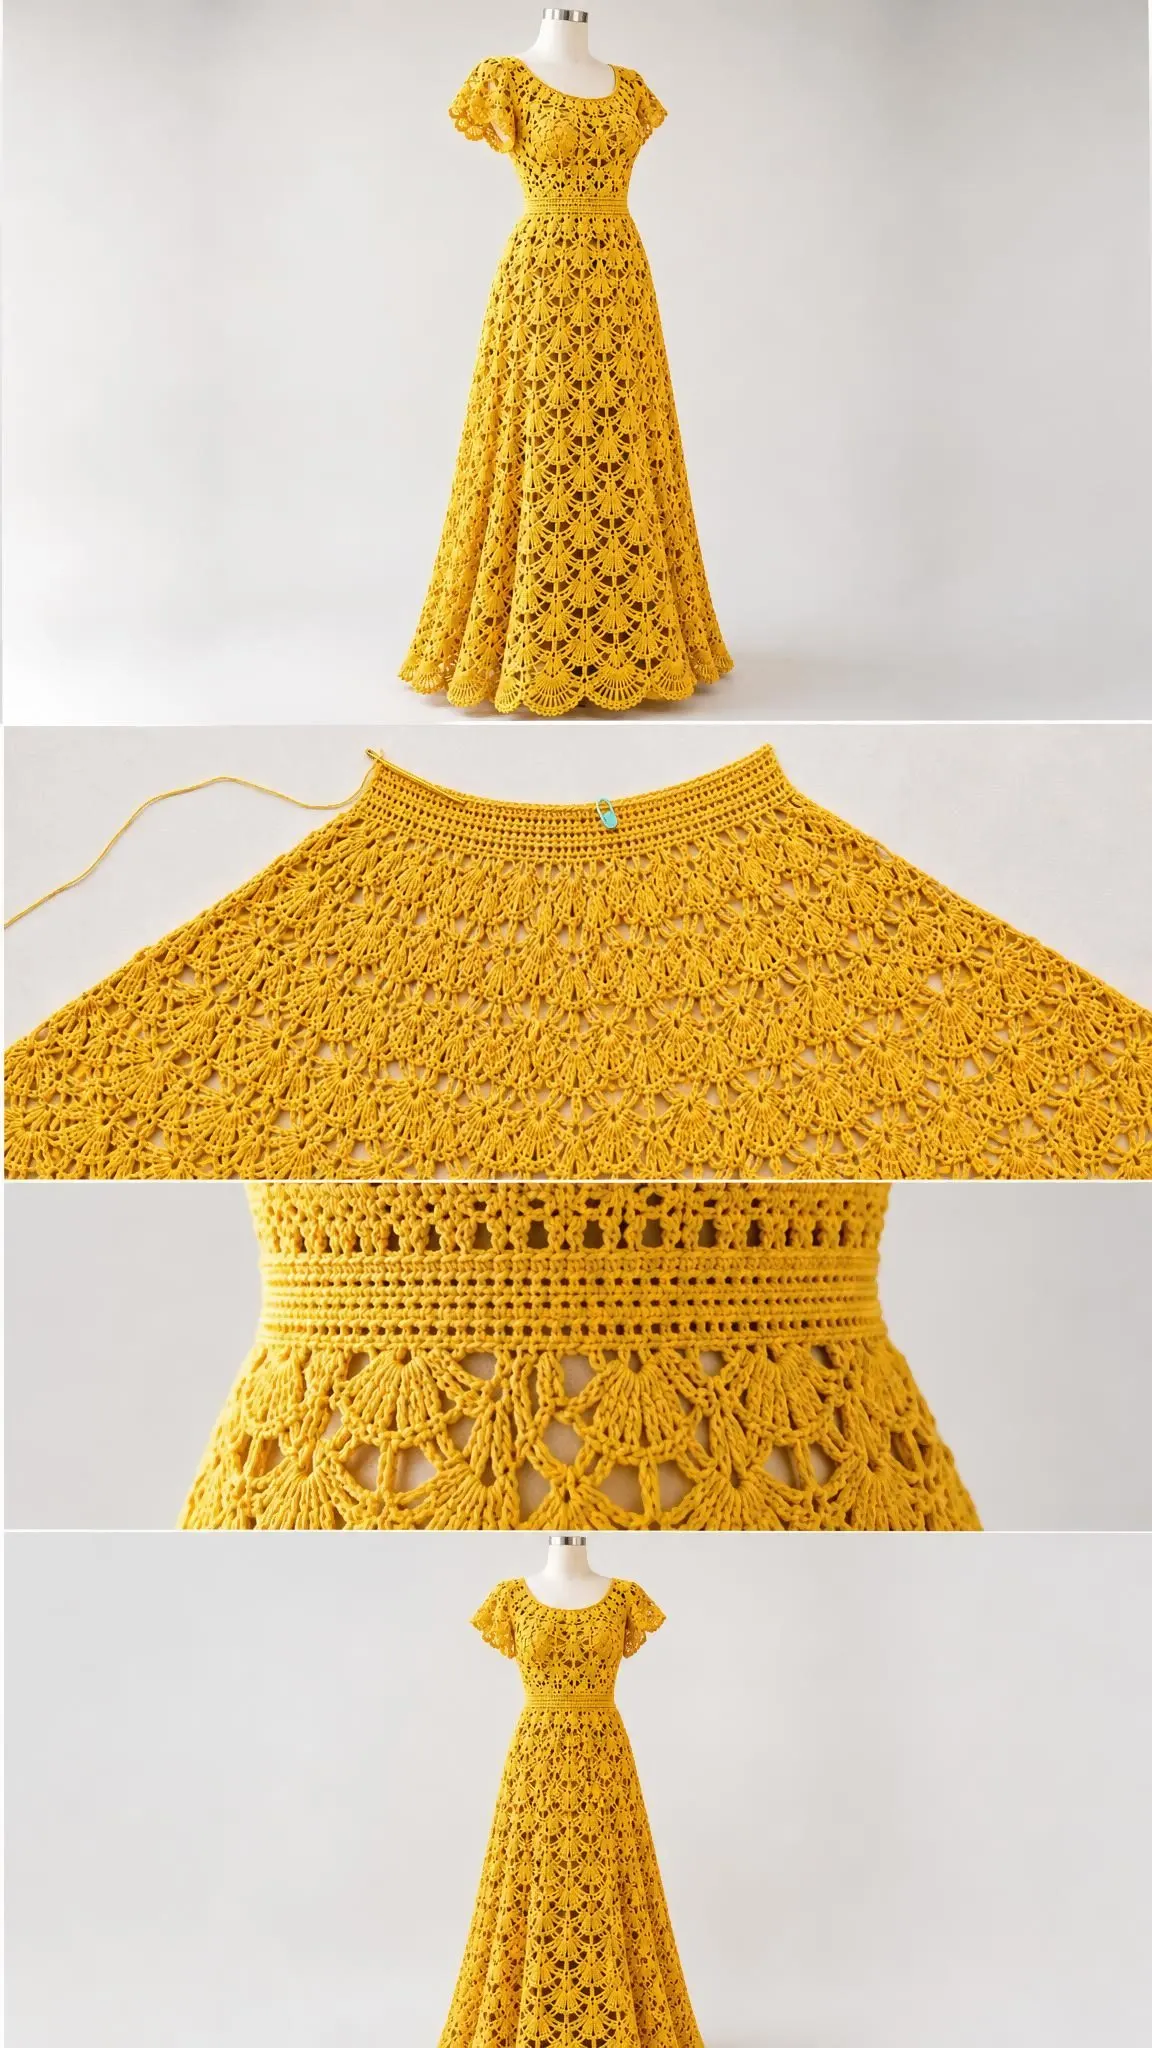
The Sunflower Fan Lace Maxi Dress combines classic crochet techniques with modern garment construction. Two flat bodice panels join at the shoulders and sides, creating a fitted upper body. The skirt begins at the waist and gradually widens through three levels, giving you that beautiful A-line silhouette without complicated shaping.
The fan lace stitch creates an open, airy fabric that drapes beautifully. Each fan consists of five double crochets separated by chain-one spaces, worked into a single stitch. As you progress through the four-row cycle, these fans transform into elegant pointed motifs before reforming at the base of the next repeat.
The sunflower yellow colorway makes this dress a showstopper for garden parties, summer weddings, or any occasion where you want to turn heads. Because the lace is open, the pattern recommends wearing an opaque slip underneath for coverage.
Finished Measurements
Understanding your finished dimensions before you begin prevents heartache later. Here’s what the completed dress measures after blocking:
| Measurement | Size |
|---|---|
| Bust / Upper Waist | 100 cm / 100 cm |
| Suggested Body Bust | 88-94 cm |
| Waist (with removable tie) | 80-94 cm |
| Hip / Hem Circumference | 120 cm / approximately 140 cm |
| Shoulder to Waist | 40 cm |
| Waist to Hem | 90 cm |
| Upper Arm Circumference | 40 cm before edging |
The waist tie creates the fitted appearance you see in the photos. Without it, the untied opening must pass comfortably over your bust. All measurements listed are after blocking but before wear stretch.
Important: Check your bust, hips, armhole depth, and shoulder-to-waist length before casting on. This pattern offers one worked adult size with adjustment guidance for different circumferences.
Materials You’ll Need
Gather everything before you start. Nothing derails momentum like a mid-project supply run.
Yarn:
- Smooth sport-weight cotton or cotton blend
- Approximately 300 meters per 100 grams
- Total needed: 750 grams / 2250 meters (includes swatching and finishing reserve)
- Color: Sunflower yellow throughout
Hooks:
- 3.5 mm crochet hook (or size needed to achieve gauge)
- 3 mm hook for firm edgings and waist tie
Notions:
- Tapestry needle
- Scissors
- 12 removable stitch markers
- Tape measure
- Blocking mats and rustproof pins
- Optional: 6 mm clear elastic cut to comfortable waist plus 2 cm overlap
- Matching sewing thread and needle (if using elastic)
For Wearing:
A separate opaque slip with a neckline at least as high as the dress and a hem reaching the crochet hem. The slip provides coverage under the open lace. Do not rely on the lace itself for modesty.
Gauge (Don’t Skip This)
Gauge is the number of stitches and rows per measured unit. Matching gauge ensures your finished dress matches the intended size.
Foundation and dense trim: 20 single crochet (sc) and 24 sc rows = 10 x 10 cm
Fan gauge: Two full four-row lace cycles = 6 cm high
Lace width: The lace must block to 5 cm per ten-stitch repeat. Four repeats should measure 20 cm across.
Filet mesh: Must block to 10 spaces across 10 cm.
How to Swatch
Chain 42, work 41 sc, then work the fan setup row and at least four complete lace cycles. Measure in the middle of your swatch, excluding the foundation and finishing rows.
- If your swatch is too wide, use a smaller hook
- If your swatch is too narrow, use a larger hook
- Adjust row count separately if your height gauge differs
Critical step: Wash and dry your swatch exactly as you plan to care for the finished dress. Then hang the blocked swatch for 24 hours and note any growth before choosing your final dress length. Cotton especially tends to grow when hung.
Abbreviations and Special Stitches
US terminology is used throughout this pattern.
| Abbreviation | Full Name | Definition |
|---|---|---|
| ch | chain | Yarn over, pull through loop on hook |
| st/sts | stitch/stitches | Individual crochet units |
| sl st | slip stitch | Insert hook, yarn over, pull through stitch and loop on hook |
| sc | single crochet | Insert hook, yarn over, pull up loop, yarn over, pull through both loops |
| hdc | half double crochet | Yarn over, insert hook, pull up loop, yarn over, pull through all three loops |
| dc | double crochet | Yarn over, insert hook, pull up loop, yarn over, pull through two loops, yarn over, pull through remaining two loops |
| tr | treble crochet | Yarn over twice, insert hook, pull up loop, (yarn over, pull through two loops) three times |
| sp | space | The gap created by chain stitches |
| RS/WS | right side/wrong side | The public-facing side versus the back |
| rep | repeat | Work the bracketed instructions again |
Special Stitches
sc2tog (single crochet two together): Insert hook into next stitch and draw up a loop, repeat in following stitch, yarn over and draw through all three loops. This decreases one stitch.
Picot: Chain 3, slip stitch in the third chain from hook. Creates a small decorative bump.
Fan (F): [dc, ch 1] four times, then dc, all in the same stitch. Each fan contains 5 dc and four ch-1 spaces.
Seaming Technique
Joining seam: With right sides together, pass a tapestry needle under corresponding edge loops on both pieces, one pair at a time, without pulling tight. Weave yarn ends back and forth through dense stitches for at least 5 cm, reversing direction twice.
Pattern Notes Before You Begin
Read this section completely before starting. It will save confusion later.
- Work flat, turning at the end of every row unless instructed to work a round
- Chain 1 for sc rows and chain 2 for dc rows do NOT count as stitches
- Work the first actual stitch in the first stitch of the previous row
- Join rounds with a slip stitch to the first actual stitch (not the turning chain)
- Joining slip stitches do not count in stitch totals
- Keep a removable marker in each edge stitch
The sample uses 101 foundation stitches per bodice panel and 10 lace repeats. In the shared instructions, "n" represents the number of repeats in the current piece or skirt level. The extra stitch closes the final repeat and forms the seam edge.
Stitch counts given for lace rows distinguish between stitches, arches, and motifs. Do not treat chain spaces as single stitches unless specifically instructed.
Block all sections before assembly and compare each checkpoint measurement before proceeding to the next step.
Construction Overview
The dress comes together in this order:
- Make and block your gauge swatch
- Make front bodice panel (waist upward)
- Make back bodice panel (waist upward)
- Add shoulder sections to front
- Make two skirt panels (widening at two level changes)
- Make sleeves (optional)
- Block all pieces
- Seam and assemble
- Add waist tie and edgings
- Final finishing
The Shared Lace Pattern
This four-row cycle forms the basis of the bodice, skirt, and sleeves. Master it once and you’ll use it everywhere.
Foundation Row
Chain (10 x number of repeats + 2). Single crochet in second chain from hook and each chain across. Turn.
Stitch count: [10 x repeats + 1 sc]
Setup Row
Ch 1, sc in first sc; ch 3, skip 4 sc, F in next sc, skip 4 sc, ch 3, sc in next sc; repeat from * across. Turn.
Count: [n fans, n+1 anchors, 2n side arches]
Row A
Ch 1, sc in first anchor; ch 3, sc in first dc of fan, (ch 3, sc in next dc) 4 times, ch 3, sc in next anchor; repeat from * across. Turn.
Count: [6n+1 sc, 6n ch-3 arches]
Row B
Ch 1, sc in first anchor; ch 4, sc in first internal ch-3 arch, (ch 3, sc in next internal arch) 3 times, ch 4, sc in next anchor; repeat from * across. Turn.
Count: [5n+1 sc, 3n ch-3 arches, 2n ch-4 arches]
Row C
Ch 1, sc in first anchor; ch 5, sc in middle of the three internal ch-3 arches, ch 5, sc in next anchor; repeat from * across. Turn.
Count: [2n+1 sc, 2n ch-5 arches]
Row D
Ch 1, sc in first anchor; ch 3, F in central sc of motif, ch 3, sc in next anchor; repeat from * across. Turn.
Count: [n fans, n+1 anchors, 2n side arches]
Repeat Rows A through D to continue the lace pattern.
Conversion Row (After Row D)
Use this when transitioning from lace to a dense section:
Sc in first anchor; 2 sc in side ch-3 arch, sc in each of 5 fan dc (skipping ch-1 spaces), 2 sc in next side arch, sc in next anchor; repeat from * across.
Count: [10n+1 sc]
Bodice Front Instructions
Foundation: Chain 102, work 101 sc, then begin fan lace with n=10.
Work the lace pattern until the panel measures approximately 30 cm tall, ending with Row D. This is about nine four-row cycles after setup, but check against your swatch gauge.
Convert to dense fabric: Work the conversion row. [101 sc]
First Shoulder
Row 1: Ch 1, sc in first 24 sc only. Leave remaining stitches unworked. Turn. [24 sc]
Row 2 (neck edge to armhole): Ch 1, sc2tog, sc in remaining sc. Turn. [23 sc]
Row 3 (armhole to neck): Ch 1, sc to final 2 sc, sc2tog. Turn. [22 sc]
Row 4: Ch 1, sc2tog, sc in remaining sc. Turn. [21 sc]
Row 5: Ch 1, sc to final 2 sc, sc2tog. Turn. [20 sc]
Remaining shoulder rows: Ch 1, sc in every sc. Continue until shoulder measures 10 cm above the neck split, approximately 24 shoulder rows total. [20 sc]
Second Shoulder
Attach yarn at the opposite outer edge and mirror the first shoulder across the outer 24 sc. Keep all decreases at the neck edge. Both shoulders finish with 20 sc. The center stitches remain unworked for the scoop neckline.
Bodice Back Instructions
Work a matching 101-stitch panel in fan lace to 40 cm total height, ending after Row D.
Convert: Work the conversion row. [101 sc]
Mark the outer 20 sc on each side for shoulder seams. The remaining 61 sc form the back neck.
Skirt Panel Instructions
Make two identical panels, working from waist downward.
Target level heights (including dense transition rows and final edging allowance):
- Upper level: 25.2 cm
- Middle level: 30.6 cm
- Lower level: 34.2 cm
Reserve 2 cm of the final level for the basic hem (or 5 cm for floral hems). Total finished skirt length is 90 cm.
Upper Level
Foundation: Chain 102; sc in second chain and across.
Work shared lace over 10 repeats to upper-level height, ending on a conversion-ready row. Convert if required. [101 sc / 10 repeats]
Increase Row 1
Ch 1, sc in first sc; sc in next 4 sc, 2 sc in next sc; repeat from * 20 times. Turn. [121 sc]
Middle Level
Restart the lace setup with 12 repeats. Work to middle-level height, ending on a conversion-ready row. Convert if required. [121 sc / 12 repeats]
Increase Row 2
Ch 1, sc in first sc; sc in next 5 sc, 2 sc in next sc; repeat from * 20 times. Turn. [141 sc]
Lower Level
Restart the lace setup with 14 repeats. Work to lower-level height less the hem allowance. Finish on a conversion-ready row and convert if required. [141 sc / 14 repeats]
Block both panels to equal level heights before joining. If the skirt reaches desired length early, shorten the lower level only. Do not remove the hip-width increase.
Sleeve Instructions (Optional)
Make two sleeves, working from upper arm toward cuff.
Foundation: Chain 82, work 81 sc, then begin shared lace with n=8.
Work to 12 cm including 2 cm cuff allowance (5 cm with floral edging). The foundation edge measures 40 cm and fits the two 20 cm armhole edges.
At halfway to sleeve length, end on a conversion-ready row and convert to 81 sc.
Increase: Sc in first sc; sc in next 3 sc, 2 sc in next sc; repeat from * 20 times. [101 sc]
Restart lace with n=10 and continue to 12 cm less the cuff allowance. Convert for cuff trim. [101 sc / 10 repeats]
Assembly
Pre-block all pieces to schematic measurements before seaming.
Pass 1: Join front and back shoulders, matching one front stitch to its back counterpart. [2 shoulder seams]
Pass 2: Seam bodice sides from waist upward for 20 cm, leaving the upper 20 cm on each panel open for armholes. [2 side seams; 2 armholes of 40 cm perimeter each]
Pass 3: Fold each sleeve lengthwise and seam its long edges. Join each 40 cm sleeve foundation around one armhole, placing the sleeve seam at the underarm and distributing the edge evenly. [2 sleeves attached]
Pass 4: Seam the two skirt panels along both long edges, matching both widening bands exactly. Keep hem level. [2 skirt seams]
Pass 5: Join skirt upper edge to bodice foundation with right sides together. Match 101 stitches to 101 stitches on each panel, aligning side seams. Do not cinch this seam. [202 stitch pairs joined]
Assembly Checkpoint
Before proceeding to edgings, verify:
- Untied bust and waist approximately 100 cm
- Hip 120 cm
- Hem 140 cm
- Skirt length including planned trim: 90 cm
- Both armholes even
- Side seams hang vertically
- Dress passes over bust without forcing the yarn
Edgings and Details
Switch to your 3 mm hook for all edgings.
Waistband
Round 1: With RS facing, work 100 sc evenly over the front waist seam and 100 sc over the back. Join. Do not turn. [200 sc]
Round 2: Ch 1, sc in every sc. Join. [200 sc]
Round 3: Ch 1, sc in first 2 sc; ch 2, skip 2 sc, sc in next 2 sc; repeat from * 49 times; ch 2, skip last 2 sc; join. [100 sc, 50 eyelets]
Round 4: Ch 1, sc in each sc and 2 sc in each ch-2 space. Join. [200 sc]
Round 5: Ch 1, sc in every sc. Join and fasten off. [200 sc]
Waist Tie
Row 1: Chain 301; slip stitch in second chain from hook and every chain across. Fasten off.
Block to approximately 150 cm. Add or remove chains to achieve this length. [300 sl sts for sample]
Pass 2: Weave through all 50 waist eyelets, bringing both ends out at center front. Tie a bow without distorting the mesh.
Optional elastic: If using waist elastic, measure a comfortable loop on the wearer, overlap ends by 2 cm, and sew securely. Tack inside the waistband at side seams and center back. Keep the crochet waistband stretchy enough to pass over the bust.
Neckline Edging
Round 1: Sc evenly around the neck edge at 2 sc per cm, putting 3 sc in each square corner or sc2tog at the bottom of a V. Adjust by at most 2 stitches to reach a multiple of 6. Record this number as E. Join. [E sc, E divisible by 6]
Round 2: Skip 2 sc, 5 dc in next sc, skip 2 sc, sc in next sc; repeat from * around. Join and fasten off. [E/6 shells]
Hem Edging
Round 1: Work 140 sc across each skirt panel, omitting the seam-edge surplus stitch from each panel. Join. [280 sc]
Round 2: Sc in first sc; ch 3, skip 4 sc, 7 dc in next sc, ch 3, skip 4 sc, sc in next sc; repeat from * 27 times; ch 3, skip 4 sc, 7 dc in next sc, ch 3, skip last 4 sc; join to first sc. [28 fans, 28 sc anchors, 56 ch-3 arches]
Round 3: Sl st into first ch-3 arch; 3 sc in side arch, sc in each of 7 dc with a picot after the 4th sc, 3 sc in next side arch, sl st in anchor; repeat from * around. Join and fasten off. [28 picots, 364 sc]
Cuff Edging (Each Sleeve)
Round 1: Sc evenly around the converted sleeve edge, omitting the surplus seam-edge stitch. Join. [100 sc per cuff]
Round 2: Sc in next 4 sc, picot; repeat from * around. Join and fasten off. [100 sc, 25 picots per cuff]
Edging Checkpoint
- Waist tie slides through all 50 eyelets
- Neck and armhole edges lie flat
- Hem repeats are evenly spaced
- Both cuffs match in stitch count
Finishing Your Dress
Pass 1: Inspect every seam, tie end, and attachment point. Weave all yarn tails through dense stitches in three directions. Trim only after secure anchoring. [0 loose ends]
Pass 2: Soak according to yarn label instructions. Press out water in towels without wringing. Lay flat to schematic dimensions. Pin lace points without forcing the openings. [1 complete dress blocked]
Pass 3: Dry completely. Remove pins. Rest flat overnight. Then hang briefly to check length. Adjust tie and confirm your opaque slip reaches the hem for worn styling. [1 finished dress]
Final Checkpoint
- Bust approximately 100 cm
- Skirt 90 cm
- Total shoulder-to-hem approximately 130 cm
- Small variations from lace blocking are normal
Care Instructions
Follow your yarn label for specific guidance.
- Hand wash cool with mild detergent if yarn permits
- Support the wet garment fully
- Reshape and dry flat
- Do not hang for storage (long crochet dresses can grow under their own weight)
- Keep away from direct heat and snagging jewelry
Safety Notes
This is an adult garment. Secure all decorative elements firmly. Keep the waist cord tied and away from machinery. Check that long hems do not trail or cause trips. Stop wearing if any strap, seam, or neckline becomes overstretched.
Size Adjustment Guide
To change the finished circumference by 10 cm, add or remove ten foundation stitches per panel. Keep the same two extra repeats at each skirt widening. Recalculate neckline and shoulder counts symmetrically. Maintain at least 4 cm positive bust ease.
For hips above 112 cm, increase the middle and lower panel widths before starting.
This is an adjustment method rather than a graded size range. Take careful measurements and work a full gauge swatch before modifying.
You’ve Got This
The Sunflower Fan Lace Maxi Dress is a project that rewards patience. Each section builds on skills from the one before, and the repeated lace pattern becomes almost meditative once you hit your rhythm. The finished dress is absolutely stunning, the kind of handmade garment that makes people stop and ask, "You MADE that?"
Take your time with the swatch. Trust the checkpoints. Block generously. And most importantly, enjoy the process of creating something truly beautiful with your own hands.
Thank you so much for choosing this pattern. If you make this dress, I would love to see it! Share your finished photos on Instagram or Facebook and tag your creation so fellow crocheters can admire your work.
Save this pattern to your Pinterest boards so you can find it when you’re ready to start, and leave a comment below if you decide to make it. I’d love to hear how your Sunflower Fan Lace Maxi Dress turns out!
Want a Quick & Easy Printable Version?
Get a clean, beautifully formatted PDF of this pattern — easy to follow step by step, ready to print or save on any device. No scrolling, no distractions, just the pattern.
Get the Printable PDF →