
Last summer, I was getting ready for a friend’s garden party when I realized my hair was having one of those days. You know the kind. Too humid for anything to cooperate, but not quite bad enough to justify hiding inside. I started digging through my accessories drawer, wishing I had something lightweight and pretty that could pull double duty as a style statement and a hair solution.
Get the Ad-Free PDF Pattern
You can find the free pattern below, or you can purchase the ad-free printable PDF from my shop.
Get the Printable PDF →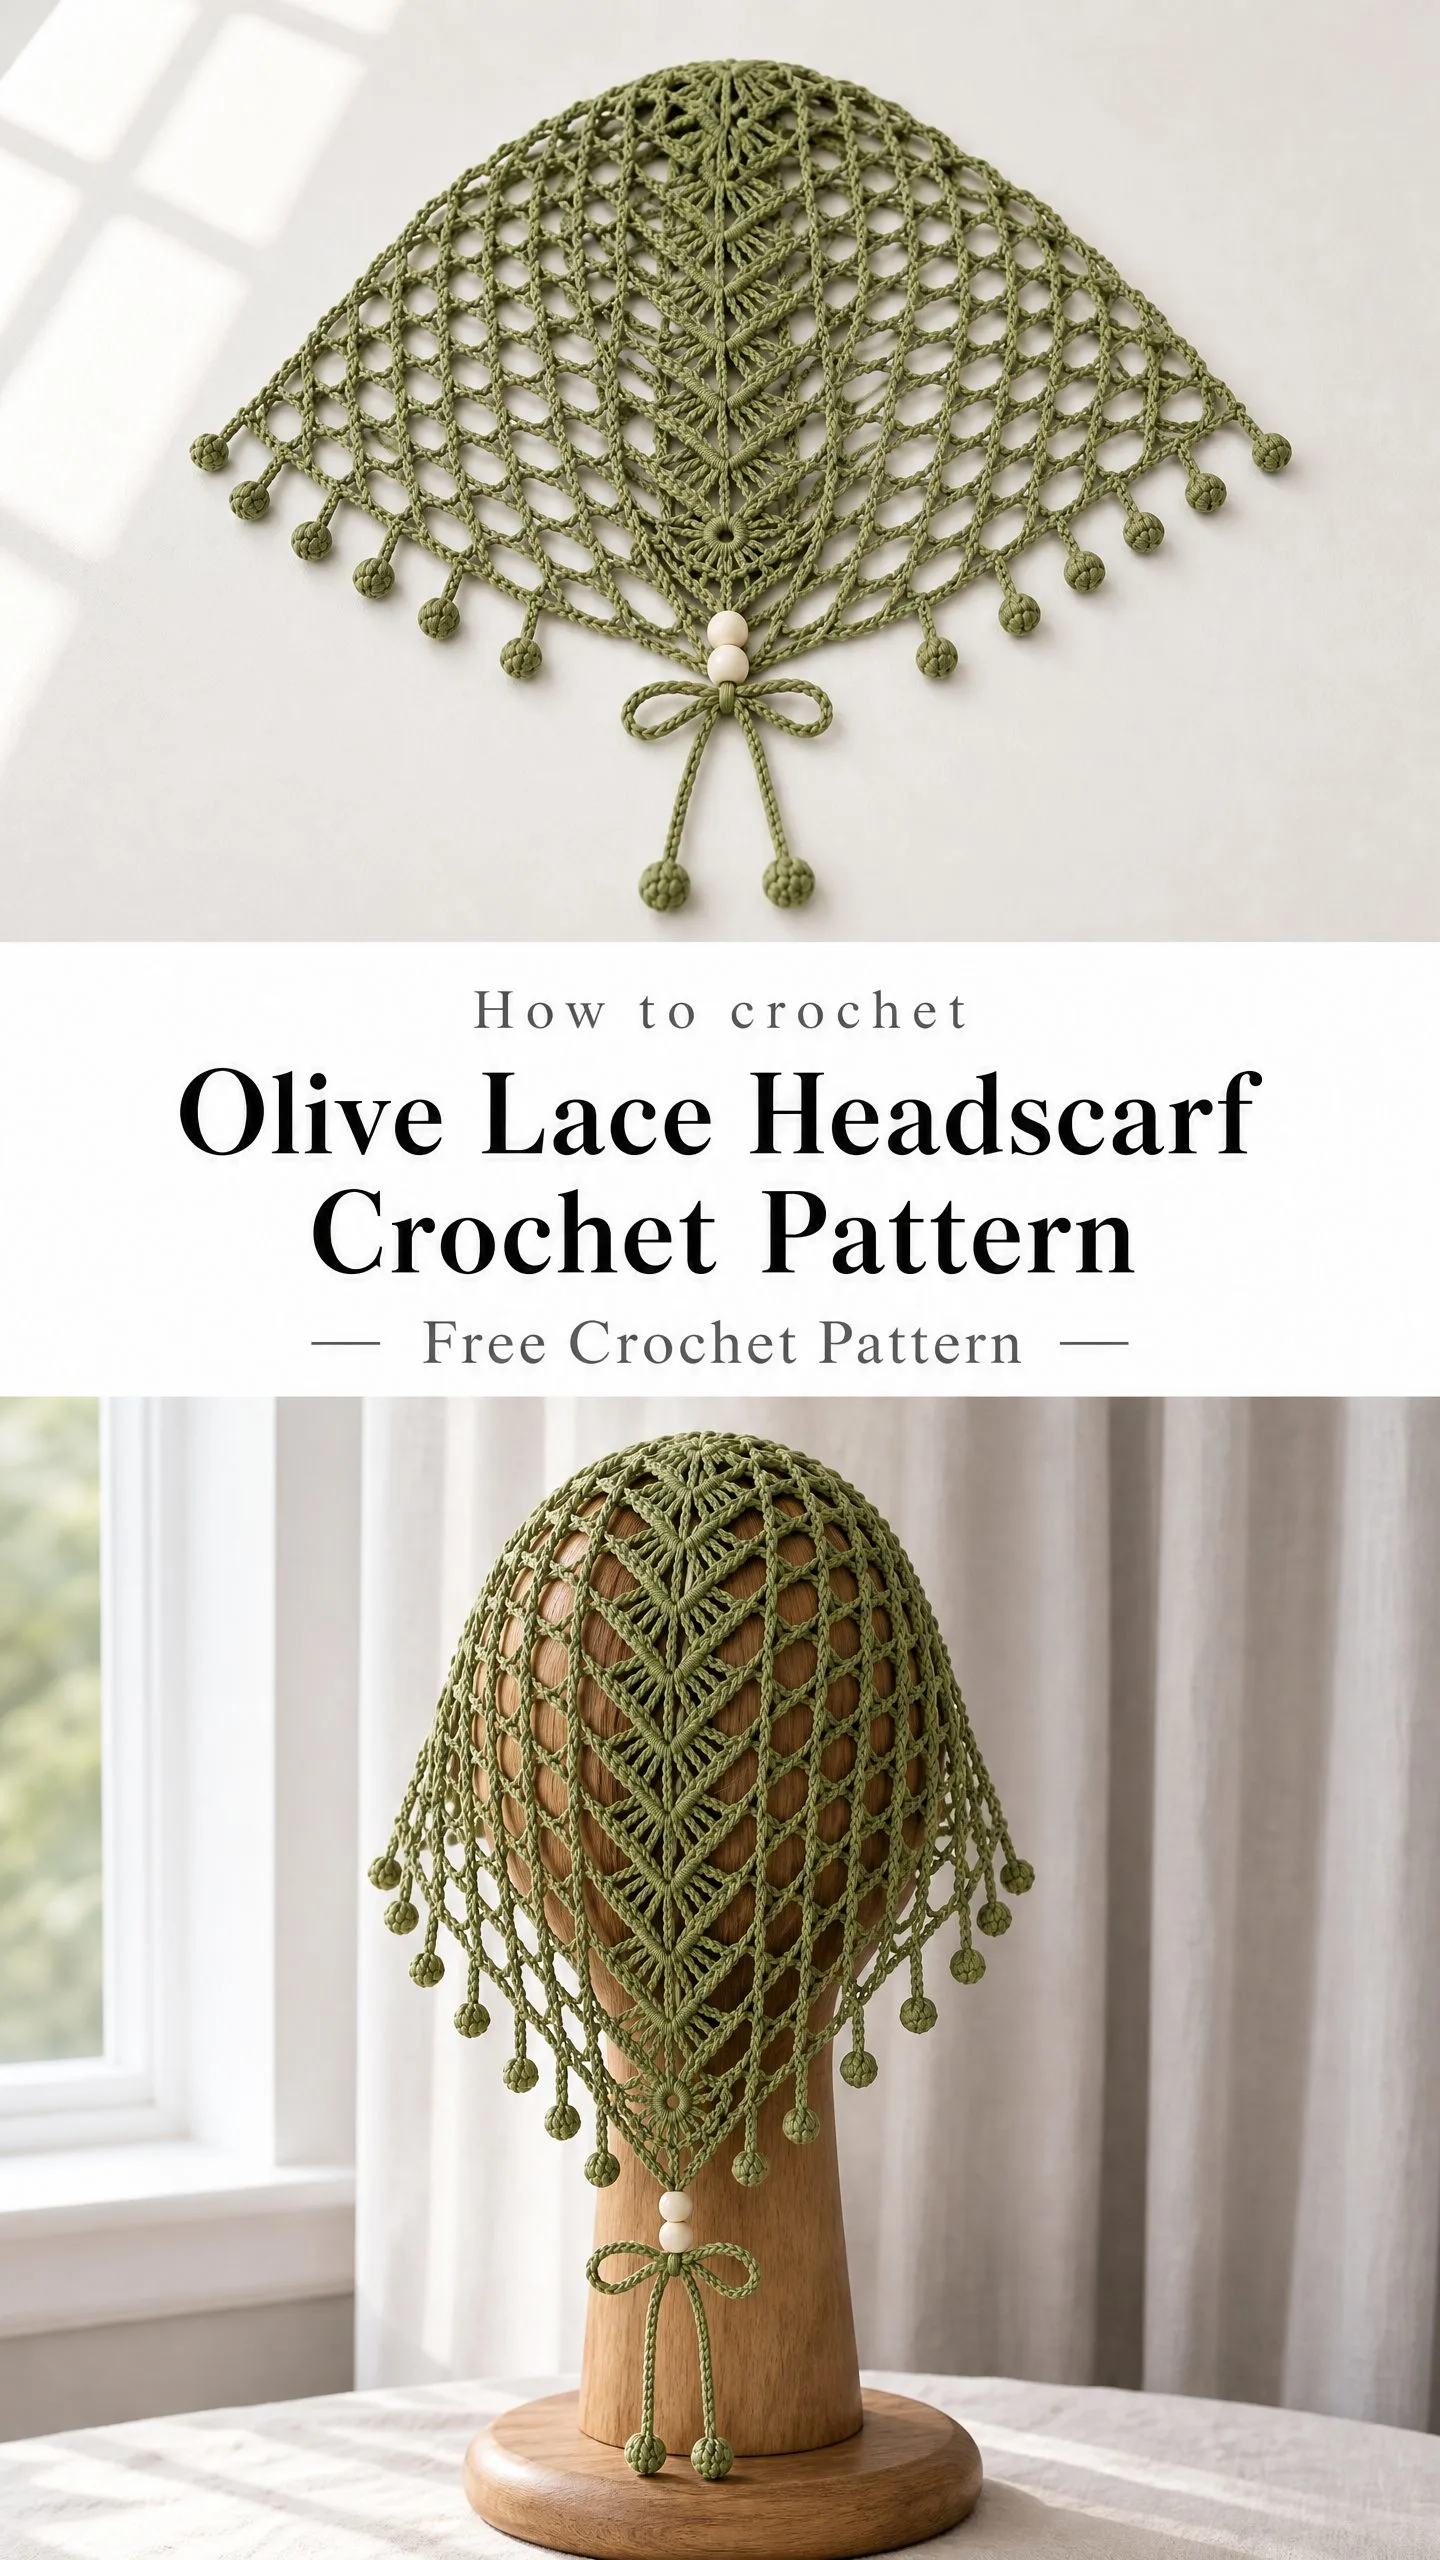
That’s when this design started taking shape in my head. A delicate lace triangle that sits over the crown, ties at the nape, and lets the breeze through while looking absolutely intentional. Something that says "I planned this" even when the reality is closer to "I needed backup."
This Olive Lace Headscarf Crochet Pattern is the result of that moment. It’s airy, feminine, and surprisingly simple to construct. If you can work chain arches and single crochet, you can absolutely make this.
About This Pattern
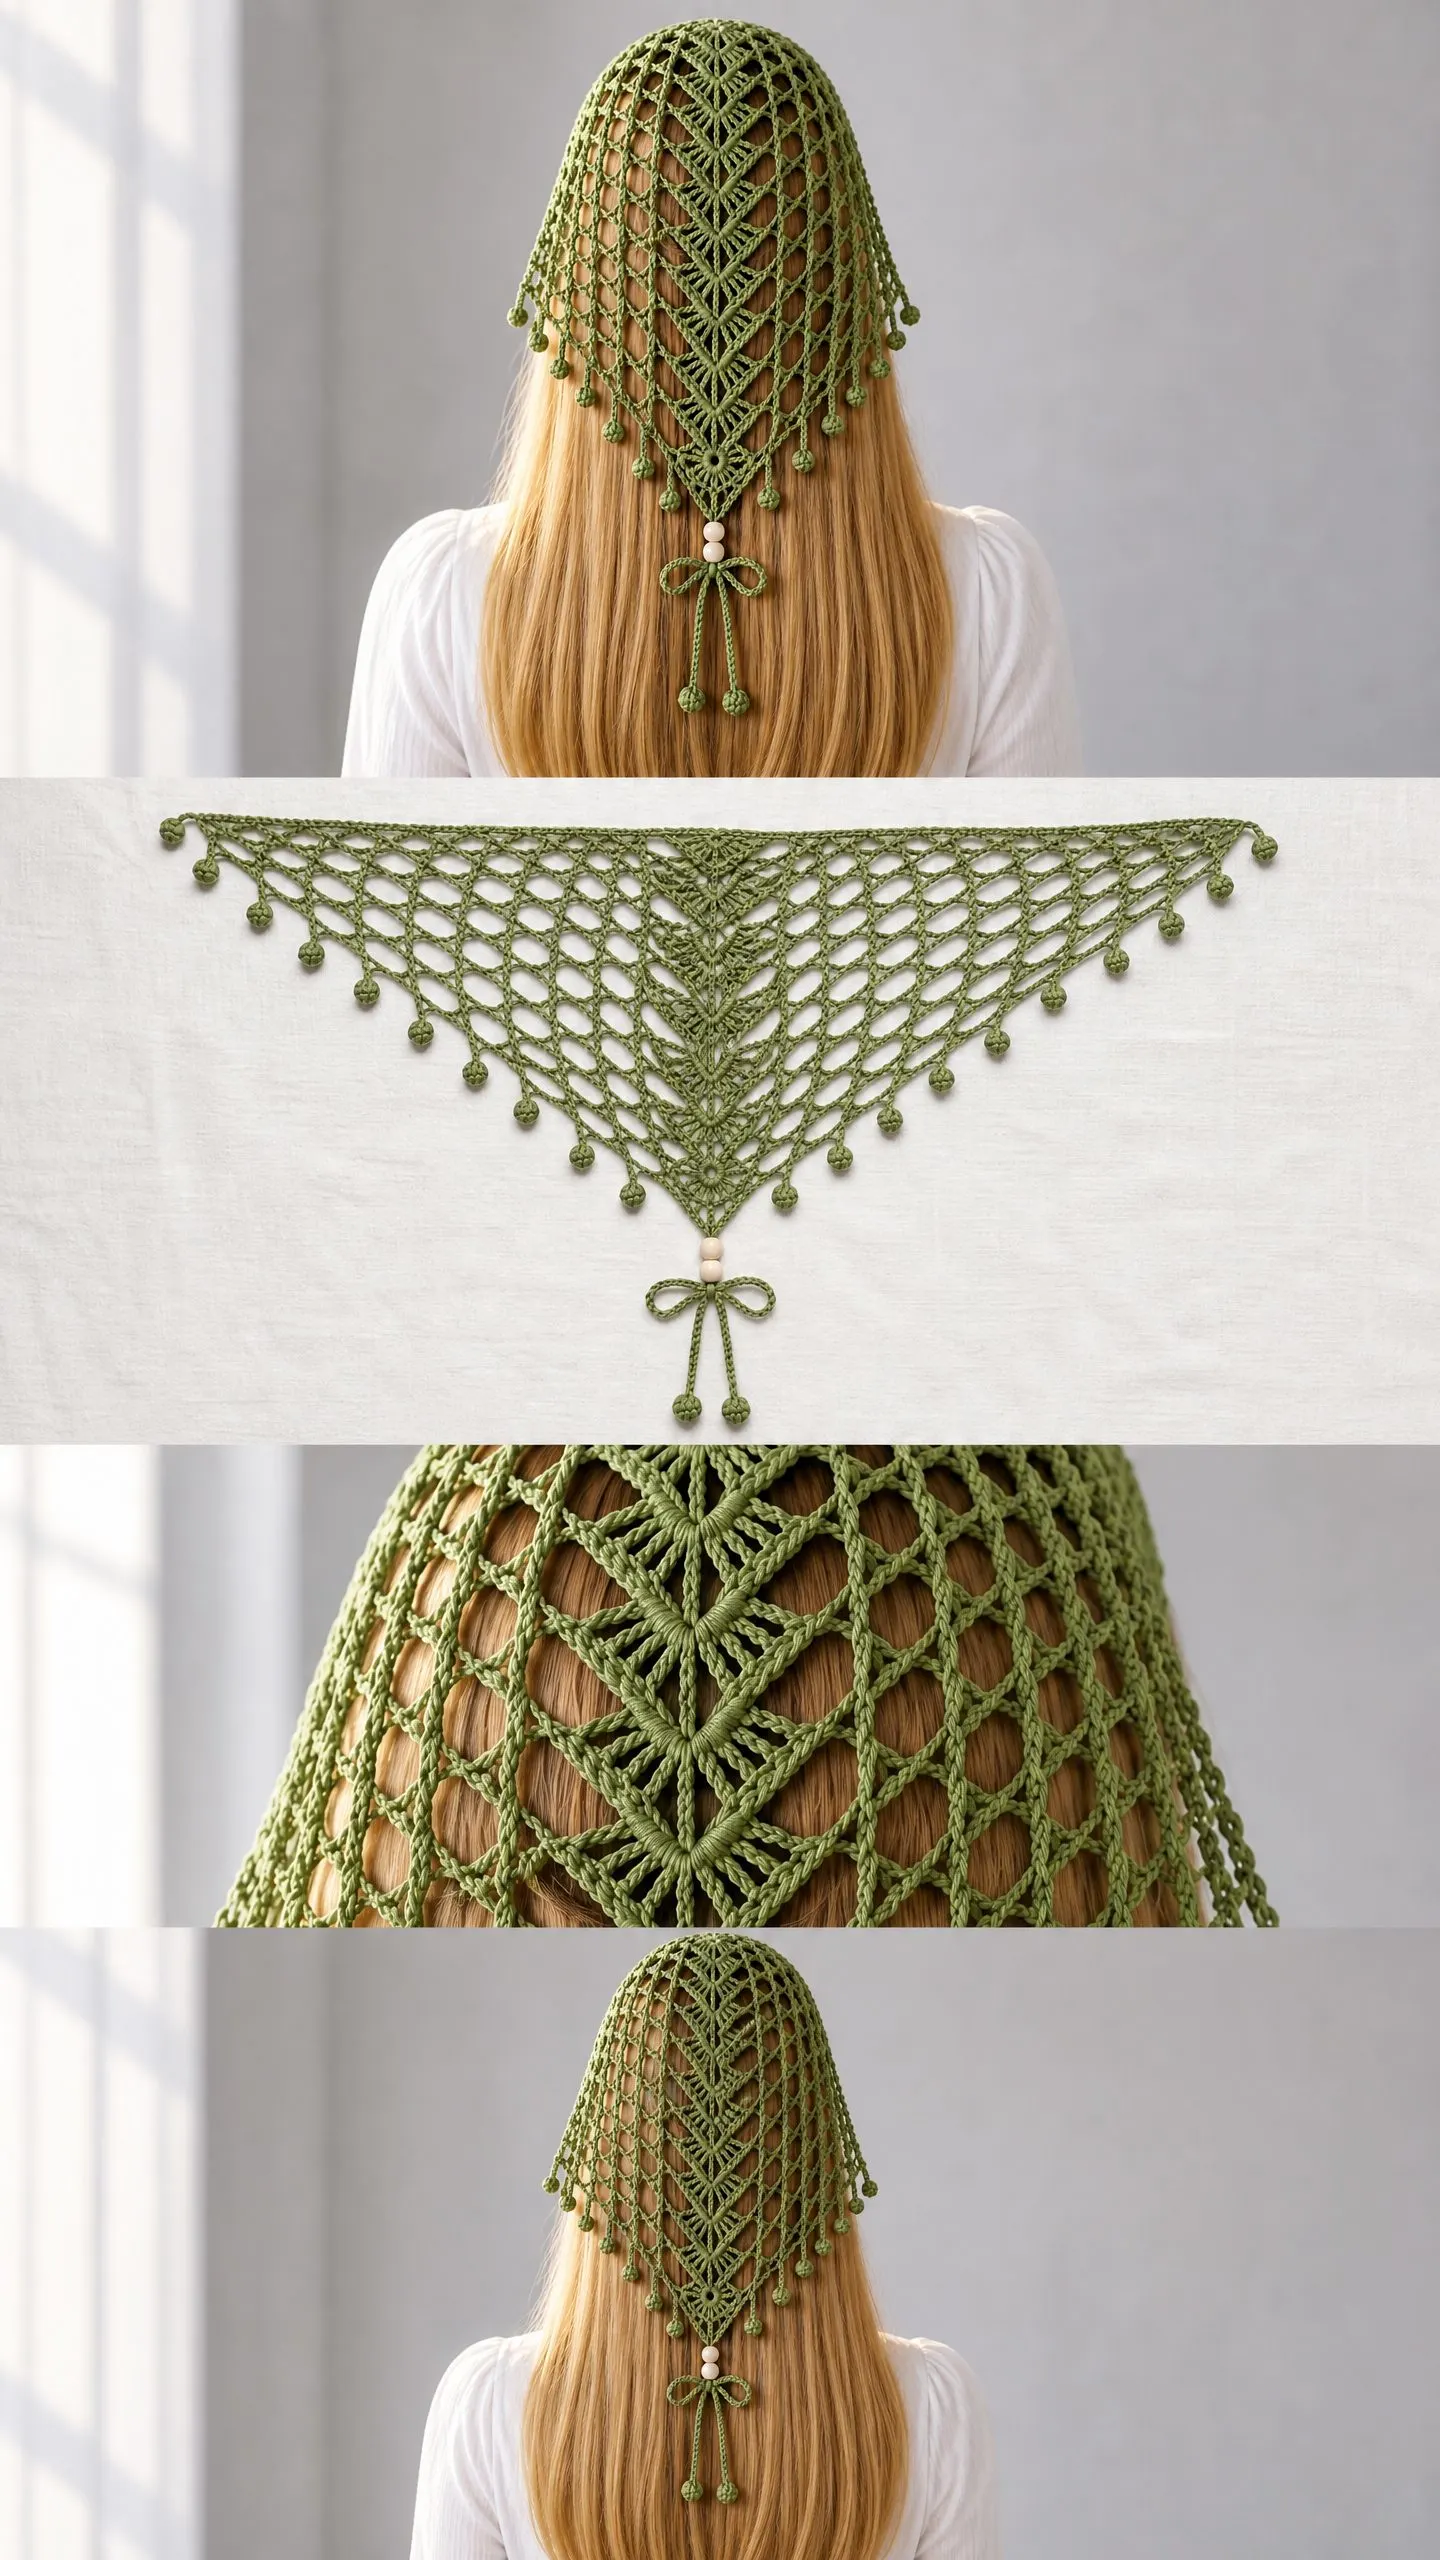
This headscarf starts at the bottom point and grows outward row by row, adding one chain arch with each pass. The mesh is open and breathable, perfect for warm weather or layering over styled hair. Once the triangle is complete, you’ll edge it with single crochet, add ties at the upper corners, and sew a line of decorative fan motifs down the center spine.
The finished piece measures approximately 48 cm (19 inches) across the top edge and 30 cm (12 inches) deep after blocking. The two ties are each about 25 cm (10 inches) long, designed to tie comfortably at the nape of the neck. This size fits an adult head circumference of roughly 54 to 58 cm, though you can easily adjust the triangle width or tie length if needed.
Important note: This is a development draft pattern. The cover image is an AI-generated design visualization, not a worked sample. The central fan spine is sewn onto the mesh rather than integrated into it. Sample testing and technical editing are recommended before commercial use.
Materials You’ll Need
Yarn: Fingering-weight cotton, approximately 350 to 400 meters per 100 grams. Allow 75 grams of olive green for the main body, plus 15 grams of accent yarn if desired. Yarn usage is estimated and should be confirmed with a sample.
Hook: 2.5 mm crochet hook, or the size needed to achieve gauge.
Notions:
Gauge
Target mesh gauge, lightly blocked: Five chain-5 arches across equals 10 cm. Eight mesh rows equals 10 cm.
Work at least 12 rows of the triangle as a swatch. Wet block it and measure through the center. If your triangle is too dense or too open, change your hook size accordingly. Gauge matters here because it affects both the final dimensions and the drape of the lace.
Abbreviations and Special Stitches
An arch is one chain-5 loop. Brackets [ ] enclose a repeat. The turning chain 1 never counts as a stitch.
Picot: Chain 3, slip stitch in the first of those 3 chains.
Bobble: [Yarn over, insert hook in indicated stitch, draw up a loop, yarn over and pull through 2 loops] five times in that same stitch. Yarn over and pull through all 6 loops on the hook. Chain 1 to close. This creates a textured bump that stands out from the fabric.
Section 01: Increasing Mesh Triangle
This is where your headscarf takes shape. You’ll start with a tiny ring at what will become the bottom point, then grow the triangle one arch at a time.
With olive green yarn, chain 4 and slip stitch to the first chain to form a ring.
Row 1: Chain 1, single crochet in the ring, chain 5, single crochet in the ring. You now have 1 arch and 2 single crochets. Place a stitch marker in the ring to mark it as the lower point of your triangle.
Row 2: Chain 1, turn. Single crochet in the first single crochet, chain 5, single crochet in the chain-5 arch, chain 5, single crochet in the last single crochet. You now have 2 arches and 3 single crochets. Work into the open arch itself, not into its individual chains.
Row 3: Chain 1, turn. Single crochet in the first single crochet, [chain 5, single crochet in the next arch] twice, chain 5, single crochet in the last single crochet. You now have 3 arches and 4 single crochets.
Rows 4 through 24: Chain 1, turn. Single crochet in the first single crochet, [chain 5, single crochet in the next arch] across all arches, chain 5, single crochet in the last single crochet.
Each row gains one arch and one single crochet. Row number n has n arches and n+1 single crochets.
Checkpoints to keep you on track:
The newest row is always the widest and forms the top edge. The starting ring remains the bottom tip.
After completing Row 24, lightly block your triangle and measure it. Your target is a top edge of 48 cm and a depth of 30 cm. If you need more width, continue adding rows using the same method. Every additional row adds approximately 2 cm of width and 1.25 cm of depth at target gauge. Write down your final row count because you’ll need it for the edging.
Section 02: Edge and Ties
Now you’ll create a clean border around the entire triangle and add the ties that secure the scarf at the back of your head.
Top edge foundation: Chain 1, turn. Work 1 single crochet in each existing single crochet AND 5 single crochets into every chain-5 arch. At 24 arches, the total is 25 + 120 = 145 single crochets. Do not pull this row tight. Keep it relaxed so the edge lies flat.
Continue around the first sloping side: Work 2 single crochets around each row-end segment as you travel down the side of the triangle.
At the starting ring (the point): Work 3 single crochets into the ring.
Continue up the second sloping side: Work 2 single crochets around each row-end segment.
Join with a slip stitch to the first top-edge single crochet. If needed, adjust stitch counts slightly to keep the edge flat, and record your final count.
Tie 1: At the first upper corner, chain 71. Working back toward the scarf, single crochet in the second chain from the hook and in each remaining chain. This gives you 70 single crochets. Slip stitch securely into the corner. Fasten off.
Tie 2: Repeat at the opposite upper corner.
Measure your ties rather than stretching them. They should be approximately 25 cm (10 inches) each. If you need longer or shorter ties, add or remove starting chains before working back.
The scarf ties behind the head beneath the hair, with the triangular point centered down the back. Do not place decorative tassels along the forehead edge. This accessory is sized and intended for adults.
Section 03: Border and Center Fans
This is where your headscarf gets its personality. You’ll add decorative bobble drops along the sloping edges and create a column of fan motifs down the center.
Along both sloping sides: Single crochet across the foundation edge. At every eighth stitch, make a short drop as follows: chain 5, work a bobble in the second chain from the hook, slip stitch along the remaining 3 chains back to the edge. Continue to the next marker and repeat.
At the lower point (optional): Sew two cream beads vertically onto a short length of doubled thread. Knot securely. Add a small crocheted bow made from yarn color A. To make the bow, chain 41, slip stitch back along 40 chains. Tie the cord at the center to form the bow shape and sew it in position below the beads. Finish each bow end with a bobble sewn securely to the tip.
Fan Motif (make 8 in olive green):
Chain 4, slip stitch to the first chain to form a ring.
Chain 3 (this counts as the first double crochet for this motif only), then work 6 double crochets in the ring. You now have 7 double crochets total. Do not close the fan into a circle. Fasten off, leaving a 20 cm tail for sewing. Spread the motif gently into a semicircle shape.
Arranging and attaching the fans:
Position your 8 fans in a centered column running from about 3 cm below the top edge to about 3 cm above the bottom tip. Point the straight edges of each fan downward. Overlap neighboring fans slightly so they form a continuous spine.
Using the yarn tails and a tapestry needle, sew each fan’s base to the mesh intersections. Then tack down the outer corners of each fan. Take care not to pull the mesh arches together as you sew. The fans should sit on top of the mesh, not distort it.
Optional tip medallion for the olive version:
Chain 4, join with a slip stitch to form a ring. Chain 3 (counts as a double crochet), work 11 double crochets in the ring, join with a slip stitch to the top of the starting chain-3. You now have 12 double crochets. Fasten off.
Sew this medallion over the base of the lowest fan. This motif is purely decorative and does not affect the structure of the triangle.
Section 05: Block, Fit, and Finish
Weaving in ends: Thread each tail onto a tapestry needle and weave it through nearby solid stitches in at least two directions. This keeps ends secure through washing and wear.
Blocking: Soak your finished scarf according to the yarn label instructions. Press excess water out by rolling the scarf in a clean towel. Lay flat on a blocking mat. Pin the top edge to approximately 48 cm and stretch the lower tip to approximately 30 cm depth. Pin both side edges symmetrically.
Use your fingertips to gently open the mesh, keeping each chain arch similar in size. Do not stretch so hard that the stitches lose their shape. Allow the scarf to dry completely before removing the pins.
Fitting: Try on the scarf by placing it over the crown of your head with the longest edge across your front hairline. Bring the two corner ties around to the nape of your neck and tie them beneath your hair. The center point should hang down the middle of your hair. Adjust the tie position for comfort without pulling the mesh tight against your head.
Care instructions: Inspect beads, tassels, and appliques before each use. Remove the accessory for sleep or any activity where the ties could catch on something. Follow your cotton yarn label for washing instructions and re-block after laundering to restore the shape.
Troubleshooting Common Issues
Curling top edge: This usually means your single crochet tension is too tight. Try relaxing your grip or going up a hook size just for that foundation row.
Flared sides: You may have too many edging stitches. Reduce the number of single crochets worked around each row-end segment.
Unequal sides: This typically happens when you’ve missed an arch or added an extra repeat somewhere in the triangle. Count your arches at each checkpoint. If they don’t match, undo to the last correct row and restore the proper arch count before continuing.
Final Thoughts on This Olive Lace Headscarf Crochet Pattern
This project is one of those satisfying makes that looks intricate but builds from very simple foundations. The increasing mesh triangle grows predictably, the edging stabilizes everything, and the sewn-on fans add visual interest without complicated stitch work. It’s a lovely project for confident beginners ready to try something a bit more decorative, or for experienced crocheters looking for a relaxing afternoon project.
The olive green colorway feels fresh and modern, but this design would look stunning in cream, dusty rose, or even a variegated cotton for something more playful. Consider making a few in different colors to match different outfits or give as thoughtful handmade gifts.
Thank you so much for choosing this pattern. I hope it brings you the same satisfaction it brought me, both in the making and in the wearing. If you make one, I would absolutely love to see it. Share your finished scarf on Instagram or Facebook and tag me so I can admire your work.
If you loved this Olive Lace Headscarf Crochet Pattern, go ahead and save it to your Pinterest boards so you can find it whenever the mood strikes. And if you do make one, drop a comment below. I always love hearing how projects turn out and seeing what color combinations you choose.
Want a Quick & Easy Printable Version?
Get a clean, beautifully formatted PDF of this pattern — easy to follow step by step, ready to print or save on any device. No scrolling, no distractions, just the pattern.
Get the Printable PDF →