
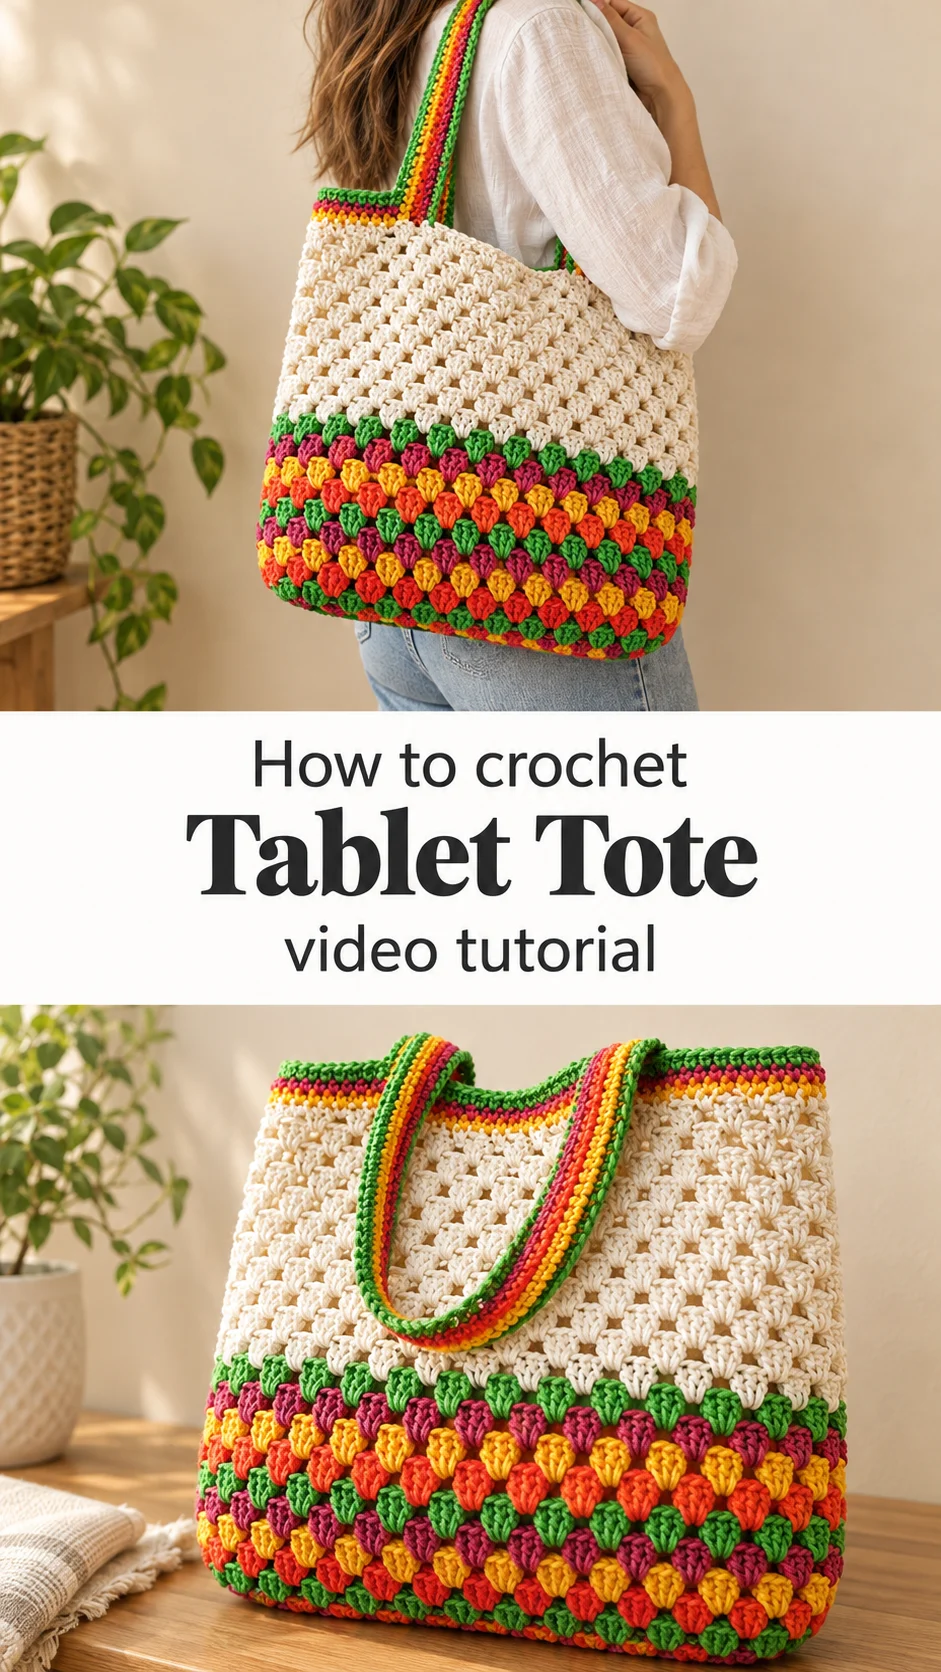
A sturdy, open-weave tote with a two-tone base and a colourful striped handle, made to carry a tablet, a notebook and a water bottle without fuss.
The Crochet Tablet Tote
This tote is a crochet carry-all built as a single upright bag with a wide mouth and a generous body. The upper half is worked in an open, airy stitch in a natural cream cotton-type yarn, while the lower band is a dense, bumpy textured pattern in a bright mix of green, purple, orange and yellow. Long handles are finished with a multi-coloured edging that echoes the base, so the whole piece reads as one cohesive design. What sets it apart from a plain market bag is the contrast between the airy upper and the firm, sculptural base, which keeps the bag standing and gives it weight where a tablet or book will sit. It suits a day at the café, a weekend market run or a trip to the library, and it is equally at home on a shoulder or hooked over an arm.
The bag is a good companion for everyday life. Its opening is wide enough to drop a tablet in without digging, and the open stitch lets air circulate around whatever you carry. The dense lower panel acts as a built-in bumper, protecting the contents from knocks against the hip or the side of a car seat. Because the design is simple in silhouette, it works with almost any wardrobe and can be dressed up or down with a change of shoes.
Tablet Tote Related Posts:
- Crochet Short Sleeve Tee: A Chic Everyday Essential
- Crochet Emoji Ball: A Fun and Playful Handmade Toy
- Crochet Ribbed Beanie: A Timeless Winter Essential
- Crochet Granny Square Pouches: A Charming Everyday Accessory
Materials
You will need a medium-weight cotton or cotton-blend yarn in a cream shade for the body, plus several contrast colours for the textured base and the handle edging. Cotton keeps its shape and holds the crisp outline of the handles, which matters for a bag that must carry weight. A hook sized to the yarn label, usually in the 4 to 5 mm range, will give the firm fabric the base needs while keeping the open upper airy. Choose a yarn that is not too fuzzy, since fuzz hides the textured stitches on the base. A yarn needle for weaving in ends and a pair of stitch markers are the only other tools you will need. If you want the bag to hold a tablet without bending, you may consider a stiff interfacing or a felt insert sewn inside the base, though many makers prefer to leave the bag unlined for a relaxed look.
Choosing the Right Yarn for a Structured Tote
The yarn decides whether the bag stands up or slumps. A firm cotton keeps the base square and the handles from stretching under load. Cotton blends with a little acrylic give a softer hand and a touch more bounce, which is pleasant in the handle but can loosen the open upper if worked too loosely. Avoid very drapey or silky yarns here, because the bag will fold in on itself when empty. For colour, keep the cream upper neutral and let the base carry the palette. Greens, purples and warm yellows sit well together, and a single strong colour in the handle edging ties the whole piece together.
Understanding the Textured Base
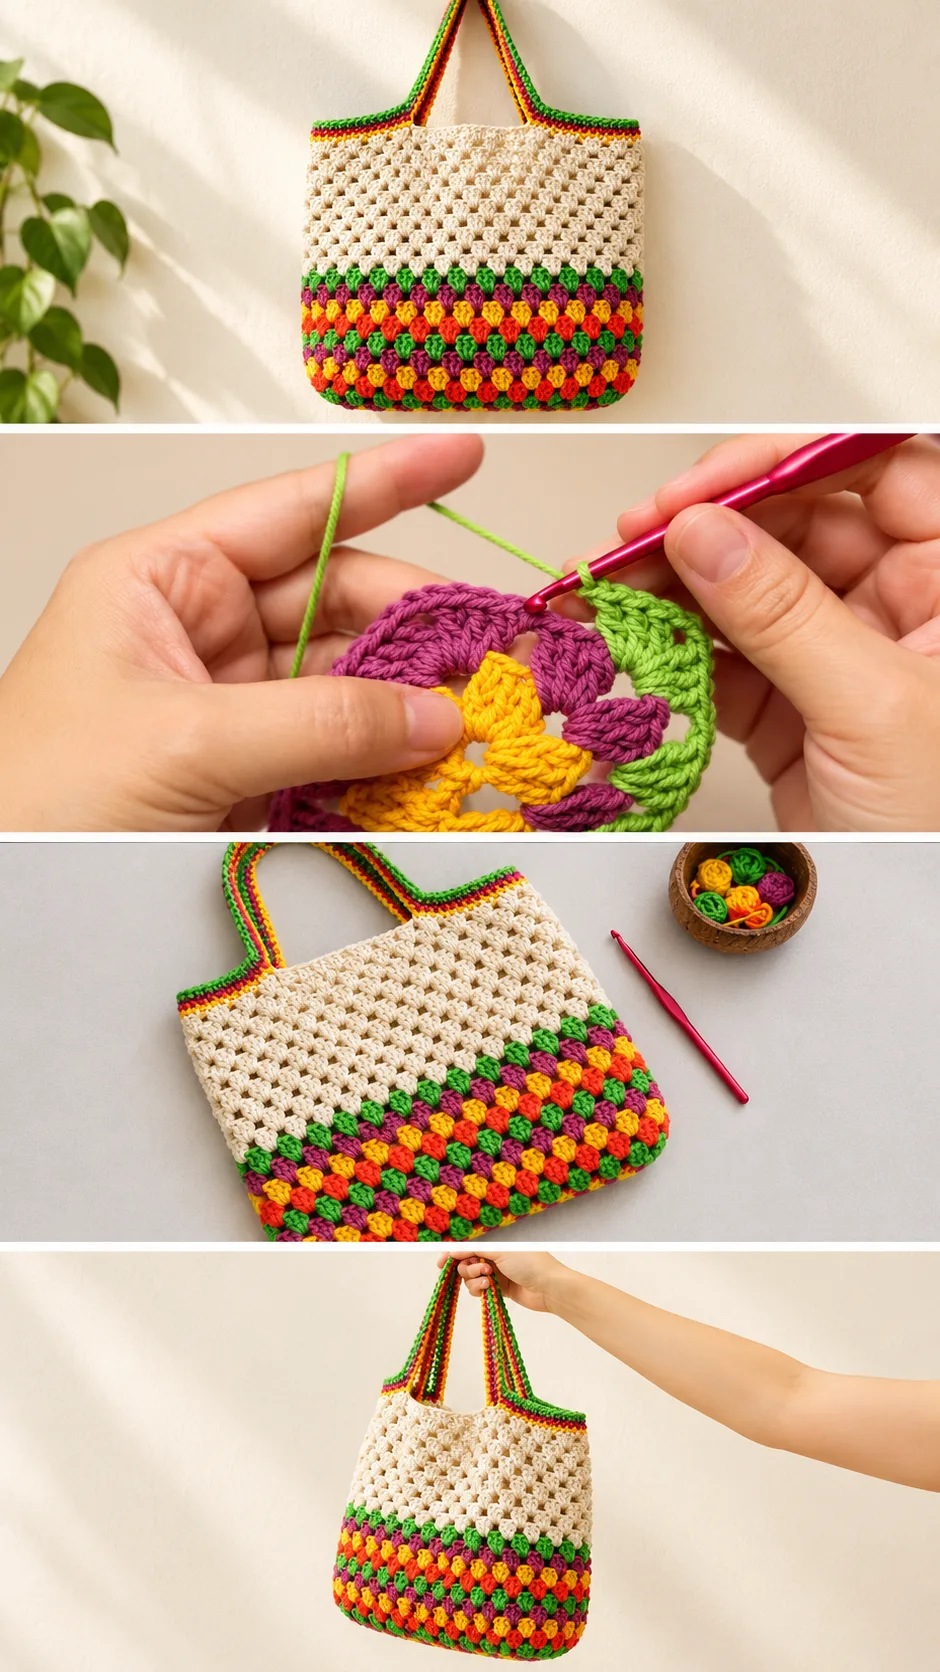
The lower band is the signature feature of this tote. Its raised, bumpy texture comes from clusters of stitches worked in a repeating colour sequence, so the colours seem to tumble across the fabric. This dense area is what gives the bag its body and stops it from sagging. Work it with an even tension so the bumps sit in neat rows; if they look flat or uneven, slow down and check that each cluster is pulled to the same height before moving on. Mismatched tension here is the most visible mistake on the finished bag.
If the Base Looks Stiff
If the textured band feels too rigid, your tension is probably tighter than the upper section. Loosen your grip slightly and work the next round a little more relaxed. The base should be firm, but not so tight that it pulls the bag out of shape.
Handles and Edging
The long handles are worked to sit comfortably on the shoulder, and the multi-coloured edging wraps the top of the bag and runs down both straps. This edging is what makes the piece look finished. Work it evenly so the handles do not curl or twist. A common problem is a wavy neckline caused by uneven stitch counts around the opening; if the top edge ripples, check the tension across each side before continuing. Consistent edging gives the bag a crisp, professional finish.
If the Handles Twist
Twisted straps usually come from working the two sides at different tensions. Lay the handle flat and compare the two halves. If one side is noticeably tighter, rework that section more loosely so both sides lie straight.
Styling the Tablet Tote
In the photos the bag is shown hanging from one hand, which is how it will most often be carried. Its bright base picks up colours from a simple linen dress or a plain white shirt, letting the bag be the focal point of an otherwise quiet outfit. For a casual weekend look, pair it with jeans and a denim jacket. It also works well over a summer sundress, where the cream upper complements soft pastels. For errands, carry it over the shoulder so the handles sit comfortably and your hands stay free.
Finishing Tips for a Polished Bag
Weave in all yarn ends carefully on the inside of the bag, running them through several stitches so they do not work loose after washing. Block the finished piece lightly to even out the open upper and square the base; a gentle steam or a damp towel pressed flat is usually enough for cotton. Check the seam where the handles meet the body and reinforce it with a few extra stitches if it looks thin, since this is where weight will pull hardest.
Caring for Your Tote
Cotton tolerates gentle washing well. Hand wash in lukewarm water with a mild detergent, rinse thoroughly, and press the water out gently without wringing, which can stretch the open stitches. Reshape the bag while damp and lay it flat to dry away from direct heat, so the base keeps its firmness. Store it folded loosely rather than crushed, to protect the textured bumps.
Following the Video Tutorial
Watch the tutorial closely at the point where the textured base begins. This is where hand position matters most, and the video shows how to keep each cluster even. Pause and replay that section as often as you need. Also watch how the handle edging is joined to the body, since that step decides how neatly the finished bag sits. Work in a sensible order: body first, then base, then handles and edging, and only weave in ends once everything is complete.
A Practical Handmade Carry-All
This tote is a dependable companion that looks good doing its job. The open upper, firm textured base and bright handle edging combine into a bag that carries a tablet, a notebook or a lunch with equal ease. Three things decide how well it turns out: a firm yarn that holds the base, even tension across the textured rows, and careful finishing of the handles. Take your time with those, and you will have a bag you reach for every day.
Video tutorial by August Craft & Crochet, linked below.
[Watch the full tutorial on YouTube – August Craft & Crochet]
Follow us on Pinterest and subscribe to the Newsletter so you don’t miss a thing!
Tutorial and photos of this tablet tote by: August Craft & Crochet.
