
A shell stitch blanket is a cheerful, textured throw built from rows of fan-shaped clusters in pink, white and olive green, and it feels like a small treasure to make and to own.
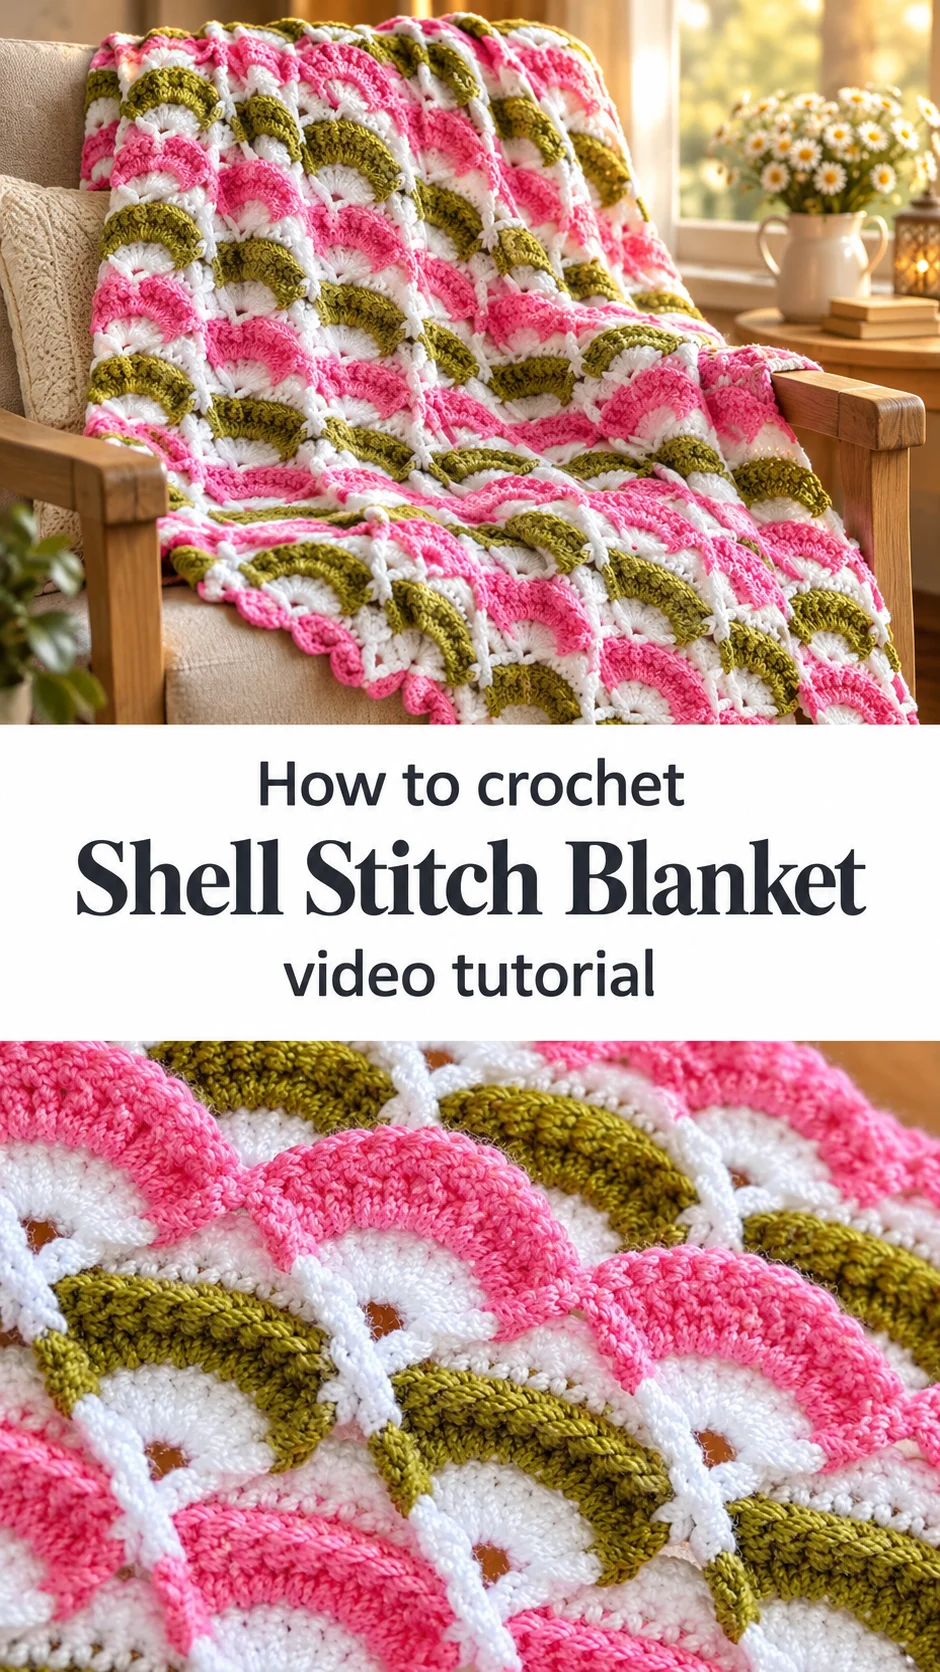
The Crochet Shell Stitch Blanket
The crochet shell stitch blanket is a lively piece of handmade textile that turns a simple fan motif into a bold, rhythmic surface. Each shell rises from the fabric with a rounded, scalloped top, and the rows stack into a pattern that looks almost like scales or a rainbow arch repeated across the whole piece. The colour choice does much of the work here: soft candy pink, crisp white and a muted olive green sit side by side, so each shell reads as a separate little dome while the overall effect stays cohesive. The stitches are dense enough to hold the shape of each fan, which gives the blanket a sculpted, three-dimensional feel that a flat ripple could never achieve. It is a piece meant to be draped over a sofa arm, folded at the foot of a bed or wrapped around a baby in a pram, where the texture catches the light and invites touch.
Why does a shell pattern like this make such a satisfying project? Partly because the motif grows quickly once the rhythm is established, and partly because the finished surface is so tactile. The contrast between the raised pink tops and the white and green bands means you can see your progress clearly from row to row. The piece is also flexible in size and use. It works as a generous lap throw, a pram blanket or a bed cover, and the same stitches can be scaled to suit each one. Gifting is natural too: a blanket with this much colour and character feels personal without needing a complicated finish.
Stitch Blanket Related Posts:
- Crochet Floral Table Runner: A Timeless Lace Accent
- Crochet Bikini Top: A Breezy Summer Essential
- Crochet 3D Roses: A Timeless Floral Treasure
- Crochet Textured Blanket: A Timeless Handmade Treasure
Materials
To make this blanket you will need a soft acrylic or acrylic-blend yarn in three colours: a pink, a white and an olive green. Acrylic blends are a sensible choice here because the shells need enough body to stand up and hold their dome shape, and a blend keeps the colours bright after repeated washing. A cotton-acrylic mix gives a slightly firmer hand if you want the texture to stay crisp. Choose a hook that suits your chosen yarn and aim for a fabric that feels slightly firm rather than loose; if the stitches look gappy, go down a size, because the shells will slump and blur without that density. Keep a stitch marker or two on hand to mark the top of each shell, a yarn needle for weaving in the many colour-change ends, and a pair of sharp scissors. A blocking mat or towel is worth having for shaping the finished throw.
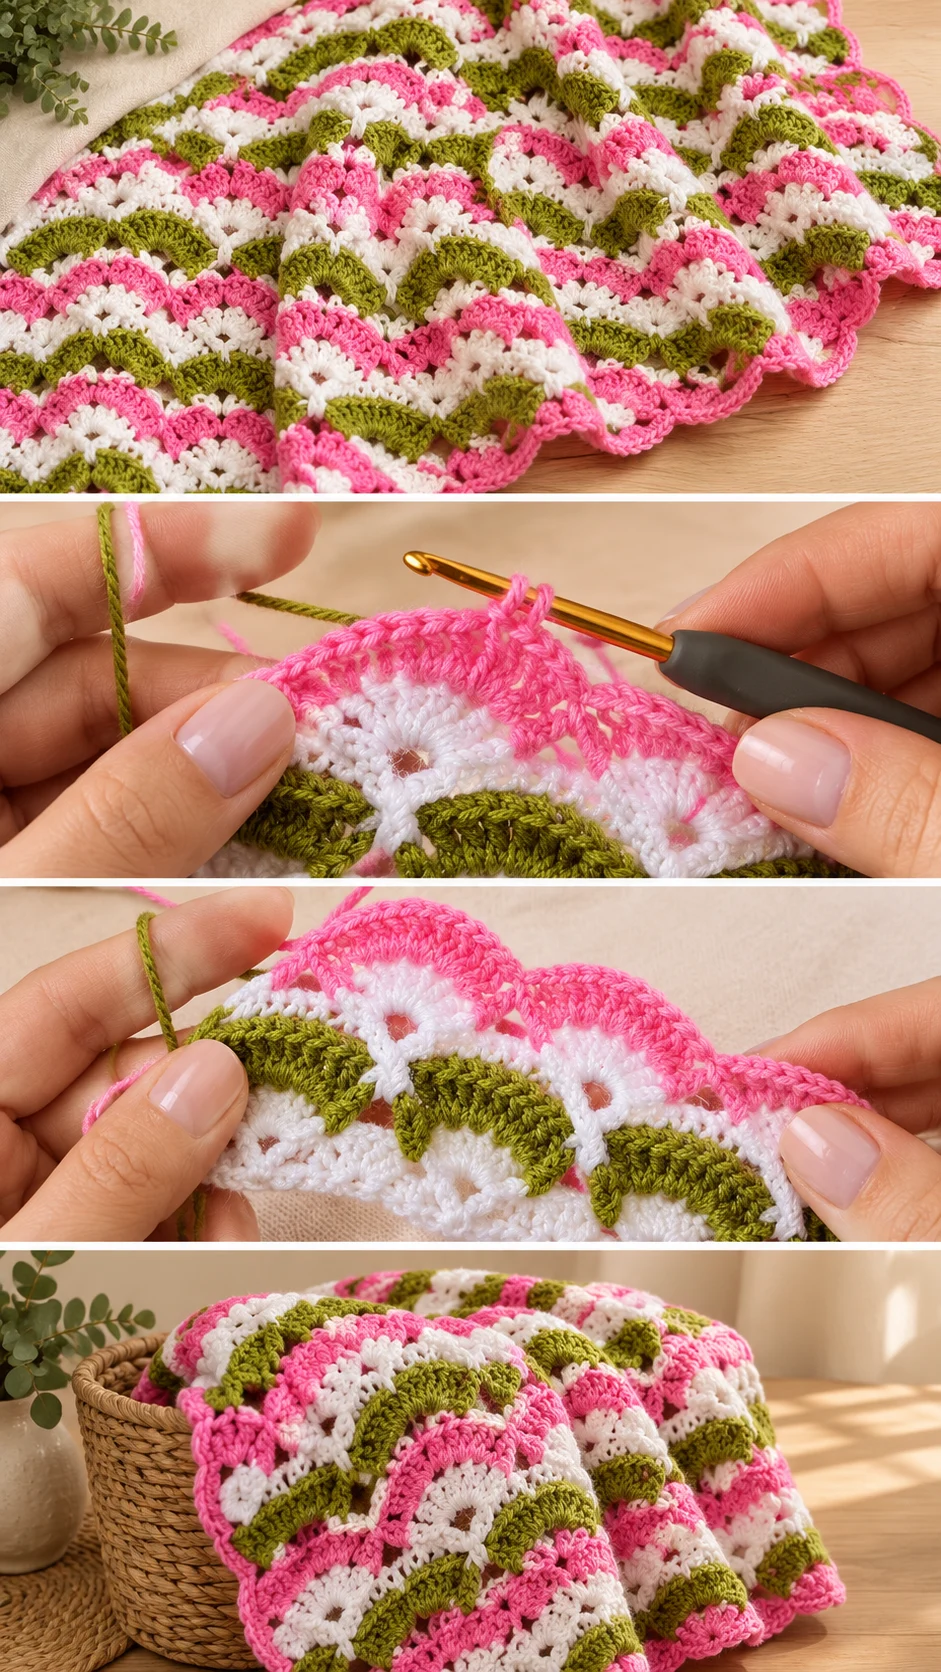
Understanding the Shell Stitch Structure
The blanket is built from rows of shells, each one a fan of stitches worked into the same space and then gathered into a rounded top. The white and green rows sit between the pink tops, creating horizontal bands that frame the shells. Because the shells are stacked and offset, the blanket develops its characteristic arched rhythm. Working in clearly defined colour blocks means the stitches for each shell must be placed accurately, so pay attention to where each new colour enters the row and keep the yarn tails neat as you go.
Keeping the Shells Crisp
The most common problem is shells that flatten out instead of rising. If your tops look flat, tighten your tension slightly on the cluster stitches so the fan has something to push against. If the edges begin to ripple, check that you are working the same number of shells in every row and that the shell tops are sitting directly above one another.
Choosing Yarn and Colours
Acrylic is the most forgiving choice and the one that suits this design best. Its slight springiness helps each shell puff up, and it washes and dries without fuss, which matters for a blanket that will see daily use. Avoid very fine or very slippery yarns, which will make the shells lose their form, and avoid heavy wool unless you are prepared for a much denser, more sculptural fabric. For colours, the pink, white and olive combination in the photos is cheerful and balanced. You could also try a soft dusty rose with oatmeal and sage for a calmer look, or a bright coral, cream and teal for something more playful.
Skill Level and Techniques
This project suits confident beginners who have already worked a few full rows and are comfortable changing colours. The stitches themselves are not difficult, but the repetition is long, and the colour changes demand attention at the start and end of each band. The hardest part is staying patient through the middle of the blanket, when the rows feel repetitive but the shells are not yet at their full height. Working in good light and taking breaks between colour blocks will help you keep your count steady.
Finishing and Blocking Your Blanket
Once the final row is done, weave in every yarn end carefully so that none show on the front. Because the blanket is made of many colour blocks, the back will have a lot of tails, so work them in along the stitches rather than cutting them flush. Blocking is worth the effort here: pin the blanket gently to its final size, mist it with water and let it dry flat. This helps the shells settle into their rounded shape and evens out the edges. If the blanket is for a baby, a neat border in white can frame the whole piece and make the finished edge look intentional.
Fixing Common Edge Issues
If one side of the blanket is wider than the other, the usual cause is uneven tension on the edge stitches. Block the piece to square it, and if the problem persists, unpick the last few rows and rework them with a steadier hand. A slightly loose edge can be tightened with a row of single crochet worked evenly all around.
How to Style and Use the Blanket
In the photos the blanket is shown as a bright, eye-catching textile that draws attention to its colour and texture. Used as a throw over a neutral sofa, it becomes the focal point of a room. Folded across the foot of a white bed, it adds warmth and pattern without overwhelming the space. For a nursery, drape it over a cot rail or fold it into a pram for a soft, cheerful touch. Pair it with plain cushions in cream or grey so the shells remain the star, and let the pink and green echo other colours in the room.
Caring for Your Shell Stitch Blanket
Wash the blanket on a gentle cycle in cool water with a mild detergent, and avoid fabric softeners, which can coat the fibres and flatten the shells. Lay it flat to dry, reshaping the shells gently with your fingers while it is still damp. Store it folded loosely rather than tightly compressed, so the shell tops keep their height over time. These steps protect both the colour and the raised texture that make the blanket special.
A Cheerful Handmade Treasure
The crochet shell stitch blanket is a rewarding project that rewards patience with a textured, colourful throw that looks as good as it feels. Choose a firm acrylic blend, keep your tension consistent and take care with the colour changes, and the shells will rise beautifully row after row. Three things decide how well it turns out: yarn with enough body, steady tension on the shells and careful blocking at the end.
Video tutorial credit: Ayşenin Örgüleri. Watch the full tutorial on YouTube to see the shell construction and colour changes in action.
Watch the tutorial video here: https://www.youtube.com/results?search_query=ayşenin+örgüleri+shell+stitch+blanket
Follow us on Pinterest and subscribe to the Newsletter so you don’t miss a thing!
Tutorial and photos of this shell stitch blanket by: AYŞENİN ÖRGÜLERİ.
