The Crochet Bow Keychain is the answer to that quiet wish for something handmade to carry with you every single day. In this article, you will discover the materials, stitches, and finishing steps that bring this charming little accessory to life.
The Bow Keychain
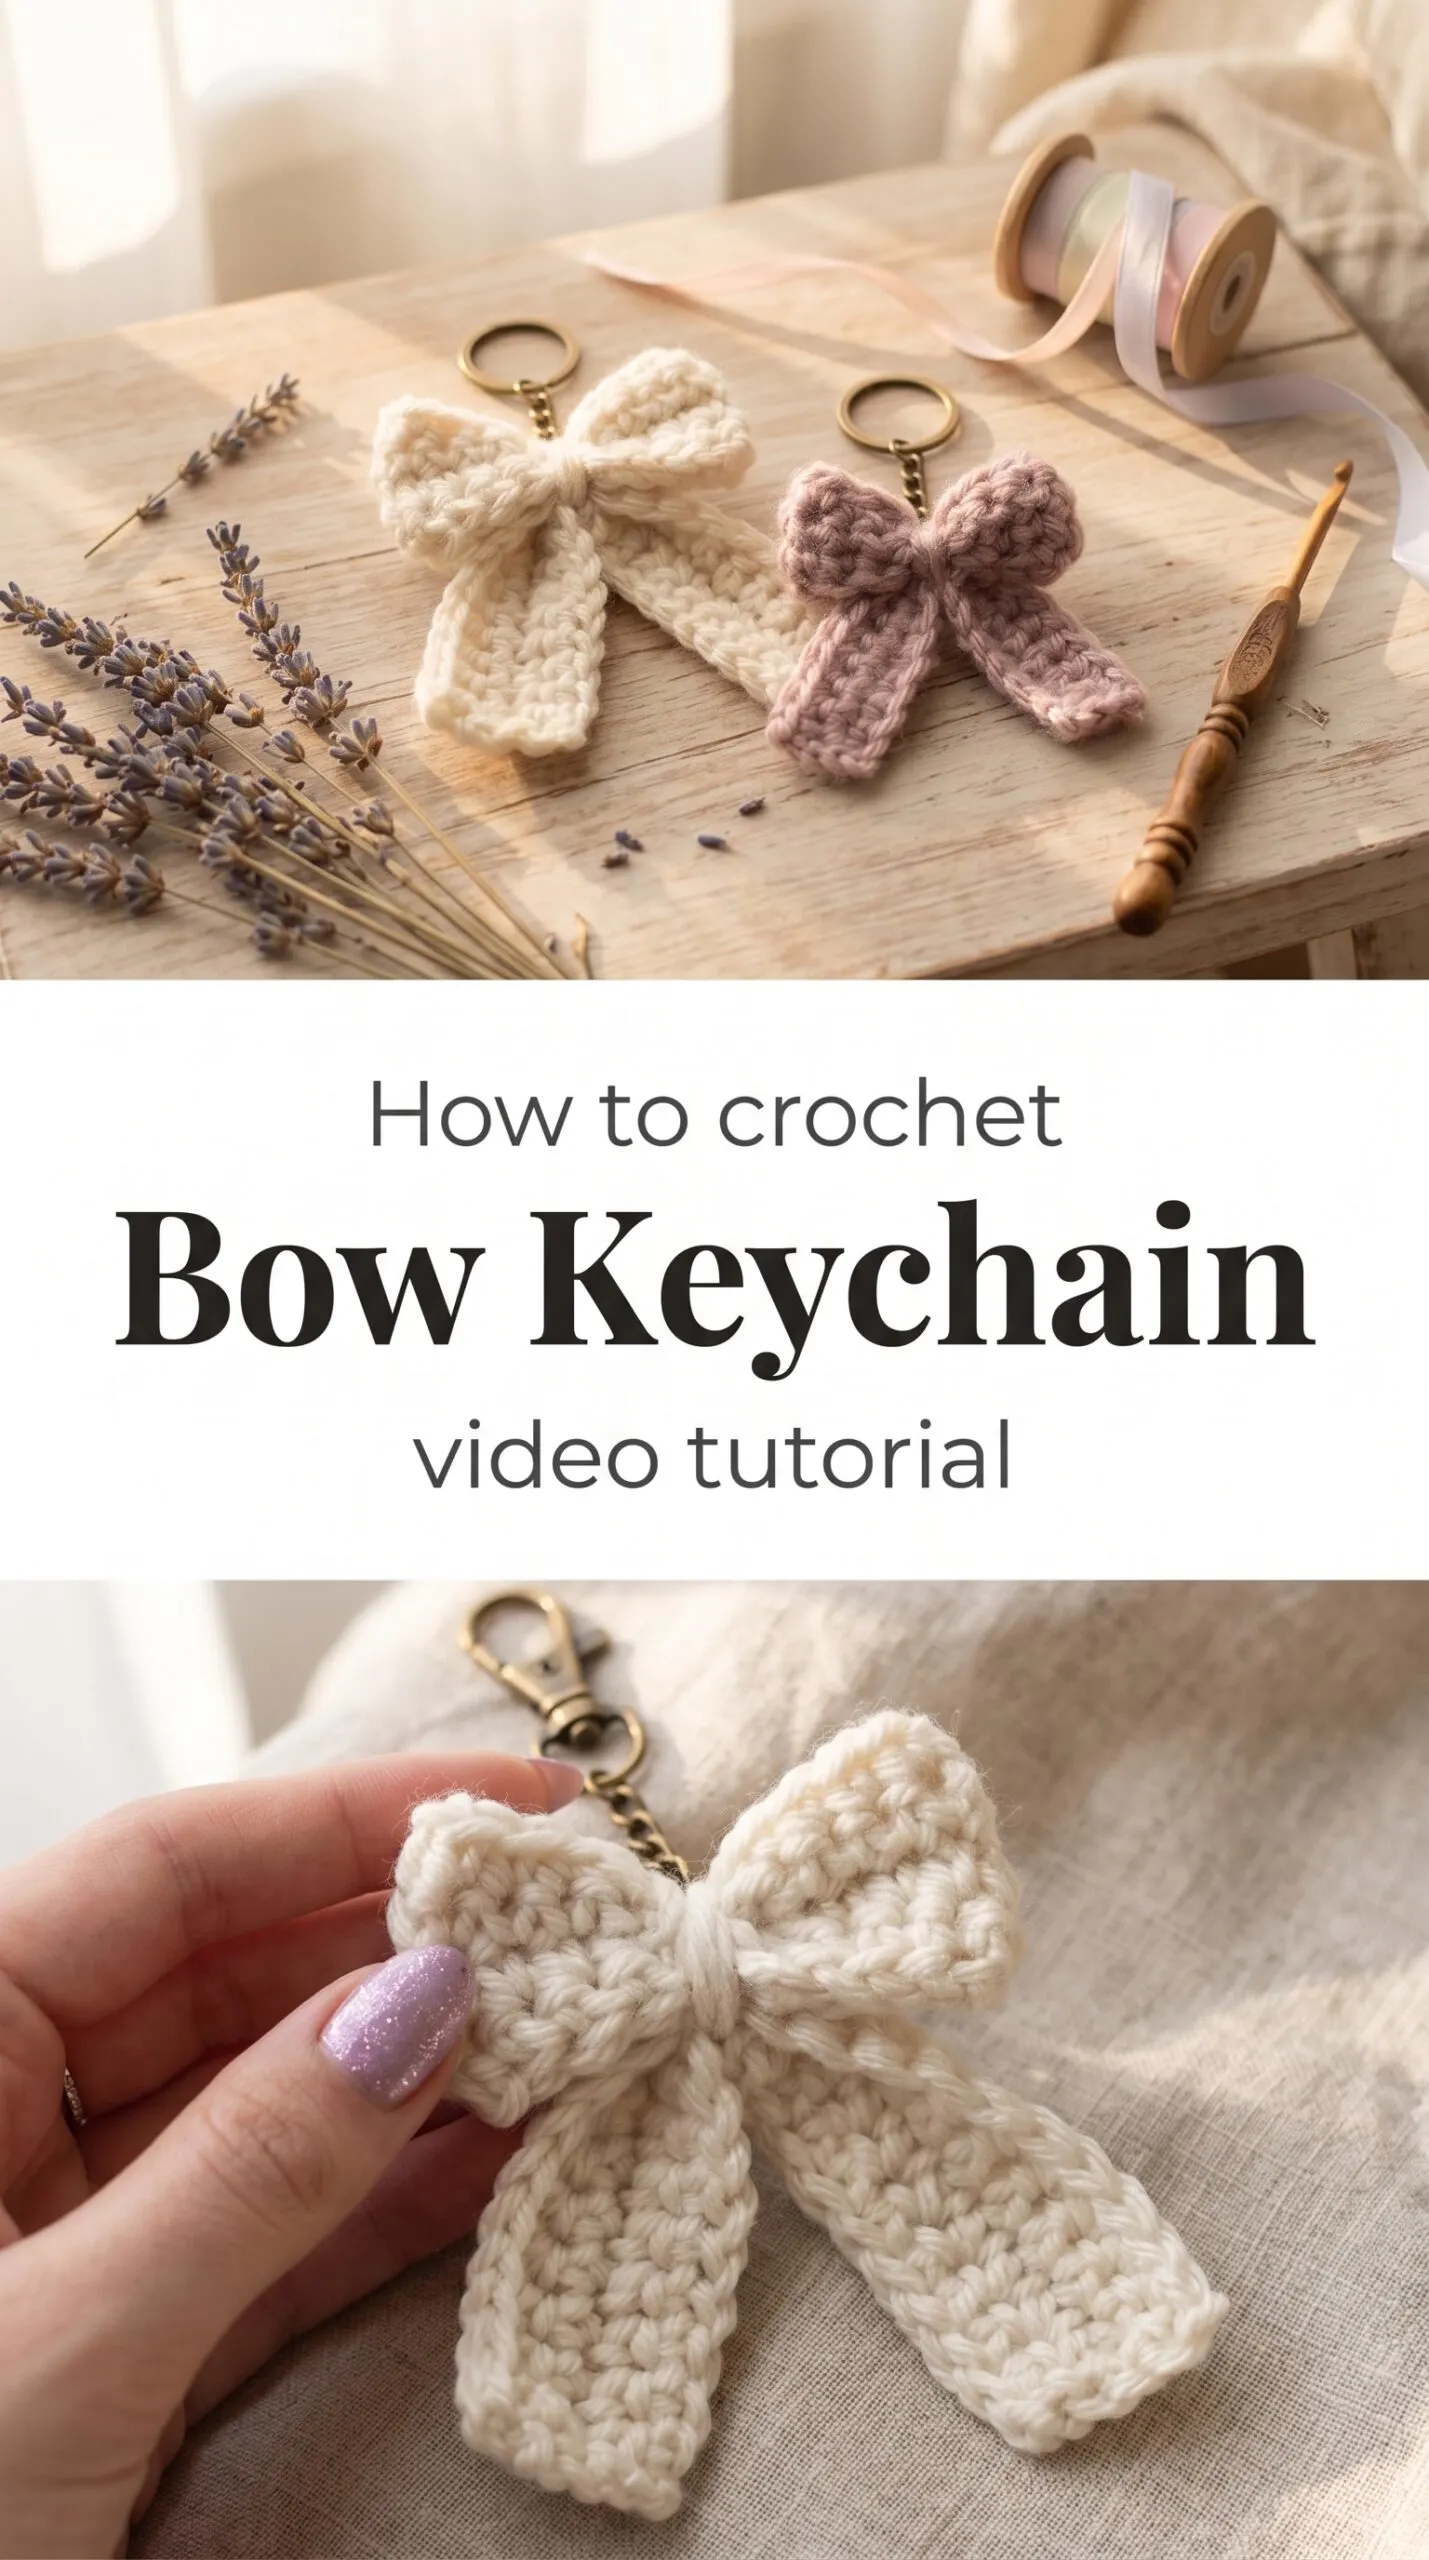
There is a particular kind of magic in an accessory that is both airy yet structured, something small enough to sit in the palm of your hand but expressive enough to tell the world exactly who you are. The Crochet Bow Keychain sits in that sweet spot between whimsy and refinement, with its looped wings and gathered center giving it the look of a wrapped gift you carry on your bag every day. It is made for the person who notices the small things, who ties their keys to something handmade and feels a quiet satisfaction every time they reach for the door. Whether you are making one for yourself or gifting it to someone whose style leans soft and intentional, this little bow delivers something a shop-bought keychain simply cannot.
Bow Keychain Related Posts:
- Crochet Granny Square: A Timeless Classic Design
- Crochet Three-Tone Tote: A Chic Everyday Companion
- Crochet Textured Phone Case: A Chic Practical Accessory
- Crochet Perfect Fit Hat: A Timeless Winter Essential
The color possibilities for this Crochet Bow Keychain are genuinely one of its most delightful features. Cream and ivory carry a whisper of elegance that works with everything, while dusty lilac or blush rose feels dreamy and modern. You could also go bold with terracotta or forest green for a more grounded, earthy aesthetic that still reads as undeniably sweet.
Materials and Tools
For this project, you will want to reach for a worsted weight yarn, which gives the bow enough body to hold its shape without becoming stiff or heavy. A smooth, plied yarn in cotton or a cotton-acrylic blend is ideal because it shows stitch definition beautifully and keeps the finished bow looking crisp and clean. Use a 4mm crochet hook, which pairs perfectly with worsted weight and gives you that firm, satisfying fabric that does not flop or stretch out of shape over time. You will also need a small swivel lobster clasp and jump ring, which attach to the gathered center of the bow and are threaded in using a blunt tapestry needle when you finish.
Stitch by Stitch
The Crochet Bow Keychain draws on a small collection of foundational stitches that are approachable for beginners while still giving intermediate crocheters something satisfying to sink into.
BULLET:SC (Single Crochet) The backbone of this pattern, used to build the dense and tidy fabric of the bow panels with clean, even rows.
BULLET:DC (Double Crochet) Adds a little height and openness to sections of the bow, creating that subtle textural contrast between the wings and center.
BULLET:CH (Chain) Used to start the foundation row and to create the turning chains that keep your edges neat and consistent throughout.
BULLET:SL ST (Slip Stitch) Works quietly at the edges and joins to close sections smoothly, keeping the bow’s silhouette sharp and defined.
There is a meditative rhythm to working these stitches in sequence, a back-and-forth that becomes almost automatic, letting your hands move while your mind rests somewhere else entirely.
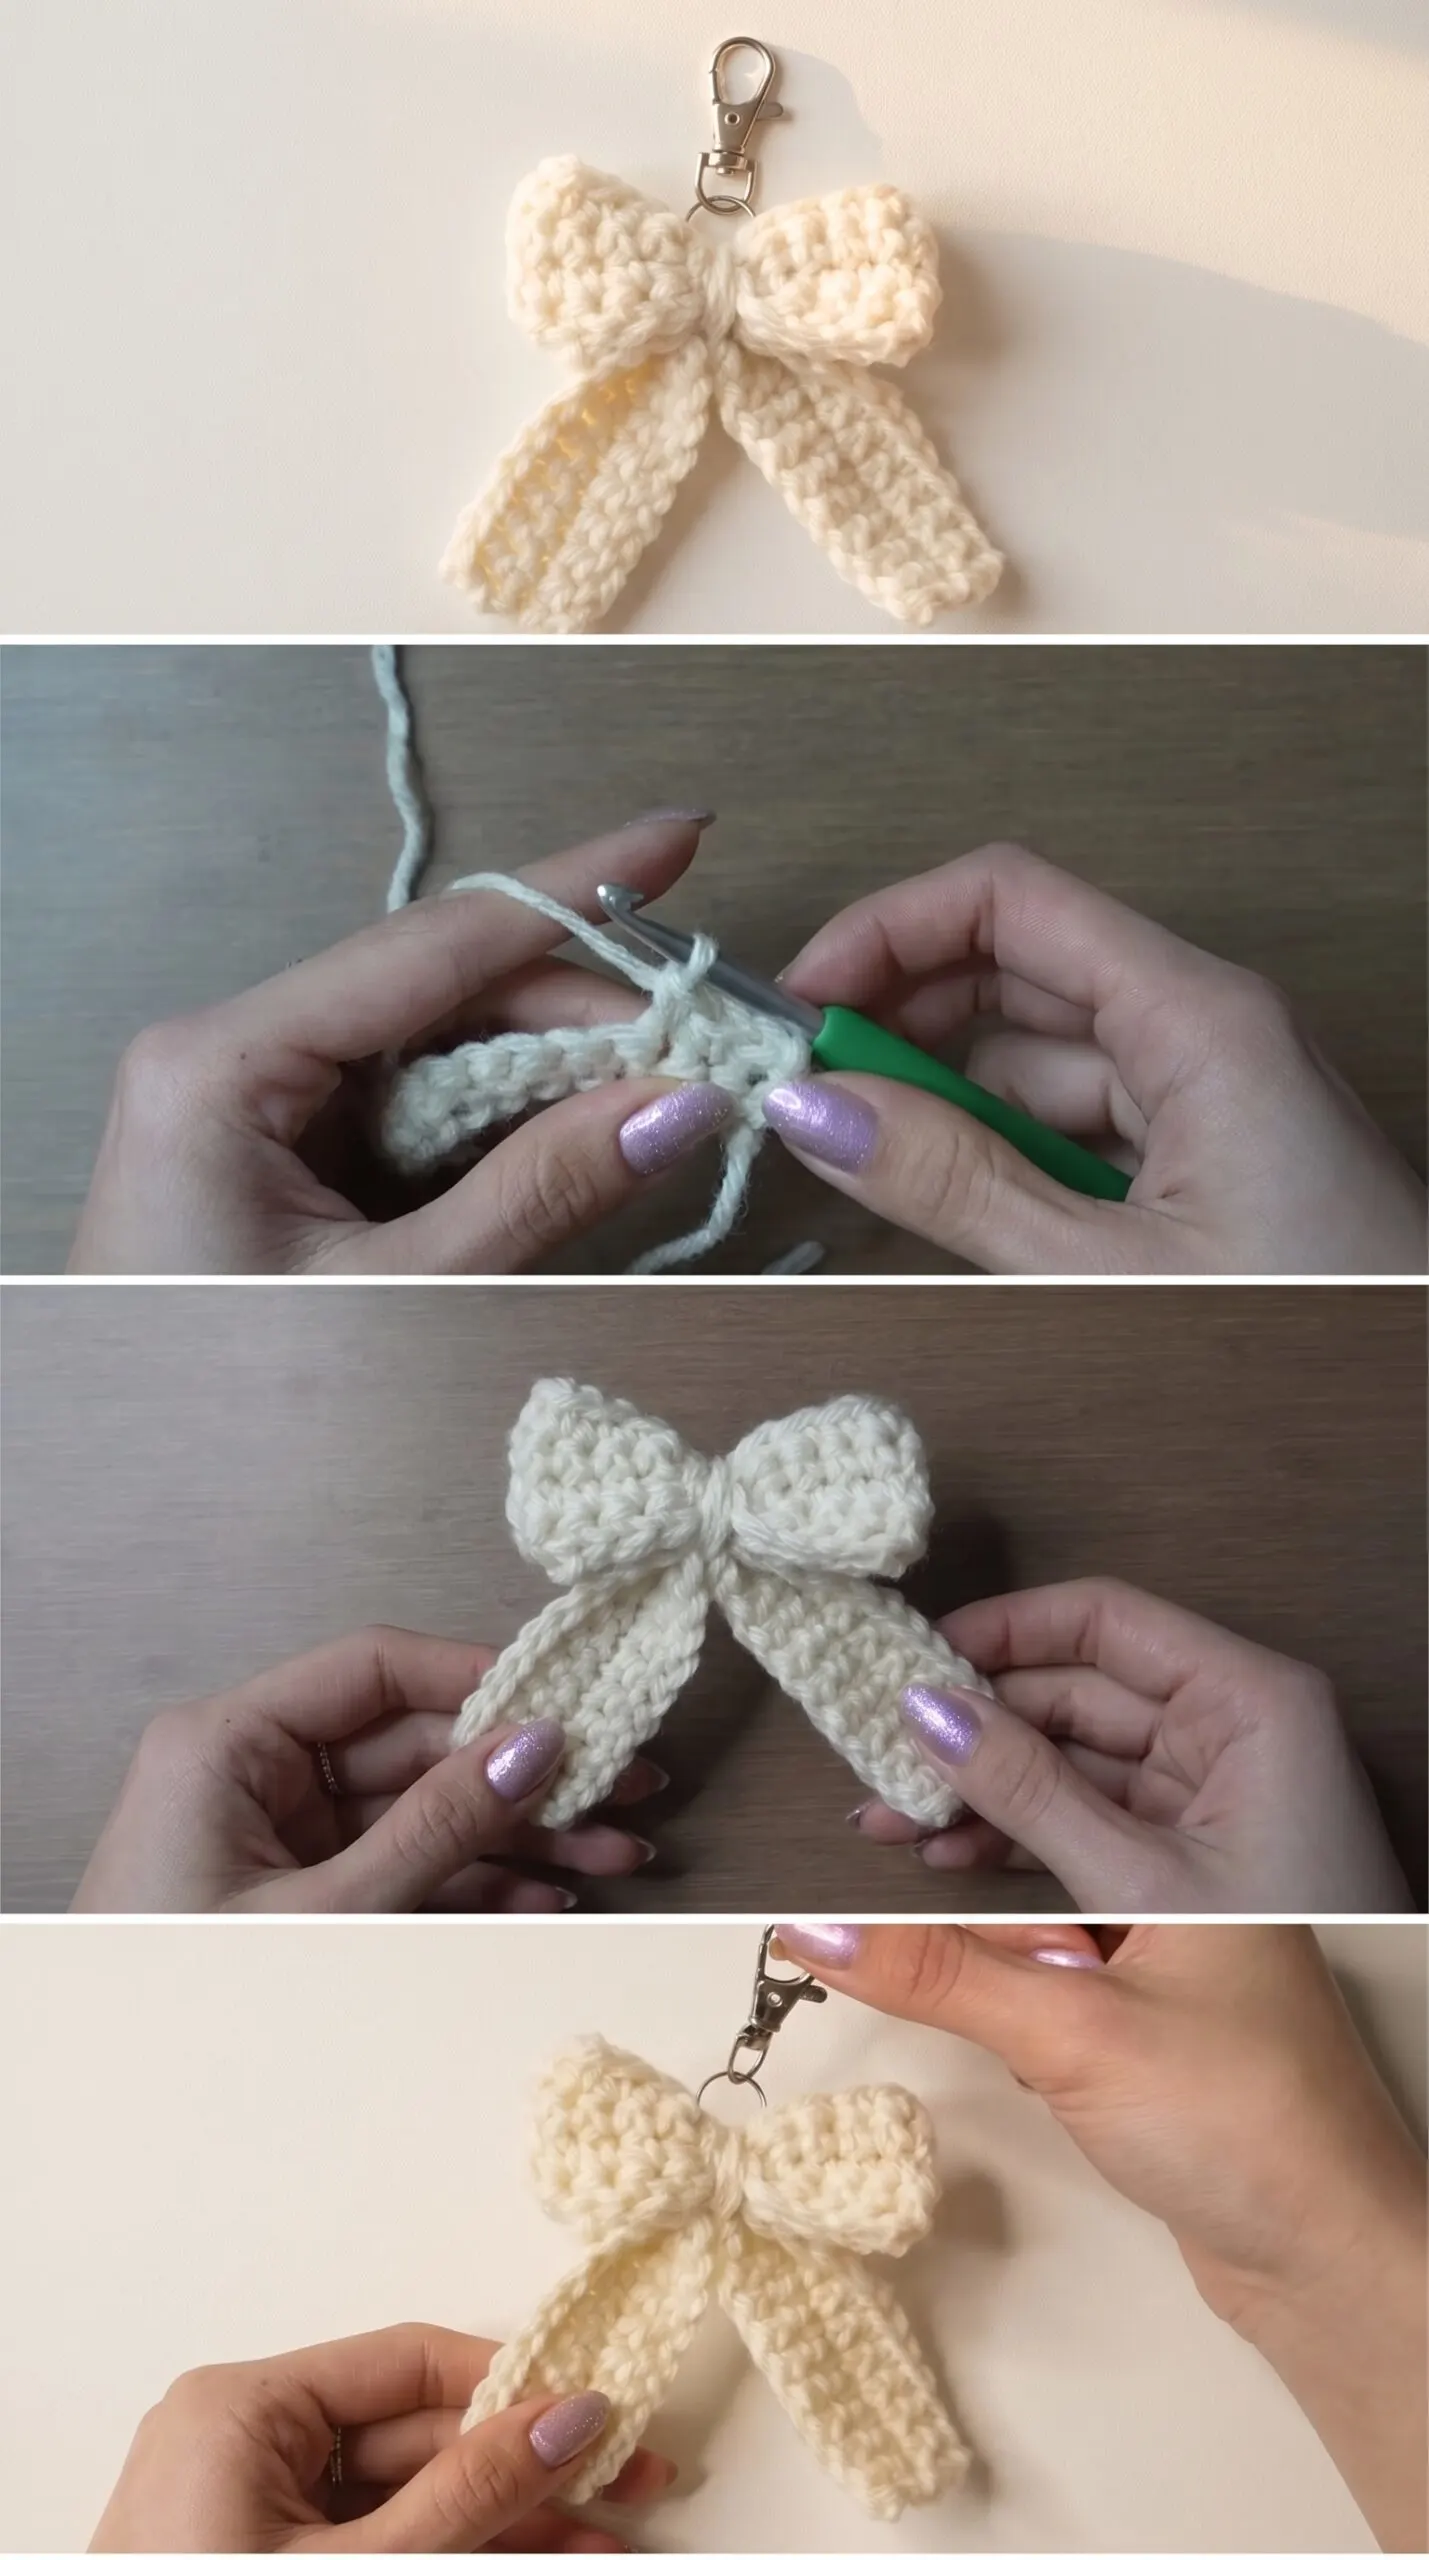
Construction
The bow is worked flat in rows, with two rectangular panels forming the wings and a smaller strip crocheted separately to wrap the center and create that gathered, cinched-in waist that makes a bow look like a bow. Assembly is simple and satisfying: the panels are folded and held together while the center strip is wrapped tightly around the middle and sewn into place using your tapestry needle and a length of the same yarn. The full step-by-step construction is shown clearly in the video tutorial, which walks you through every fold and join so nothing feels guesswork. If you want to customize the size, simply adjust your starting chain length, working with fewer chains for a dainty miniature version or more for a statement bow that commands attention.
Wearing Your Bow Keychain
Clip your finished Crochet Bow Keychain to a canvas tote bag for an effortlessly charming everyday look, or attach it to a zipper pull on a backpack for a touch of softness against structured nylon. It also looks completely lovely dangling from a set of house keys alongside a woven tassel or a small resin charm, building a little collection of handmade things that jingle together in your bag. Once you see how quickly this comes together, you will want to make one in every color you own.
Keeping Your Bow Keychain Looking Its Best
Because this Crochet Bow Keychain lives on a keychain and travels with you daily, it is worth giving it a gentle hand wash every few weeks using cool water and a small amount of mild soap. Lay it flat on a clean towel to dry rather than hanging it, which can cause the bow shape to stretch slightly before the fibers have set. If you notice the center wrap loosening over time, a few small stitches with a threaded tapestry needle will pull it back into shape in seconds. Store any extras in a small drawstring pouch to keep the fibers from catching on anything rough when they are not being worn.
Every bow you make is a small, deliberate act of adding beauty to an ordinary thing, and that is worth more than any factory-made accessory ever could be. Save this article to your Pinterest boards and share your finished Crochet Bow Keychain so others can find the pattern and start making their own.
Follow us on Pinterest and subscribe to the Newsletter so you don’t miss a thing!
Tutorial and photos of this bow keychain by: VivCrochets.
