
A pink drawstring backpack crocheted in dense single crochet, finished with a red bow, strawberry appliqués and red cord straps, made for the maker who wants a carry-all that looks like a treat.
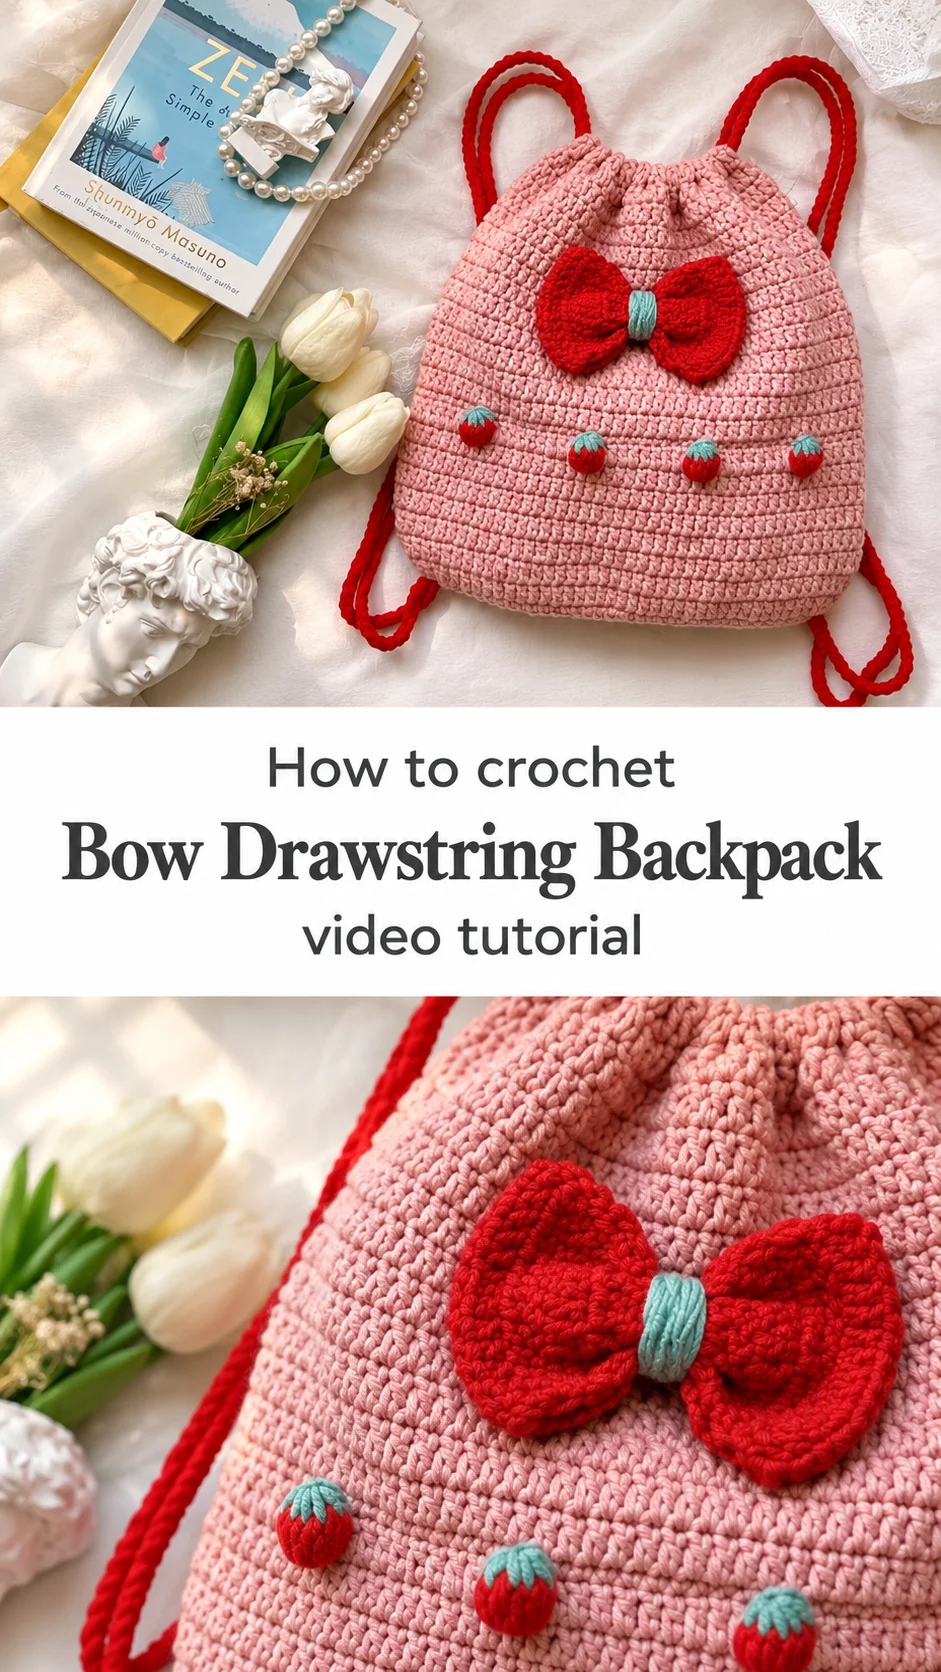
The Crochet Bow Drawstring Backpack
This crochet bow drawstring backpack is a soft, rounded sack built to be worn on the shoulders and pulled closed at the top. Its body is worked in a dusty pink yarn with a firm, even texture, so the fabric holds its shape instead of slumping. A large red bow sits at the centre front, its loops framed by a band of soft mint at the knot, and a row of small strawberries with mint leaves runs across the lower half. Long red cords form the straps, which thread through the top edge and gather the bag shut. Together these details make a piece that is playful without being fussy, and it suits a school day, a weekend market trip or a quiet afternoon out just as well.
The bag is worked as one body with the drawstring channel built in at the top, so there are no pieces to join except the decorations. That simplicity is part of its appeal: the eye is drawn to the bow and the strawberries rather than to any seams.
Drawstring Backpack Related Posts:
- Crochet Lace Tablecloth: A Timeless Handmade Accent
- Crochet Classic Handbag: A Timeless Fashion Statement
- Crochet Floral Stitch Blanket: A Timeless Handmade Treasure
- Crochet Bucket Bag: A Chic Everyday Essential
Materials
To make a bag with this much structure, choose a worsted-weight acrylic or an acrylic-cotton blend. A smooth yarn with some elasticity keeps the stitches crisp, and a firm hook one or two sizes smaller than the label suggests gives the dense, almost padded fabric visible in the photos. Cotton alone tends to sag under the weight of the bow, so reserve it for a lighter version. You will need a tapestry needle for weaving in ends and attaching the decorations, stitch markers to keep your place in each round, and scissors. The bow needs a small amount of mint yarn to wrap its centre, and each strawberry takes a little red and a little green-blue, so buy a little more than you think you need for the decorations. The red cord for the straps and drawstring should be a sturdy braided or tube cord, since a loose cord will fray and loosen at the channel.
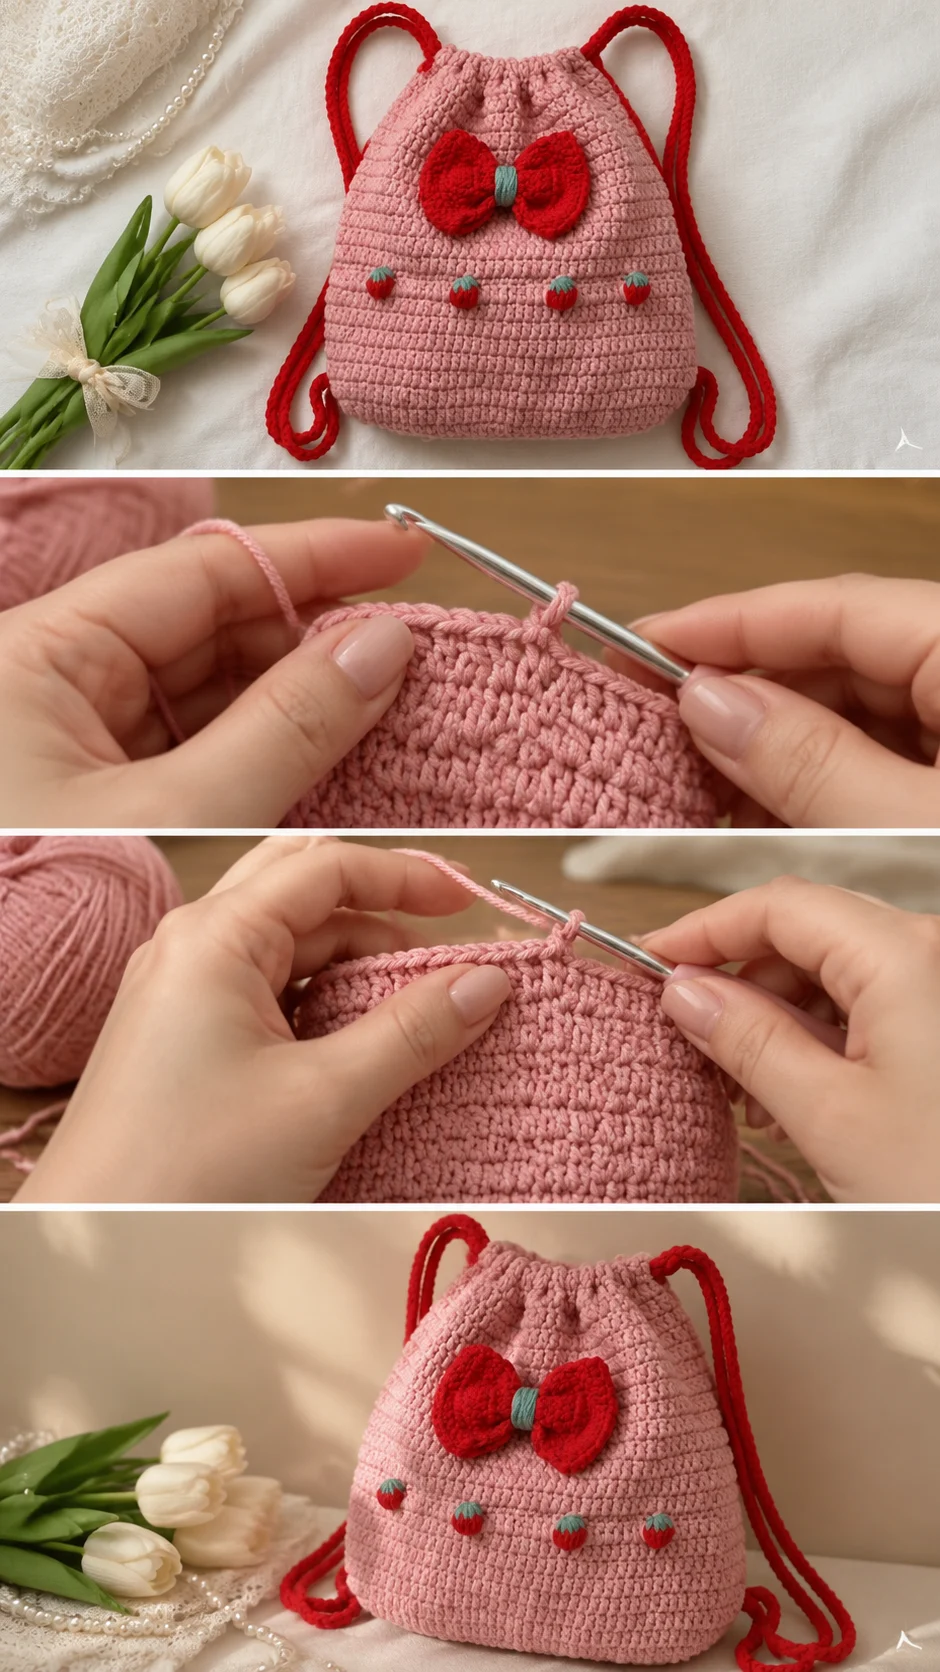
Choosing the Yarn and Colours
The pink body in the photos is a soft, matte tone that reads as warm rather than candy-bright. If you want the same effect, pick a dusty rose or a muted blush and avoid anything too glossy, which would make the bag look slippery. A mint or sage accent works beautifully against red and pink; a cream or oatmeal body gives a gentler, more everyday version, while a deep berry shade turns the same design into something more grown-up. Keep the red for the bow and cords close in tone to the one in the photos so the strawberries and bow still read as a set.
Shaping the Body and the Drawstring Channel
The rounded silhouette comes from steady, even rounds that widen gently and then close into the base. Work each round with consistent tension so the sides stay straight rather than bowing outward. At the top, the channel is formed by leaving a small gap in the rim and working the final rounds so the fabric folds neatly over the cord. Make sure the channel is wide enough for the cord to slide freely; if the top gathers too tightly when you pull, your channel is too narrow.
Watch in the tutorial how the rounds are worked in a continuous spiral, and pause when the creator explains the slip stitch that closes each round. That small join is what keeps the body smooth. Replay the section on the channel as many times as you need.
Making the Bow Stand Out
The bow is the centrepiece, so it deserves careful attention. Work the two loops and the tails as separate pieces, then pinch them together at the centre and wrap them with mint yarn. If the bow looks floppy, the loops are probably too loose; work them with a tighter tension, or add a little stuffing to the centre before wrapping.
Adding the Strawberries
Each strawberry is worked as a small, firmly stuffed red shape with a mint calyx at the top. Stuff them lightly so they keep their plump form without bulging the body. Attach them with the tail ends of the yarn, pulling through to the inside of the bag and tying off securely. Space them evenly across the lower band, and check the placement against the photos before you fasten them. If a strawberry looks lopsided, unpick it and reposition it before tying off.
Tips for a Neat Finish
Weave in every end on the inside of the bag, not on the front, so the surface stays clean. If the body edge ripples, the rounds are probably getting larger than they should; try reducing the number of increases or working a tighter tension for a few rounds. If the bow is hard to attach, sew it at the centre and at the two loop bases rather than just the middle, so it sits flat.
Caring for Your Bag
Hand wash in cool water with a mild detergent, then press the bag gently between towels rather than wringing it, which would distort the rounded shape. Lay it flat to dry away from direct heat. Store it stuffed with tissue paper so the body keeps its form, and keep the red cords untangled so they draw smoothly.
A Charming Handmade Keepsake
This bag is a small, sweet piece that will be used as often as it is admired. Its success rests on three things: a firm, even body, a well-made drawstring channel and decorations attached neatly. Take your time with those, and the finished backpack will feel as good to carry as it looks.
Video tutorial by the original creator, linked here for the full step-by-step instructions.
Watch the Tutorial
Video tutorial: the creator’s full walkthrough of this bow drawstring backpack. Pause at each decoration step and replay the channel section until the cord glides through smoothly.
Follow us on Pinterest and subscribe to the Newsletter so you don’t miss a thing!
Tutorial and photos of this bow drawstring backpack by: Vivi Crochet 🌷.
