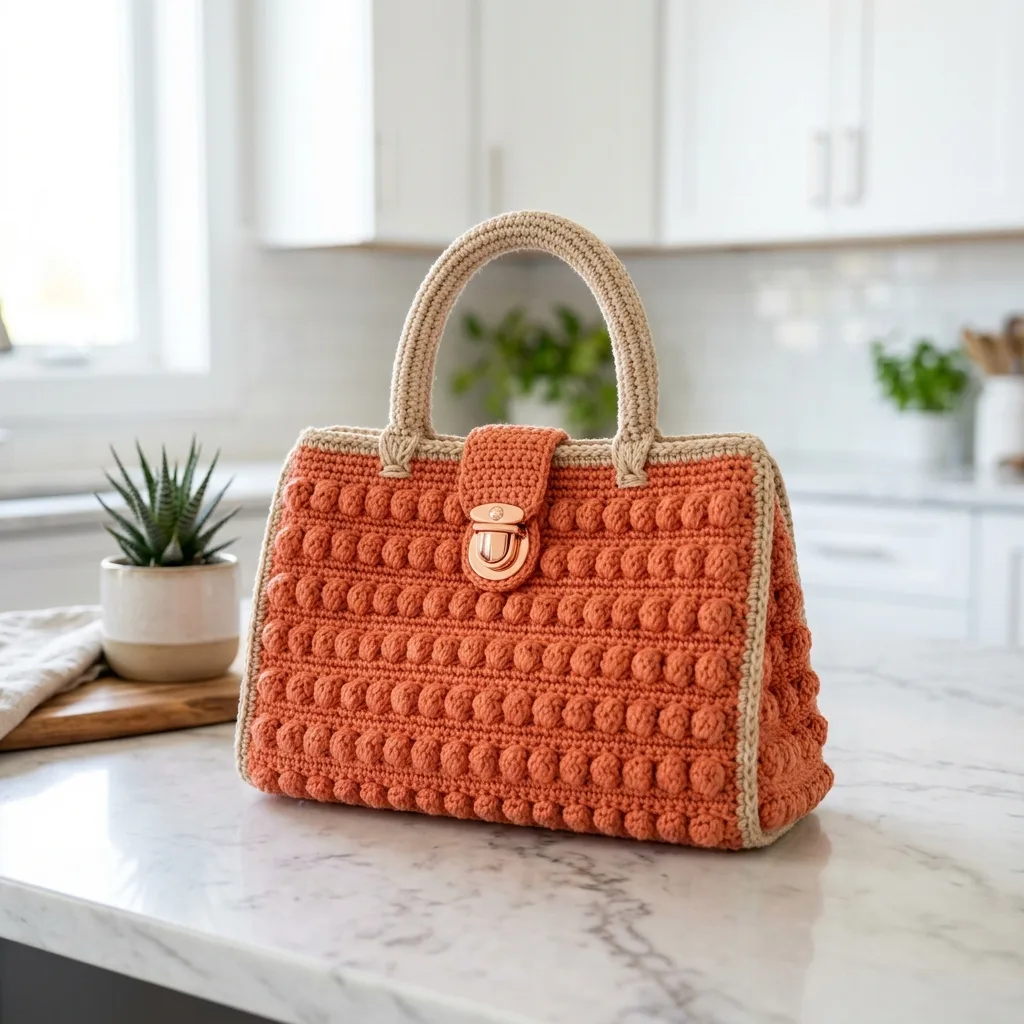
When I set out to design this bag, I had a clear vision: a structured handbag with gorgeous texture that looks like it came straight from a boutique, not a craft table. I wanted bobbles that really pop, a shape that holds its form, and those little finishing details that make people stop and ask where you bought it. After testing different stitch combinations and tweaking the construction method, I am SO pleased with how the Coral Sunset Bobble Bag turned out. The warm terracotta against that sandy trim gives it such an elevated feel, and the padded handles make it genuinely comfortable to carry.
Get the Ad-Free PDF Pattern
You can find the free pattern below, or you can purchase the ad-free printable PDF from my shop.
Get the Printable PDF →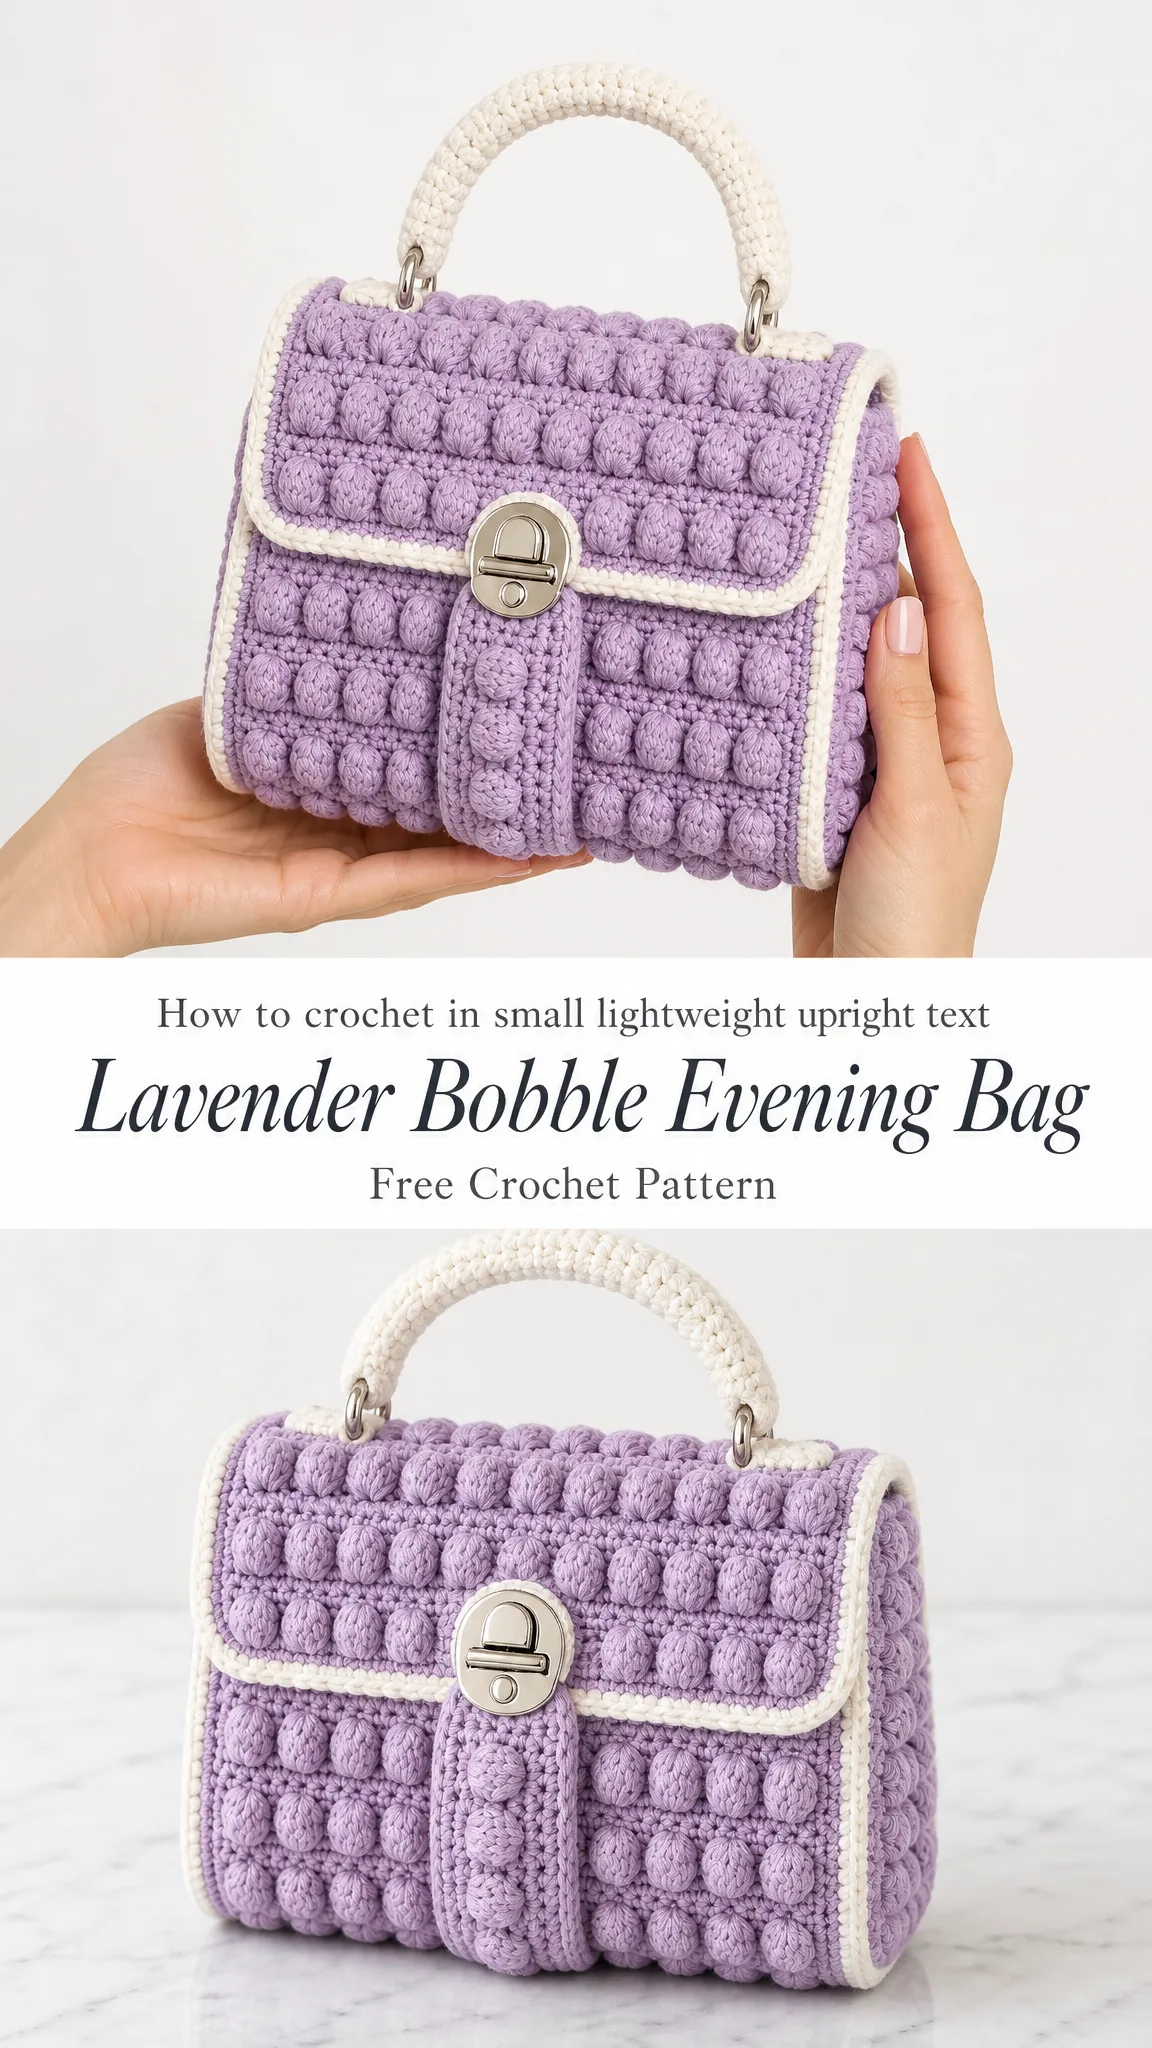
About This Crochet Handbag Pattern
This intermediate level crochet pattern creates a boutique-style handbag measuring 11.5 inches wide by 7.5 inches tall by 3.25 inches deep (29 x 19 x 8 cm). The main texture features rows of 5-dc bobbles worked on a single crochet (sc) ground, creating that stunning dimensional effect you see in the photos.
The construction method keeps things manageable. You will work two flat panels for the front and back, then create one long side and bottom gusset strip. After assembly, you will add the sand-colored trim, padded handles, closure tab, and hardware. An optional lining takes it to the next level if you want that polished interior.
Expect to spend about 10 to 14 hours on this project from start to finish. That might sound like a lot, but trust me, the bobble rows work up faster than you would think once you get into the rhythm.
Materials You Will Need
Gather these supplies before you start:
Yarn:
Recommended Yarn Brands:
You can substitute with any firm worsted-weight cotton or cotton-blend that matches gauge. Avoid very stretchy acrylic if you want the bag to keep its shape.
Hook and Notions:
Optional Structure Materials:
Hardware:
Gauge
14 single crochet stitches x 16 rows = 4 inches / 10 cm in blocked single crochet with the recommended hook.
Bobble rows are taller than plain sc rows, so measure the finished panel checkpoint as well.
Panel checkpoint: After 28 rows, one panel should measure about 11.5 inches wide x 7 inches tall (29 x 18 cm) before edging.
Taking time to check your gauge saves heartache later. If your swatch is too big, go down a hook size. Too small? Go up a hook size.
Abbreviations and Stitch Guide
This pattern uses US crochet terminology. UK makers, note that US sc equals UK dc, and US dc equals UK tr.
Special Stitch: 5-DC Bobble
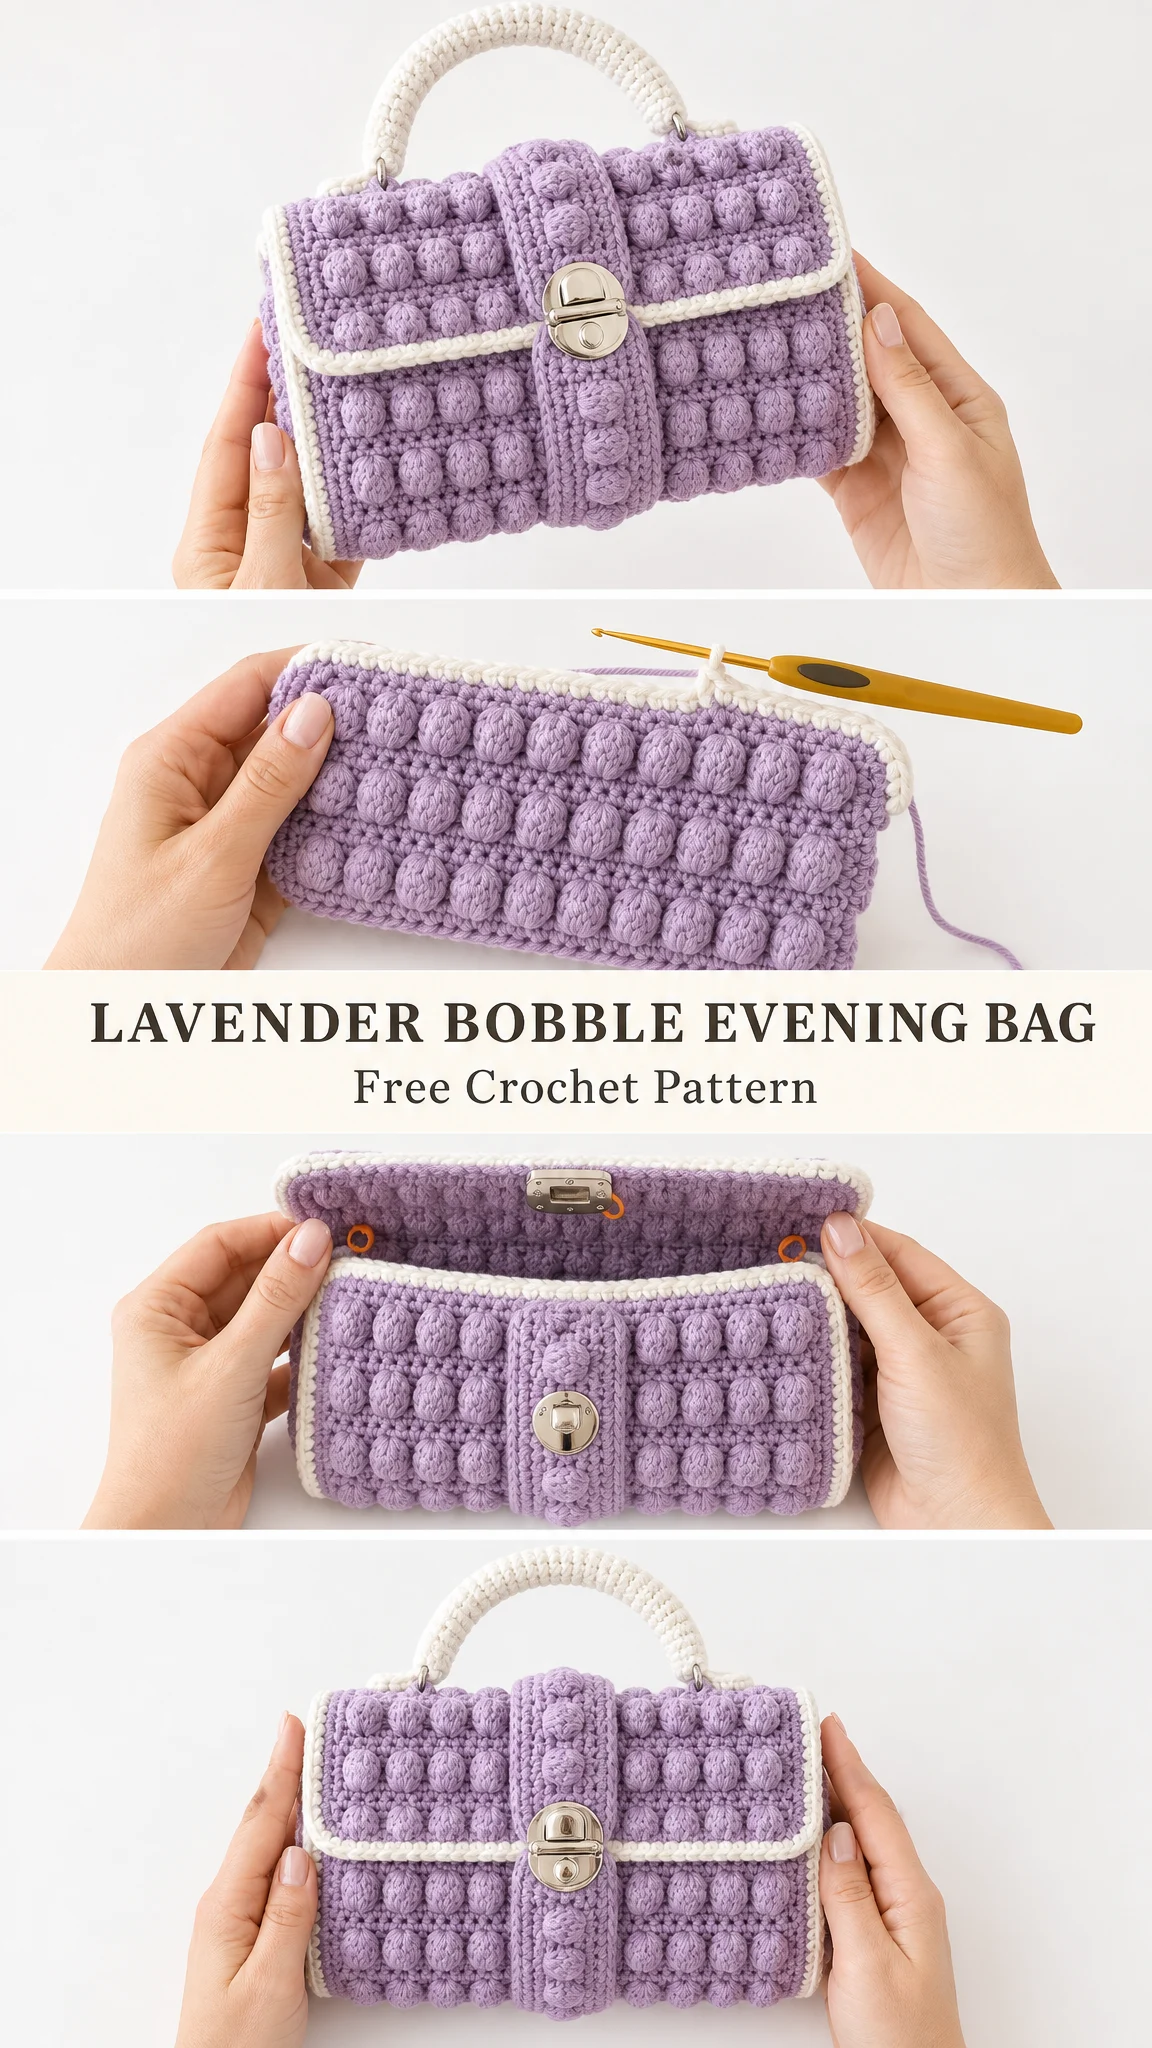
This is where the magic happens. Here is how to work the bobble stitch step by step:
In the indicated stitch, yarn over, insert hook, pull up a loop, yarn over and pull through 2 loops. You now have a partial double crochet on your hook. Repeat this partial dc step 5 times total in the same stitch until 6 loops are on the hook. Yarn over and pull through all 6 loops at once. Gently push the bobble to the right side of your work.
The key to beautiful bobbles is pushing each one to the RS before you work your next stitch. This ensures they all pop out on the same side.
Important Pattern Notes
Before you dive in, keep these tips in mind:
Front and Back Panels
Make 2 identical panels in MC. Each panel is worked flat, then edged later in TC.
Row 1: Ch 41. Sc in 2nd ch from hook and each ch across. Turn. (40 sc)
Row 2: Ch 1, sc in each st across. Turn. (40 sc)
Row 3: Ch 1, sc in each st across. Turn. (40 sc)
Row 4: Ch 1, sc in first st, *bobble in next st, sc in next 3 sts; rep from * 9 times, bobble in next st, sc in last 2 sts. Turn. (10 bobbles + 30 sc = 40 sts)
Row 5: Ch 1, sc in each st across. Turn. (40 sc)
Row 6: Ch 1, sc in each st across. Turn. (40 sc)
Row 7: Ch 1, sc in each st across. Turn. (40 sc)
Row 8: Ch 1, sc in first st, *bobble in next st, sc in next 3 sts; rep from * 9 times, bobble in next st, sc in last 2 sts. Turn. (10 bobbles + 30 sc = 40 sts)
Row 9: Ch 1, sc in each st across. Turn. (40 sc)
Row 10: Ch 1, sc in each st across. Turn. (40 sc)
Row 11: Ch 1, sc in each st across. Turn. (40 sc)
Row 12: Ch 1, sc in first st, *bobble in next st, sc in next 3 sts; rep from * 9 times, bobble in next st, sc in last 2 sts. Turn. (10 bobbles + 30 sc = 40 sts)
Row 13: Ch 1, sc in each st across. Turn. (40 sc)
Row 14: Ch 1, sc in each st across. Turn. (40 sc)
Row 15: Ch 1, sc in each st across. Turn. (40 sc)
Row 16: Ch 1, sc in first st, *bobble in next st, sc in next 3 sts; rep from * 9 times, bobble in next st, sc in last 2 sts. Turn. (10 bobbles + 30 sc = 40 sts)
Row 17: Ch 1, sc in each st across. Turn. (40 sc)
Row 18: Ch 1, sc in each st across. Turn. (40 sc)
Row 19: Ch 1, sc in each st across. Turn. (40 sc)
Row 20: Ch 1, sc in first st, *bobble in next st, sc in next 3 sts; rep from * 9 times, bobble in next st, sc in last 2 sts. Turn. (10 bobbles + 30 sc = 40 sts)
Row 21: Ch 1, sc in each st across. Turn. (40 sc)
Row 22: Ch 1, sc in each st across. Turn. (40 sc)
Row 23: Ch 1, sc in each st across. Turn. (40 sc)
Row 24: Ch 1, sc in first st, *bobble in next st, sc in next 3 sts; rep from * 9 times, bobble in next st, sc in last 2 sts. Turn. (10 bobbles + 30 sc = 40 sts)
Row 25: Ch 1, sc in each st across. Turn. (40 sc)
Row 26: Ch 1, sc in each st across. Turn. (40 sc)
Row 27: Ch 1, sc in each st across. Turn. (40 sc)
Row 28: Ch 1, sc in first st, *bobble in next st, sc in next 3 sts; rep from * 9 times, bobble in next st, sc in last 2 sts. Turn. (10 bobbles + 30 sc = 40 sts)
Panel checkpoint: You should have 7 bobble rows with 10 bobbles per bobble row, totaling 70 bobbles per panel. The piece measures about 11.5 x 7 inches (29 x 18 cm) before edging.
Remember to make two of these panels!
Side and Bottom Gusset
Make 1 long strip in MC. This strip creates both side walls and the flat bottom of your bag.
Row 1: Ch 12. Sc in 2nd ch from hook and each ch across. Turn. (11 sc)
Rows 2-3: Ch 1, sc in each st across. Turn. (11 sc)
Row 4: Ch 1, sc in first st, *bobble in next st, sc in next 3 sts; rep from * twice, bobble in next st, sc in last st. Turn. (3 bobbles + 8 sc = 11 sts)
Rows 5-103: Continue the same rhythm of 3 sc rows, then 1 bobble row. Row 104 is a bobble row. Keep 11 sts on every row.
Gusset checkpoint: Your strip should measure about 3.25 inches / 8 cm wide and 26 inches / 66 cm long. It should reach from the top left edge of one panel, around the bottom, to the top right edge without stretching.
Trim Edging for Panels
With TC and RS facing, join in any corner of a panel. Work 1 round of sc evenly around: 40 sc across bottom, 28 sc up first side, 40 sc across top, and 28 sc down second side. Make each corner a 3-sc corner by adding 2 extra sc there. Join with sl st. (144 sc total)
Repeat for the second panel. Keep the border smooth. You may need to adjust by 1-2 side stitches if needed so the fabric lies flat.
Assembly Instructions
Join Gusset to Front Panel
Hold the gusset against one panel with RS facing out. Starting at the upper left corner, use TC and sl st or whipstitch through the outer loops to join: 28 side sts, 40 bottom sts, and 28 side sts. Leave the top open. (96 joined edge sts)
Repeat to attach the second panel to the remaining long edge of the gusset. Match corners carefully before seaming.
Top Opening Trim
Round 1: With TC, join at a side seam. Sc evenly around the entire top opening: 40 sts across front, 11 sts across side edge, 40 sts across back, 11 sts across side edge. Join. (102 sc)
Round 2: Ch 1, sc in each st around, join. (102 sc)
Round 3: Sl st loosely around for a neat corded edge. Fasten off. (102 sl sts)
Closure Tab
With MC, ch 9.
Row 1: Sc in 2nd ch from hook and each ch across. Turn. (8 sc)
Rows 2-14: Ch 1, sc in each st across. Turn. (8 sc)
Edging: With TC or MC, sc evenly around tab, placing 3 sc in each corner.
Sew the top short end to the center back top edge. Install the clasp or magnetic snap centered on the front.
Handles
Make 2 handles in TC. For firmer handles, crochet around cotton cord or fold the strip around cord before sewing.
Row 1: Ch 54. Sc in 2nd ch from hook and each ch across. Turn. (53 sc)
Rows 2-5: Ch 1, sc in each st across. Turn. (53 sc)
Fold the handle lengthwise with WS together and whipstitch the long edge closed to make a rounded padded handle.
Attach each handle end 2.25 inches / 6 cm in from the side edge and about 1 inch / 2.5 cm below the top edge. Sew through the trim and panel several times for strength. Repeat on the back.
Finishing and Structure
Size Customization Options
Want to make this bag bigger or smaller? Here is how:
Troubleshooting Common Issues
Bobbles lean inward: Loosen the bobble pull-through and push each bobble to the RS before the next sc.
Panel curls: Block before assembly and keep edge stitches relaxed.
Gusset seems short: Block the strip first, then pin it to the panel before seaming.
Top opening flares: Work Round 2 of the top trim with a smaller hook.
Bag feels soft: Add lining, a base insert, or plastic canvas between the crochet and lining.
Care Instructions
Spot clean when possible. For cotton yarn, hand wash in cool water, reshape, stuff lightly with towels, and dry flat. Remove detachable hardware before washing when possible.
You Did It!
Thank you so much for choosing to make the Coral Sunset Bobble Bag! I hope you love using this structured crochet handbag as much as I loved designing it. Those bobbles really do make a statement, and you should feel incredibly proud of your finished piece.
If you make this bag, I would absolutely love to see it! Share your finished project on Instagram or Facebook and tag me so I can admire your work. There is nothing better than seeing these patterns come to life in different colors and yarn choices.
Be sure to save this Coral Sunset Bobble Bag crochet pattern to your Pinterest boards so you can find it whenever you are ready to start stitching. And if you make one, please drop a comment below. I love hearing how your projects turn out!
Want a Quick & Easy Printable Version?
Get a clean, beautifully formatted PDF of this pattern — easy to follow step by step, ready to print or save on any device. No scrolling, no distractions, just the pattern.
Get the Printable PDF →