Alright, yarn lovers, this one’s for you. Go dig through your stash right now and pull out that gorgeous skein you’ve been saving for "something special." This structured bobble evening bag is exactly the kind of project that deserves your best yarn. The construction is genuinely interesting, with separate panels that come together into a polished, professional-looking handbag complete with hardware and lining. Fair warning: this is an intermediate project that requires some patience with seaming and hardware installation, but if you’re comfortable with bobbles and basic bag construction, you’ve absolutely got this.
Get the Ad-Free PDF Pattern
You can find the free pattern below, or you can purchase the ad-free printable PDF from my shop.
Get the Printable PDF →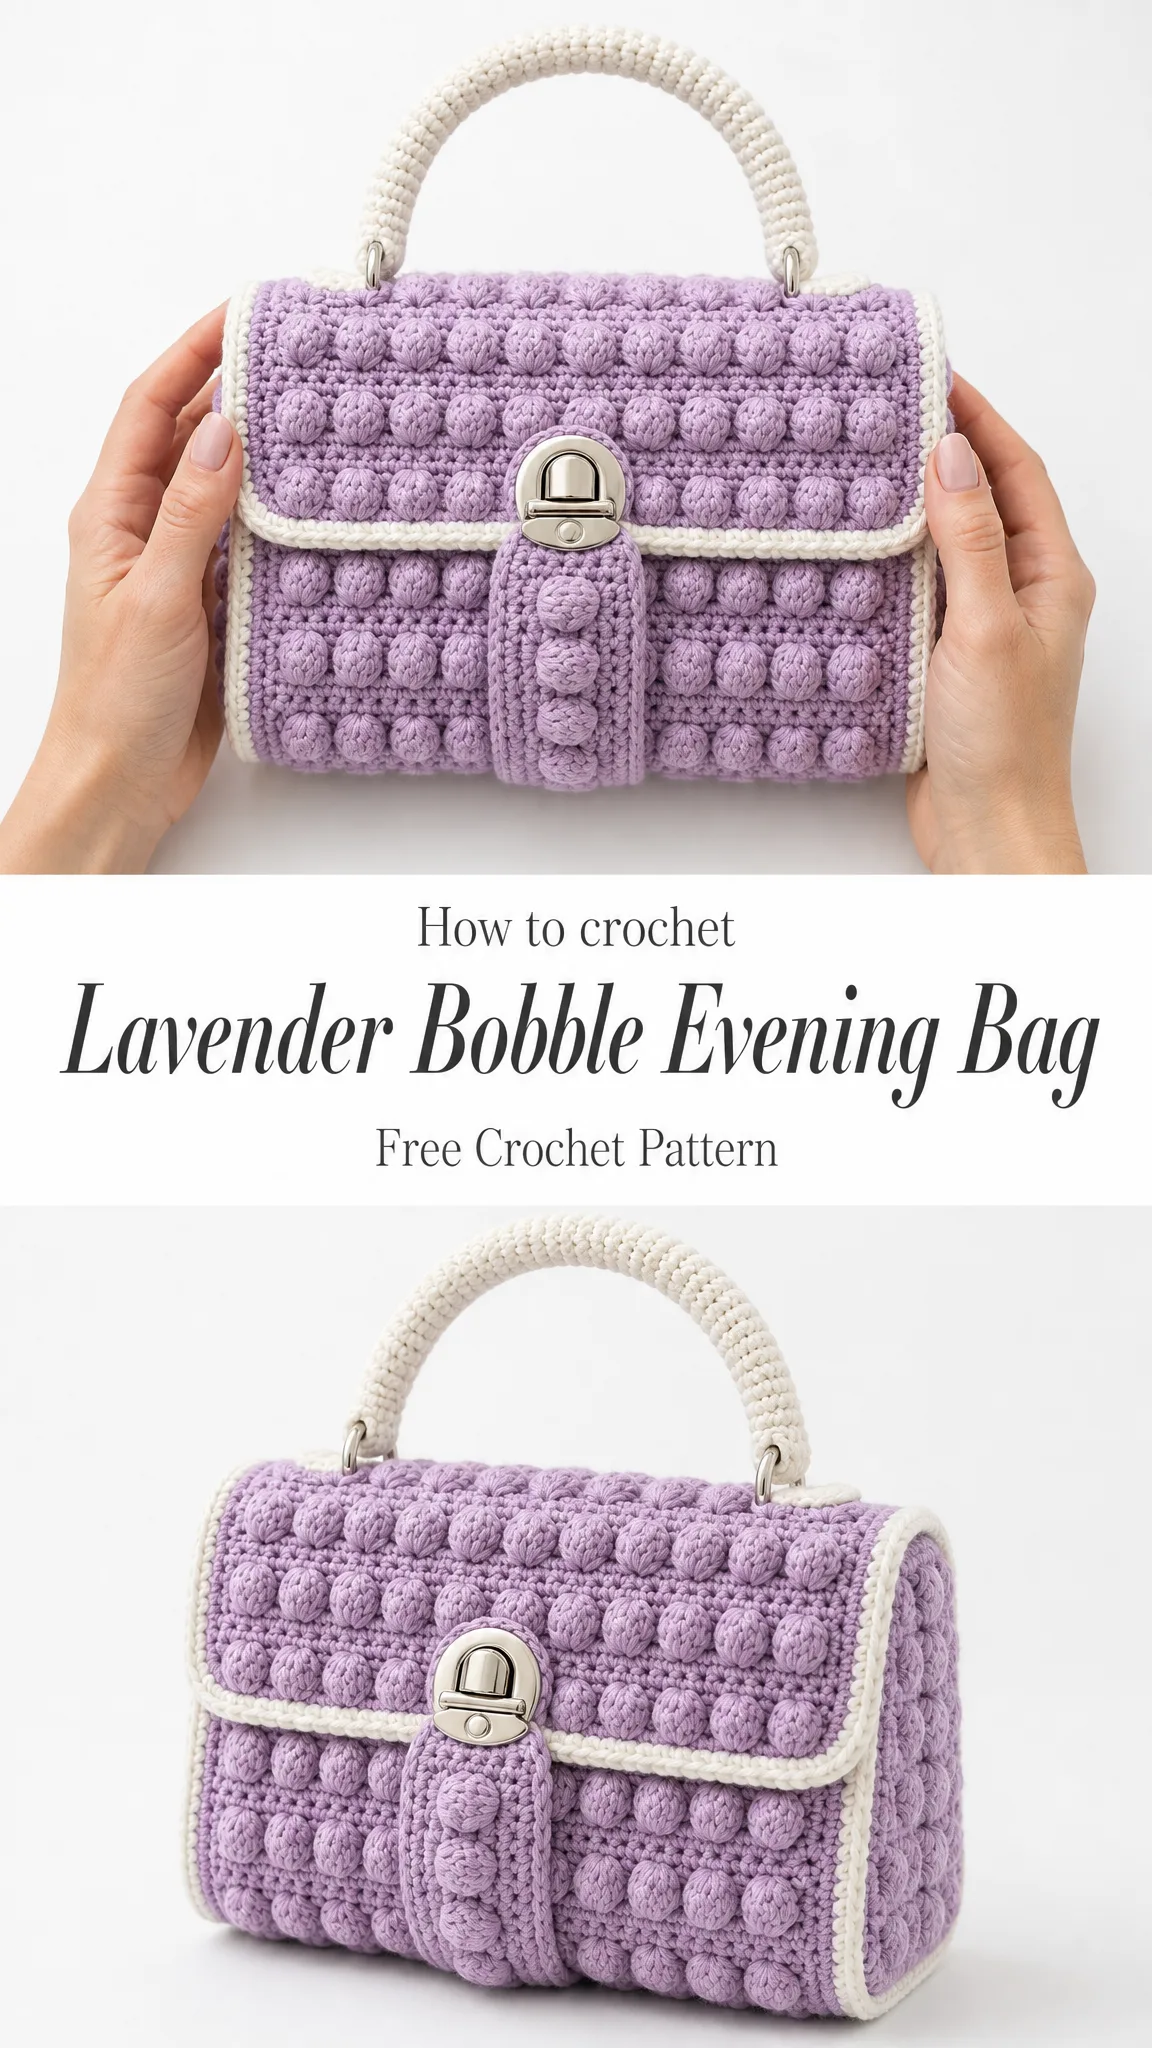
About This Lavender Bobble Evening Bag Pattern
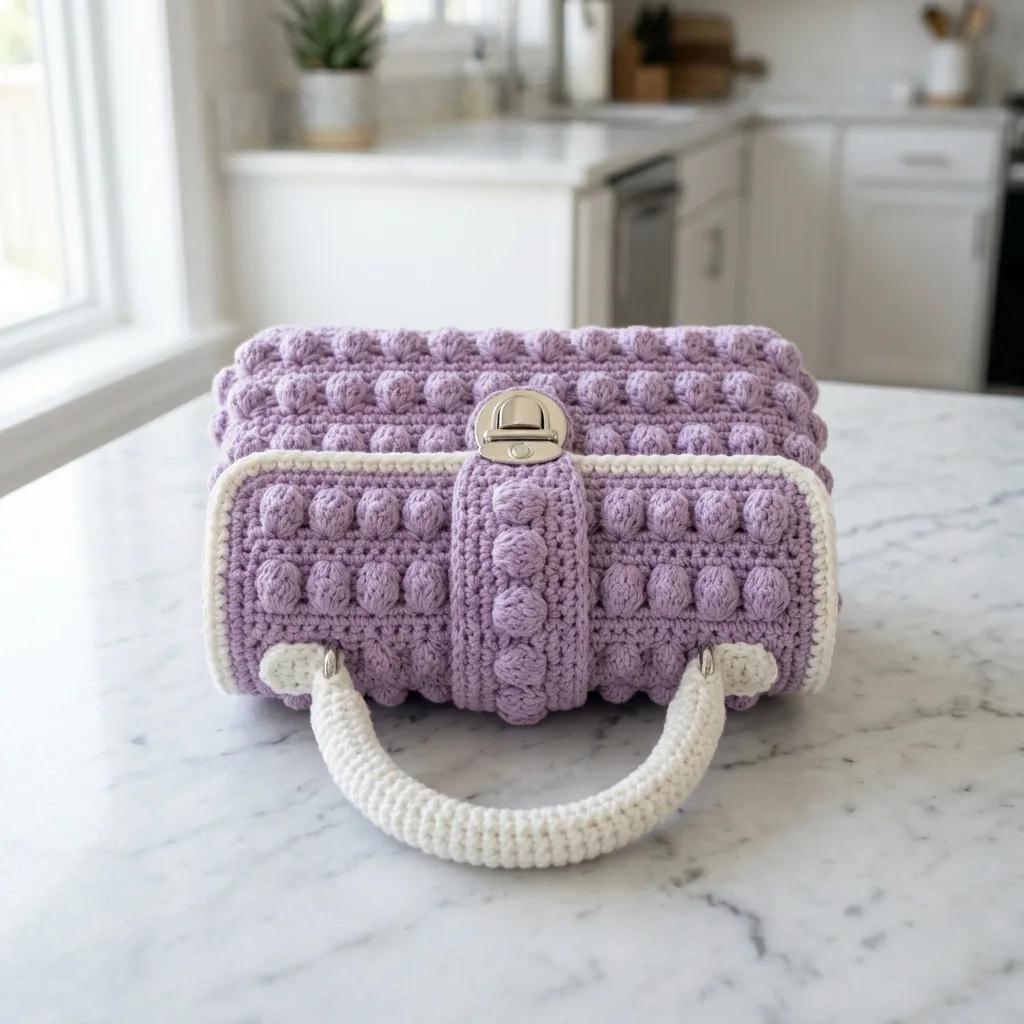
This stunning evening bag features raised bobble stitches covering the outer panels, creating that eye-catching textured look you see in high-end boutique pieces. The lavender and white color combination gives it an elegant, feminine vibe, but you could easily adapt this to any color palette that suits your style.
The finished bag measures 9.5 x 6 x 4 inches (24 x 15 x 10 cm), making it the perfect size for an evening out. It’s large enough to hold your phone, wallet, keys, and a few essentials, but compact enough to carry comfortably. The handle drop is 4 inches (10 cm), so it sits nicely when held in your hand or hung over your wrist.
What makes this bag special is the attention to detail. You’ll add white single crochet piping around the panel edges, creating that crisp framed look. A center strap flap folds over the front and holds a silver turn-lock closure. And yes, there’s a proper fabric lining inside with a magnetic snap for extra security.
Skill Level and Time Estimate
This pattern is rated intermediate. You should be comfortable working bobble stitches, crocheting in rows, seaming panels together, installing hardware, and doing basic fabric lining work.
Expect the crochet portion to take approximately 8 to 12 hours, depending on your speed and experience. Budget an additional 1 to 2 hours for lining installation and hardware attachment. This isn’t a weekend afternoon project, but it’s absolutely doable over a week or two of evening crafting sessions.
Materials You’ll Need
Yarn:
Suggested Yarns:
Hook:
Hardware:
Additional Supplies:
Substitution Note: Choose a worsted weight cotton or cotton-blend yarn that creates a dense fabric. If you prefer acrylic, add stabilizer to every panel so the bag maintains its squared shape. Match gauge rather than label weight for best results.
Gauge
Bobble stitch pattern: 4 bobbles x 6 rows = 2 x 2 inches (5 x 5 cm), measured between bobbles after blocking.
Getting exact gauge matters for this project because it affects hardware placement and lining size. Take time to make a gauge swatch before diving in.
Abbreviations and Stitch Guide
How to Make the Bobble Stitch
The bobble stitch creates those beautiful raised bumps on your fabric. Here’s how to work it:
In the indicated stitch, yarn over, insert hook, pull up a loop, yarn over and pull through 2 loops. This is a partial double crochet. Repeat this partial double crochet 4 more times in the same stitch until you have 6 loops on your hook. Yarn over and pull through all 6 loops. Chain 1 to lock the bobble in place. Push the bobble to the right side of your work.
Don’t worry if this feels awkward at first. After a few bobbles, your hands will find their rhythm.
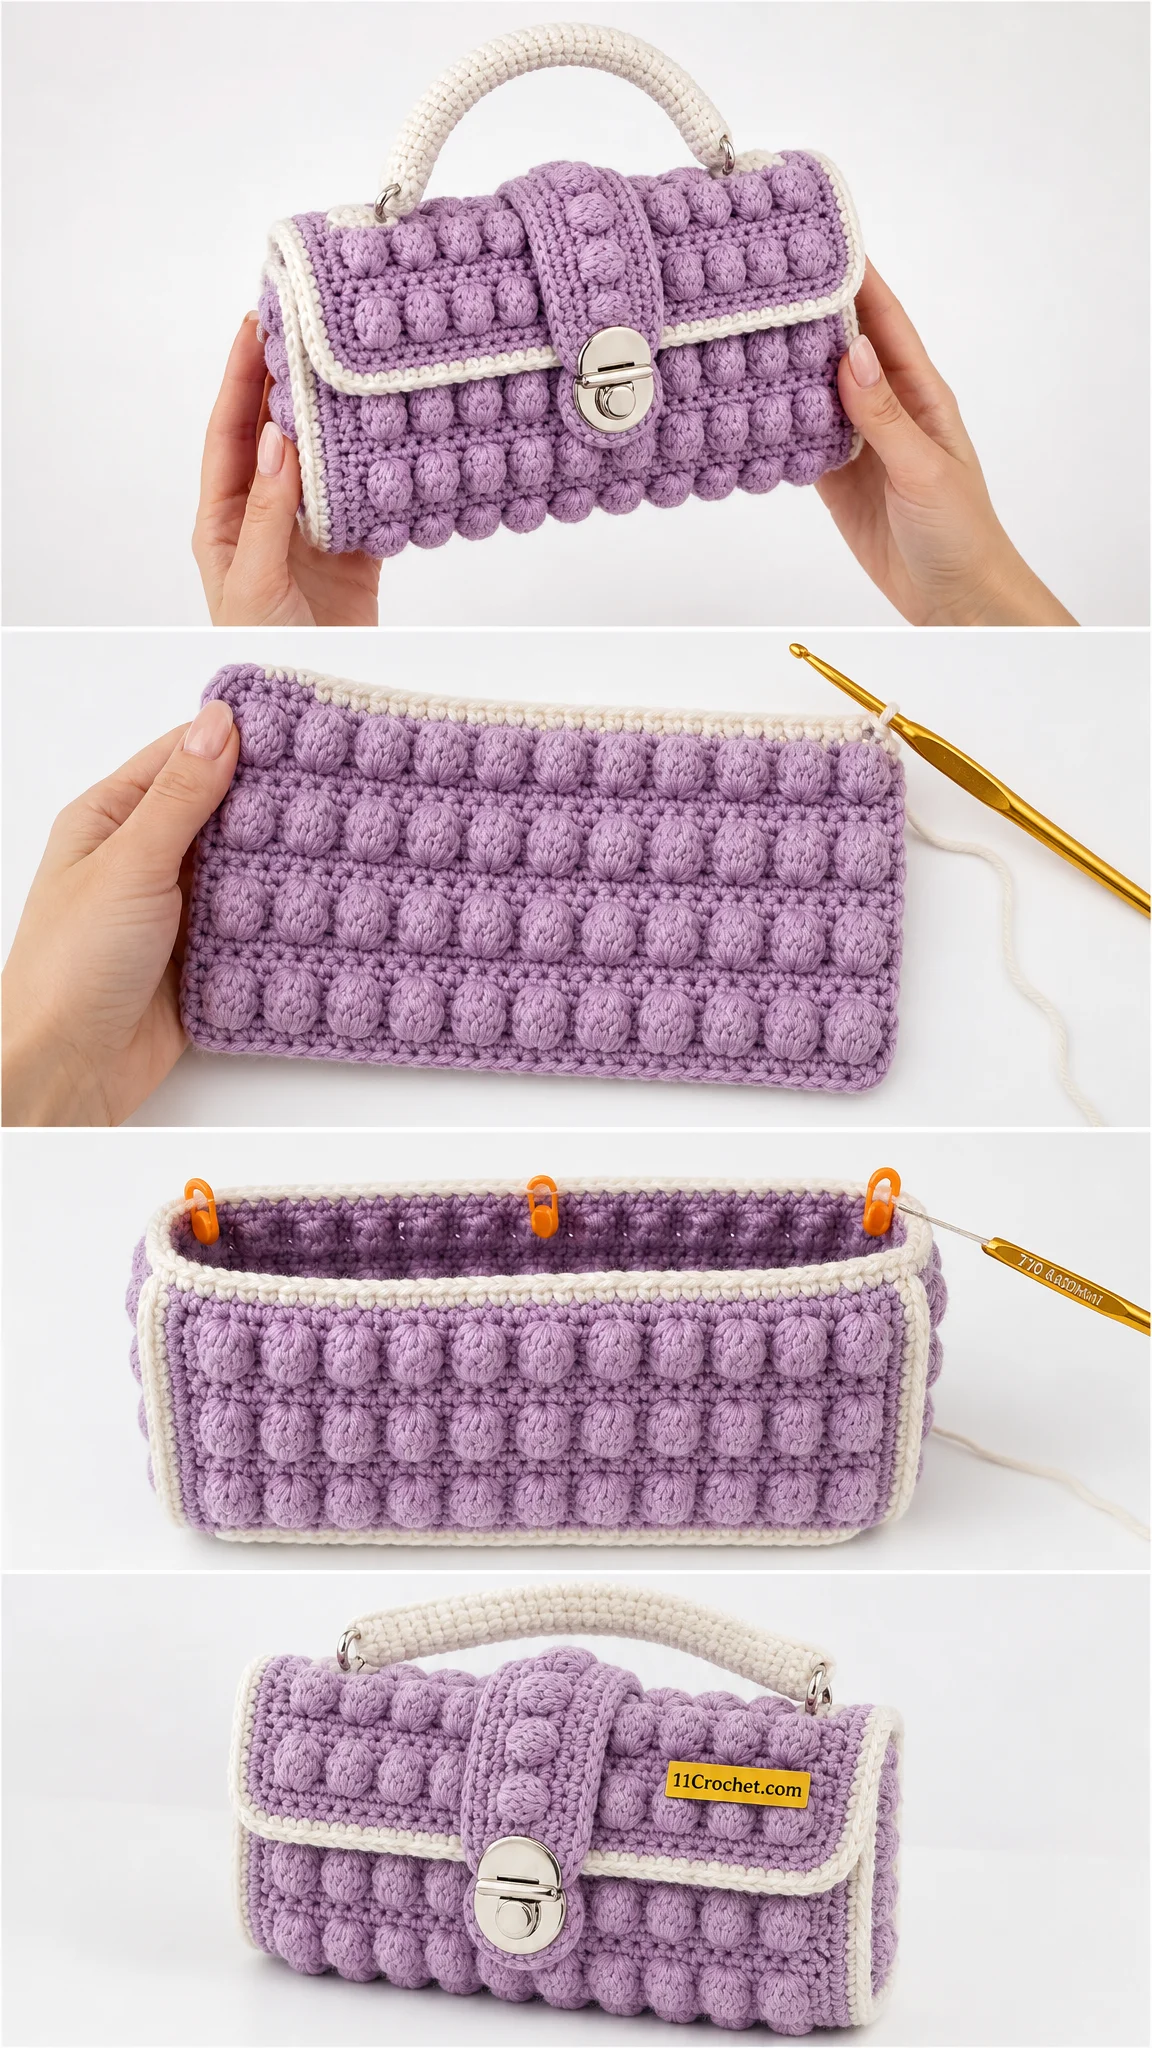
Construction Overview
Before we dive into the pattern, here’s how this bag comes together:
1. Crochet the front and back bobble panels in lavender
2. Crochet the flat base and two side gussets
3. Add white single crochet piping around panel edges
4. Crochet the center strap flap and attach turn-lock hardware
5. Seam panels around stabilizer inserts for structure
6. Crochet the white handle and attach with metal rings
7. Sew and install the lining with magnetic snap
Front Panel Instructions
Make 1 in lavender. Work firmly because this panel forms the front face where the strap flap sits.
Step 1: Ch 45.
Step 2 (Row 1, WS): Sc in 2nd ch from hook and in each ch across. (44 sc) Ch 1, turn.
Step 3 (Row 2, RS bobble row): Sc in first 2 sts. *Bobble in next st, sc in next 3 sts; rep from * across to last 2 sts, bobble in next st, sc in last st. Ch 1, turn. You should have 11 bobbles across.
Step 4 (Row 3, WS): Sc in each st and ch-1 lock space across, keeping the count at 44 working positions. Ch 1, turn.
Step 5 (Row 4): Sc in each st across. Ch 1, turn.
Step 6 (Row 5, offset bobble row): Sc in first 4 sts. *Bobble in next st, sc in next 3 sts; rep from * across, ending with sc in remaining sts. Ch 1, turn.
Step 7 (Row 6): Repeat Row 3.
Step 8 (Rows 7-26): Repeat Rows 2-6 until the panel measures about 9.5 inches (24 cm) wide by 5.25 inches (13.5 cm) tall, ending after a WS sc row. Focus on maintaining straight edges.
Step 9 (Final row): Sc across. Fasten off and weave in ends.
Designer Note: The front panel has a horizontal white framed line just below the top third. This gets added later as surface edging across the front after the strap flap is attached.
Back Panel Instructions
Make 1 the same as the front panel. Do not add the strap flap to this piece. The back remains fully covered in bobbles.
Base Instructions
Make 1 in lavender.
Step 1: Ch 39.
Step 2 (Row 1): Sc in 2nd ch from hook and across. (38 sc) Ch 1, turn.
Step 3 (Rows 2-12): Sc across. The base should measure about 8.5 x 3.5 inches (22 x 9 cm). Add or remove rows to match your desired depth.
Step 4: Fasten off, leaving a long tail for seaming.
Side Gussets
Make 2 in lavender.
Step 1: Ch 16.
Step 2 (Row 1): Sc in 2nd ch from hook and across. (15 sc) Ch 1, turn.
Step 3 (Row 2, RS): Sc in first 2 sts. *Bobble in next st, sc in next 3 sts; rep across, ending with sc as needed. Ch 1, turn.
Step 4 (Row 3): Sc across. Ch 1, turn.
Step 5 (Rows 4-22): Repeat Rows 2-3 until gusset is 6 inches (15 cm) tall.
Step 6: Fasten off.
Center Strap Flap
Make 1 in lavender.
Step 1: Ch 9.
Step 2 (Row 1): Sc in 2nd ch from hook and across. (8 sc) Ch 1, turn.
Step 3 (Row 2): Sc in first 2 sts, bobble in next st, sc in next 2 sts, bobble in next st, sc in last 2 sts. Ch 1, turn.
Step 4 (Row 3): Sc across. Ch 1, turn.
Step 5 (Rows 4-20): Repeat Rows 2-3 until strap measures 5.25 inches (13.5 cm), or long enough to fold from top back edge over the front center.
Step 6: Work 1 round of sc around the strap, placing 3 sc in each corner. Fasten off.
White Piping and Front Frame
Use white yarn and a 4 mm hook. Work with RS facing. Keep your edging snug but not tight.
Front panel outer piping: Join white in any corner. Sc evenly around all four sides, placing 3 sc in each corner. Sl st to join. Fasten off.
Back panel outer piping: Repeat around the back panel.
Side gusset piping: Work 1 round of sc around each gusset.
Base piping: Work 1 round of sc around base if desired for a clean seam.
Front horizontal frame line: With white yarn, surface sl st or surface sc in a straight line across the front panel about 2.25 inches (5.5 cm) down from the top edge. Continue around the lower front rectangle to create that beautiful framed pocket look.
Check symmetry before fastening off. The white line should run behind the strap flap position and look level from edge to edge.
Body Assembly
Step 1: Cut stabilizer pieces: front and back 9.25 x 5.75 inches (23.5 x 14.5 cm), base 8.5 x 3.5 inches (22 x 9 cm), side pieces 3.5 x 5.75 inches (9 x 14.5 cm), flap insert slightly smaller than strap flap.
Step 2: Place stabilizer behind front panel. Whipstitch or mattress stitch the base to the lower edge of the front panel, matching centers.
Step 3: Attach side gussets to front panel from base corner up to top edge. Repeat on both sides.
Step 4: Attach the back panel to the base and side gussets, keeping bobbles facing outward.
Step 5: Insert stabilizer pieces as you seam so edges stay boxed and squared.
Step 6: Steam lightly from a distance or block gently. Do not flatten your beautiful bobbles!
Turn-Lock Closure Installation
Step 1: Fold strap flap over the center front. Mark the closure position just below the top third of the bag.
Step 2: Install the top turn-lock plate on the lower end of the strap flap following your hardware instructions.
Step 3: Install the receiving plate on the front panel. Add a small stabilizer scrap behind the hardware before tightening prongs or screws.
Step 4: Sew the top end of the strap flap securely to the back top edge or inside top back panel so it folds neatly over the front.
Crocheted Handle
Step 1: With white yarn, ch 34, or chain to 10 inches (25 cm) for a 4 inch (10 cm) handle drop.
Step 2 (Row 1): Sc in 2nd ch from hook and across. Ch 1, turn.
Step 3 (Rows 2-4): Sc across. Fasten off, leaving tails.
Step 4: Fold handle lengthwise around a cord or extra strand of yarn for padding. Sew long edges together to make a rounded handle.
Step 5: Wrap each handle end around a metal ring and stitch firmly. Attach rings to reinforced white tabs at the upper front side corners.
Lining Installation
Step 1: Cut lining fabric: 1 rectangle 11 x 14 inches (28 x 36 cm) for body plus seam allowance, or cut front/back/base/side pieces to match the bag interior.
Step 2: Sew lining sides and base with right sides together. Box the bottom corners to match 4 inch (10 cm) depth.
Step 3: Install magnetic snap on lining, centered near the top opening. Reinforce the snap area with interfacing.
Step 4: Place lining inside bag with wrong sides together. Fold top lining edge under and hand stitch to the inner top edge of the crochet bag.
Finishing Checklist
Before calling your bag complete, run through this list:
Care Instructions
Spot clean with cool water and mild soap. Reshape by hand and dry flat. Keep hardware dry when possible. Do not machine wash once stabilizer, lining, and hardware are installed.
Left-Handed Crocheters
Follow the same stitch counts and rows. Your right and left side panels will mirror the photos. Keep the closure centered and place the strap flap on the outside front before final assembly.
Final Thoughts on This Crochet Evening Bag Pattern
This Lavender Bobble Evening Bag is the kind of project that makes people stop and ask, "Wait, you MADE that?" The combination of textured bobbles, clean white piping, professional hardware, and proper lining creates a bag that looks like it came from a designer boutique.
Yes, it takes time and attention to detail. Yes, you’ll need to install hardware and sew a lining. But when you’re done, you’ll have a one-of-a-kind accessory that you can carry with pride, knowing every single stitch came from your own hands.
Thank you so much for choosing this pattern! I genuinely hope you love making it as much as I loved designing it. If you finish your bag, I would absolutely love to see it. Tag me on Instagram or share a photo in my Facebook group. Seeing your beautiful finished projects is honestly the best part of my job.
If this pattern is speaking to you, go ahead and save it to your Pinterest boards so you can find it when you’re ready to start. And if you do make this gorgeous bag, drop a comment below and tell me about it. I love hearing which colors you choose and how your hardware installation goes!
Want a Quick & Easy Printable Version?
Get a clean, beautifully formatted PDF of this pattern — easy to follow step by step, ready to print or save on any device. No scrolling, no distractions, just the pattern.
Get the Printable PDF →