Last spring, my niece announced she wanted to be "a walking garden" for her dance recital. Not a flower. Not a fairy. A walking garden. I laughed at first, but then I started sketching, and honestly? This Pink Rose Garden Crochet Dress became one of the most ambitious and rewarding projects I have ever completed. The look on her face when she twirled in front of the mirror made every single one of those hundred-plus roses worth it.
Get the Ad-Free PDF Pattern
You can find the free pattern below, or you can purchase the ad-free printable PDF from my shop.
Get the Printable PDF →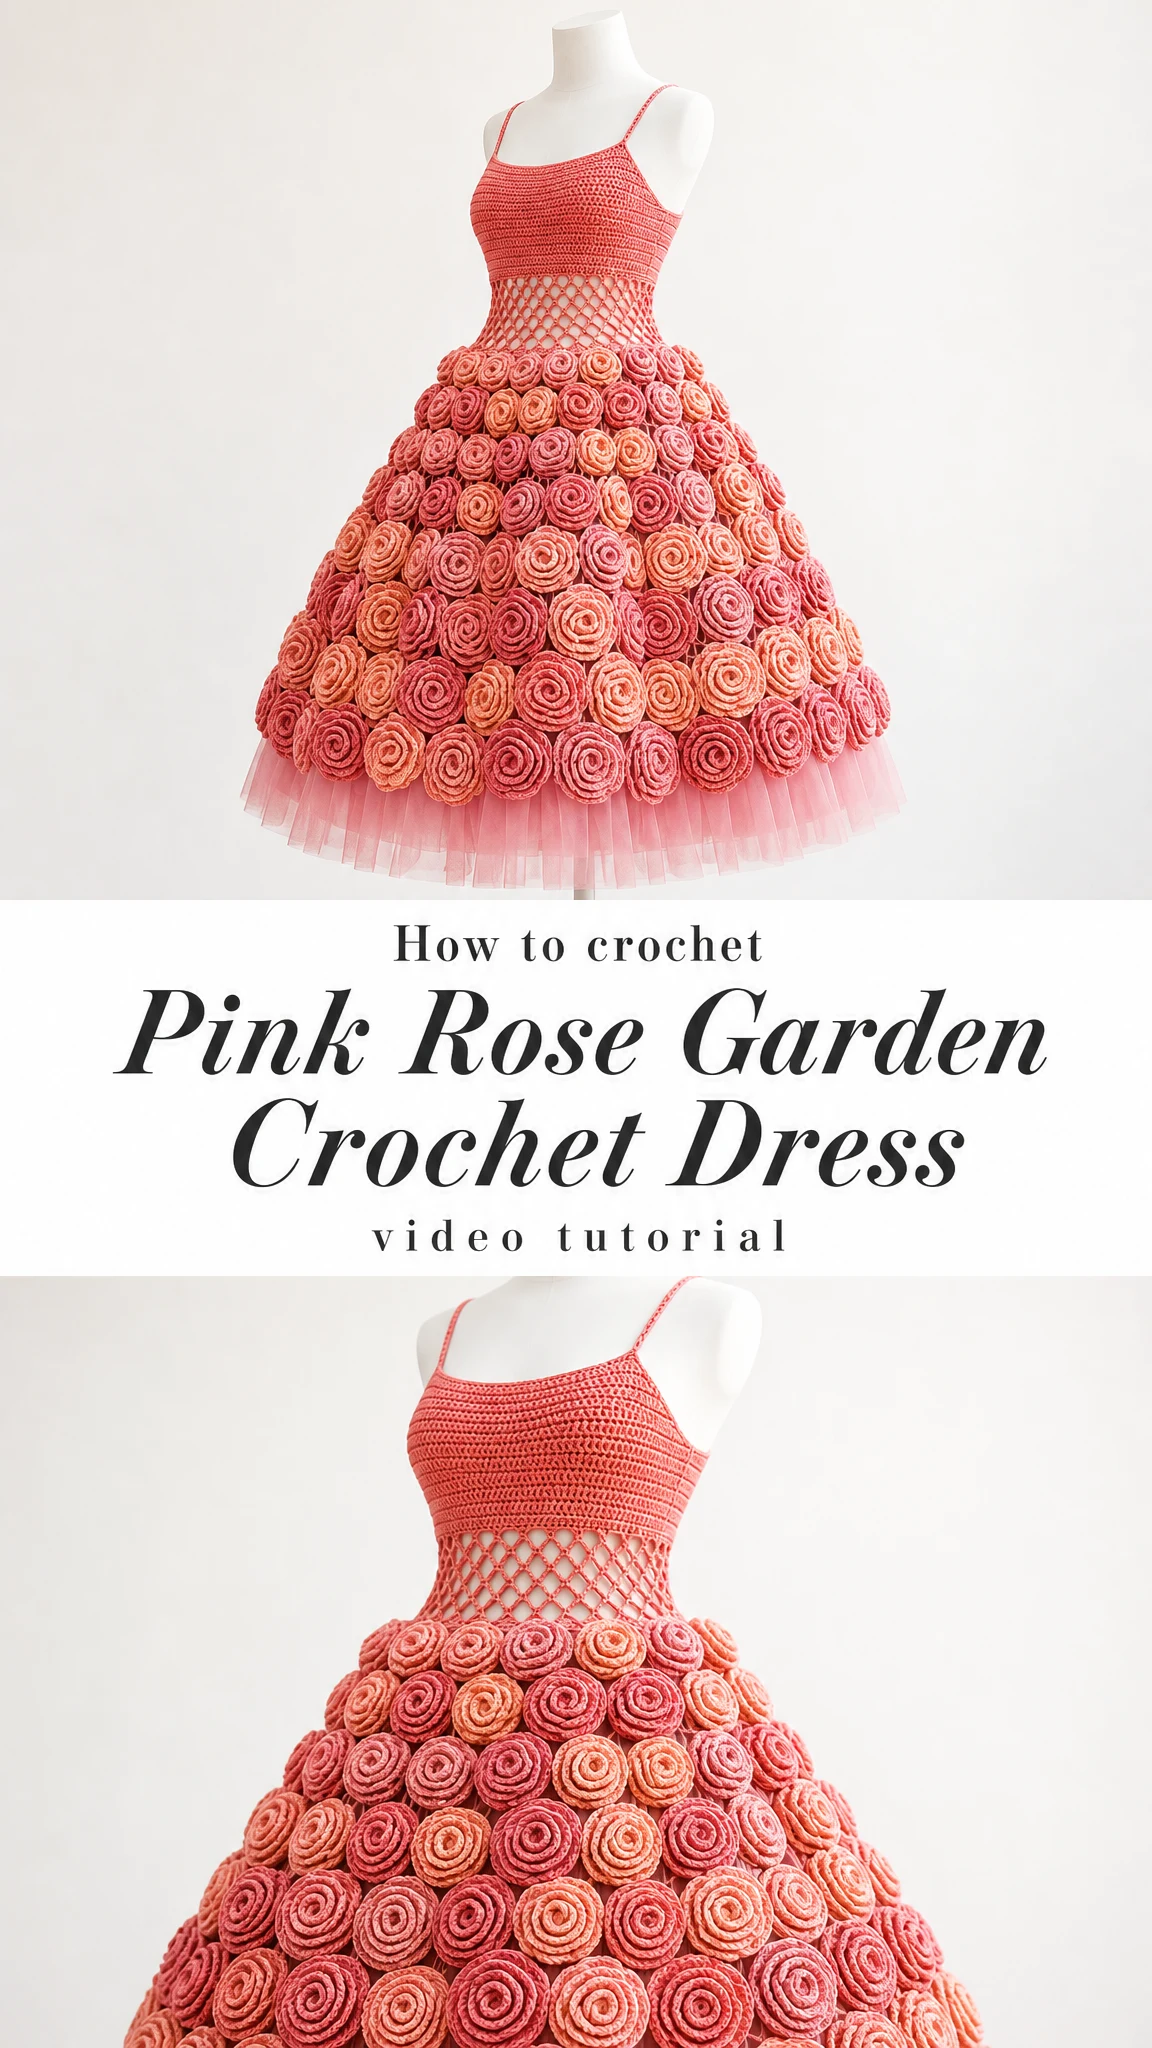
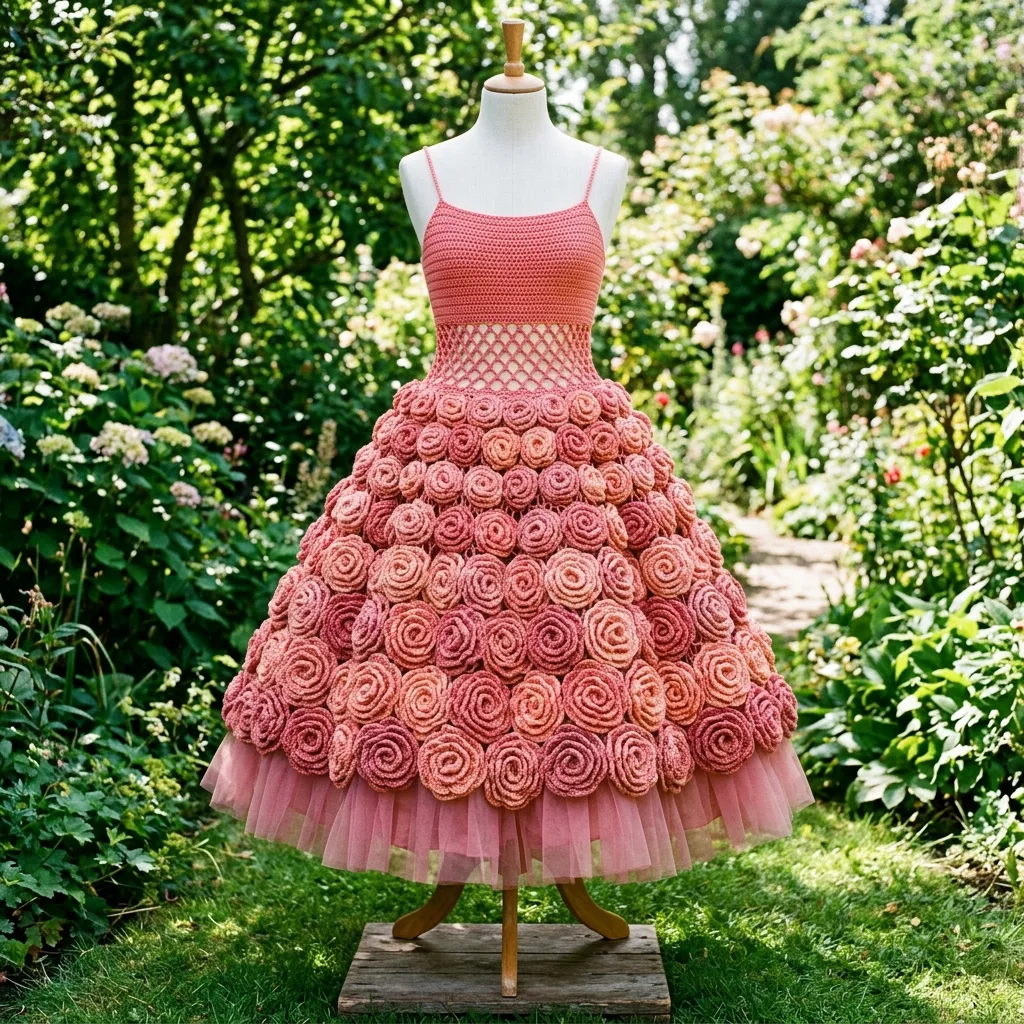
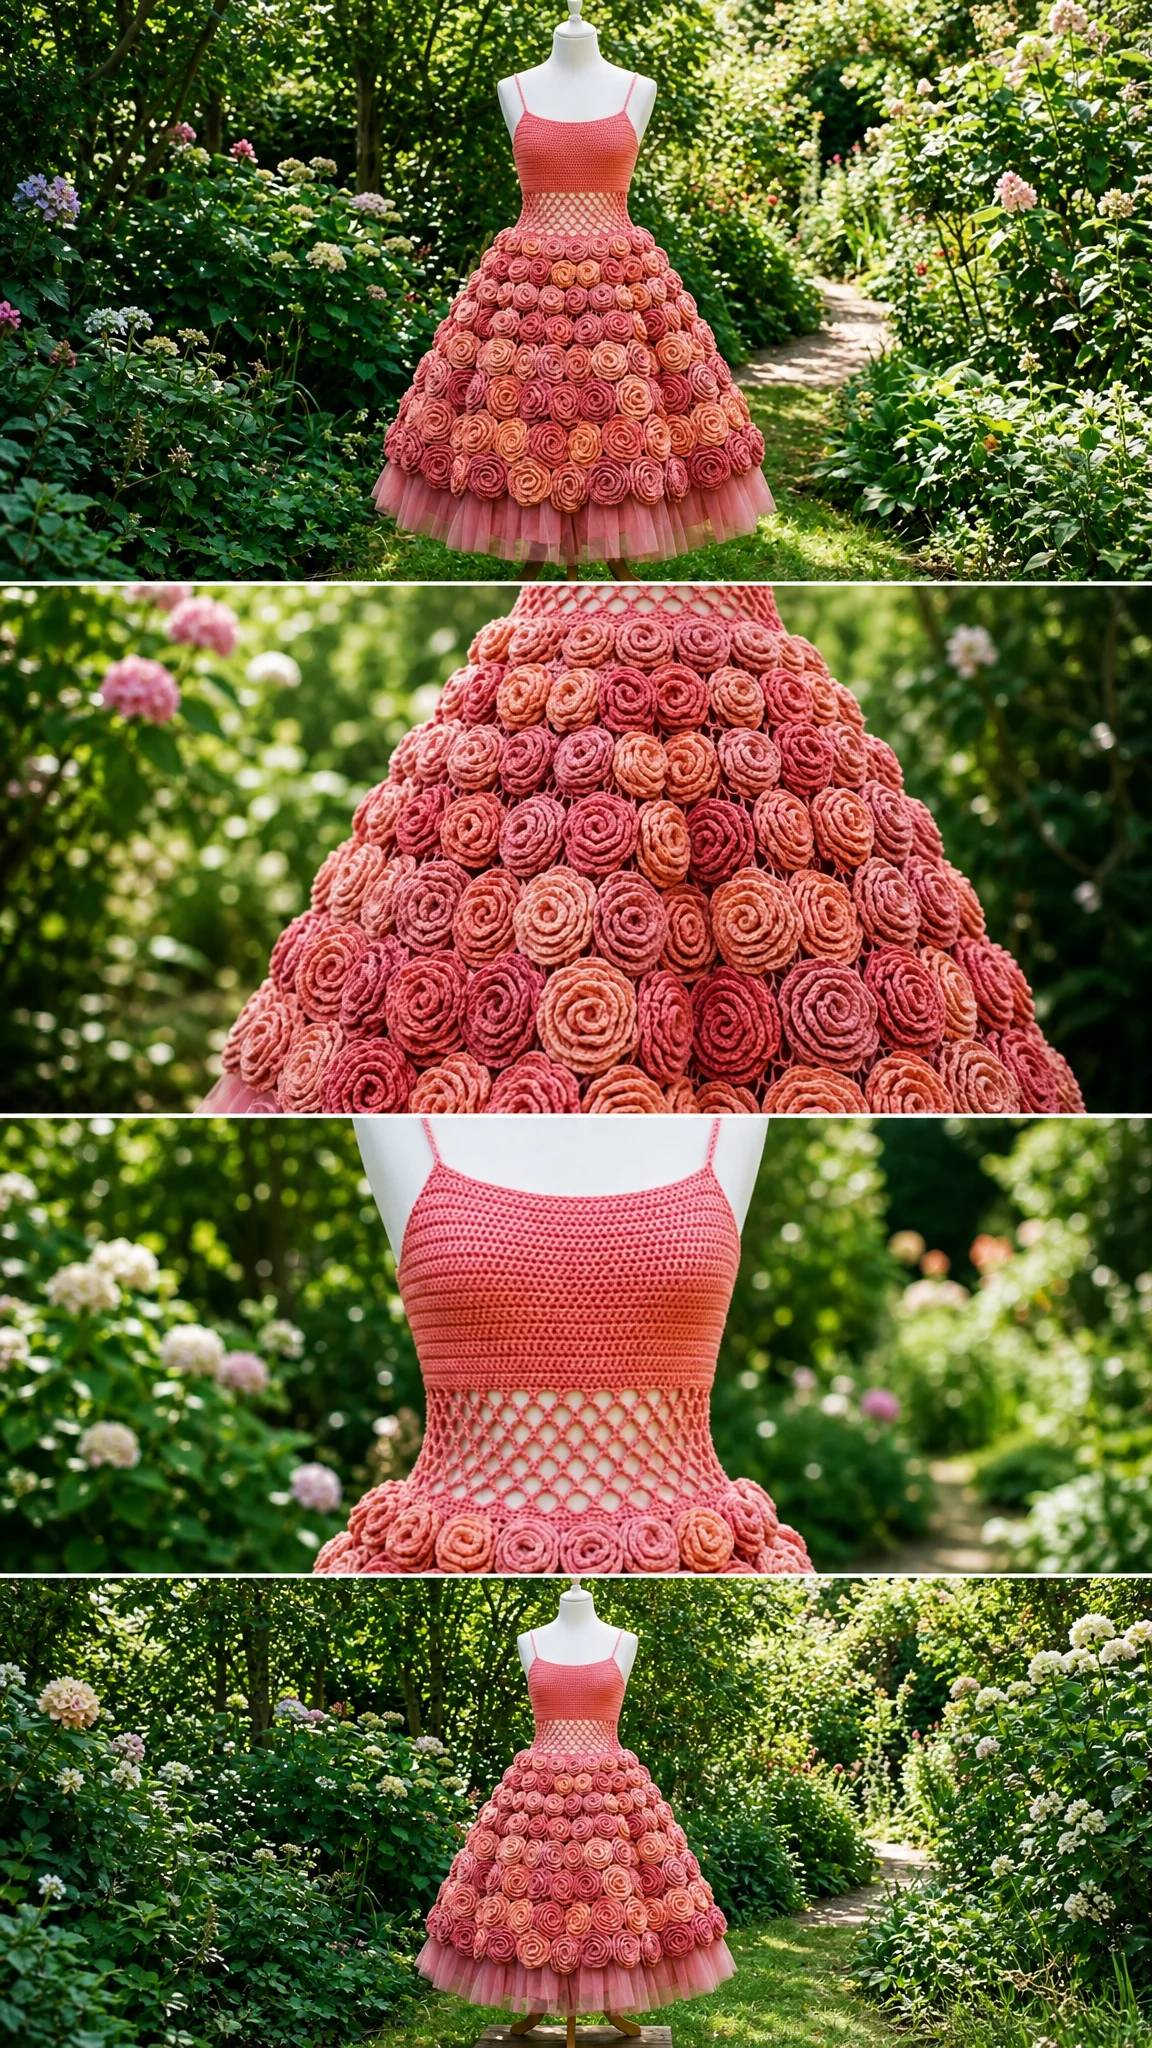
This dimensional rose skirt dress combines a fitted single crochet bodice, an open diamond mesh waist, and rows upon rows of handmade spiral rosettes in gorgeous coral, dusty rose, and peach tones. A soft tulle underskirt adds volume and movement, creating that dreamy garden silhouette. Whether you are making this for a special occasion, a display form, or a treasured keepsake, this crochet pattern will guide you through every stitch.
Pattern Overview and Skill Level
This Pink Rose Garden Dress pattern is rated intermediate. You should be comfortable with single crochet (sc) fabric, open mesh construction, sewing motifs, and shaping a layered skirt. If you have made granny squares and sewn them together, you already have most of the skills needed here.
The total time estimate is 18 to 26 hours: the bodice takes about 3 to 5 hours, the mesh waist 1 to 2 hours, the roses 10 to 15 hours, and assembly plus finishing around 4 hours. Yes, those roses take time. But each one works up quickly on its own, making this the perfect "Netflix and crochet" project.
Finished Measurements:
These measurements fit a doll, mannequin, or child-size display form. You can adjust as needed for your specific recipient.
Materials You Will Need
Gathering your supplies before you begin makes the whole process smoother. Here is everything required for this crochet tutorial:
Yarn:
– Coral Pink (approximately 45% of total)
– Dusty Rose (approximately 35% of total)
– Peach Blush (approximately 20% of total)
Recommended Yarn Brands:
Substitution Note: Choose any DK or light worsted cotton or cotton blend that meets gauge. For a lighter skirt, use sport weight cotton and add more rows or roses until the skirt circumference matches your form. Avoid very stretchy acrylic for the bodice unless you add lining or elastic support.
Tools:
Additional Materials:
Gauge
Getting your gauge right ensures your dress fits properly. Take a few minutes to make a swatch before diving in.
22 sc x 24 rows = 4 inches x 4 inches (10 cm x 10 cm) in single crochet using a 2.5 mm hook.
If your swatch is too small, try going up a hook size. If it is too large, go down a hook size. This step is especially important for the fitted bodice.
Abbreviations
Let me walk you through every abbreviation used in this pattern. Even if you know these by heart, a quick refresher never hurts.
Left-Handed Note: Left-handed crocheters can follow the same stitch counts. The spiral roses will curl in the opposite direction, which is perfectly fine. Sew all roses with the spiral facing outward and keep row spacing consistent.
Construction Overview
Before we dive into the step by step instructions, here is the big picture of how this dress comes together:
1. Crochet a fitted single crochet bodice with slim straps
2. Add an open diamond mesh waistband below the bodice
3. Make many spiral rosettes in three pink tones
4. Sew roses in overlapping rows onto the skirt base, starting at the hem and moving upward
5. Gather and attach a tulle underskirt for volume
6. Weave ends, block lightly if needed, and secure all layers
Understanding this flow helps you see how each piece connects to the next.
Part 1: The Bodice
The bodice is written as a rectangle worked in rows and joined at the back. For a custom fit, measure around the chest of your form and work until the rectangle wraps comfortably with 0.5 inch (1.25 cm) ease.
Bodice Rows:
1. Ch 49, or any even number that equals your desired bodice width plus 1 turning chain.
2. Row 1: Sc in 2nd ch from hook and in each ch across. Turn. (48 sc)
3. Rows 2 through 28: Ch 1, sc in each st across. Turn.
4. Check height: The piece should measure about 6 inches (15 cm) from neckline to lower edge. Add or remove rows to fit your form.
5. Join back seam with sl st or mattress stitch, leaving the top edge open.
6. Neckline edging: Join yarn at back seam, ch 1, sc evenly around top edge, sl st to join. FO.
7. Lower edge: Join yarn at back seam, ch 1, sc evenly around lower edge, sl st to join. Do not fasten off if continuing directly to the mesh waist.
Part 2: The Straps
The straps are simple but essential. They support the entire dress, so take care here.
1. Try the bodice on the form and mark strap positions at the front and back.
2. Attach yarn at front marker. Ch 32, or enough to reach the back marker without pulling.
3. Sl st to back marker, turn, sc back across the ch for a firm strap.
4. Sl st into the front edge, FO, and weave in ends.
5. Repeat for the second strap.
Pro Tip: For heavier skirts, sew a line of matching thread through each strap after crocheting to reduce stretching over time.
Part 3: Open Mesh Waist
The mesh waist bridges the bodice and rose skirt. It should sit flat but not tight. Work in joined rounds.
1. Round 1: With yarn attached to lower bodice edge, ch 4, skip approximately 2 sc, sc in next st; rep around. Sl st into base of first ch-4 loop.
2. Round 2: Sl st into first ch space, ch 5, sc in next ch space; rep around. Sl st to join.
3. Rounds 3 through 5: Repeat Round 2, keeping the diamond openings aligned.
4. Final round: Ch 1, work 2 sc in each ch space and 1 sc in each sc around. Sl st to join. FO.
The mesh creates a beautiful visual transition and allows the skirt to drape naturally.
Part 4: Rose Motif (Spiral Rosette)
This is where the magic happens. You will make enough roses to cover the skirt densely. For the shown look, plan on 95 to 130 roses depending on motif size and skirt fullness. Make a mix of small, medium, and large roses for a natural layered texture.
Standard Spiral Rosette:
1. Ch 51.
2. Row 1: Sc in 2nd ch from hook and in each ch across. Turn. (50 sc)
3. Row 2: Ch 2, hdc in same st, 2 hdc in each st across. Turn. The strip will begin to curl.
4. Row 3: Ch 2, [hdc, 2 hdc in next st] rep across for a fuller spiral. For a flatter rose, work 1 hdc in each st instead.
5. FO, leaving a 14 inch (35 cm) tail for sewing.
6. Roll the strip from one short end into a spiral. Keep the lower edge flat and let the upper edge flare like petals.
7. Use the long tail to sew through the base several times until the rose holds its shape.
Size Options:
Mix sizes throughout the skirt for visual interest and natural texture.
Color Placement Guide: Work roses in a randomized garden effect. Use Coral Pink for about 45%, Dusty Rose for 35%, and Peach Blush for 20%. Scatter lighter roses between darker rows so no two identical colors dominate one area.
Part 5: Skirt Base and Rose Placement
The roses are sewn to a flexible base. You may use a crocheted mesh base, a matching fabric base, or sew directly onto the upper edge and tulle if the dress is for display. For the strongest wearable result, use a crocheted mesh or fabric base.
Crocheted Mesh Base Option:
1. Join yarn to the final round of the mesh waist.
2. Round 1: Ch 4, skip 2 sts, sc in next st; rep around.
3. Rounds 2 through 10: Sl st into first ch space, ch 5, sc in next ch space; rep around. Increase every second round by working two ch-5 loops into every 8th space.
4. Continue until the base reaches about 20 inches (50 cm) from waist to hem or your desired length.
5. Finish with one round of sc worked evenly around the hem. FO.
Sewing the Rose Rows:
1. Lay the dress flat with the RS facing out.
2. Start at the hem. Pin the first row of roses so they slightly overlap and hide the base.
3. Sew each rose through its base only, catching the mesh or fabric underneath.
4. Add the next row above it, offsetting roses between the roses below.
5. Continue upward until the entire skirt is covered.
6. At the waist, use smaller roses so the transition into the mesh looks smooth.
Take your time with placement. Step back occasionally to check the overall balance of colors and sizes.
Part 6: Tulle Underskirt
The tulle underskirt adds volume and that dreamy movement you see in the photos.
1. Cut 2 to 3 strips of tulle, each about 8 to 10 inches (20 to 25 cm) tall and 2 to 3 times the waist measurement.
2. Stack layers for extra volume.
3. Sew a long gathering stitch along the top edge.
4. Pull the thread gently until the tulle matches the waist circumference.
5. Place the gathered edge inside the dress, just below the mesh waist.
6. Hand sew the tulle to the inside lower bodice or skirt base. Keep stitches hidden from the outside.
7. Trim the lower tulle edge so it peeks below the roses evenly.
Finishing Touches
Almost there! These final steps make all the difference.
Care Instructions: Hand wash gently in cool water if needed. Lay flat to dry. Reshape roses while damp and allow the tulle to air dry fully.
Fit Adjustments
Every form and recipient is different. Here is how to customize:
Safety Note for Children’s Items
If you are making this dress for a child to wear, please test all finished items for safe use. Secure all sewn roses thoroughly and avoid long loose threads. Check every rose after washing to ensure nothing has come loose.
I hope you love making this Pink Rose Garden Crochet Dress as much as I loved designing it. This project is truly a labor of love, and the result is absolutely stunning. Whether it graces a mannequin in your craft room or twirls on a little one at a special event, it is sure to turn heads.
If you want to come back to this pattern later, go ahead and save it to your Pinterest boards so you never lose track of it. And if you make this dress, I would absolutely love to see your finished creation! Drop a comment below or tag me on social media. Seeing your roses bloom brings me so much joy.
Want a Quick & Easy Printable Version?
Get a clean, beautifully formatted PDF of this pattern — easy to follow step by step, ready to print or save on any device. No scrolling, no distractions, just the pattern.
Get the Printable PDF →