Last summer, I lost my favourite crossbody bag somewhere between the farmers market and a coffee shop. I retraced my steps three times, asked every vendor, and finally accepted it was gone. That night, sitting with my yarn stash, I decided I was done buying bags that disappeared into the void. I wanted something handmade, something sturdy, something that felt like *me*. This little terracotta backpack is what came out of that frustration, and honestly? I like it better than anything I could have bought.
Get the Ad-Free PDF Pattern
You can find the free pattern below, or you can purchase the ad-free printable PDF from my shop.
Get the Printable PDF →
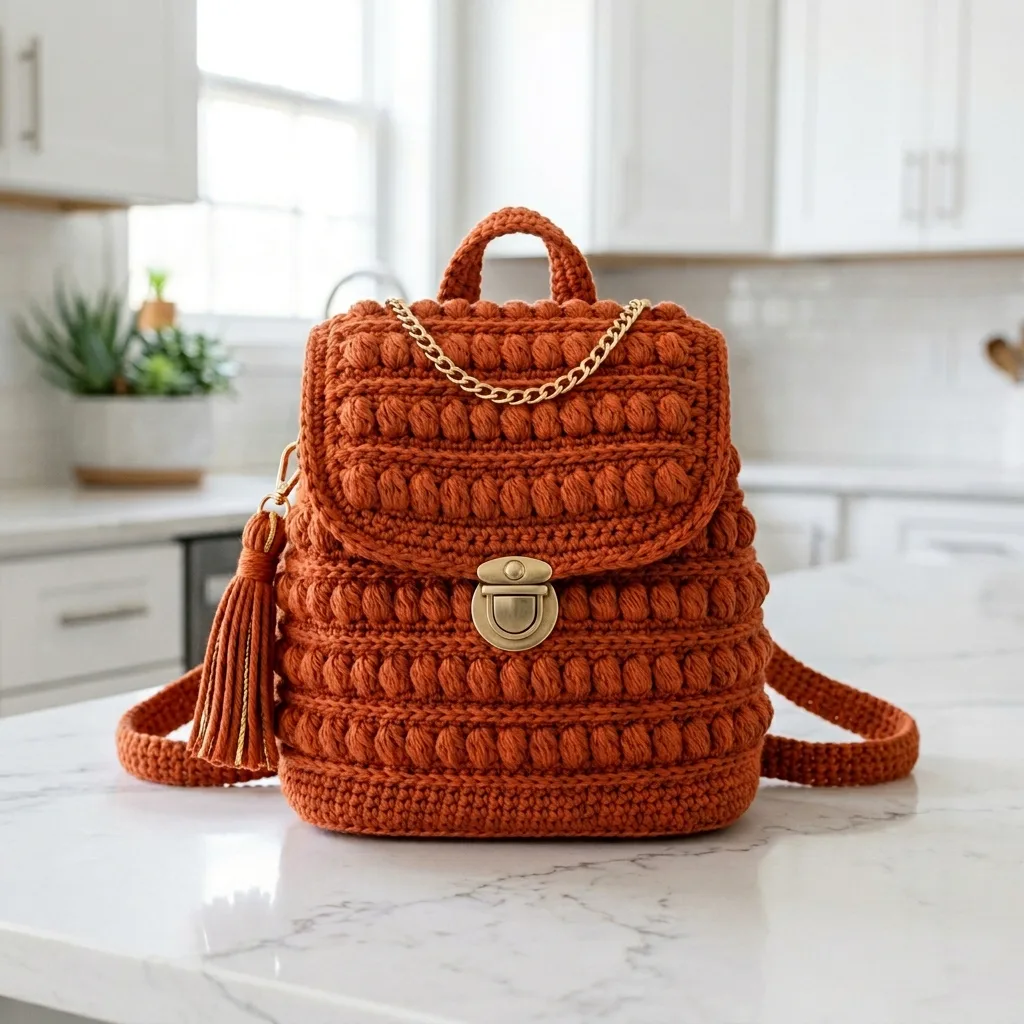
This cosy puff stitch mini backpack combines gorgeous texture with practical structure. The rows of plump puff stitches create that eye-catching bobbled effect, while the dense cotton fabric means it actually stands up on its own. Add in gold hardware, a decorative chain, adjustable straps, and a sweet tassel, and you have got yourself a bag that looks like it came from a boutique.
If you have been wanting to try a bag project but felt intimidated, this is a wonderful place to start. The construction is more straightforward than it looks. You will work a seamless base and body in the round, then add the flap, handle, and straps separately. Let me walk you through everything you need to know.
Why You Will Love This Crochet Backpack Pattern
This pattern hits that sweet spot between impressive and achievable. The puff stitch (ps) creates incredible texture without complicated colourwork or shaping. Once you get into the rhythm of the two-round repeat, the body works up almost meditative.
The finished dimensions are 20 cm tall, 18 cm wide, and 9 cm deep (about 7⅞ × 7 × 3½ inches). That is roomy enough for your phone, wallet, keys, sunglasses, and a few extras, but compact enough to feel sleek rather than bulky.
The pattern is rated intermediate, and I would say that is accurate. You should be comfortable with basic stitches worked in the round, and willing to learn the puff stitch if you have not tried it before. The estimated time is 12 to 16 hours, which makes it a satisfying weekend project or a relaxing week of evening sessions.
Materials You Will Need
Gather these supplies before you start. Having everything ready makes the process so much smoother.
Yarn:
Recommended yarn options:
Hook:
Hardware and notions:
A Note on Yarn Substitutions
Any category 4 medium cotton or cotton blend with good stitch definition will work beautifully. If you want a chunkier bag, you can use cotton t-shirt yarn or tube yarn with a 5 to 6 mm hook, but expect a larger finished size.
Important: Avoid soft, drapey acrylics. They will not hold the backpack’s structure, and you will end up with a floppy bag that does not stand on its own. Cotton is your friend here.
Gauge
16 single crochet (sc) × 18 rounds = 10 cm (4 inches)
For the puff pattern, approximately 7 repeats (14 stitches) × 12 rounds = 10 cm.
Here is the truth about gauge for bags: firmness matters more than exact numbers. Your fabric should feel dense and stand up on its own. If it feels floppy or loose, go down a hook size. A too-loose gauge will give you a saggy bag, and nobody wants that.
Stitch Guide and Abbreviations
This pattern is written in US terms. Here is every abbreviation you will encounter:
Special Stitch: Puff Stitch (ps)
This stitch creates those beautiful puffy bobbles. Do not worry if it feels awkward at first. After a few repeats, your hands will know what to do.
Step 1: Yarn over, insert hook in the stitch, yarn over and pull up a tall loop.
Step 2: [Yarn over, insert hook in the same stitch, yarn over, pull up a tall loop] 3 more times. You now have 9 loops on your hook.
Step 3: Yarn over and draw through all 9 loops.
Step 4: Chain 1 to close and lock the puff.
Unless a round says otherwise, work each puff into the front loop of the stitch for extra relief and texture.
Tip for left-handed makers: These directions assume right-handed crochet. Work the mirror image by reading "right" as "left" and running rounds counterclockwise. All stitch counts stay identical.
Note: The chain 1 at the start of a round does NOT count as a stitch.
The Pattern: Base and Body
Part One: The Base (Oval, Continuous Rounds)
Place a stitch marker in the first stitch of each round and move it up as you go. This keeps you from losing your place in the continuous spiral.
Foundation: Ch 15.
Rnd 1: 2 sc in 2nd ch from hook, sc in next 12 ch, 4 sc in last ch; rotate to work the opposite side of the chain, sc in next 12 ch, 2 sc in the starting stitch. (32 sc)
Rnd 2: [2 sc in each of next 2 sts, sc in next 12] twice. (40 sc)
Rnd 3: Sc around, increasing 8 sts evenly. (48 sc)
Rnd 4: Sc around, increasing 8 sts evenly. (56 sc)
Rnd 5: Sc around, increasing 8 sts evenly. (64 sc)
Rnd 6: Working in BLO, sc in each st around. This creates the crisp edge where the base meets the body. (64 sc)
Your base should measure about 18 × 9 cm (7 × 3½ inches).
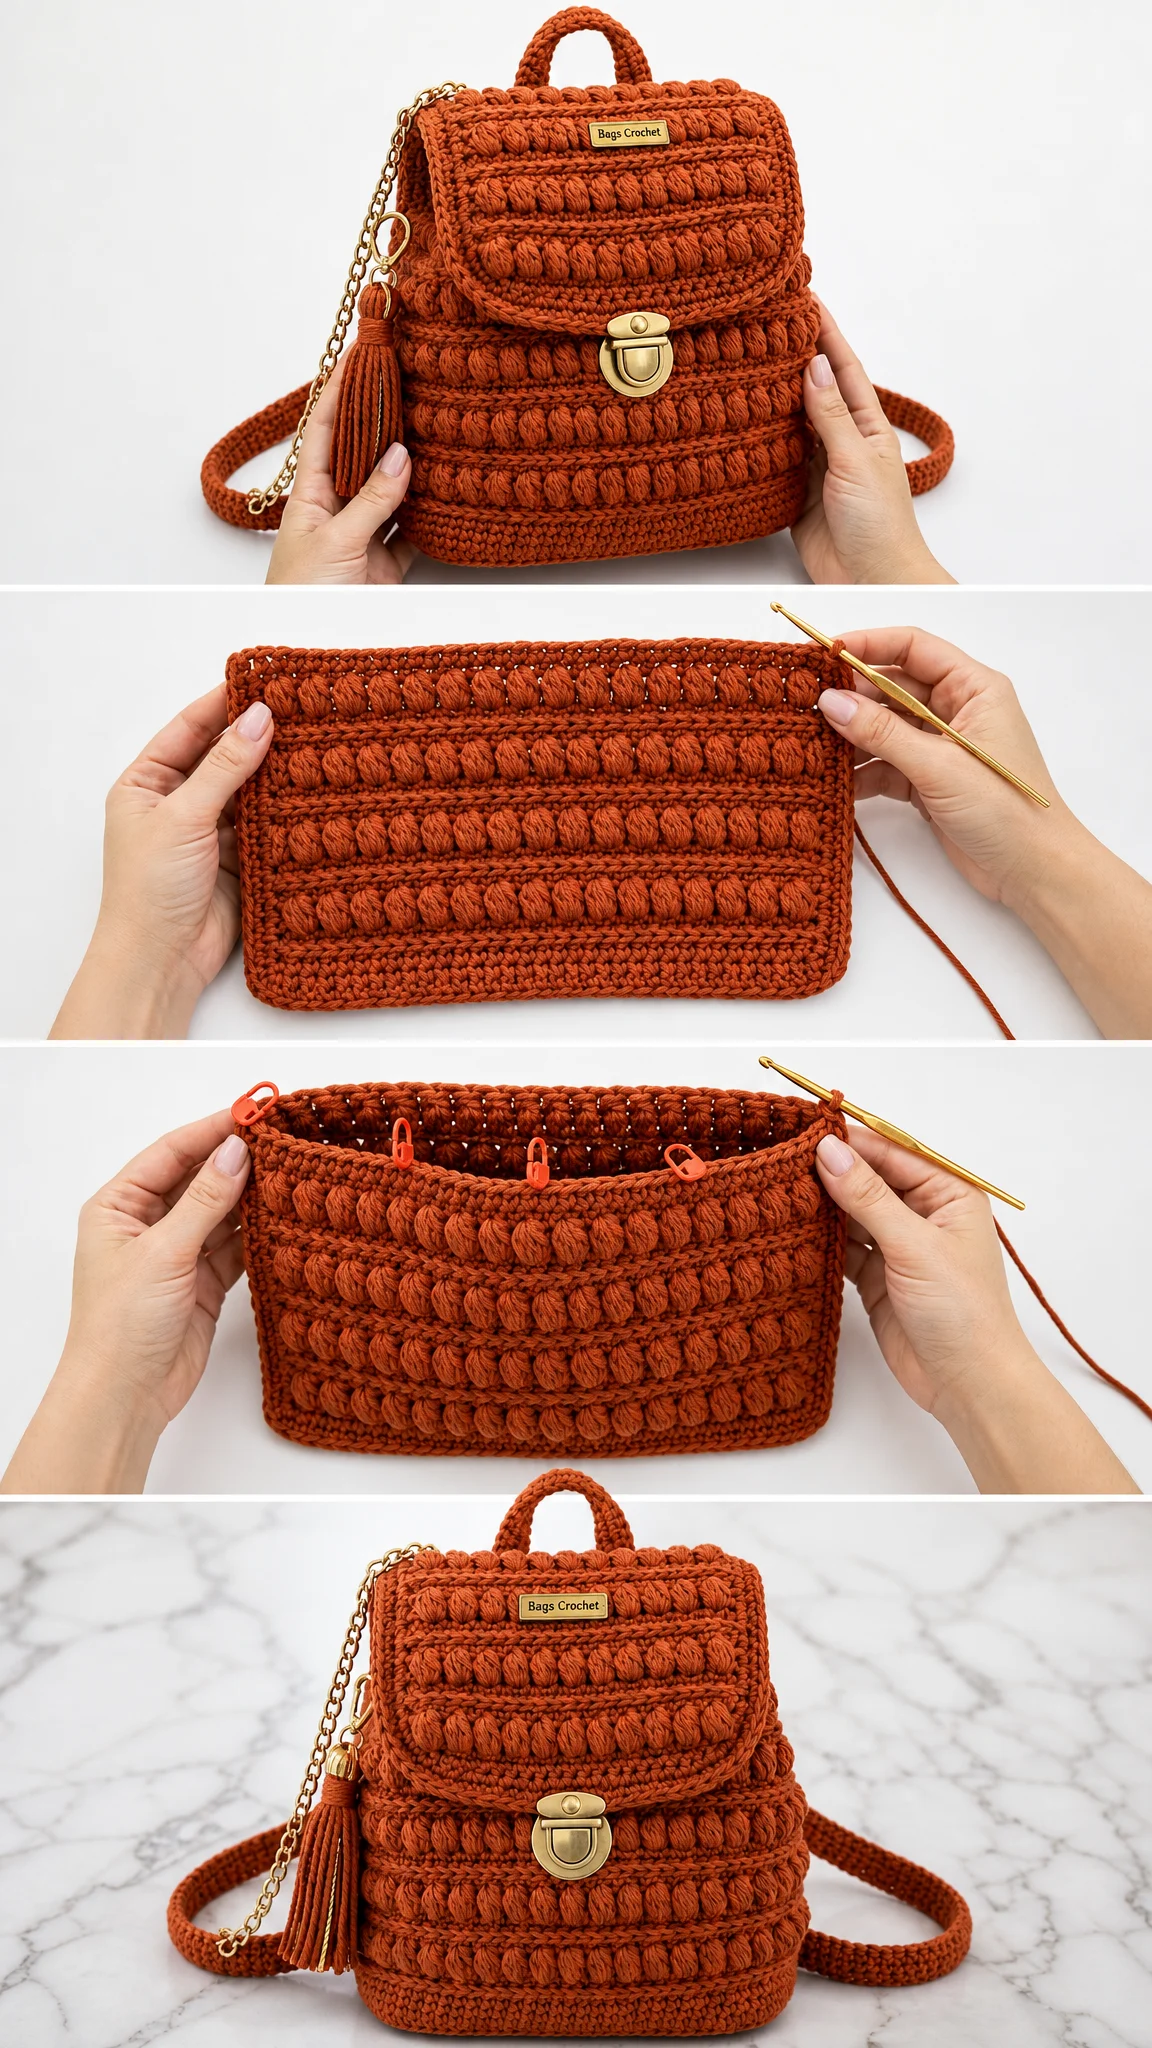
Part Two: The Body (Worked Up From the Base)
Now you will switch to joined rounds: join each round with a slip stitch to the first stitch, then chain 1 to begin the next round.
Set-up rnd: Ch 1, sc in each st around, join. (64 sts)
Puff Pattern Repeat (Worked Over 64 Stitches)
Rnd A (puff round): Ch 1, [ps in FLO of next st, sc in next st] around, join to first puff. (32 ps, 32 sc)
Rnd B (anchor round): Ch 1, sc in each st around (one sc in the top of each puff and each sc), join. (64 sc)
Important tip: On every new Rnd A, place each puff in the stitch sitting directly above the previous puff so they stack into neat vertical columns. This creates those beautiful straight lines of texture you see in the photos.
Body: Repeat Rnds A and B nine times (18 rounds total), or until the body measures about 15 cm or 6 inches from the base.
Closure Channel and Top Edge
Next 2 rnds: Ch 1, sc in each st around, join. (64 sc)
Eyelet rnd: Ch 1, [sc in next 3, ch 1, skip next st] around, join. (16 eyelets)
Next rnd: Ch 1, sc in each st and in each ch-1 space around, join. (64 sc)
Final 2 rnds: Ch 1, sc in each st around. After the last round, sl st, fasten off and weave in the end. (64 sc)
Drawstring Cord
Make a chain about 60 cm or 24 inches long, then fasten off. Weave it through the eyelet round, starting and ending at centre front. Pull to gather the opening and knot the ends. You can add tiny tassels to the cord ends if you like that extra detail.
The Flap
The flap is worked flat in rows. The straight starting edge becomes the hinge where it attaches to the back of the bag.
Foundation: Ch 27.
Row 1 (RS): Sc in 2nd ch from hook and across, turn. (26 sc)
Row 2: Ch 1, sc across, turn. (26 sc)
Row 3 (puff row): Ch 1, sc in first st, [ps in FLO of next st, sc in next st] to last st, sc in last st, turn. (12 ps)
Row 4: Ch 1, sc across, turn. (26 sc)
Rep Rows 3 and 4 four times, until the flap measures about 8 to 9 cm or 3½ inches.
Shape the Rounded Bottom
Row 1: Ch 1, sc2tog, sc to last 2 sts, sc2tog, turn. (24 sts)
Row 2: Ch 1, sc across, turn. (24 sts)
Row 3: Ch 1, sc2tog, sc to last 2 sts, sc2tog, turn. (22 sts)
Edging: Ch 1, sc evenly around the whole flap, working 2 to 3 sc at each lower corner; sl st to join. Fasten off, leaving a long tail for sewing.
The push lock hardware has prongs that pierce the fabric, so you do not need to create a buttonhole. You will position it during assembly.
Handle and Straps
Top Handle (Make 1)
Row 1: Ch 6; sc in 2nd ch from hook and across. (5 sc)
Rows 2+: Ch 1, sc across; repeat until the strip is about 12 cm or 4¾ inches long.
Fold the strip lengthwise and whipstitch the long edge closed to make a rounded handle. Fasten off, leaving tails for sewing.
Shoulder Straps (Make 2)
Row 1: Ch 5; sc in 2nd ch from hook and across. (4 sc)
Rows 2+: Ch 1, sc across until the strap measures about 38 to 42 cm or 15 to 16½ inches. Adjust to your preferred fit. Fasten off, leaving long tails.
D-Ring Tabs (Make 2)
Ch 5; work sc rows for about 5 cm or 2 inches. Fold around a D-ring and secure with a few stitches.
Tassel (Optional)
Wrap yarn approximately 30 times around a 9 cm card. Tie tightly at the top, cut the bottom loops, wrap the neck to create the tassel shape, and trim evenly. Clip to the tassel charm, or simply use the charm on its own.
Assembly
Tip: Stuff the bag lightly with tissue while attaching hardware to keep its shape and make positioning easier.
Step 1: Weave in all ends except the long sewing tails.
Step 2 (Flap): Centre the flap’s straight top edge across the back opening. This is the hinge. Sew it to the inside back with whipstitch or slip stitches. It should fold forward over the front.
Step 3 (Push Lock): Centre the base plate on the front where the flap tip lands. Push its prongs through and secure with the backing plate inside. Fix the tongue piece to the underside of the flap tip the same way. Test the closure to make sure it clicks properly.
Step 4 (Handle): Centre the folded handle across the top, just behind the flap hinge, and sew both ends down very securely. This handle will take weight, so reinforce it well.
Step 5 (Chain): Lace the gold chain across the front, looping through the base of the handle on each side. Tack the ends so it drapes nicely.
Step 6 (Straps): Sew the top of each strap beside the handle. Thread the loose end through a slider buckle, then the lower D-ring tab, then back through the buckle. This makes the straps adjustable. Sew the D-ring tabs to the lower back, evenly spaced.
Step 7 (Tassel): Clip the charm to a side O-ring.
Step 8 (Drawstring): Thread the cord through the eyelets, cinch, and tie at centre front under the flap.
Finishing and Care
Block and Shape
Give the bag a light steam to even out the puffs and set the structure. Let it dry stuffed with tissue so it holds its silhouette. This step makes a real difference in how polished your finished bag looks.
Care Instructions
Spot clean when possible. If needed, hand wash in cool water and reshape flat to dry. Never wring a structured cotton bag, as this can distort the shape permanently.
Maker’s Notes
You Did It!
This backpack is one of those projects that looks so much harder than it actually is. Once you get into the puff stitch rhythm, the rounds fly by, and suddenly you have this gorgeous textured bag that everyone will ask about.
I hope you love making this as much as I loved designing it. If you want to save this crochet backpack pattern for later, go ahead and pin it to your favourite Pinterest board. And please, if you make one, drop a comment below or tag me in your photos. Seeing your finished projects honestly makes my whole week. Happy crocheting!
Want a Quick & Easy Printable Version?
Get a clean, beautifully formatted PDF of this pattern — easy to follow step by step, ready to print or save on any device. No scrolling, no distractions, just the pattern.
Get the Printable PDF →