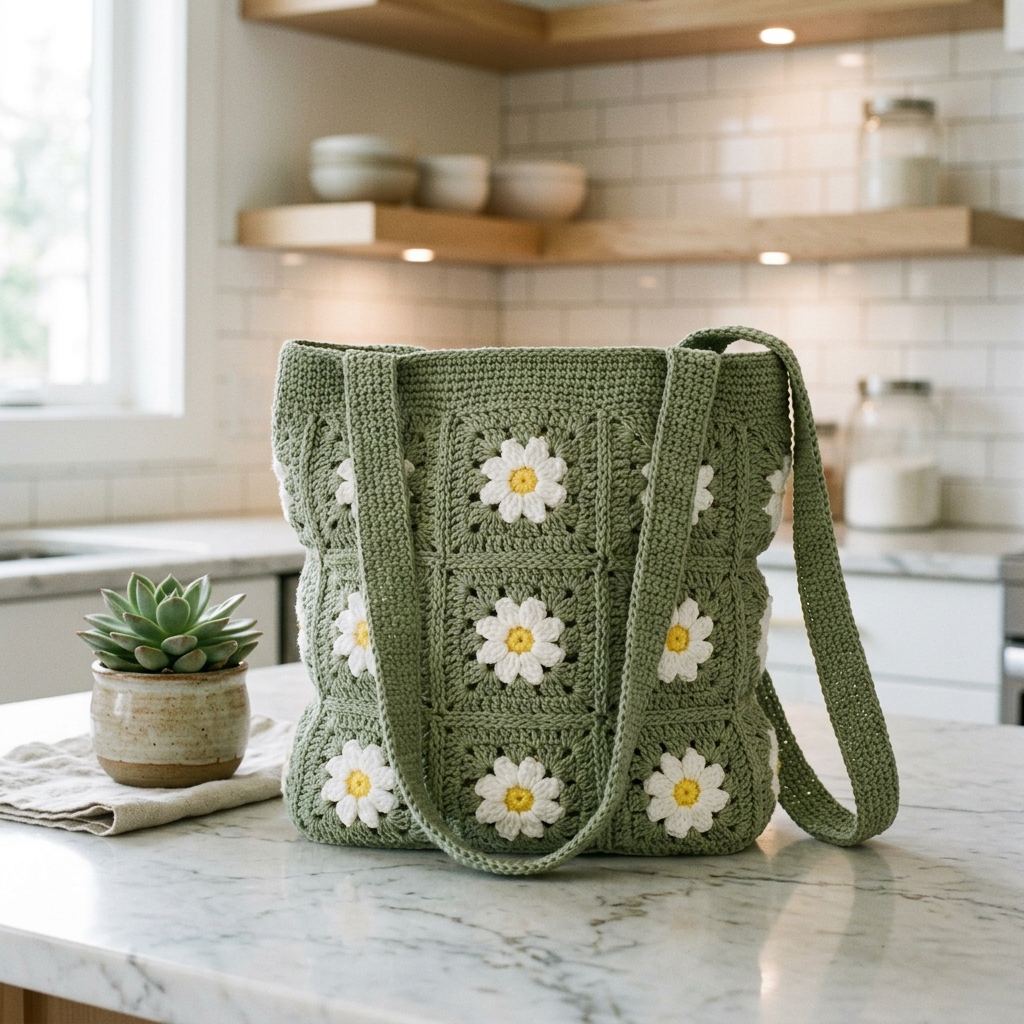
I don’t know about you, but I am absolutely obsessed with a good tote bag. Something about having a handmade bag slung over my shoulder just feels right. It carries my farmer’s market finds, holds my current work in progress, and looks adorable doing it. This sage green daisy granny tote combines my love for classic granny squares with cheerful little flowers, and honestly, it makes me smile every time I pick it up. All the vintage charm with a fresh, modern twist.
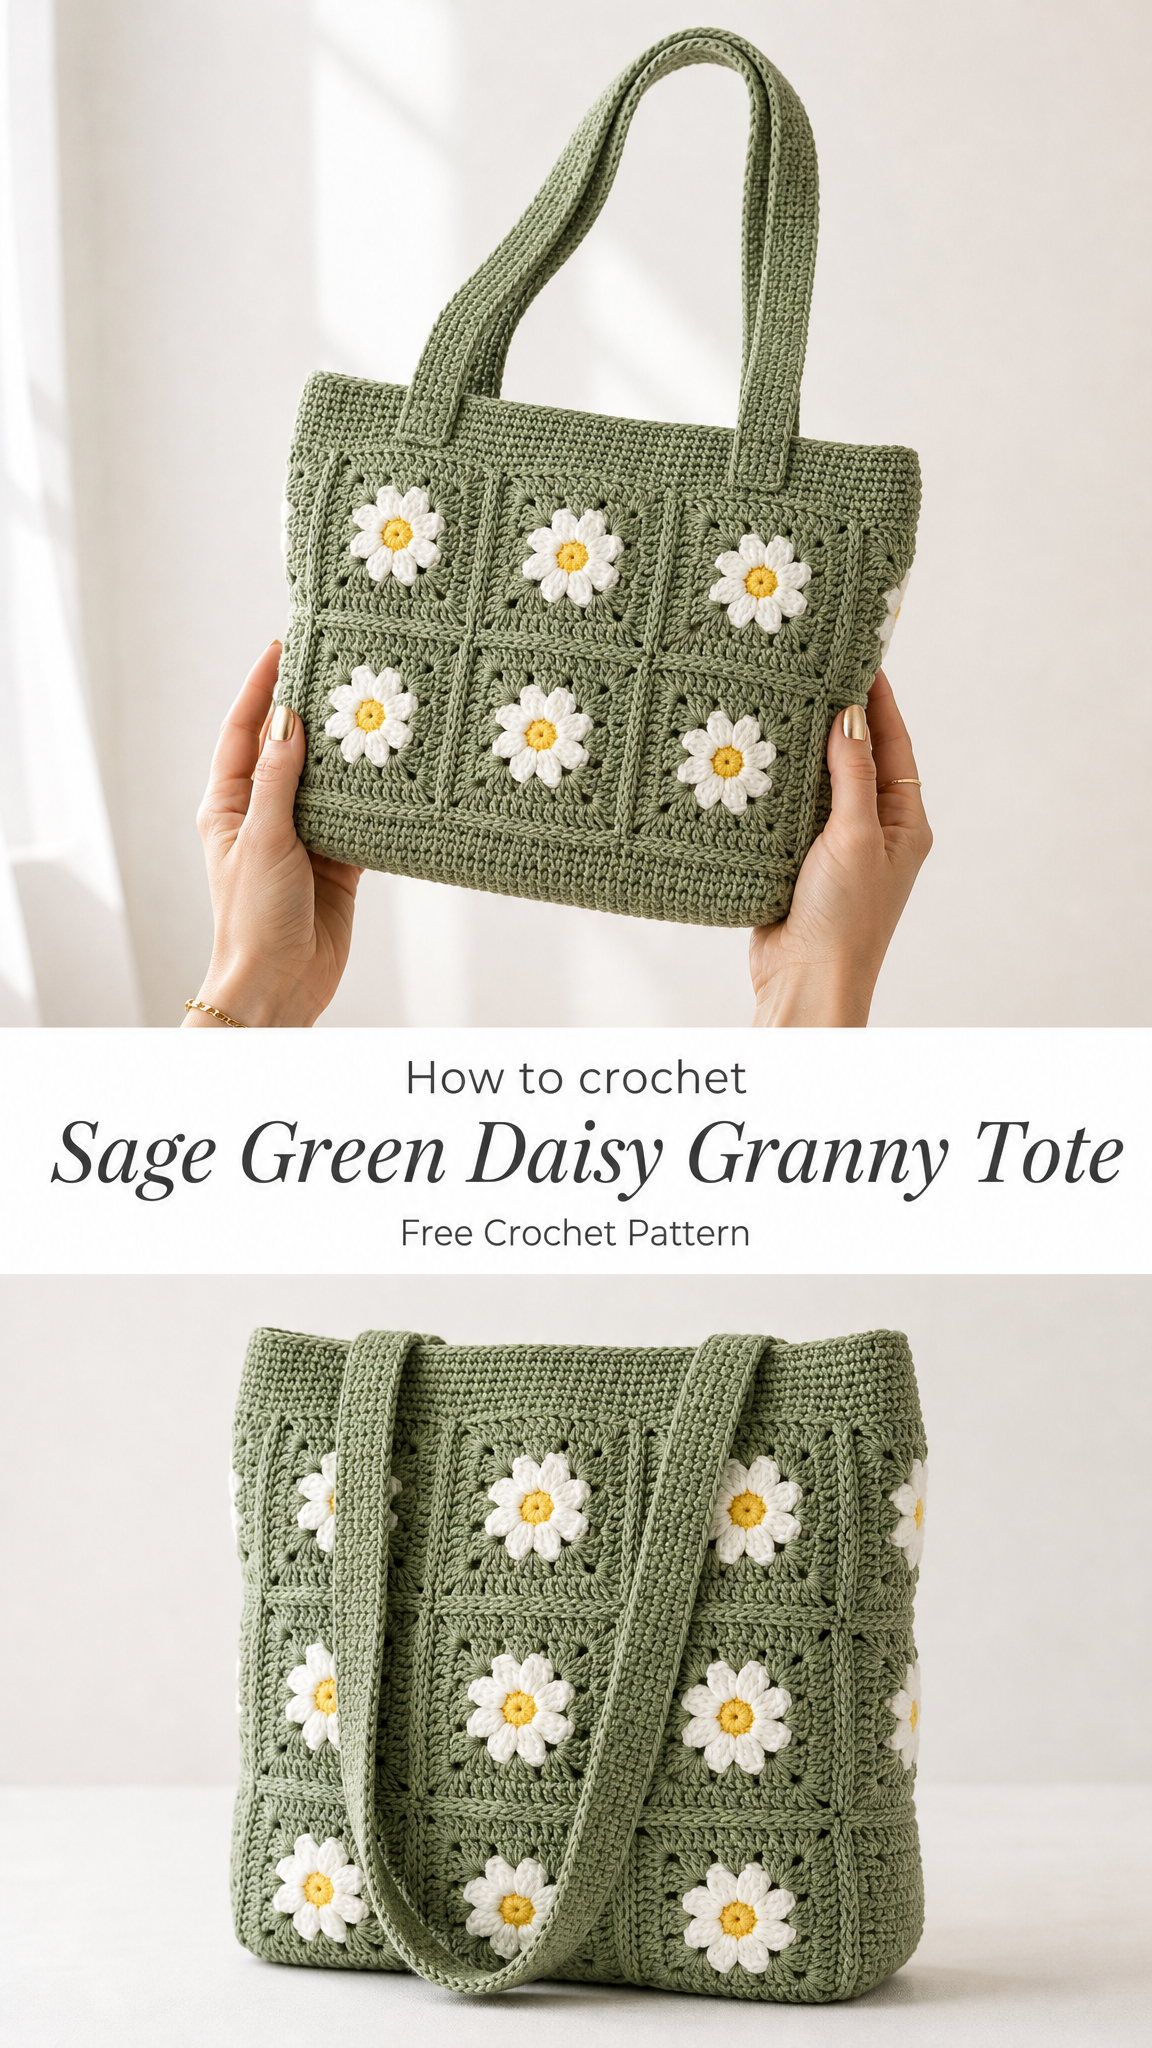
This crochet tote bag pattern is one of those projects that looks far more complicated than it actually is. If you can crochet a basic granny square and make a simple daisy, you can absolutely make this bag. I promise. We’re going to break it down step by step, and by the end, you’ll have a gorgeous, sturdy tote that’s perfect for spring and summer adventures.
Why You’ll Love This Daisy Granny Tote Crochet Pattern
This bag hits all the right notes. The granny square construction means it works up quickly in manageable pieces. You’re not wrestling with a huge project on your hook. Instead, you make individual squares, join them together, and suddenly you have a tote bag. It’s satisfying in the best way.
The daisy centers add a sweet, cottage-core vibe without being too fussy. And that sage green? It’s neutral enough to go with everything but interesting enough to get compliments. Trust me on this one.
What makes this pattern beginner friendly:
Materials Needed
Yarn:
I used a cotton blend yarn for this project because it gives the bag nice structure and holds up well to everyday use. Acrylic works too, but pure cotton can stretch over time with heavy loads.
Hook:
Notions:
Finished Dimensions:
Approximately 12 inches wide by 13 inches tall, not including straps. Strap drop is about 10 inches.
Stitch Abbreviations and Definitions
Let me walk you through every stitch we’ll use. Even if you know these, a quick refresher never hurts.
ch = chain: Wrap yarn over hook, pull through loop. This creates the foundation for most crochet projects.
sl st = slip stitch: Insert hook, yarn over, pull through both loops on hook at once. Used for joining and moving across stitches without adding height.
sc = single crochet: Insert hook, yarn over and pull up a loop (2 loops on hook), yarn over and pull through both loops. A short, tight stitch.
dc = double crochet: Yarn over, insert hook, yarn over and pull up a loop (3 loops on hook), yarn over and pull through 2 loops, yarn over and pull through remaining 2 loops. A taller stitch that creates the classic granny square look.
Magic ring = An adjustable starting loop that closes completely. If this feels intimidating, you can substitute ch 4 and sl st to join into a ring.
Gauge
4 inches = one completed daisy granny square
Gauge matters for this project because it affects your final bag size. If your squares are much larger or smaller, adjust your hook size accordingly.
How to Crochet the Daisy Granny Square
You’ll need 18 total squares for the bag body. Take a deep breath. That sounds like a lot, but they work up fast once you get into a rhythm.
Daisy Center (Yellow)
Round 1: Using yellow yarn, make a magic ring. Ch 1 (does not count as a stitch), work 6 sc into the ring. Sl st to first sc to join. Pull magic ring closed. (6 sts)
Fasten off yellow and weave in the tiny tail. Don’t skip this step or your daisy centers will unravel.
Daisy Petals (White)
Round 2: Join white yarn to any sc with a sl st. *Ch 3, dc in same st, ch 3, sl st in same st, sl st in next st.* Repeat from * around. You’ll create 6 petals total. (6 petals)
Take a moment to admire your little daisy. Cute, right?
Fasten off white.
Granny Square Border (Sage Green)
Round 3: Join sage green yarn to the ch-3 space at the tip of any petal. Ch 3 (counts as first dc), 2 dc in same space. *Ch 1, 3 dc in tip of next petal.* Repeat from * around. Ch 1, sl st to top of beginning ch-3 to join. (18 dc, 6 ch-1 spaces)
Round 4: Sl st to next ch-1 space. Ch 3 (counts as first dc), 2 dc in same space, ch 1, 3 dc in same space (this creates your first corner). *Ch 1, 3 dc in next ch-1 space, ch 1, (3 dc, ch 1, 3 dc) in next ch-1 space (corner made).* Repeat from * around, ending with ch 1, sl st to top of beginning ch-3 to join. (4 corners, 4 sides)
Round 5: Sl st to corner ch-1 space. Ch 3, 2 dc in same space, ch 1, 3 dc in same space (corner). *Ch 1, 3 dc in next ch-1 space, ch 1, (3 dc, ch 1, 3 dc) in corner space.* Continue around, working 3 dc clusters in each side space and corner clusters in each corner. Sl st to join. (4 corners with 2 clusters per side between them)
Fasten off, leaving a long tail on some squares for seaming later.
Your finished square should measure approximately 4 inches. Make 17 more. Yes, really. Put on a podcast or your favorite show and enjoy the repetitive motion. It’s meditative, I promise.
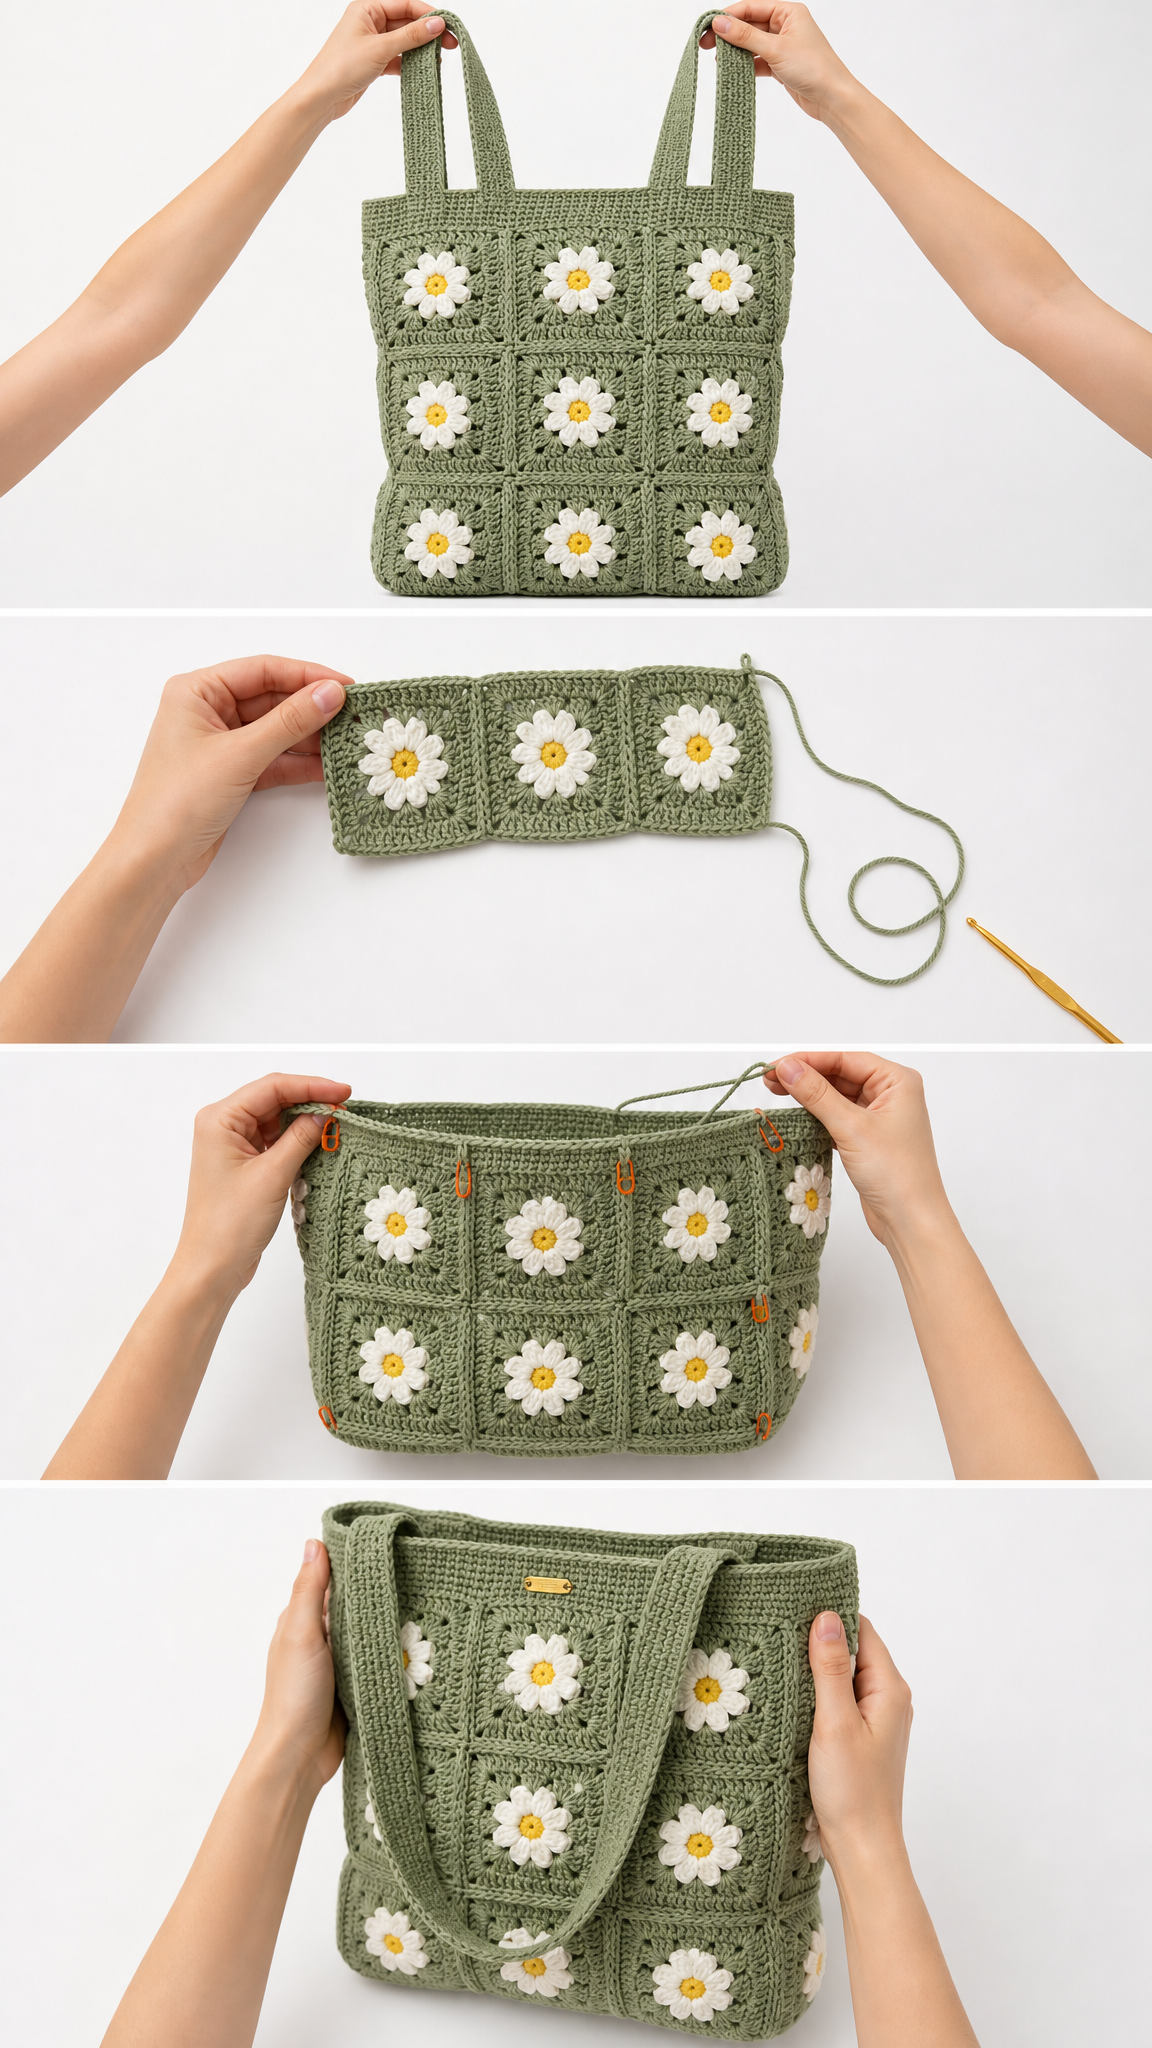
Bag Assembly
Now comes the fun part. Watching your squares become an actual bag is incredibly satisfying.
Layout
Front and Back Panels: Arrange 9 squares each in a 3 wide by 3 tall grid. Make sure all your daisies face the same direction. Trust me, you’ll notice if one is sideways.
Joining Method
I used a whip stitch seam for a flat, invisible join, but you can also use single crochet through both loops for a more visible, decorative ridge.
To whip stitch: Hold two squares with right sides facing. Using your yarn needle and sage green yarn, insert needle through the back loops only of corresponding stitches on both squares. Pull through. Repeat across the entire edge.
Step 1: Join your 9 front panel squares into 3 rows of 3.
Step 2: Join the 3 rows together to create one large front panel.
Step 3: Repeat for the back panel.
Step 4: With wrong sides facing out, join the front and back panels along the two side edges and across the bottom. Leave the top open.
Turn right side out. Looking good!
Top Border
The border stabilizes the bag opening and gives you a clean edge to attach your straps.
Round 1: Join sage green yarn at any corner of the bag opening. Ch 1, sc evenly around the entire top edge, working approximately 3 sc per square and 1 sc in each seam. Sl st to first sc to join. (approximately 72 sts, adjust as needed for your gauge)
Round 2: Ch 1, sc in each st around. Sl st to join. (72 sts)
Round 3: Ch 1, sc in each st around. Sl st to join. Fasten off. (72 sts)
Crochet Tote Straps
The straps need to be sturdy since they’ll bear the weight of whatever you carry. We’re making them with rows of single crochet for strength and minimal stretch.
Make 2 straps.
Row 1: Using sage green yarn, ch 6. Sc in second ch from hook and each ch across. (5 sts)
Rows 2 through 85: Ch 1, turn. Sc in each st across. (5 sts)
This creates a strap approximately 34 inches long. Feel free to adjust the length based on how you like to carry your bags. Shorter for hand carry, longer for shoulder or crossbody wear.
Fasten off, leaving a long tail for attaching.
Attaching the Straps
Position the first strap on the front panel, placing each end approximately 2 squares apart (centered on the bag). The strap should sit about 1 inch down from the top edge on the inside of the bag.
Using your yarn needle, whip stitch securely around all four sides of each strap end. Go over it twice for extra strength. Nobody wants a broken strap incident at the grocery store.
Repeat for the second strap on the back panel. Make sure both straps align so the bag hangs evenly.
Finishing Touches
Weave in all remaining ends. Every single one. I know it’s tedious, but loose ends will work their way out over time and look messy.
Optional additions:
Blocking: Lightly steam block your finished bag to even out the stitches and help it hold its shape. Don’t soak cotton bags, as they can take forever to dry and may stretch.
Care Instructions
For cotton or cotton blend yarn, machine wash on gentle cycle with cold water. Lay flat to dry to maintain the bag’s shape. Avoid the dryer, which can cause shrinkage and damage the structure.
For acrylic yarn, machine wash and dry on low heat, though laying flat is still gentler on your handwork.
Tips for Crochet Success
If your squares are different sizes: Block them before joining. Wet blocking or steam blocking can help even things out.
If you’re nervous about the daisy petals: Practice a few before committing. The petal round feels awkward at first but becomes intuitive quickly.
If you want a bigger bag: Add more squares. A 4 by 4 layout gives you a generous market tote. A 3 by 4 layout creates a taller, narrower silhouette.
If you want a sturdier base: Crochet a solid rectangle of single crochet stitches for the bottom instead of joining squares there. This prevents items from poking through.
Why Granny Square Bags Are Perfect for Every Skill Level
This step by step crochet tutorial works beautifully whether you’re relatively new to crochet or have been hooking for years. Beginners get the satisfaction of completing small, manageable pieces that eventually become something impressive. Experienced crocheters get a relaxing, low-concentration project perfect for TV watching or waiting rooms.
The modular construction also makes this incredibly portable. Toss a few squares in your purse and work on them during lunch breaks or kids’ sports practices. Before you know it, you’ll have a finished crochet tote bag ready for adventure.
More Ways to Customize Your Daisy Tote
This pattern is just a starting point. Make it your own!
Color variations:
Daisy alternatives:
The beauty of granny square crochet patterns is their endless adaptability. Same basic technique, completely different results based on your color and flower choices.
I really hope you love making this sage green daisy granny tote as much as I loved designing it. It’s the kind of project that reminds me why I fell in love with crochet in the first place. Useful, beautiful, and genuinely fun to create.
If you make this bag, I would absolutely love to see it! Tag me on Instagram or share a photo in my Facebook group. Seeing your versions makes my whole day, and it helps other crocheters feel inspired to try it too.
Save this crochet pattern to your Pinterest boards so you can find it whenever you’re ready to start. And please drop a comment below if you make one. I love hearing which colors you chose, how the pattern worked for you, and where your finished tote ends up traveling. Happy crocheting, friend!
