Go ahead and dig into that stash of crochet thread you’ve been saving for something special. This Romantic Rose Garden Bracelet is exactly the kind of project that deserves those beautiful jewel tones you’ve tucked away. The construction is fascinating because you’ll create each tiny rose and leaf separately, then assemble them into a stunning wearable piece. I’ll be honest with you, this is an intermediate to advanced project that requires patience and fine motor skills. But if you’ve worked with thread before and enjoy detailed work, you’re going to love watching this bracelet come together.
About This Crochet Rose Bracelet Pattern
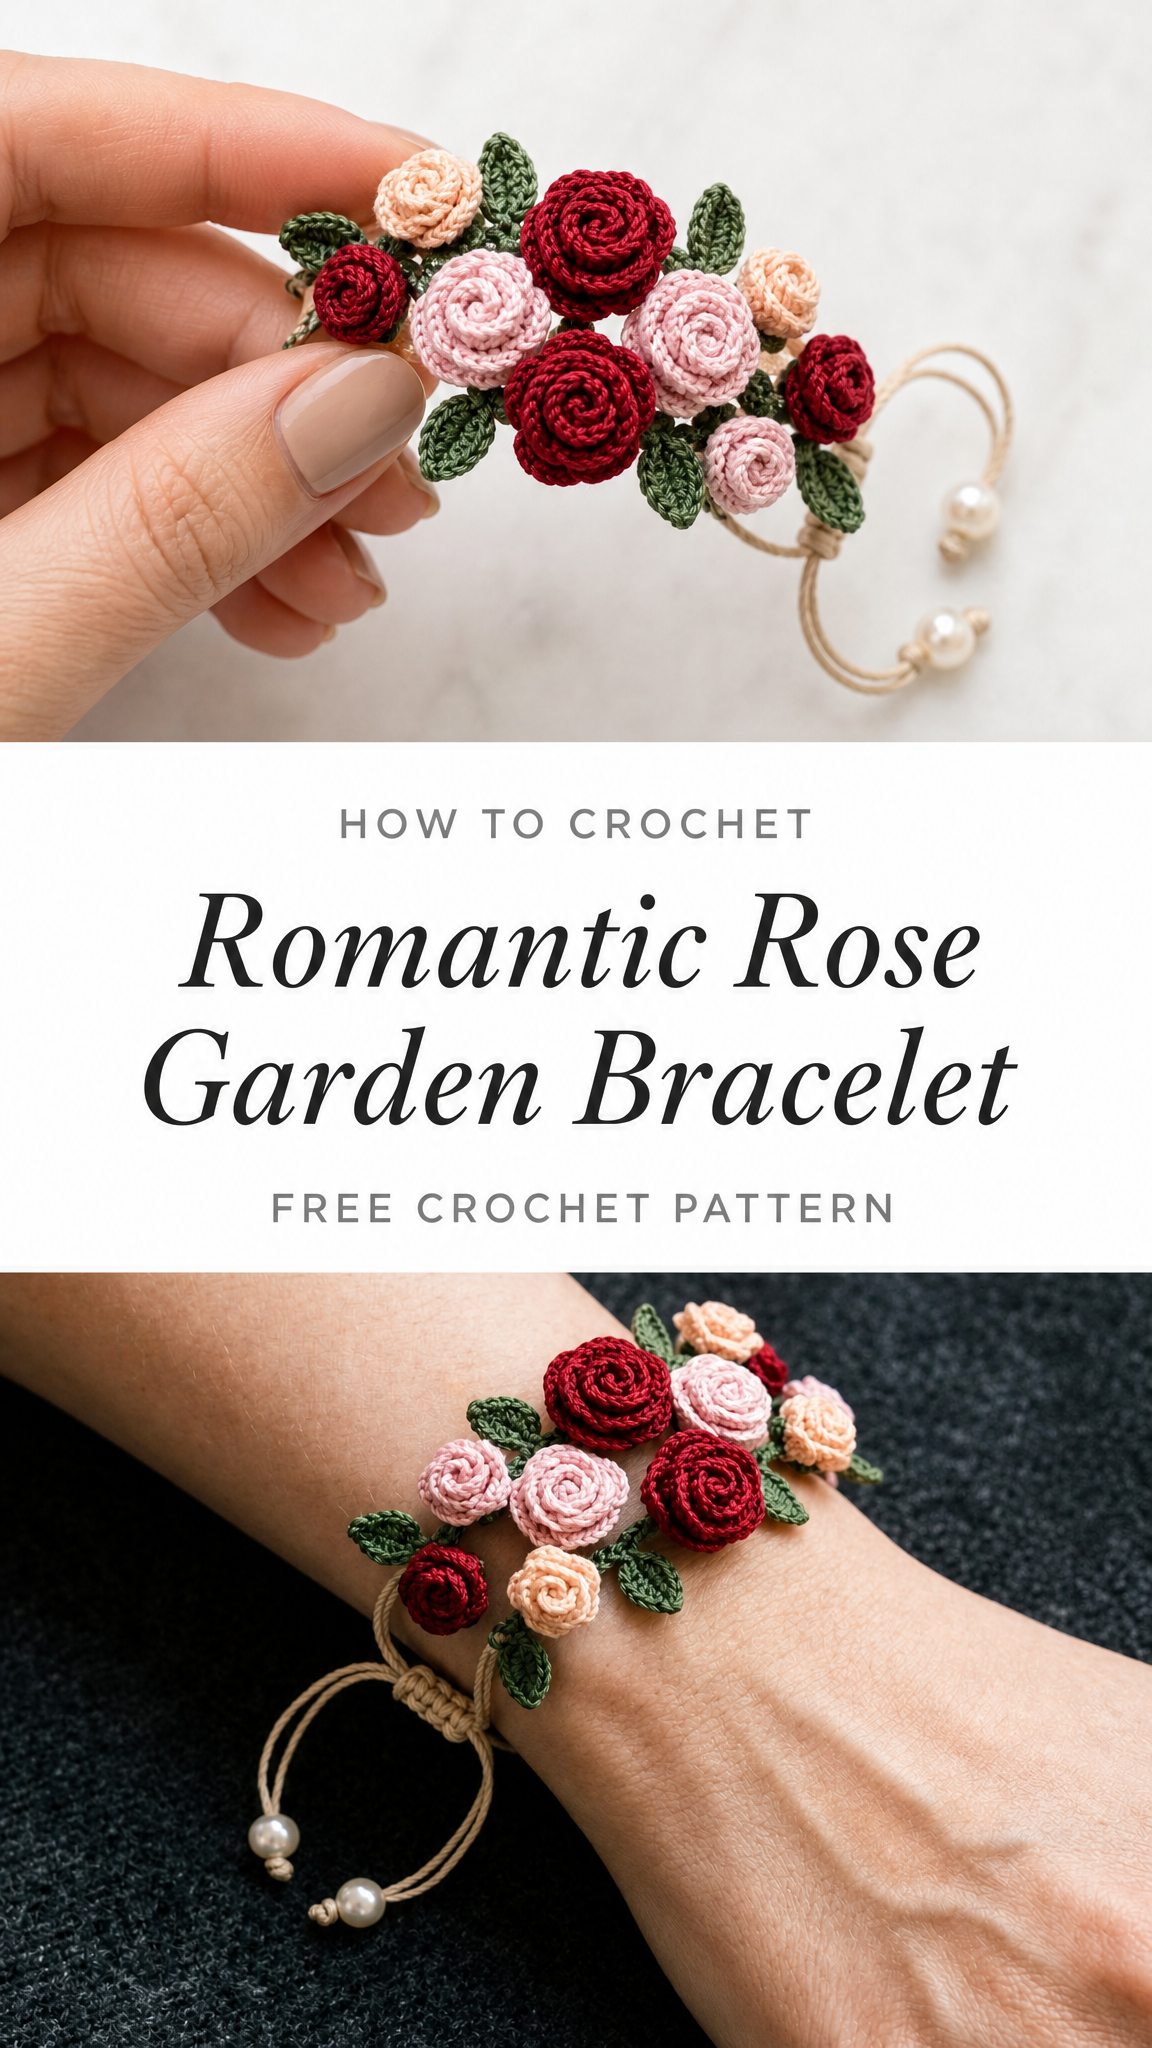
This delicate crochet bracelet features miniature spiral roses in varying sizes, complete with pointed leaves and an adjustable sliding knot closure. The roses are created using a simple strip method, then rolled and secured to form that gorgeous spiral effect you see. Pearl bead accents on the cord ends add an elegant finishing touch.
What makes this crochet pattern special is the layered dimensional look. The roses nestle together naturally, creating depth and visual interest that looks far more complicated than the actual stitches involved. Each component uses basic stitches worked in thread weight yarn, giving you professional looking results.
Skill Level
Intermediate to Advanced
This bracelet requires comfort working with fine crochet thread and a small steel hook. The stitches themselves are basic, but the scale is tiny. You’ll need steady hands and good lighting. If you’ve never worked with crochet thread before, I recommend practicing a few roses with worsted weight yarn first to understand the construction.
Finished Measurements
Materials Needed
Yarn:
I used mercerized cotton thread for a smooth finish and subtle sheen. DMC Petra or Aunt Lydia’s Classic work beautifully for this project.
Hook:
Additional Supplies:
Abbreviations and Stitch Definitions
Before we begin, let me explain each stitch you’ll need:
ch = chain: Yarn over, pull through loop on hook. This creates the foundation for most crochet work.
sl st = slip stitch: Insert hook, yarn over, pull through both loops at once. Used for joining and moving across stitches without adding height.
sc = single crochet: Insert hook, yarn over and pull up a loop (2 loops on hook), yarn over and pull through both loops. Creates a short, tight stitch.
hdc = half double crochet: Yarn over, insert hook, yarn over and pull up a loop (3 loops on hook), yarn over and pull through all 3 loops. Slightly taller than single crochet.
dc = double crochet: Yarn over, insert hook, yarn over and pull up a loop (3 loops on hook), yarn over and pull through 2 loops, yarn over and pull through remaining 2 loops. Creates a taller stitch with nice drape.
sk = skip: Miss the indicated stitch and work into the next one.
st(s) = stitch(es)
Pattern Notes
How to Crochet the Roses
Large Rose (Make 3 in burgundy, 2 in dusty pink)
These are the focal point roses that sit in the center of your arrangement.
Row 1: Ch 40.
Row 2: Working in the back bump of the chain (this creates a neater edge), dc in 4th ch from hook, dc in next ch, *2 dc in next ch, dc in next 2 ch*. Repeat from * across. (approximately 48 sts)
Row 3: Ch 3 (counts as first dc), turn. *2 dc in next st, dc in next st*. Repeat from * across to last st, dc in last st. (approximately 72 sts)
Fasten off, leaving a 6 inch tail.
To Roll the Rose:
Starting at the beginning of your strip (where you started your chain), begin rolling tightly. The ruffled edge created by the increases will naturally spiral outward, forming petals. Roll the entire strip, keeping the bottom edge even. Use your tapestry needle and tail to stitch through the base several times, securing the spiral. Make a few stitches through multiple layers to keep everything stable.
Medium Rose (Make 2 in dusty pink, 2 in peach)
Row 1: Ch 30.
Row 2: Working in back bump of chain, dc in 4th ch from hook, dc in next ch, *2 dc in next ch, dc in next 2 ch*. Repeat from * across. (approximately 36 sts)
Row 3: Ch 3 (counts as first dc), turn. *2 dc in next st, dc in next st*. Repeat from * across to last st, dc in last st. (approximately 54 sts)
Fasten off and roll following the same method as the large rose.
Small Rose (Make 2 in burgundy, 1 in peach, 1 in dusty pink)
These tiny buds fill in gaps and add dimension.
Row 1: Ch 20.
Row 2: Working in back bump of chain, dc in 4th ch from hook, *2 dc in next ch, dc in next ch*. Repeat from * across. (approximately 25 sts)
Fasten off and roll following the same method. These smaller roses are a bit trickier to roll tightly, so take your time.
How to Crochet the Leaves
Standard Leaf (Make 12 to 15 in forest green)
These pointed leaves frame your roses beautifully.
Row 1: Ch 8.
Row 2: Sl st in 2nd ch from hook, sc in next ch, hdc in next ch, dc in next 2 ch, hdc in next ch, sc in last ch. (7 sts)
Do not turn. Continue working along the opposite side of the foundation chain.
Row 3: Ch 1, sc in first ch, hdc in next ch, dc in next 2 ch, hdc in next ch, sc in next ch, sl st in last ch.
Fasten off, leaving a 4 inch tail for attaching.
You should have a symmetrical pointed leaf shape. The center ridge forms naturally from working both sides of the chain.
Assembling Your Rose Garden Bracelet
This is where your crochet bracelet really comes together. Take your time with placement.
Step 1: Prepare Your Cord
Cut a 24 inch length of your waxed cord. Fold it in half to find the center point. This center will be where you attach your floral arrangement.
Step 2: Lay Out Your Design
Before attaching anything, arrange your roses and leaves on a flat surface. Place larger roses in the center, with medium roses flanking them. Tuck small roses into gaps. Position leaves to peek out from behind and between roses. Take a photo of your arrangement so you remember the placement.
Step 3: Create the Base
Using green thread and your hook, ch 40. Work a row of sc across (40 sts). This creates a stable base to attach your pieces. Fasten off.
Step 4: Attach Roses to Base
Using a sewing needle and matching thread, stitch your roses to the crocheted base. Start with the largest center roses, stitching through the bottom of each rose and through the base. Add medium roses next, slightly overlapping the large ones. Fill in with small roses last.
Step 5: Add Leaves
Tuck leaves between and behind roses. Stitch the base of each leaf to the crocheted foundation. Some leaves should extend past the edges of your arrangement for a natural, garden like appearance.
Step 6: Attach to Cord
Position your floral arrangement along the center portion of your folded cord. The cord should sit behind the arrangement. Using your sewing needle, stitch the crocheted base to the cord in several places, making sure the attachment is secure.
Step 7: Create Adjustable Sliding Knot Closure
This is a macramé technique that allows the bracelet to be adjusted.
Bring both cord ends together so they overlap by about 3 inches, running in opposite directions. Take a separate 6 inch piece of cord. Position it next to the overlapping cords. Wrap this short piece around both cords 6 to 8 times, keeping wraps tight and neat. Thread the end through the loop, pull tight. Trim and tuck ends. Apply a tiny drop of fabric glue if desired.
Step 8: Add Pearl Beads
Thread one pearl bead onto each cord end. Tie a knot below each bead to secure it in place. Trim excess cord below the knots.
Tips for Success
Working with thread can feel frustrating at first. Give yourself grace. Good lighting makes an enormous difference. A magnifying lamp is helpful if you have one.
If your roses look floppy, you may be crocheting too loosely. Try going down a hook size or simply pulling your stitches tighter.
For a fuller bracelet, make additional roses and leaves. The images show a lush, abundant arrangement that uses quite a few components.
To keep roses from unrolling, stitch through the base multiple times. A tiny dot of fabric glue on the underside also helps.
Thread color matters. Mercerized cotton gives a lovely sheen that catches light beautifully. Matte cotton works too but creates a more casual look.
Customization Ideas
This crochet rose bracelet pattern adapts beautifully to different occasions:
Wedding Jewelry: Use ivory and blush tones for bridal party gifts. Consider adding tiny pearl beads in the flower centers.
Seasonal Variations: Try autumn colors like rust, gold, and olive for fall. Pastels work wonderfully for spring.
Gift Giving: This makes a thoughtful handmade gift for Mother’s Day, birthdays, or anniversaries. Package it in a small jewelry box with tissue paper.
Matching Sets: Use the same rose and leaf components to create matching earrings, a hair clip, or a choker necklace.
Care Instructions
Because this bracelet is made from cotton thread, it can be gently hand washed if needed. Use cool water and mild soap. Press between towels to remove water, then reshape and lay flat to dry. Avoid wringing or twisting, which can distort the roses.
Store flat in a jewelry box to prevent crushing the dimensional flowers.
Wrapping Up This Crochet Rose Bracelet Pattern
You now have everything you need to create this stunning Romantic Rose Garden Bracelet from start to finish. The step by step instructions walk you through each tiny rose, every pointed leaf, and the complete assembly process. This crochet tutorial combines simple stitches with detailed construction to create jewelry that looks absolutely store bought.
I hope you enjoy making this bracelet as much as I enjoyed designing it. It’s the kind of project that feels meditative once you get into the rhythm of rolling those little roses. And the finished piece? Absolutely worth every minute.
If you make this pattern, I would genuinely love to see your version. Tag me on Instagram or share a photo in my Facebook group. Seeing your creations is honestly the best part of sharing patterns.
I really hope you’ll save this pattern to your Pinterest boards so you can find it when you’re ready to start stitching. And please drop a comment below if you give it a try. I love hearing how projects turn out and answering any questions along the way.
