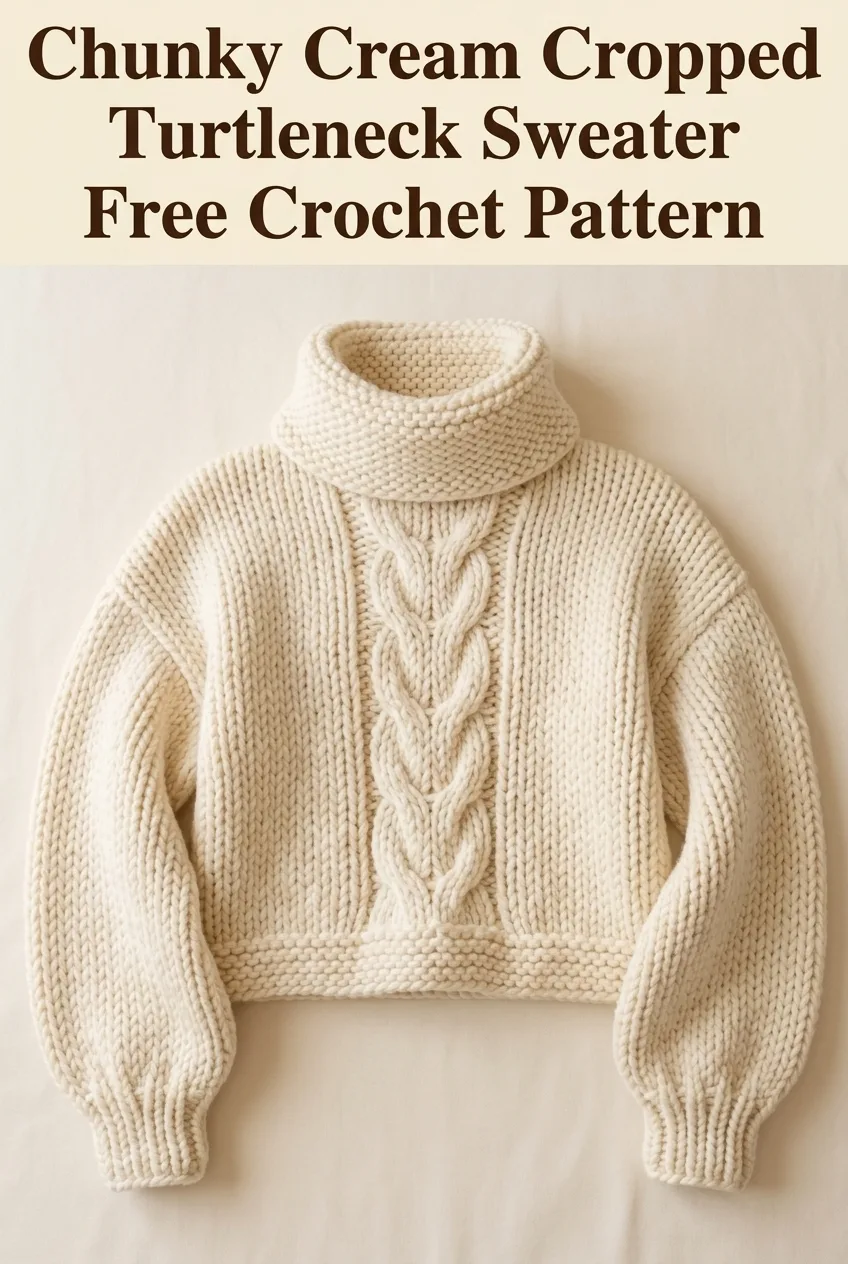
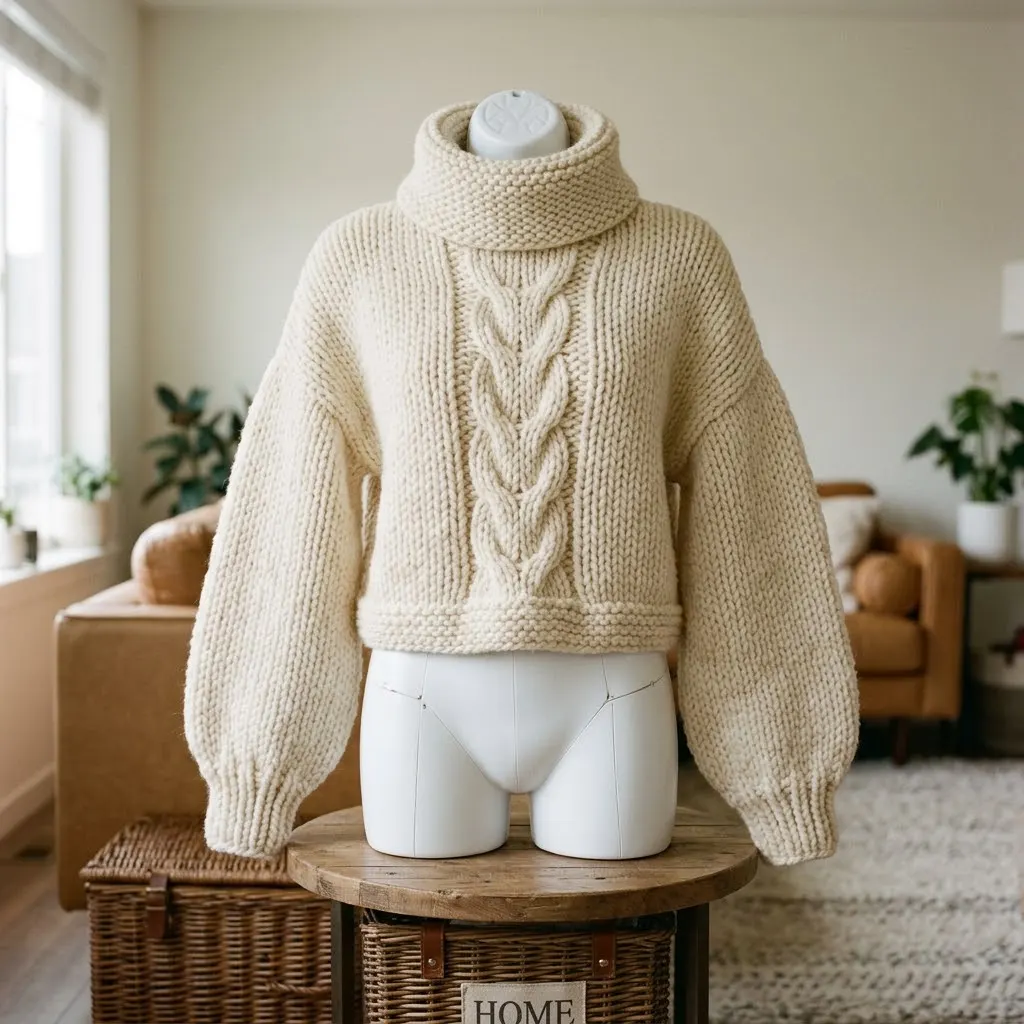
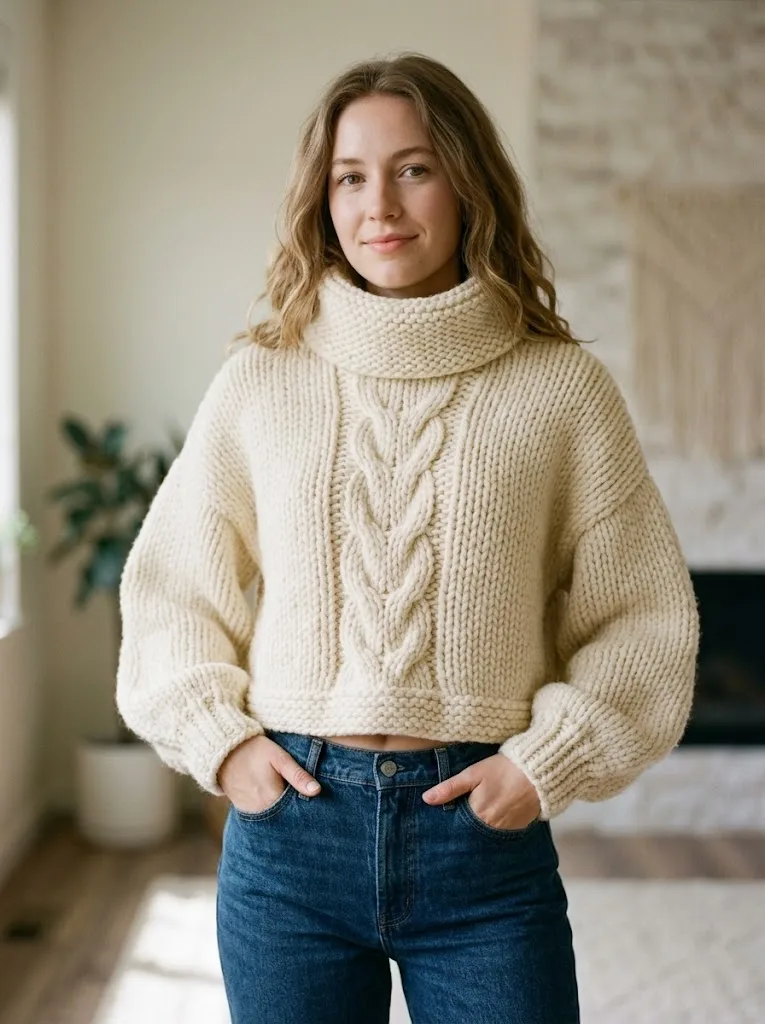
I have been dreaming about designing a cozy cropped sweater that looks like it came straight from a high-end boutique. I wanted oversized balloon sleeves, a dramatic cable detail down the front, and that perfect slightly cropped length that pairs beautifully with high-waisted jeans. The turtleneck had to be substantial enough to really snuggle into on cold days. After weeks of swatching and frogging and swatching again, I finally nailed it. I am SO pleased with how this chunky cream cropped turtleneck sweater turned out, and I cannot wait to walk you through every single step.
Why You Will Love This Crochet Sweater Pattern
This cropped turtleneck sweater combines everything I love about modern knitwear aesthetics with the satisfaction of crochet construction. The oversized silhouette is incredibly forgiving when it comes to fit, which makes this a wonderful first sweater project if you have been nervous about garment making.
The center cable panel looks intimidating, but I promise it is more approachable than you think. We will work it using front post stitches that create that beautiful braided texture. The rest of the sweater uses simple stitches that work up quickly in chunky yarn.
What makes this sweater special:
Skill Level
Intermediate. You should be comfortable with basic crochet stitches, increasing and decreasing, and working in the round. The cable technique uses front post stitches, which I will explain in detail. If you have never worked cables before, this is a great introduction because the chunky yarn makes the stitches easy to see and manipulate.
Materials Needed
Yarn:
Suggested yarns: Lion Brand Wool-Ease Thick & Quick, Malabrigo Rasta, or Cascade Magnum
Hook:
Notions:
Gauge
8 stitches and 10 rows = 4 inches in half double crochet using 10mm hook
Please, please check your gauge. I know it adds time, but with a sweater this chunky, even half a stitch difference per inch adds up to several inches across the finished garment. Make a 6-inch square swatch, wash and block it the way you plan to care for your sweater, then measure.
If your swatch is too big, go down a hook size. Too small? Go up a hook size.
Finished Measurements
This pattern is written for size Medium with a finished bust measurement of approximately 44 inches. The sweater is designed with 8 to 10 inches of positive ease for that relaxed, oversized look.
Abbreviations and Stitch Definitions
Let me walk you through every stitch we will use. Even if you know these already, a quick refresher never hurts.
Ch = Chain. Wrap yarn over hook, pull through loop on hook. This is your foundation.
Sl st = Slip stitch. Insert hook, yarn over, pull through stitch and loop on hook in one motion. Used for joining and moving across stitches without adding height.
Sc = Single crochet. Insert hook, yarn over, pull up a loop (2 loops on hook), yarn over, pull through both loops. The shortest basic stitch.
Hdc = Half double crochet. Yarn over, insert hook, yarn over, pull up a loop (3 loops on hook), yarn over, pull through all 3 loops. Slightly taller than single crochet with a nice drape.
FPdc = Front post double crochet. Yarn over, insert hook from front to back to front around the post (vertical part) of the stitch below, yarn over, pull up a loop, (yarn over, pull through 2 loops) twice. This creates raised texture on the front of your work.
BPdc = Back post double crochet. Same as FPdc, but insert hook from back to front to back. Creates texture on the back of your work.
Dec = Decrease. Work 2 stitches together as one to reduce stitch count.
Inc = Increase. Work 2 stitches in the same stitch to add to stitch count.
Special Technique: The Center Cable
The cable panel uses a 6-stitch cable that crosses every 4 rows. Here is how to work the cable cross:
Cable Cross (worked over 6 stitches):
Skip the next 3 stitches (do not work them yet). Work FPdc around each of the following 3 post stitches. Now go back and work FPdc around those 3 skipped stitches, working in front of the stitches you just made.
This creates that beautiful braided effect. The key is keeping your tension relaxed so the crossed stitches have room to move.
Do not panic if your first cable looks a little wonky. The chunky yarn is forgiving, and blocking works magic on cables.
Pattern Instructions
Back Panel
The back is worked flat in rows from bottom to top.
Ribbed Hem:
Row 1: Ch 10. Sc in 2nd ch from hook and in each ch across. (9 sc)
Row 2: Ch 1, turn. Working in back loops only, sc in each st across. (9 sc)
Rows 3 through 44: Repeat Row 2. (9 sc)
This creates a stretchy ribbed band approximately 22 inches long. If you need to adjust width, add or subtract rows in multiples of 2.
Body:
You will now pick up stitches along the long edge of the ribbing.
Row 1: Ch 1, turn the ribbing 90 degrees. Work 44 hdc evenly across the long edge (approximately 1 hdc per row). (44 hdc)
Row 2: Ch 2 (does not count as stitch here and throughout), turn. Hdc in each st across. (44 hdc)
Rows 3 through 30: Repeat Row 2. (44 hdc)
Your back panel should measure approximately 18 inches from ribbing to top edge.
Shoulder Shaping:
Row 31: Ch 2, turn. Hdc in first 14 sts, leave remaining sts unworked. (14 hdc) Fasten off.
Skip center 16 stitches for neck opening. Rejoin yarn to work second shoulder.
Row 31 (second shoulder): Ch 2, hdc in last 14 sts. (14 hdc) Fasten off.
Front Panel
The front is worked the same as the back, but with a center cable panel.
Ribbed Hem:
Work exactly as back panel ribbing, Rows 1 through 44. (9 sc)
Body with Cable:
Row 1: Ch 1, turn the ribbing 90 degrees. Work 19 hdc evenly across, place marker, work 6 hdc for cable section, place marker, work 19 hdc to end. (44 hdc)
Row 2: Ch 2, turn. Hdc in first 19 sts, FPdc around each of the next 6 sts, hdc in last 19 sts. (44 sts)
Row 3: Ch 2, turn. Hdc in first 19 sts, BPdc around each of the next 6 post sts, hdc in last 19 sts. (44 sts)
Row 4: Ch 2, turn. Hdc in first 19 sts, work Cable Cross over next 6 sts, hdc in last 19 sts. (44 sts)
Row 5: Repeat Row 3.
Rows 6 through 30: Continue alternating, working the Cable Cross every 4th row (Rows 8, 12, 16, 20, 24, 28).
Shoulder Shaping:
Work exactly as back panel shoulder shaping.
Sleeves (Make 2)
The sleeves are worked from cuff to shoulder with balloon shaping.
Ribbed Cuff:
Row 1: Ch 8. Sc in 2nd ch from hook and in each ch across. (7 sc)
Row 2: Ch 1, turn. Working in back loops only, sc in each st across. (7 sc)
Rows 3 through 20: Repeat Row 2. (7 sc)
Join the short ends with sl st to form a cuff tube.
Sleeve Body:
Round 1: Ch 2. Work 20 hdc evenly around the cuff opening. Sl st to first hdc to join. (20 hdc)
Round 2: Ch 2. Hdc in each st around. Sl st to join. (20 hdc)
Round 3: Ch 2. *Hdc in next 4 sts, 2 hdc in next st.* Repeat around. Sl st to join. (24 hdc)
Rounds 4 through 6: Ch 2. Hdc in each st around. Sl st to join. (24 hdc)
Round 7: Ch 2. *Hdc in next 5 sts, 2 hdc in next st.* Repeat around. Sl st to join. (28 hdc)
Rounds 8 through 10: Ch 2. Hdc in each st around. Sl st to join. (28 hdc)
Continue increasing 4 stitches every 3rd round until you have 44 stitches.
Continue even (no increases) until sleeve measures 18 inches from cuff.
Fasten off, leaving a long tail for seaming.
Turtleneck Collar
Joining Front and Back:
First, sew shoulder seams using mattress stitch or whip stitch.
Collar:
Round 1: Join yarn at center back neck. Ch 2. Work 40 hdc evenly around neck opening. Sl st to join. (40 hdc)
Round 2: Ch 2. *FPdc around next st, BPdc around next st.* Repeat around. Sl st to join. (40 sts)
Rounds 3 through 16: Repeat Round 2 to create ribbed texture.
Fasten off and weave in ends. The collar will naturally fold over.
Assembly and Finishing
Step 1: Lay front and back panels flat with right sides facing. Sew shoulder seams.
Step 2: Find the center top of each sleeve. Match this point to the shoulder seam. Pin sleeves in place.
Step 3: Sew sleeves to body, easing any fullness evenly.
Step 4: Sew side seams from hem to underarm. Continue sewing underarm sleeve seams from body to cuff.
Step 5: Weave in all remaining ends. I like to weave each tail in two different directions for extra security.
Step 6: Block your sweater. For wool, soak in cool water with a bit of wool wash for 20 minutes. Gently squeeze out water (never wring), roll in a towel, then lay flat to dry. Shape the sleeves, smooth the cable, and let everything relax.
Tips for Success
On the cable panel: If your cables feel tight, try going up half a hook size just for those rows. The crossed stitches need room to move.
On the balloon sleeves: The dramatic shape comes from the increases in the lower arm and the gathered attachment at the shoulder. Do not skip the blocking step, as it really helps the sleeves drape beautifully.
On fit: This sweater is meant to be oversized. If you prefer a closer fit, reduce the body stitches by 4 to 8, but keep the cable panel the same width.
On yarn substitution: Stick with super bulky weight. A lighter yarn will completely change the proportions and drape. If you want to use a different weight, you will need to recalculate the entire pattern.
Customization Ideas
Longer length: Add more rows to the body section before shoulder shaping. Each row adds approximately half an inch.
Different neckline: Skip the turtleneck and work only 4 rounds of ribbing for a mock neck, or 2 rounds for a simple crew finish.
Color blocking: Work the cable panel in a contrasting color for a modern look.
Allover cables: If you love the cable, add smaller cable panels on either side of the center cable, or work cables on the sleeves as well.
Care Instructions
I really hope you love making this chunky cream cropped turtleneck sweater as much as I loved designing it. This crochet sweater pattern has become one of my absolute favorites to wear on chilly mornings, and I think you will reach for yours constantly once it is finished.
If you make this pattern, I would absolutely love to see it. Tag me on Instagram or share a photo in my Facebook group. Seeing your versions honestly makes my whole week.
Save this crochet pattern to your Pinterest boards so you can find it when you are ready to cast on. And please drop a comment below if you make one. I love hearing which colors you chose and how the fit worked out for you. Happy crocheting, friend.
