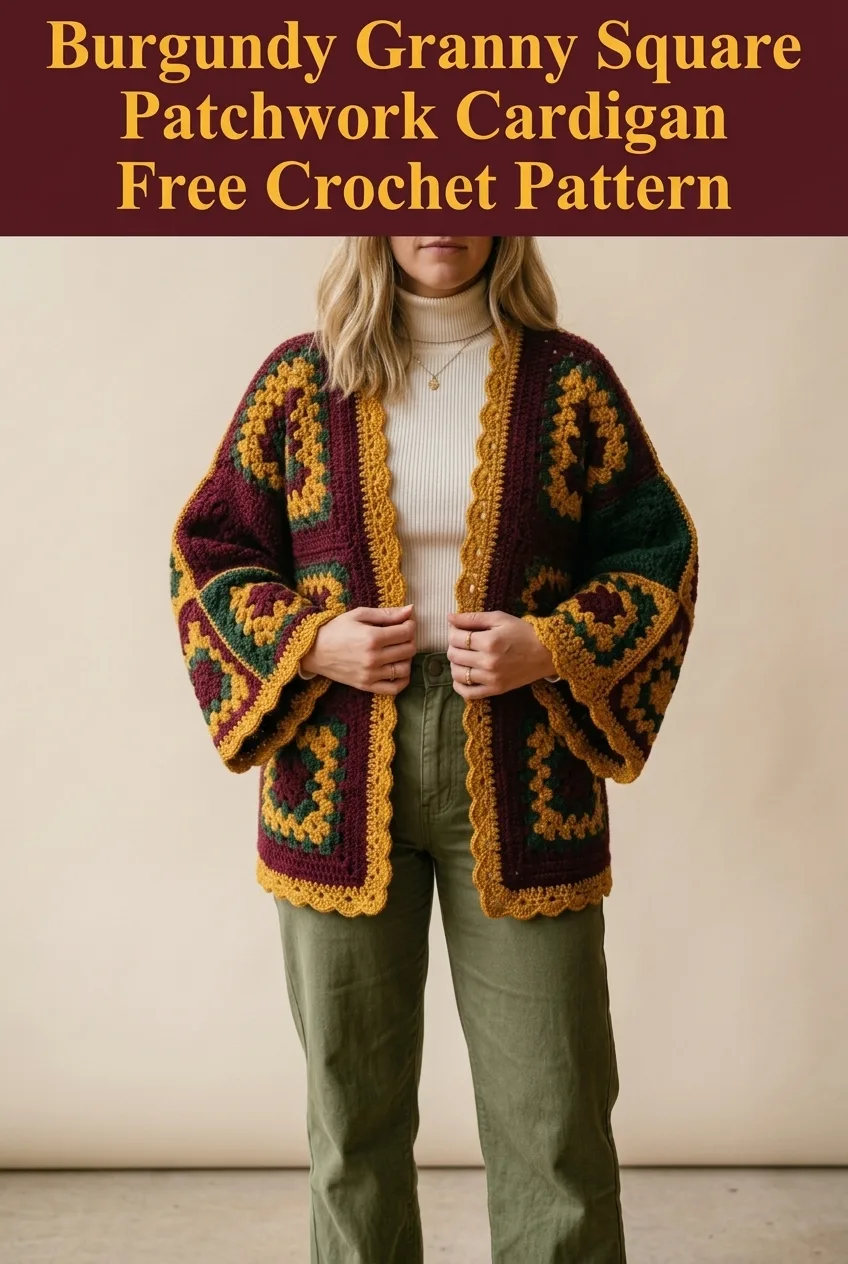
Okay, fellow yarn hoarders. This is your sign to finally dig into that stash and pull out those gorgeous autumn skeins you have been saving for "someday." This Burgundy Granny Square Patchwork Cardigan combines classic granny square construction with a modern, wearable silhouette. You will be joining squares in a strategic layout to create the body and those gorgeous bell sleeves. Fair warning: this is an intermediate project that requires patience with joining and some basic garment construction knowledge. But if you can make a granny square, you can absolutely make this cardigan.
Why This Granny Square Cardigan Pattern Works
The beauty of a patchwork cardigan lies in its portability and flexibility. Each granny square is small enough to work on during your lunch break or while binge-watching your favorite show. Then, when you have enough squares completed, the assembly process brings everything together into a stunning wearable piece.
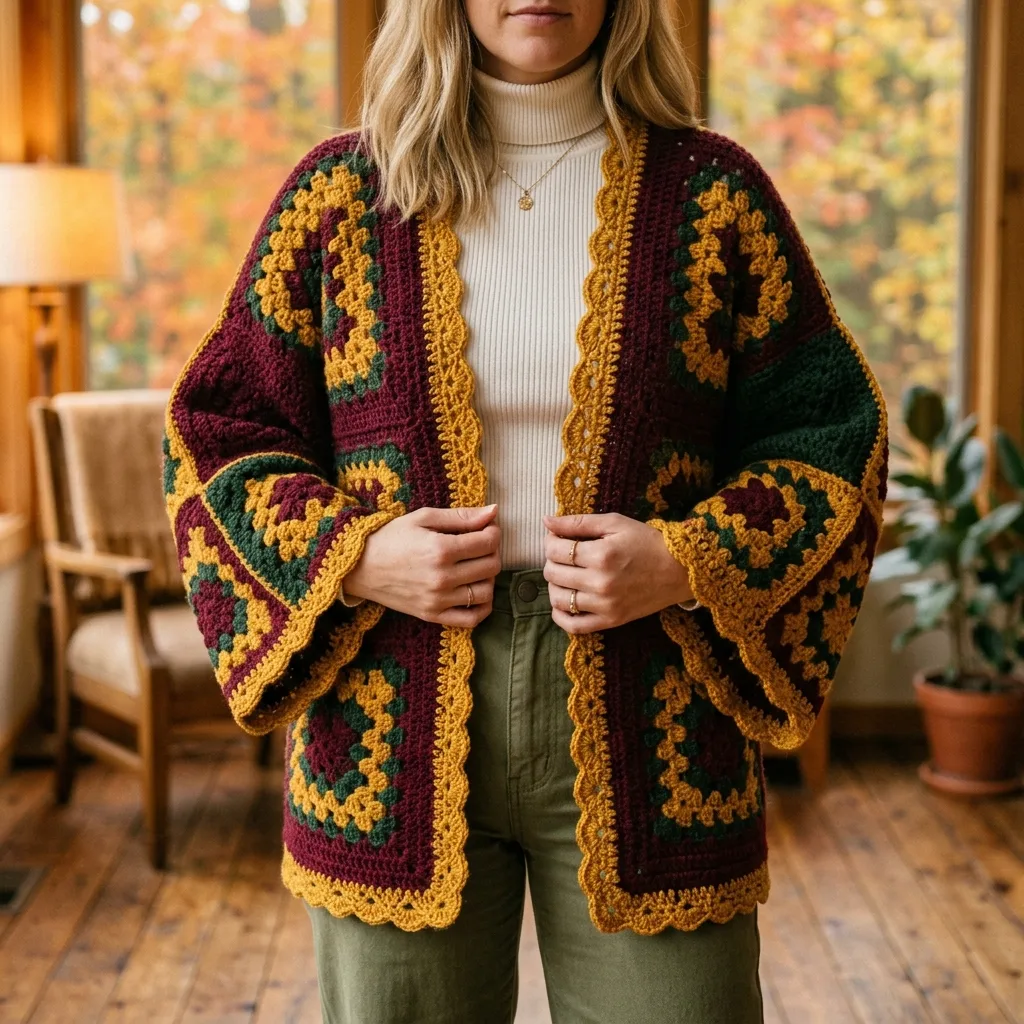
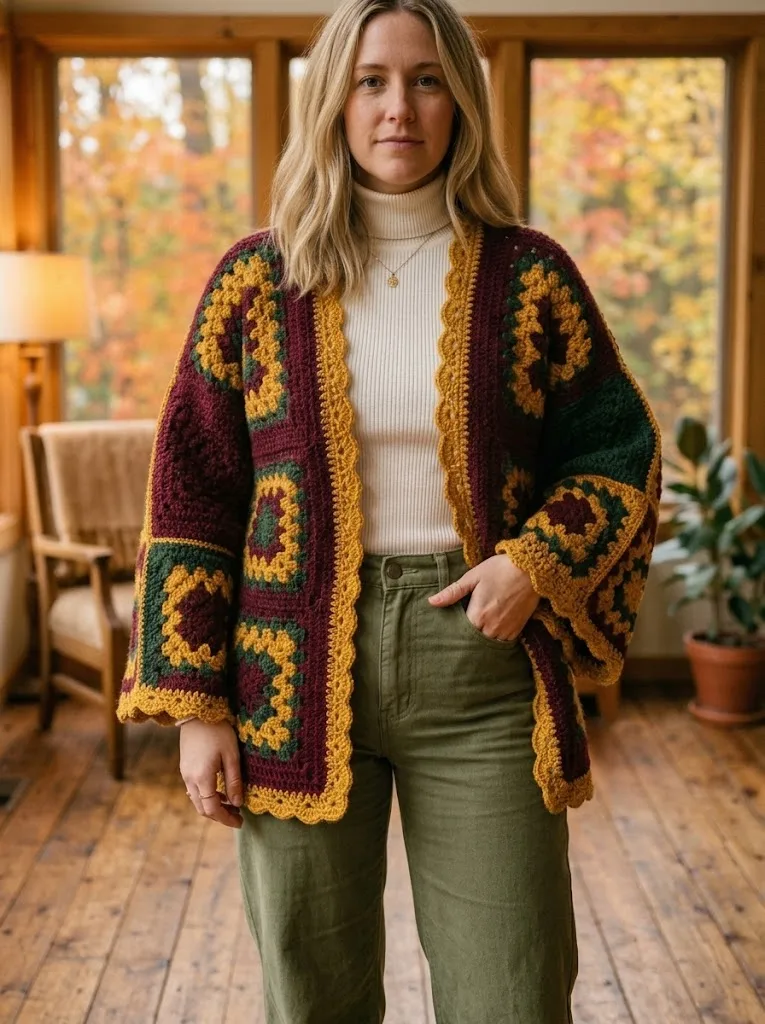
This particular design features a rich color palette of burgundy, mustard gold, and forest green. These shades work beautifully together and create that cozy autumn aesthetic we all crave when the leaves start turning. The scalloped edging along the front opening and hem adds a feminine touch that elevates the entire cardigan.
What I love most about this construction method is the minimal shaping required. Because granny squares are modular, you simply arrange them in the correct configuration and join them together. No complicated increases or decreases to worry about.
Skill Level
Intermediate
You should be comfortable with basic crochet stitches, working in rounds, changing colors, and joining motifs. If you have never made a granny square before, I recommend practicing a few plain squares first before diving into this project.
Finished Measurements
This pattern creates a relaxed, oversized fit.
*Note: Your finished measurements may vary based on your gauge and blocking.*
Materials Needed
Yarn
Worsted weight yarn (weight category 4) in three colors:
I recommend a soft acrylic or acrylic blend for easy care and good stitch definition. Yarn with a slight sheen will make your stitches pop beautifully.
Hook
Notions
Gauge
One completed granny square measures 5.5 inches by 5.5 inches after blocking.
Gauge matters for this project. If your squares are too small, your cardigan will be tight. If they are too large, the cardigan will be oversized beyond the intended fit. Make a test square and block it before committing to all your squares.
Abbreviations and Stitch Definitions
Let me break down every stitch and term you will encounter in this pattern:
Pattern Notes Before You Begin
Color sequence for granny squares: The squares in this cardigan follow a specific color pattern that creates visual cohesion across the finished garment. Each square starts with one color in the center and works outward with alternating colors.
Joining method: This cardigan uses a whip stitch join for clean, flat seams. You can also use a slip stitch join or the join-as-you-go method if you prefer.
Blocking is essential. Granny squares tend to curl and distort. Blocking relaxes the fibers, opens up the lacework, and ensures all your squares are uniform in size.
Weave in ends as you go. With this many color changes, you will have a lot of ends. Trust me when I say dealing with them incrementally is much better than facing a mountain of tails at the end.
How to Crochet the Granny Squares
You will need a total of 24 granny squares for this cardigan: 12 for the body and 12 for the sleeves.
Basic Granny Square Pattern
Round 1 (Color A, Burgundy):
Ch 4. Sl st to the first ch to form a ring.
Ch 3 (counts as first dc throughout), 2 dc into the ring, ch 2, *3 dc into ring, ch 2.* Repeat from * two more times. Sl st to top of beginning ch-3 to join. Fasten off Color A.
*You should have 4 clusters of 3 dc each, separated by 4 corner ch-2 spaces. (12 dc total)*
Round 2 (Color C, Forest Green):
Join Color C with a sl st to any corner ch-2 space.
Ch 3, 2 dc in same corner space, ch 2, 3 dc in same corner space (first corner made). *Ch 1, skip to next corner ch-2 space, work (3 dc, ch 2, 3 dc) in corner space.* Repeat from * around. Ch 1, sl st to top of beginning ch-3 to join. Fasten off Color C.
*You now have 8 clusters of 3 dc (2 clusters per corner), 4 corner ch-2 spaces, and 4 side ch-1 spaces. (24 dc total)*
Round 3 (Color B, Mustard Gold):
Join Color B with a sl st to any corner ch-2 space.
Ch 3, 2 dc in same corner space, ch 2, 3 dc in same corner space. *Ch 1, 3 dc in next ch-1 space, ch 1, work (3 dc, ch 2, 3 dc) in corner ch-2 space.* Repeat from * around, ending with ch 1, 3 dc in last ch-1 space, ch 1. Sl st to top of beginning ch-3 to join. Fasten off Color B.
*(36 dc total)*
Round 4 (Color A, Burgundy):
Join Color A with a sl st to any corner ch-2 space.
Ch 3, 2 dc in same corner space, ch 2, 3 dc in same corner space. *Ch 1, (3 dc in next ch-1 space, ch 1) across side to next corner, work (3 dc, ch 2, 3 dc) in corner ch-2 space.* Repeat from * around. Sl st to top of beginning ch-3 to join. Fasten off Color A.
*(48 dc total)*
Round 5 (Color B, Mustard Gold, Final Round):
Join Color B with a sl st to any corner ch-2 space.
Ch 3, 2 dc in same corner space, ch 2, 3 dc in same corner space. *Ch 1, (3 dc in next ch-1 space, ch 1) across side to next corner, work (3 dc, ch 2, 3 dc) in corner ch-2 space.* Repeat from * around. Sl st to top of beginning ch-3 to join. Fasten off Color B. Weave in all ends.
*(60 dc total)*
Your completed square should measure approximately 5.5 inches on each side after blocking.
Repeat this pattern to create 24 identical squares.
Cardigan Assembly
This is where your cardigan comes to life. Take your time with assembly. Neat, even seams make all the difference.
Body Layout
The body is constructed from 12 squares arranged in a specific configuration.
Back Panel: Arrange 4 squares in a 2×2 grid. Join using whip stitch through back loops only for a flatter seam.
Left Front Panel: Arrange 2 squares in a 1×2 vertical strip. Join together.
Right Front Panel: Arrange 2 squares in a 1×2 vertical strip. Join together.
Joining Front to Back:
Lay out your pieces with the back panel in the center. Position the front panels on either side, leaving space at the top center for the neck opening.
Join the top outer corners of each front panel to the corresponding top outer corners of the back panel. These seams create your shoulder seams.
Join the side seams, leaving the top portion open for armholes. Each armhole opening should be approximately the width of one square (5.5 inches).
Sleeve Construction
Each sleeve uses 6 squares arranged in a 2×3 configuration.
Step 1: Arrange 6 squares in a 2 wide by 3 tall layout.
Step 2: Join all squares together using your preferred seaming method.
Step 3: Fold the completed rectangle in half lengthwise, bringing the two long edges together.
Step 4: Seam along the long edge to create a tube. This forms your sleeve.
Step 5: Attach the wider end of the sleeve tube to the armhole opening of the body. Ease the sleeve into the armhole, pinning as needed before seaming.
Repeat for the second sleeve.
Scalloped Edging
The decorative border along the front opening and bottom hem ties the entire cardigan together beautifully.
Edging Pattern
Using Color B (Mustard Gold) and your smaller hook if desired, join yarn at the bottom corner of one front panel.
Row 1:
Work sc evenly along the entire front opening, around the neckline, and down the opposite front. Aim for approximately 3 sc per inch. Work 3 sc in each corner to maintain a flat edge. Sl st to join if working in the round, or turn if working flat.
Row 2 (Scallop Row):
*Skip 2 sc, work 5 dc in next sc (scallop made), skip 2 sc, sl st in next sc.* Repeat from * around entire edging. Fasten off and weave in ends.
Repeat this scalloped edging along the bottom hem of the cardigan and the cuffs of each sleeve.
Finishing Touches
Block your completed cardigan by laying it flat on blocking mats, pinning to shape, and lightly misting with water. Allow to dry completely before wearing.
Weave in any remaining ends. Take care to weave ends into stitches of the same color to keep them invisible.
Styling Your Granny Square Patchwork Cardigan
This cardigan layers beautifully over turtlenecks, basic tees, and even dresses. The bell sleeves make a statement, so keep accessories minimal. The rich color palette makes it perfect for fall festivals, apple picking, cozy coffee dates, or any occasion where you want to feel wrapped in handmade warmth.
Troubleshooting Tips
Squares are different sizes: Check your tension. Work more loosely or tightly as needed, or change hook size.
Seams are puckering: You may be pulling your joining yarn too tightly. Keep consistent, gentle tension.
Edging is ruffling: You may have too many stitches. Decrease your stitch count slightly on the next attempt.
Colors are not matching across squares: Ensure you are using yarn from the same dye lot for each color.
Thank you so much for choosing this pattern for your next crochet project. I truly hope you love making and wearing this cozy granny square cardigan as much as I enjoyed designing it. If you make one, please tag me on Instagram or share in our Facebook group. I absolutely love seeing your finished projects and your gorgeous color choices.
If this pattern sparked some inspiration, go ahead and pin it to your crochet board on Pinterest so you can find it when you are ready to start. And please drop a comment below if you make this cardigan. I would love to hear how it turned out for you!
