Go dig through your stash right now. That collection of colorful cotton yarn you’ve been saving for "the perfect project"? This is it. These rainbow striped platform wedge sandals combine simple rows of single crochet with a bold color-changing technique that makes every skein shine. I won’t sugarcoat it. This is an intermediate project that requires attaching your crochet work to a premade wedge sole. But if you’ve ever wanted to create truly wearable crochet fashion, the construction is more straightforward than you might expect.
About This Crochet Platform Sandals Pattern
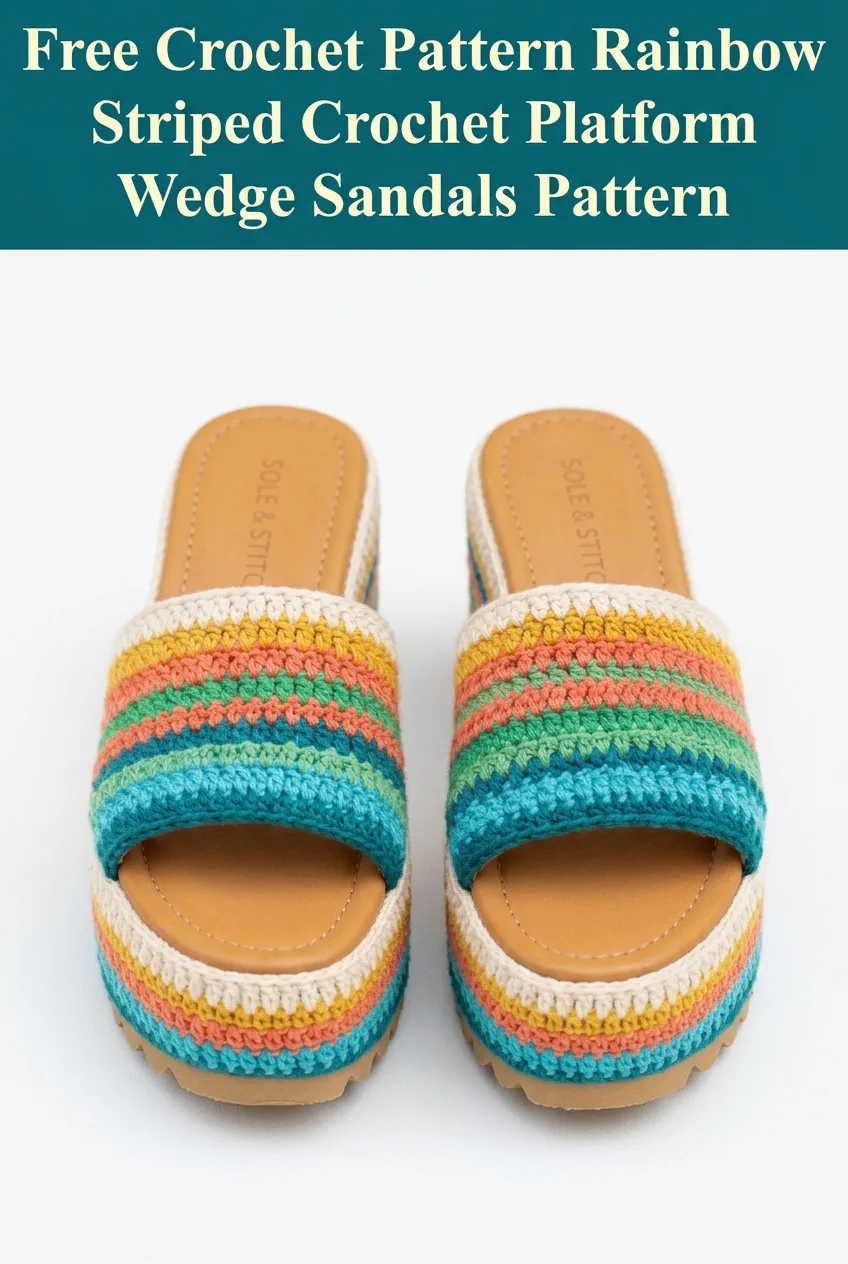
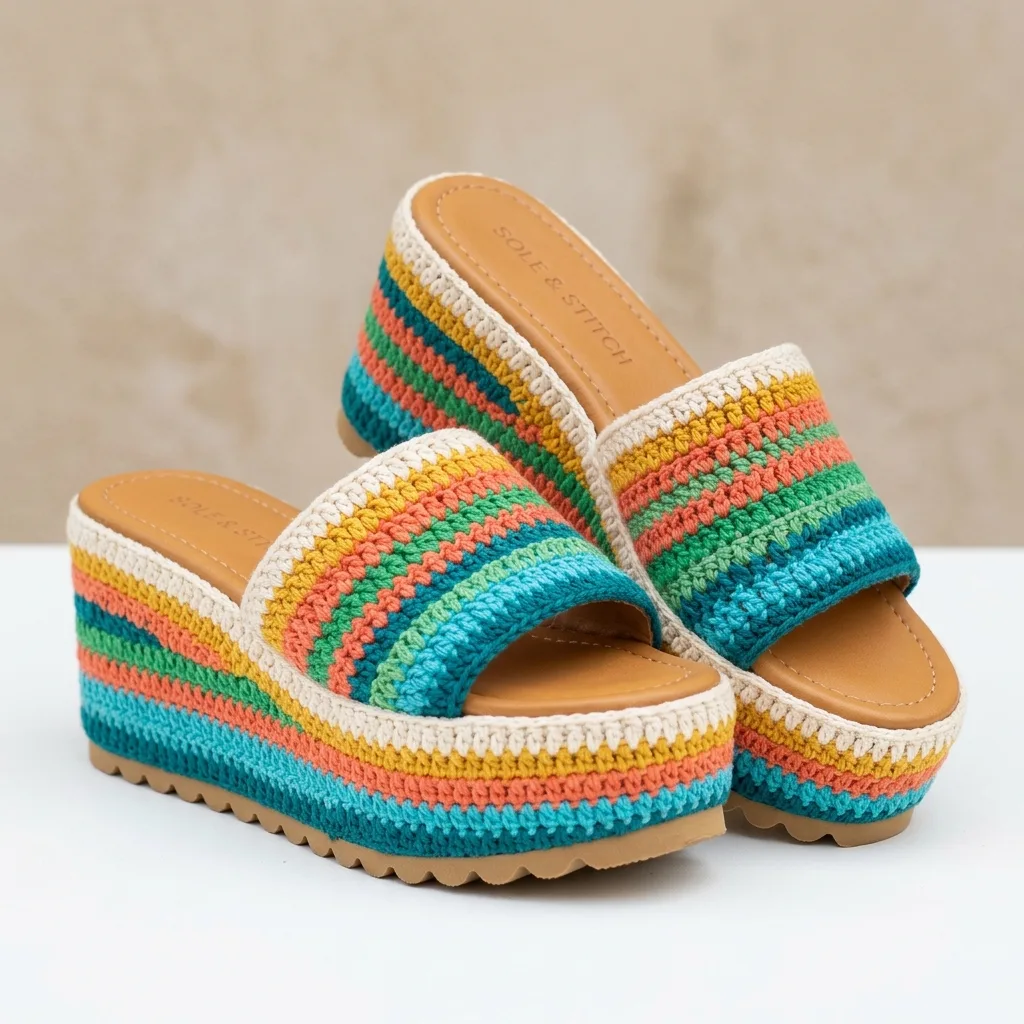
These stunning crochet wedge sandals feature vibrant horizontal stripes in a rainbow color sequence. The design includes two crocheted components: a wide toe strap and a platform covering that wraps around the wedge sole. Both pieces use the same straightforward stitch pattern, making this a satisfying project once you get into the rhythm.
The beauty of this crochet sandal pattern lies in its bold simplicity. Rows of single crochet (sc) create a dense, sturdy fabric that holds up to wear while showcasing each color perfectly. The cream border provides a clean finish that frames all those gorgeous stripes.
Skill Level: Intermediate
This pattern requires basic crochet skills plus some finishing work involving fabric glue and working with premade shoe components. If you’ve never attached crochet to another material before, don’t worry. I’ll walk you through every step.
Materials Needed
Yarn:
– Cream/Off-white: 50 yards
– Teal blue: 40 yards
– Coral/Salmon: 35 yards
– Golden yellow: 35 yards
– Kelly green: 35 yards
– Turquoise: 30 yards
Cotton yarn is essential here. It provides the structure and durability these sandals need, plus it won’t stretch out with wear like acrylic might.
Hook:
Additional Supplies:
Gauge
18 stitches and 20 rows = 4 inches in single crochet
Gauge matters for this pattern because your crocheted pieces need to fit your specific sole size. Take time to check your gauge before starting. If your gauge is too loose, go down a hook size. Too tight? Go up a hook size.
Finished Measurements
These instructions are written for a Women’s US Size 7/8 (EU 38). I’ll include notes for adjusting to other sizes throughout the pattern.
Abbreviations and Stitch Definitions
ch = chain: Yarn over, pull through loop on hook. This creates your foundation and turning chains.
sc = single crochet: Insert hook into stitch, yarn over and pull up a loop (2 loops on hook), yarn over and pull through both loops. This is the only stitch you need for the entire pattern.
st(s) = stitch(es)
sl st = slip stitch: Insert hook into stitch, yarn over and pull through both the stitch and the loop on hook in one motion. Used for joining and finishing.
Color Sequence
The stripe pattern repeats in this order:
1. Cream (2 rows)
2. Teal blue (2 rows)
3. Coral (2 rows)
4. Golden yellow (2 rows)
5. Kelly green (2 rows)
6. Turquoise (2 rows)
Repeat this sequence throughout both pieces. The consistent two-row stripes create that satisfying rainbow effect.
Color Change Tip: When switching colors, complete the last single crochet of the old color until you have 2 loops on your hook. Then yarn over with the new color and pull through to complete the stitch. This keeps your color changes crisp and clean on the right side of your work.
Crochet Pattern Instructions
Toe Strap (Make 2)
The toe strap is worked flat in rows, then curved and attached to the sandal base.
Foundation:
With cream yarn, ch 42.
Row 1: Sc in 2nd ch from hook and in each ch across. (41 sts)
Row 2: Ch 1, turn. Sc in each st across. (41 sts)
Rows 3-4: Change to teal blue. Ch 1, turn. Sc in each st across. (41 sts)
Rows 5-6: Change to coral. Ch 1, turn. Sc in each st across. (41 sts)
Rows 7-8: Change to golden yellow. Ch 1, turn. Sc in each st across. (41 sts)
Rows 9-10: Change to kelly green. Ch 1, turn. Sc in each st across. (41 sts)
Rows 11-12: Change to turquoise. Ch 1, turn. Sc in each st across. (41 sts)
Rows 13-14: Change to cream. Ch 1, turn. Sc in each st across. (41 sts)
Continue in the established color sequence until your strap measures approximately 4.5 inches wide. For most sizes, this means ending after completing the second cream stripe section, around Row 26.
Rows 15-26: Continue in color pattern as established. (41 sts each row)
Final Border Rows:
Change to cream for the last 2 rows regardless of where you are in the sequence. This creates a matching cream border on both edges.
Fasten off and weave in ends.
Side Border for Toe Strap
Turn your completed strap sideways. You’ll now add a cream border along both short edges.
Right Edge:
With cream, join yarn at corner with a sl st.
Row 1: Ch 1, work 26 sc evenly along the short edge.
Fasten off.
Left Edge:
Repeat on the opposite short edge.
These borders give the strap a polished, finished look and help it maintain its shape when attached to the sole.
Platform Wedge Cover (Make 2)
This piece wraps around the sides of the wedge platform. Measure your specific wedge sole before starting. You need the circumference of the platform edge and the height from the rubber sole to the top edge.
My measurements:
Foundation:
With teal blue, ch 64 (or adjust based on your circumference measurement, roughly 4.5 sts per inch).
Row 1: Sc in 2nd ch from hook and in each ch across. (63 sts)
Row 2: Ch 1, turn. Sc in each st across. (63 sts)
Rows 3-4: Change to coral. Ch 1, turn. Sc in each st across. (63 sts)
Rows 5-6: Change to golden yellow. Ch 1, turn. Sc in each st across. (63 sts)
Rows 7-8: Change to kelly green. Ch 1, turn. Sc in each st across. (63 sts)
Rows 9-10: Change to turquoise. Ch 1, turn. Sc in each st across. (63 sts)
Rows 11-12: Change to cream. Ch 1, turn. Sc in each st across. (63 sts)
Continue until your piece measures the height of your platform wedge. My sample required approximately 12 rows total.
Fasten off, leaving a long tail for seaming if desired.
Top Border for Platform Cover
With cream yarn, join at one corner of the long top edge.
Border Row: Ch 1, sc evenly across the entire top edge, working approximately 1 sc per row end.
Fasten off and weave in ends.
Assembly Instructions
This is where your sandals really come together. Take your time with this section. Rushing the assembly can affect how professional your finished sandals look.
Preparing Your Materials
1. Lay out both wedge sole blanks, all crocheted pieces, and your adhesive.
2. Do a dry fit first. Place each crocheted piece against its intended location without any glue.
3. Mark any adjustments needed with stitch markers or pins.
Attaching the Platform Cover
1. Apply a thin, even layer of fabric glue around the platform edge of one sandal.
2. Starting at the back heel area, press the platform cover piece against the glued surface.
3. Work your way around the platform, smoothing the crochet fabric as you go.
4. Use clothespins or clips to hold the fabric in place while drying.
5. Let dry completely according to your adhesive instructions. Usually 24 hours for full cure.
6. Repeat for the second sandal.
Troubleshooting Tip: If your crocheted piece is slightly too long, you can overlap the ends at the back heel area where it’s least visible. If it’s too short, you may need to crochet additional rows and reattach.
Attaching the Toe Strap
1. Curve your toe strap piece into a U-shape.
2. Apply glue to the inside edges of the sandal where the strap will attach.
3. Position the strap so equal amounts sit on each side of the sandal.
4. Press firmly and hold in place with clips.
5. Allow to dry completely before wearing.
6. Repeat for the second sandal.
Finishing Touches
Once everything is dry, examine your sandals for any loose edges. Apply additional glue to any spots that need reinforcement.
Use sharp scissors to trim any yarn tails that might be visible. A quick press with a cool iron over a damp cloth can help smooth any uneven areas in the crochet fabric.
Size Adjustments
For smaller sizes (US 5-6):
For larger sizes (US 9-11):
Always measure your specific sandal blanks before starting. Every manufacturer sizes things slightly differently.
Customization Ideas
Different Color Schemes:
Adding Embellishments:
Alternative Strap Styles:
Care Instructions
Because these sandals involve both crochet and adhesive components, care is important for longevity.
If the crochet components start to lift, simply reapply fabric glue to secure them again.
Why This Crochet Tutorial Works
This step by step crochet pattern succeeds because it combines familiar techniques with an unexpected application. You’re not learning complicated new stitches. You’re applying basic skills in a creative way.
The beginner friendly stitch pattern means you can focus your attention on the color work and assembly rather than struggling with complex techniques. And the bold stripes make this a genuinely impressive finished project.
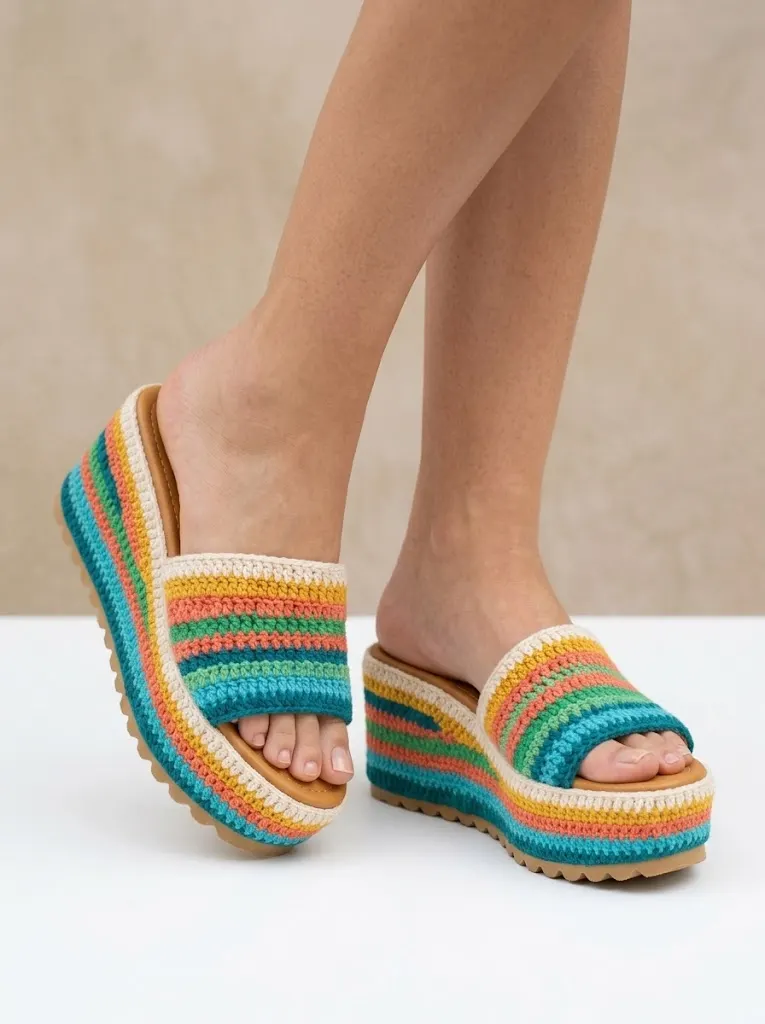
These Rainbow Striped Crochet Platform Wedge Sandals make wonderful gifts for friends who appreciate handmade fashion. They’re conversation starters. People will absolutely ask where you got them, and you get to say you made them yourself.
I really hope you love making these colorful sandals as much as I enjoyed designing them. If you create your own pair, please save this pattern to your Pinterest boards so you can find it again easily. And I would absolutely love to see your finished sandals! Drop a comment below or tag me on Instagram with your photos. Seeing your makes truly brightens my day.
