
A small, open-work square of white crochet, with a ring of picot-edged petals that seems to float between the stitches, is the kind of motif you can make a dozen of in an evening and still find yourself admiring.
The Crochet Flower Motif
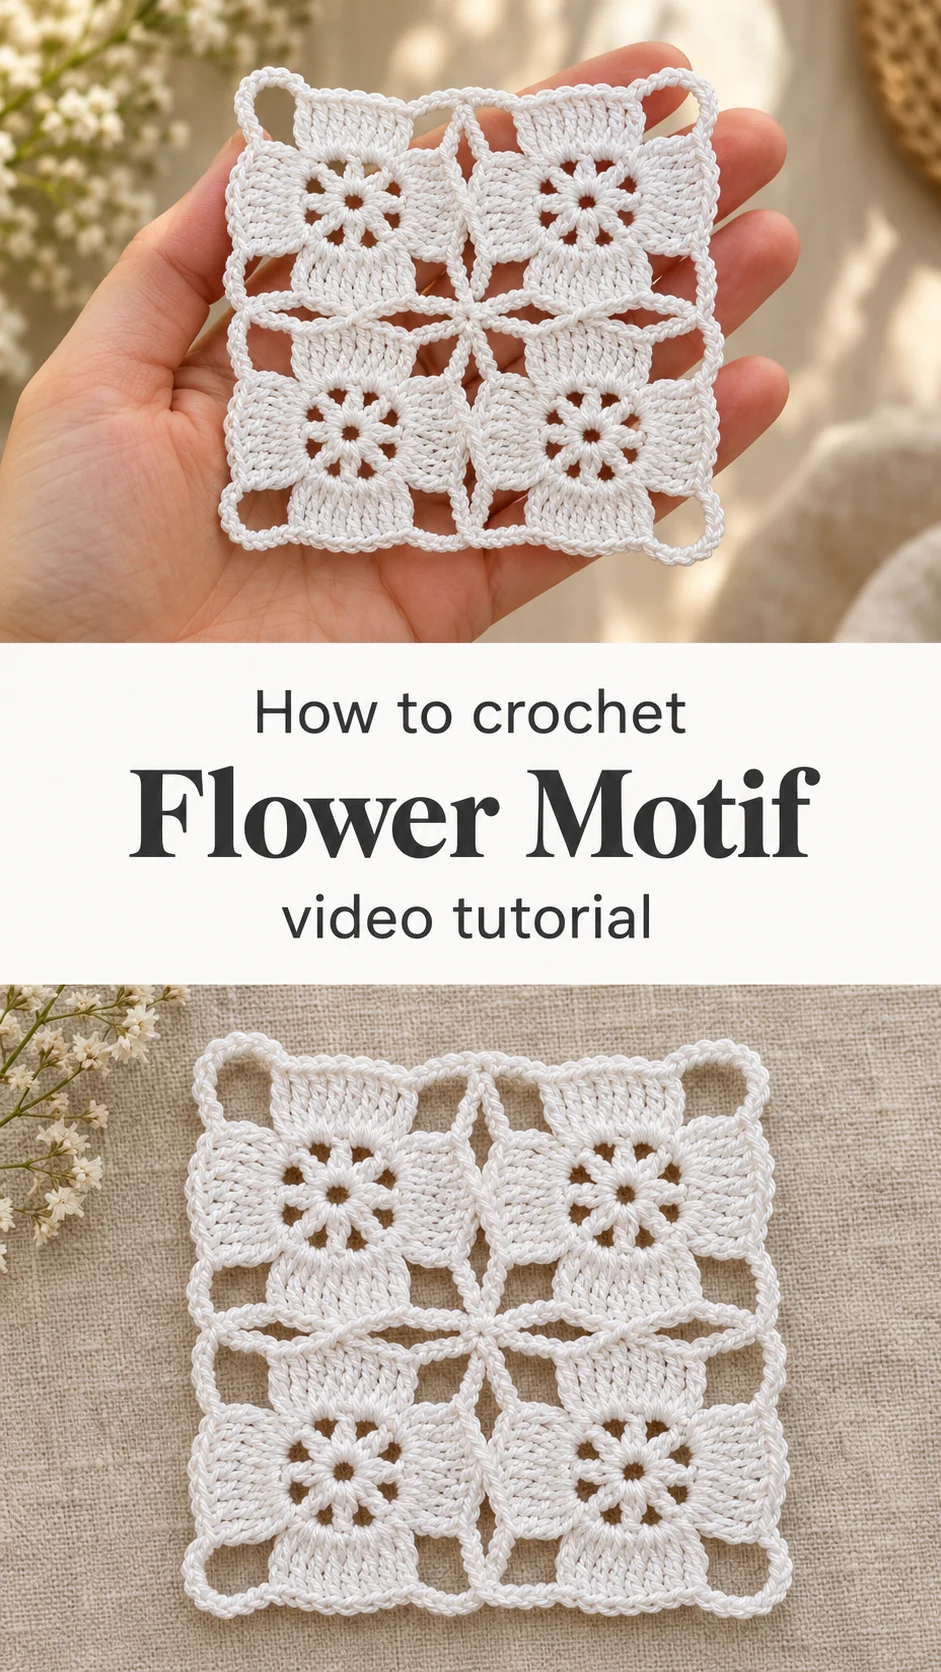
This flower motif is a square built from four petal-shaped blocks that surround a central star of chain loops. Each block carries a small eight-petal flower worked in open rounds, so the square reads as both solid and airy at the same time. The bright white finish makes every stitch stand out, which means neat, even tension shows at a glance. Its edges are finished with a loop border that frames each unit, so the squares sit side by side without a heavy seam. That combination of dense petal fabric and lacy openings is what sets this design apart from a plain granny square. It works well as a coaster, a table runner unit, a cushion panel or a stand-alone decorative square.
Because each unit is complete on its own, you can join them in any direction and change the size of your project by adding or removing squares. It is an easy motif to start with when you want a finished result in a single session.
Flower Motif Related Posts:
- Crochet Filet Lace Band: A Timeless Delicate Accent
- Crochet Lace Beret: A Chic and Timeless Accent
- Crochet Waffle Beanie: A Bold and Timeless Classic
- Crochet Heart Tote Bag: A Charming Handmade Essential
Materials
You will need a fine cotton yarn in white or a light neutral shade, such as a mercerised crochet cotton. Cotton keeps the petal edges crisp and the open centres defined; a fuzzy or acrylic yarn would blur the flower details and soften the outline of the square. Choose a steel or fine metal crochet hook sized to suit your thread, typically a small hook in the range recommended on the yarn label. A smaller hook makes the petals tighter and more sculptural, while a larger one opens the flowers and makes the square drape more loosely. You will also need a tapestry needle for weaving in the ends, a pair of sharp scissors, and a blocking surface if you plan to pin the squares flat. Stitch markers are helpful for keeping track of the corners.
Understanding the Structure of the Motif
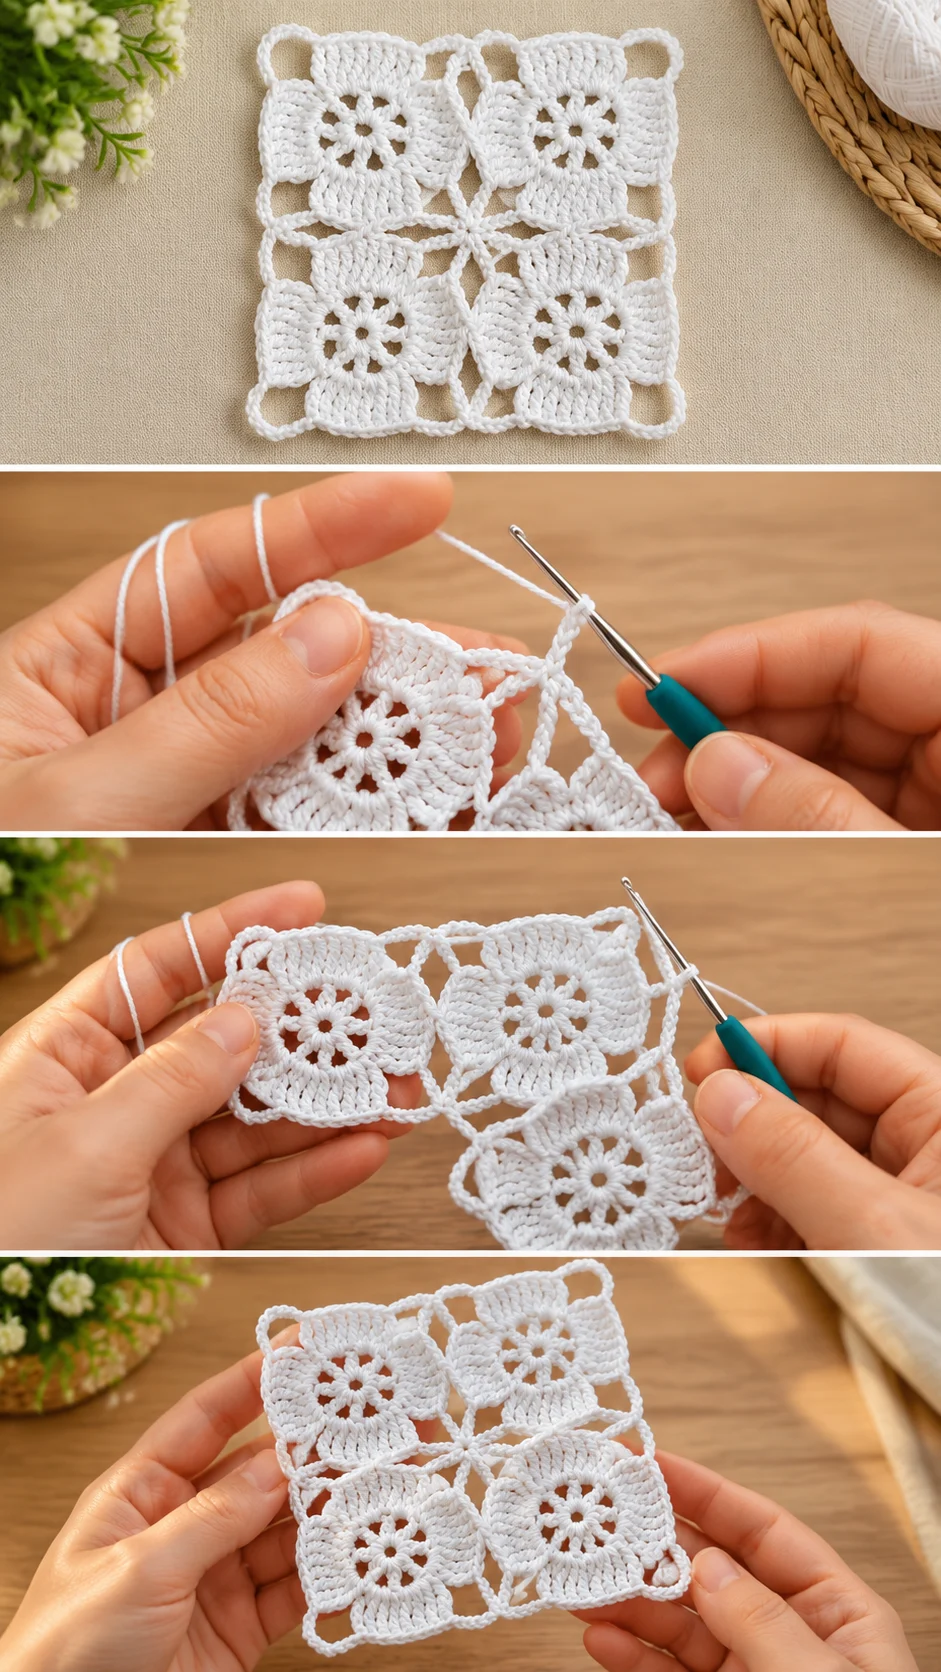
The square begins at its centre, where a ring of chain loops forms the star that all four blocks share. Each block is then built outward, with petal clusters that rise above the base and a flower worked into the middle of each block. The petals are raised, which gives the motif its three-dimensional feel, and the spaces between them create the lace effect. Working the blocks in sequence keeps the corners square; if you skip the markers, the sides can drift and the finished unit will look slightly lopsided.
Keeping the Corners Square
Corners are where most mistakes appear. If the flower centres look smaller on one side, count the stitches on each block and compare them against the others before moving on. A small adjustment early saves you from trying to correct the whole square later.
The Flower Centres and Petal Detail
The eight-petal flower in each block is the signature feature. The petals are formed from short stitch groups that are worked close together, then pulled tight so they curl slightly toward the centre. The choice you face is how tightly to pull the working loop: a firm pull gives a crisp, well-defined flower, while a looser pull lets the petals relax and look softer. Aim for even tension across all four flowers so the square looks uniform. If one flower looks loose, try working the next round with a slightly tighter grip rather than unpicking the whole block.
If the petals look flat or lumpy, the problem is usually tension rather than technique. Block the finished square gently to set the shape.
Choosing Yarn and Colour
White cotton is the classic choice, and it suits the lace openings beautifully. A cream or oatmeal shade gives a warmer, vintage look, while a soft grey or pale blue creates a cooler, more contemporary square. Avoid very dark colours if you want the openings to stay visible, since the holes will disappear into shadow. If you want colour, try a single accent shade for the flower centres only, leaving the petals and border in the base colour.
How to Style and Use the Squares
In the photos the squares are shown in a clean grid, which emphasises their repeat and the way the open spaces align between units. Joined in a four-by-four layout, they make a light table topper or a textured cushion front. Used as a single square, the motif makes a delicate coaster or a pretty brooch backing. For a bolder display, place a few units on a folded linen napkin or pin them to a wall hanging to show the lace against a plain background.
Finishing Tips for a Neat Result
Weave in every end carefully along the back of the petals so they do not show through the openings. Blocking is worth the effort: dampen the square, pin it to shape, and let it dry fully before handling. This opens the lace, evens the petals and softens the cotton. When joining squares, use a slip stitch or a matching chain seam so the join blends with the loop border.
Fixing Common Problems
If the square ripples, the tension is likely uneven between rounds; unpick the last round and work it more loosely. If the square cups, check that each block has the same number of petals and that the central star is worked evenly. If a flower looks too small, the hook is probably too large for the thread, so switch to a smaller size.
Care for Your Finished Motifs
Hand wash cotton squares in lukewarm water with a mild detergent, then rinse gently without wringing. Lay them flat to dry, reshaping the petals with your fingers while still damp. Store them flat, away from direct light, to keep the white bright and the lace from yellowing. A squares-in-a-box approach keeps finished units neat until you are ready to join them.
Following the Video Tutorial
Watch the tutorial closely at the point where the petals are formed, since that is where hand position matters most. Pause and replay the central star and the first block to confirm the stitch order before continuing. Work one full square first, lay it beside the video, and compare your flowers with those shown. This makes it easy to spot tension issues early.
A Timeless Handmade Motif
This flower square rewards patience with a piece that looks crafted rather than mass-made. Choose a yarn that suits the openwork, keep your tension even, and block with care. Those three choices decide whether your squares sit neatly together and show their lace at its best.
Video tutorial by Knitting Love: [Watch the full tutorial on YouTube](https://www.youtube.com/)
[Video tutorial]
Follow us on Pinterest and subscribe to the Newsletter so you don’t miss a thing!
Tutorial and photos of this flower motif by: Knitting Love 💗.
