
This is a crocheted bucket bag with bobble texture, floral motifs, and a drawstring closure. It uses single crochet, bobble stitches, and popcorn stitches. The construction is straightforward: you work a flat circular base, then build the cylindrical body upward in rounds, attach four flower squares, and add hardware.
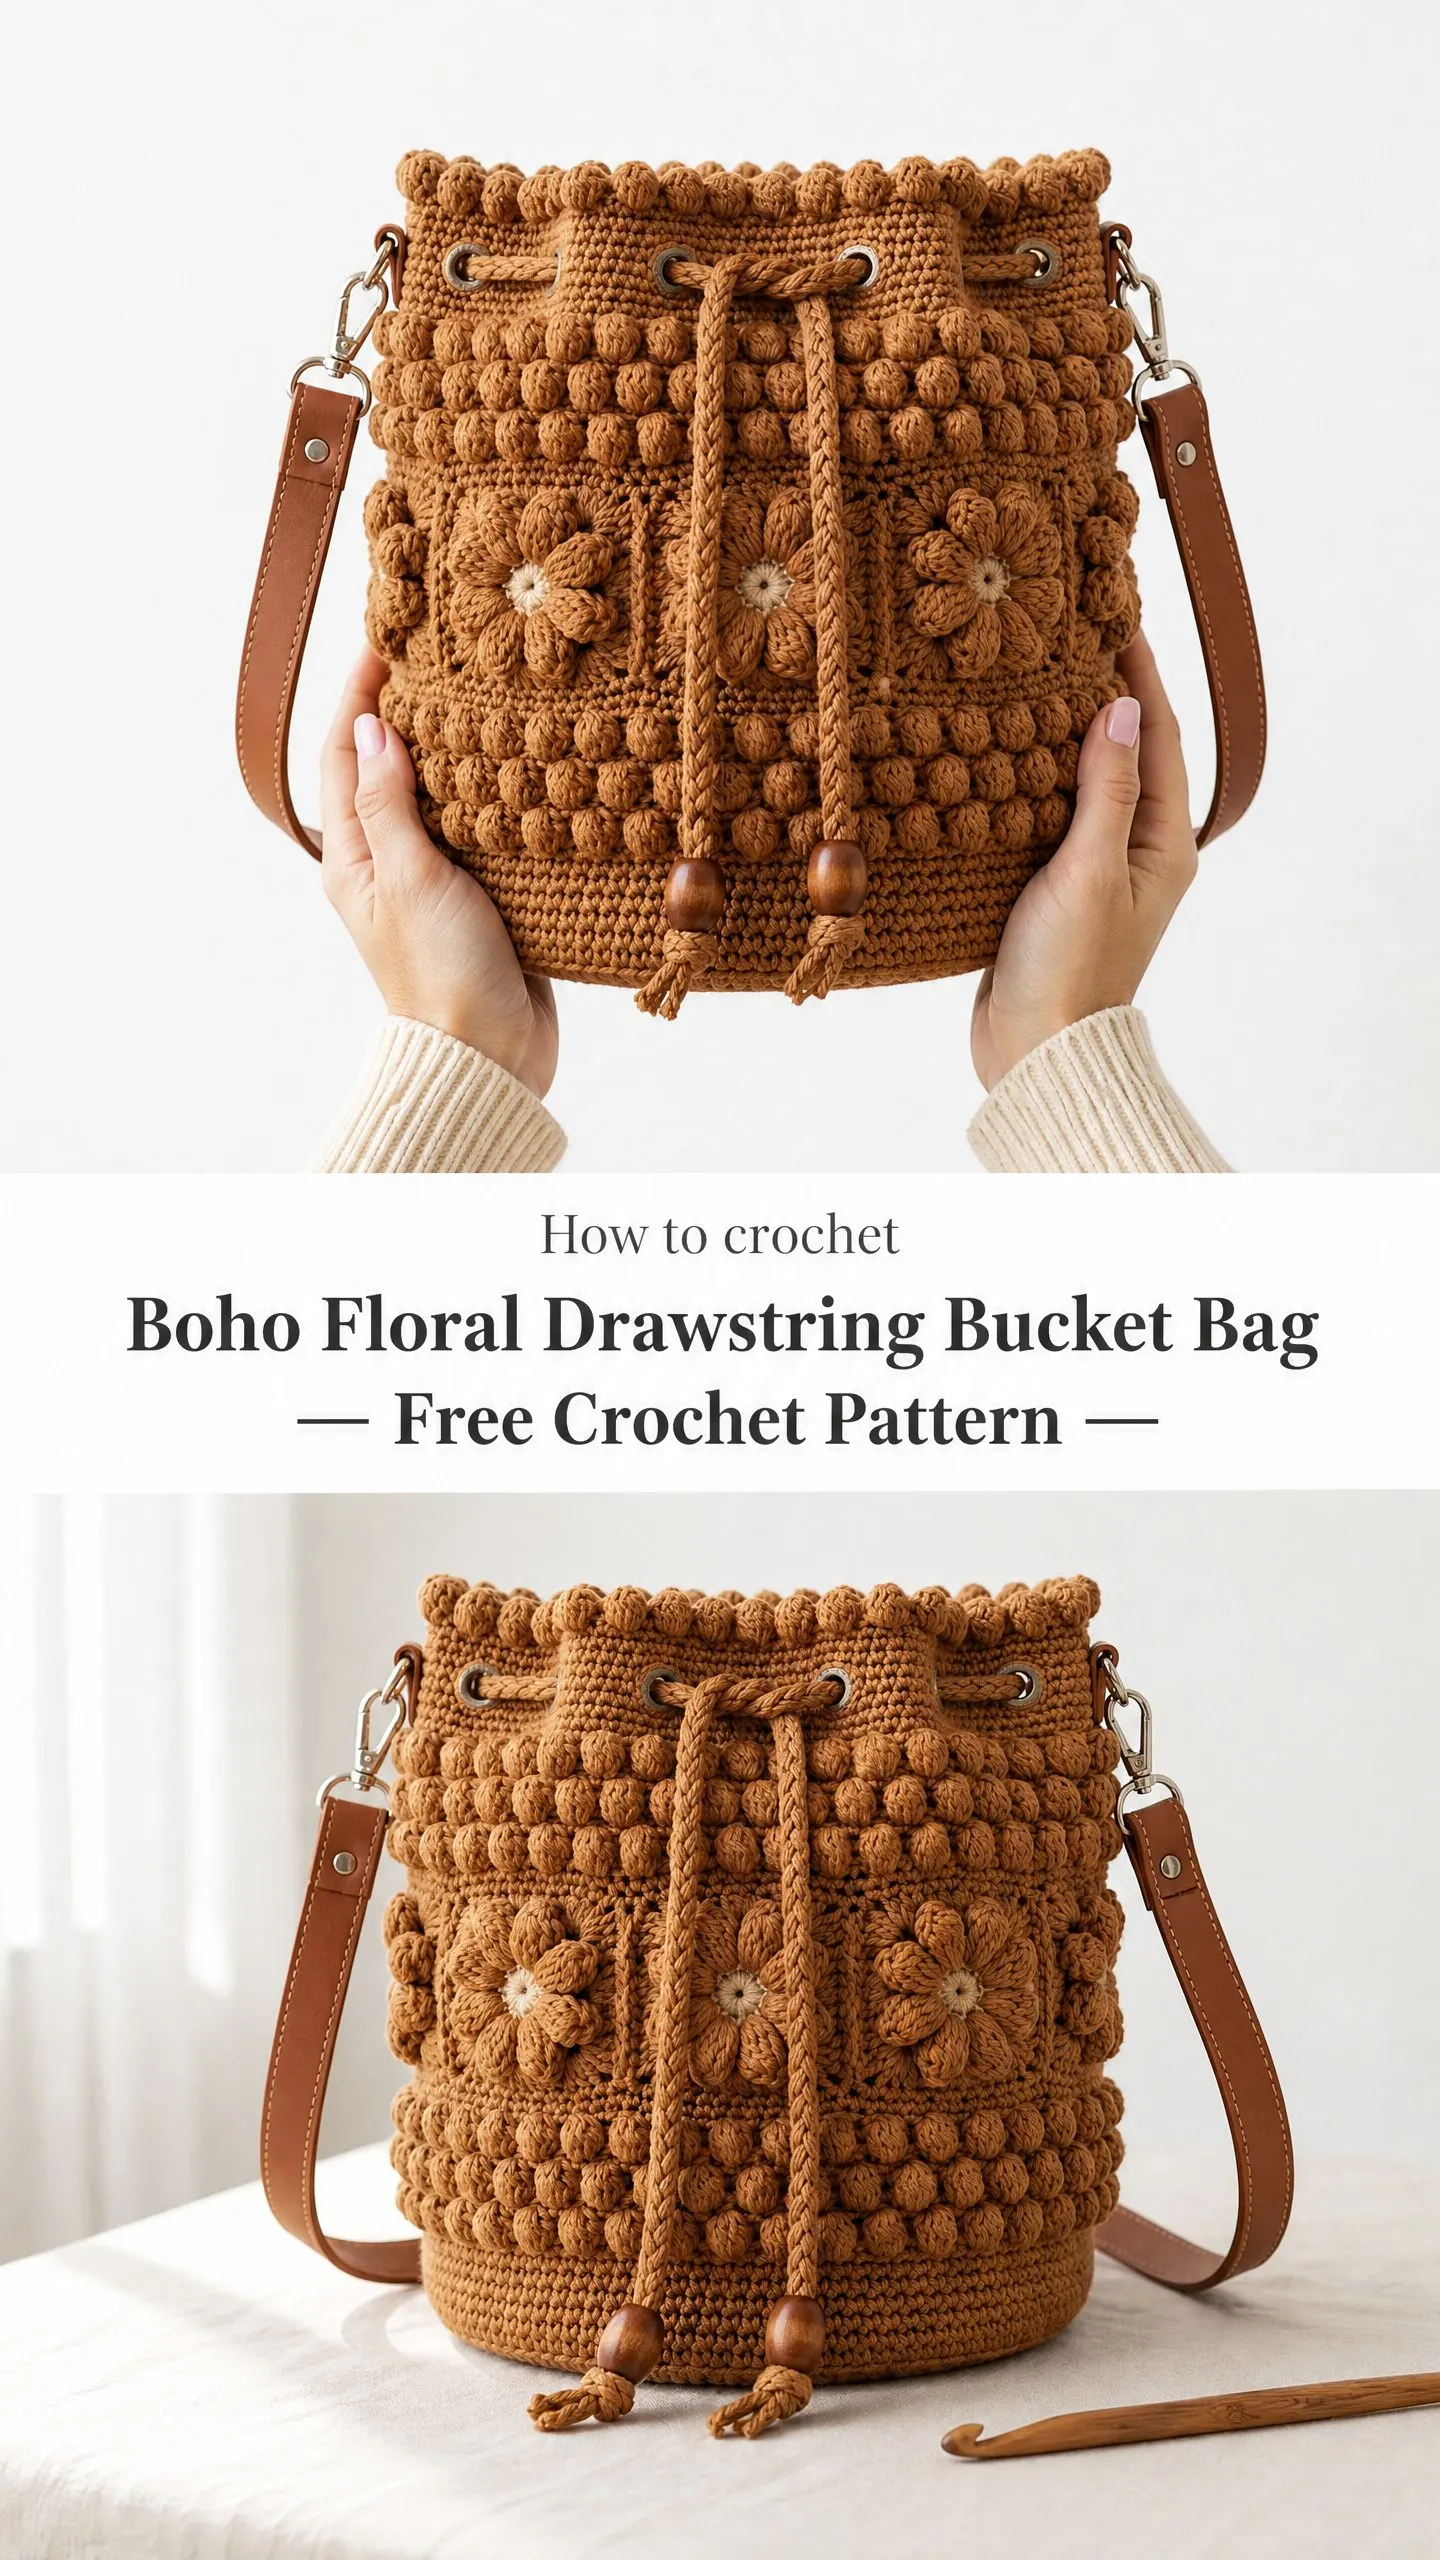
The finished bag measures approximately 10 inches wide by 10 inches tall. It requires intermediate skills since you need comfort with continuous rounds, textured stitches, and basic assembly. If you have completed two or three projects and can work increases confidently, you can handle this.
Expect about 18 to 25 hours of work depending on your pace. The result is a structured, bohemian crossbody bag with serious visual impact.
Why This Crochet Pattern Works So Well
The bobble stitch texture gives this bag incredible dimension without complicated colorwork. You are working just one main color throughout the body, yet the raised bobbles catch light and create shadow that makes the fabric look far more complex than it actually is.
The flower motifs are crocheted separately and sewn on afterward. This means you can work them at your own pace, block them properly, and position them exactly where you want them. No fussy color changes mid-round. No counting nightmare trying to place flowers while building the bag walls.
The leather strap and metal hardware elevate the entire piece. A handmade bag with professional-looking D-rings, lobster clasps, and grommets reads as intentional and polished. People will ask where you bought it.
Materials You Will Need
Yarn: Worsted weight cotton or cotton-blend yarn (Category 4), approximately 600 to 700 yards total in a warm caramel or tan color. You also need about 15 yards of cream or off-white for the flower centers.
Recommended Yarn Options:
1. Lion Brand 24/7 Cotton in Camel (100% mercerized cotton, 186 yards per 3.5 oz skein). You will need approximately 4 skeins of the main color plus a small amount of off-white. This yarn has excellent stitch definition for bobble work.
2. Paintbox Yarns Simply DK used double-stranded in Mustard Yellow or Caramel Brown. Doubling gives extra body for structure.
3. We Are Knitters The Petite Wool in Caramel (100% Peruvian wool). This creates a more rustic, vintage texture.
Choose yarn with minimal stretch. Cotton and linen-blend yarns hold bobble texture better than acrylic. Avoid fuzzy or textured yarns that will hide your stitch work.
Hooks:
Notions:
Gauge Information
With the G-6 (4.0 mm) hook and worsted cotton:
Take time to check your gauge. Bag dimensions depend on accurate gauge. Bobble fabric contracts slightly compared to plain single crochet (sc), so the effective stitch width in the bobble sections is closer to 3/8 inch per stitch.
Abbreviations and Special Stitches
Before we dive in, let me define every stitch and abbreviation you will encounter:
ch = chain: yarn over, pull through loop on hook
sl st = slip stitch: insert hook, yarn over, pull through stitch and loop on hook in one motion
sc = single crochet: insert hook, yarn over and pull up a loop (2 loops on hook), yarn over and pull through both loops
hdc = half double crochet: yarn over, insert hook, pull up a loop (3 loops), yarn over and pull through all 3
dc = double crochet: yarn over, insert hook, pull up a loop, (yarn over, pull through 2 loops) twice
st/sts = stitch/stitches
sp = space
ch-sp = chain space
rnd = round
rep = repeat
pm = place marker
BLO = back loop only: insert hook under only the back loop of the stitch instead of both loops
MR = magic ring: adjustable starting loop
sk = skip
Bob = Bobble stitch (see below)
PC = Popcorn stitch (see below)
yo = yarn over
RS = right side
WS = wrong side
MC = main color (caramel/tan)
AC = accent color (cream/off-white)
Bobble Stitch (Bob)
This creates a puffy raised ball that pops to the outside of your work. Here is how to work it:
[Yarn over, insert hook into the indicated stitch, yarn over and pull up a loop, yarn over and pull through 2 loops] five times into the same stitch. You now have 6 loops on your hook. Yarn over and pull through all 6 loops. Chain 1 to close.
The bobble naturally pushes toward the right side when you work in rounds with the right side facing.
5-dc Popcorn (PC)
This creates a raised puff for the decorative border at the top edge:
Work 5 double crochet into the same stitch. Drop the loop from your hook. Insert your hook from front to back through the top of the first dc of the group. Pick up the dropped loop and pull it through. Chain 1 to close.
Linked Double Crochet (LDC)
This produces tighter, denser fabric for the base:
Insert hook into the horizontal bar on the side of the previous dc (the middle bar), yarn over and pull up a loop (2 loops on hook). Insert hook into the indicated stitch, yarn over and pull up a loop (3 loops on hook). [Yarn over and pull through 2 loops] twice.
Front Post Single Crochet (FPSC)
This creates a raised ridge where the base meets the body:
Insert hook from front to back around the post of the indicated stitch (going around the vertical bar of the stitch below), yarn over and pull up a loop, yarn over and pull through both loops.
Pattern Notes Before You Begin
1. The bag is worked in continuous rounds unless otherwise noted. Use a stitch marker in the first stitch of each round and move it up as you work.
2. Construction order: flat circular base worked from center out, cylindrical body worked upward from base, top border with popcorn trim, drawstring channel, then finishing and hardware attachment.
3. The 4 Flower Motifs are crocheted separately and sewn onto the body. Two go on the front, two go on the back, arranged in a 2-wide by 2-tall grid.
4. Work all bobble stitches on right side rounds. When worked in rounds with the right side facing, bobbles pop outward naturally.
5. Tension matters greatly. Work bobbles firmly so they stand out but do not create holes.
Step-by-Step Crochet Pattern Instructions
Base
Using F-5 (3.75 mm) hook and MC, make a magic ring.
Rnd 1: Ch 1, work 8 sc into the ring, sl st to first sc to join, pull ring closed. (8 sc)
Rnd 2: Ch 1, 2 sc in each st around, sl st to join. (16 sc)
Rnd 3: Ch 1, [2 sc in next st, 1 sc in next st] 8 times, sl st to join. (24 sc)
Rnd 4: Ch 1, [2 sc in next st, 1 sc in next 2 sts] 8 times, sl st to join. (32 sc)
Rnd 5: Ch 1, [2 sc in next st, 1 sc in next 3 sts] 8 times, sl st to join. (40 sc)
Rnd 6: Ch 1, [2 sc in next st, 1 sc in next 4 sts] 8 times, sl st to join. (48 sc)
Rnd 7: Ch 1, [2 sc in next st, 1 sc in next 5 sts] 8 times, sl st to join. (56 sc)
Rnd 8: Ch 1, [2 sc in next st, 1 sc in next 6 sts] 8 times, sl st to join. (64 sc)
Rnd 9: Ch 1, [2 sc in next st, 1 sc in next 7 sts] 8 times, sl st to join. (72 sc)
Rnd 10: Ch 1, [2 sc in next st, 1 sc in next 8 sts] 8 times, sl st to join. (80 sc)
Switch to G-6 (4.0 mm) hook.
Rnd 11: Ch 1, [2 sc in next st, 1 sc in next 9 sts] 8 times, sl st to join. (88 sc)
Rnd 12 (worked in BLO to create turning ridge): Ch 1, sc in each st around in BLO, sl st to join. (88 sc)
Checkpoint: The base should measure approximately 7 inches in diameter after Rnd 12. The BLO round creates a clean folded edge at the base perimeter.
Body Setup Round
Do not turn. The work now proceeds upward. The base is flat beneath you.
Rnd 13: Ch 1, work FPSC around the post of each stitch of Rnd 11 (the round just below the BLO ridge), inserting hook around the post of the stitch. Work 1 FPSC in each of the 88 sts. Sl st to join. (88 sc)
This creates a very clean join between base and body.
Body Section 1: Lower Bobble Band
Rnd 14: Ch 1, sc in each of 88 sts around. Sl st to join. (88 sc)
Rnd 15: Ch 1, [Bob in next st, sc in next st] 44 times around. Sl st to join. (44 bobbles, 44 sc = 88 sts)
Rnd 16: Ch 1, sc in each of 88 sts around. Sl st to join. (88 sc)
Rnd 17: Ch 1, sc in first st, [Bob in next st, sc in next st] 43 times, Bob in next st. Sl st to join. (44 bobbles, 44 sc = 88 sts)
Rnd 17 offsets the bobbles from Rnd 15 by one stitch, creating the checkerboard bobble texture.
Rnd 18: Ch 1, sc in each of 88 sts around. Sl st to join. (88 sc)
Rnd 19: Ch 1, [Bob in next st, sc in next st] 44 times around. Sl st to join. (88 sts)
Rnd 20: Ch 1, sc in each of 88 sts around. Sl st to join. (88 sc)
Rnd 21: Ch 1, sc in first st, [Bob in next st, sc in next st] 43 times, Bob in next st. Sl st to join. (88 sts)
Rnd 22: Ch 1, sc in each of 88 sts around. Sl st to join. (88 sc)
Checkpoint: After Rnd 22, the lower bobble band should measure approximately 2.5 inches tall from the base join. You should have 4 bobble rows creating dense texture.
Body Section 2: Floral Motif Band Placement Rounds
Before working this section, crochet all 4 Flower Motifs (instructions follow). The body now works a band of plain single crochet where the flower motifs will be applied.
Rnds 23-32: Ch 1, sc in each of 88 sts around. Sl st to join. (88 sc each round)
Repeat this plain sc round 10 times total.
These rounds form a plain sc band approximately 2.25 inches tall. This is where the 4 flower motifs will be sewn after finishing.
Body Section 3: Upper Bobble Band
Rnd 33: Ch 1, [Bob in next st, sc in next st] 44 times around. Sl st to join. (88 sts)
Rnd 34: Ch 1, sc in each of 88 sts around. Sl st to join. (88 sc)
Rnd 35: Ch 1, sc in first st, [Bob in next st, sc in next st] 43 times, Bob in next st. Sl st to join. (88 sts)
Rnd 36: Ch 1, sc in each of 88 sts around. Sl st to join. (88 sc)
Rnd 37: Ch 1, [Bob in next st, sc in next st] 44 times around. Sl st to join. (88 sts)
Rnd 38: Ch 1, sc in each of 88 sts around. Sl st to join. (88 sc)
Rnd 39: Ch 1, sc in first st, [Bob in next st, sc in next st] 43 times, Bob in next st. Sl st to join. (88 sts)
Rnd 40: Ch 1, sc in each of 88 sts around. Sl st to join. (88 sc)
Checkpoint: After Rnd 40, the bag body from base join should measure approximately 8 inches tall.
Drawstring Channel
Rnd 41: Ch 1, sc in each of 88 sts around. Sl st to join. (88 sc)
Rnd 42 (Drawstring eyelet round): Ch 1, [sc in next 9 sts, ch 2, sk 2 sts] 8 times around. Sl st to first sc. (72 sc, 8 ch-2 spaces = 88 sts equivalent)
The 8 eyelets are spaced evenly. Of these 8 openings, 4 grommets will be set into 4 evenly spaced eyelets (at positions 1, 3, 5, and 7 counting around).
Rnd 43: Ch 1, sc in each sc and 2 sc in each ch-2 sp around. Sl st to join. (88 sc)
Rnd 44: Ch 1, sc in each of 88 sts around. Sl st to join. (88 sc)
Top Border With Popcorn Trim
Rnd 45: Ch 1, sc in each of 88 sts around. Sl st to join. (88 sc)
Rnd 46: Ch 1, [PC in next st, sc in next st] 44 times around. Sl st to join. (44 popcorns, 44 sc = 88 sts)
Rnd 47: Ch 1, sc in each of 88 sts around. Sl st to join. (88 sc)
Sl st loosely and fasten off, leaving a 6-inch tail to weave in.
Checkpoint: The total bag body including border should now measure approximately 10 inches tall from base to top of popcorn border.
Flower Motifs (Make 4)
Each motif is approximately 4 x 4 inches with a central flower and granny-square-style border.
Using AC (cream/off-white) and G-6 hook, make a magic ring.
Rnd 1 (Flower center): Ch 1, 8 sc into ring, sl st to join, pull ring closed. (8 sc)
Switch to MC.
Rnd 2 (Petals): Ch 1, [sc in next st, ch 3, 4 dc in next st, ch 3] 4 times around, sl st to first sc. (4 petal clusters with 4 dc each, 4 sc between petals)
Rnd 3 (Fill between petals): Sl st to top of first ch-3 arch, ch 3 (counts as dc), 4 dc in same ch-3 sp, ch 2, [5 dc in next ch-3 sp, ch 2] 3 times, sl st to top of ch-3. (4 groups of 5 dc, 4 ch-2 spaces)
Rnd 4 (Granny square corners): Sl st into next 2 sts of dc group to reach center of group, sl st into center dc. Ch 3 (counts as dc), 2 dc in same st, ch 2, 3 dc in same st (corner made), ch 1, [3 dc in center dc of next 5-dc group, ch 2, 3 dc in same st, ch 1] 3 times, sl st to top of ch-3. (4 corner ch-2 spaces, 4 side ch-1 spaces, 8 groups of 3 dc)
Rnd 5 (Border): Ch 1, [sc in each dc across to corner sp, (sc, ch 2, sc) in corner ch-2 sp, sc in next ch-1 sp] 4 times, sl st to join.
Fasten off, leaving a 12-inch tail for seaming.
Assembly and Finishing
Attaching the Flower Motifs
Block the 4 motifs to 4 x 4 inches before sewing. Soak in cool water for 10 minutes, gently squeeze out water, pin to a foam mat, and allow to dry completely.
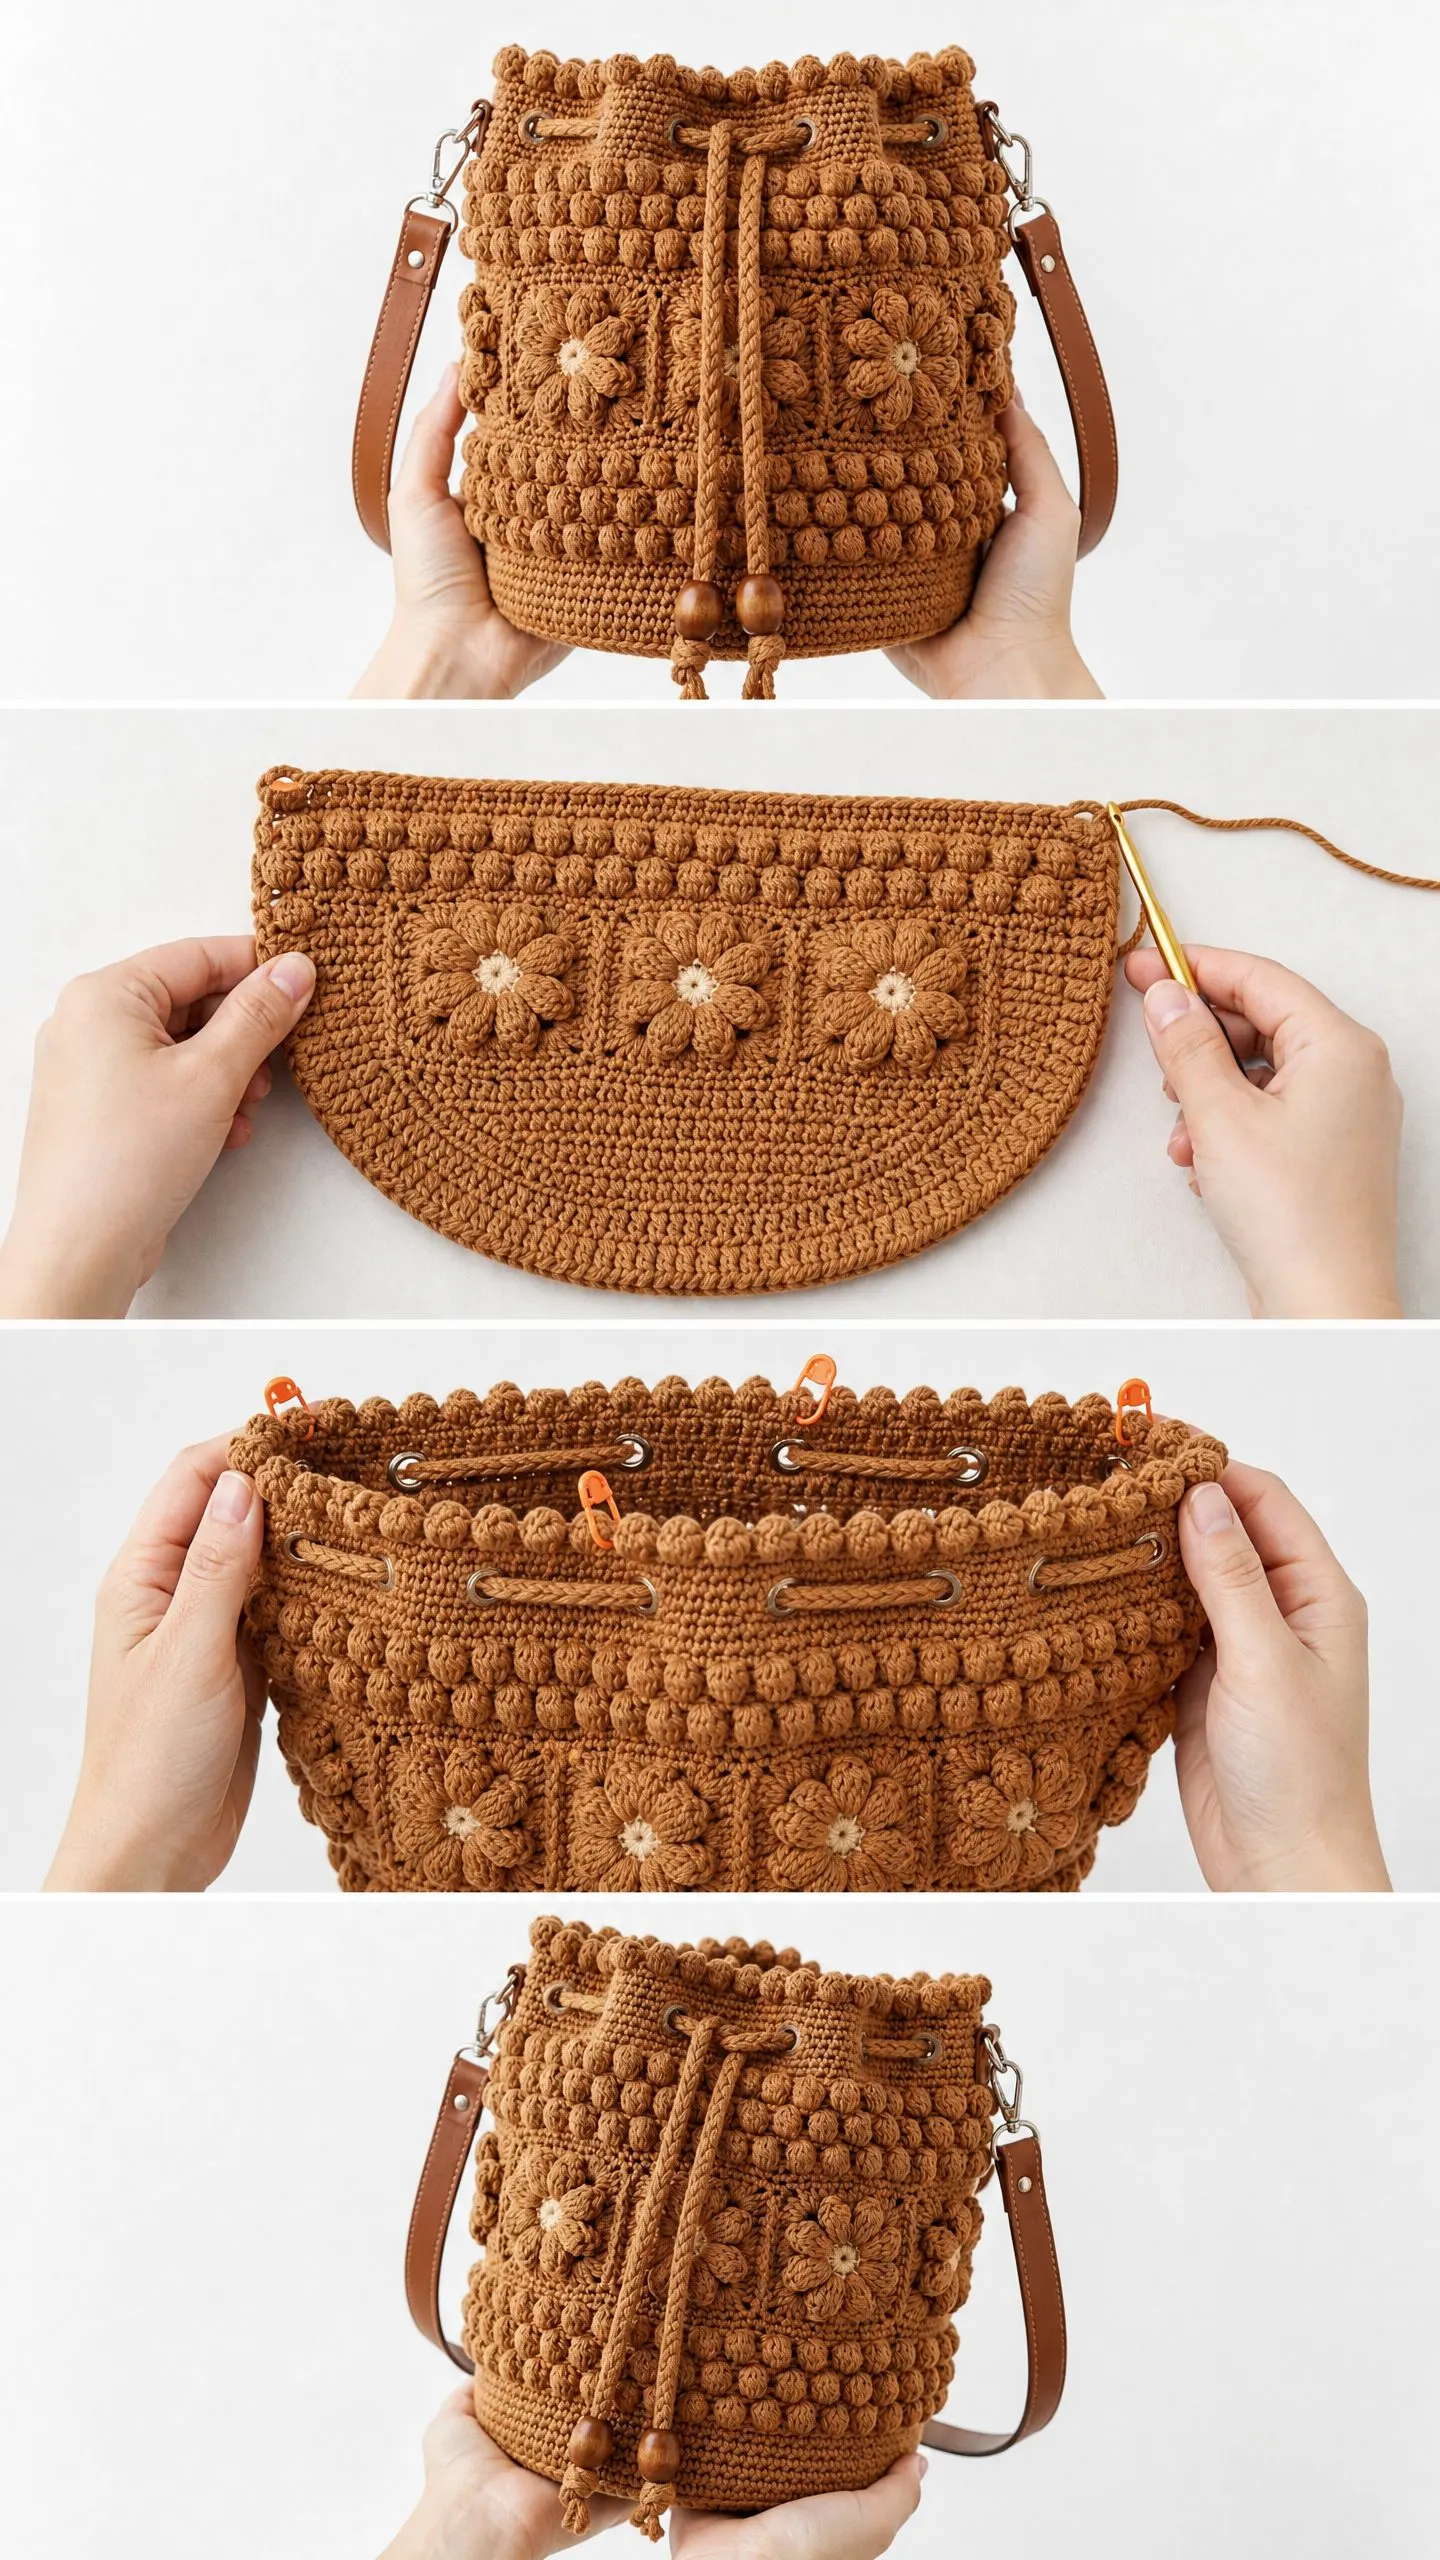
Position 2 motifs on the front of the bag and 2 on the back, arranged in a 2-wide by 2-tall grid. Center them over the plain sc section (Rnds 23 to 32). The outer edges should sit approximately 2 stitches in from the bobble side sections.
Using a tapestry needle and MC yarn, whipstitch around the outer border of each motif, catching both the motif edge and the sc stitches beneath.
Making the Drawstring Cords (Make 2)
Cut 3 lengths of MC yarn, each 80 inches long. Fold in half, attach to a fixed point, and twist together to form a twisted cord approximately 36 inches long. Alternatively, work a crochet chain of 120 ch for a cord approximately 36 inches long.
Thread one cord through grommets from the right side of the bag, entering at one grommet and exiting at the opposite side. Thread the second cord from the other two grommets so both cords enter and exit from opposite sides. When pulled, both cords cinch the bag closed.
Thread one wooden bead onto each of the 4 cord ends and secure with an overhand knot below the bead.
D-Ring and Strap Attachment
Create short crocheted tabs: Ch 8, sc in 2nd ch from hook and across (7 sc), fold in half around the D-ring bar, and sl st the two short ends together. Sew this tab flush to the exterior at the side midpoints, 2 rounds below the grommet channel.
Attach the lobster clasps of your purchased leather strap to the two D-rings.
Final Finishing Steps
Weave in all ends on the interior using a tapestry needle. Trim ends close.
Install grommets at the 4 marked eyelet positions in Rnd 42 using a grommet setter tool. Follow manufacturer instructions.
Optional: Cut a circle of felt or stiff interfacing to 7 inches diameter and insert into the bottom of the bag to help maintain the cylindrical shape.
Optional lining: Cut a rectangle of lining fabric 32 x 11 inches and a circle 7 inches diameter. Seam the rectangle into a cylinder, attach the circle base, turn under the top edge, and hand-stitch to the inside just below the drawstring channel.
Blocking Your Finished Bucket Bag
For the bag body, lightly mist with water and gently ease into shape. Insert a round form like a bowl or rolled towel into the body to maintain the cylindrical shape while drying. Do not wring or stretch aggressively.
If using cotton yarn, steam blocking with a garment steamer held 2 inches from the surface further sets the bobble texture.
Care Instructions
Hand wash in cool water with gentle soap. Do not wring. Roll in a clean towel to absorb excess moisture. Reshape and air dry completely over a cylindrical form. Do not tumble dry. Keep the leather strap away from prolonged water exposure.
Size Customization Tips
For a smaller bag (8 inches x 8 inches): Stop base increases after Rnd 9 (72 sts). Work body on 72 sts throughout. Reduce the plain sc motif band to 8 rounds and make 2 smaller flower motifs working only through Rnd 4.
For a larger tote (12 inches x 13 inches): Continue base increases through Rnd 13 (104 sts). Extend the plain sc motif band to 14 rounds and arrange 3 flower motifs per side.
For a deeper bag: Add rounds to any section. Each 2 rounds of sc adds approximately 0.45 inches to height.
Thank you so much for choosing this bucket bag crochet pattern for your next project. I genuinely hope you love making it as much as I loved designing it. The bobble texture is so satisfying to work, and seeing those flower motifs come together on the finished bag is incredibly rewarding.
If you make this bag, I would absolutely love to see it! Tag me on Instagram or share a photo in my Facebook group. Seeing your finished projects is honestly the best part of sharing patterns.
Save this crochet tutorial to your Pinterest boards so you can find it easily when you are ready to start. And please drop a comment below if you make one. I read every single comment and love hearing how your projects turn out!
