
This baby dress pattern combines a delicate white mesh bodice with a flowing lavender skirt and a pretty scalloped hem. It works up from the top down in one piece. You will use basic double crochet and chain stitches throughout. The finished dress fits a 6 month old baby and makes a stunning gift for showers, christenings, or photo sessions.
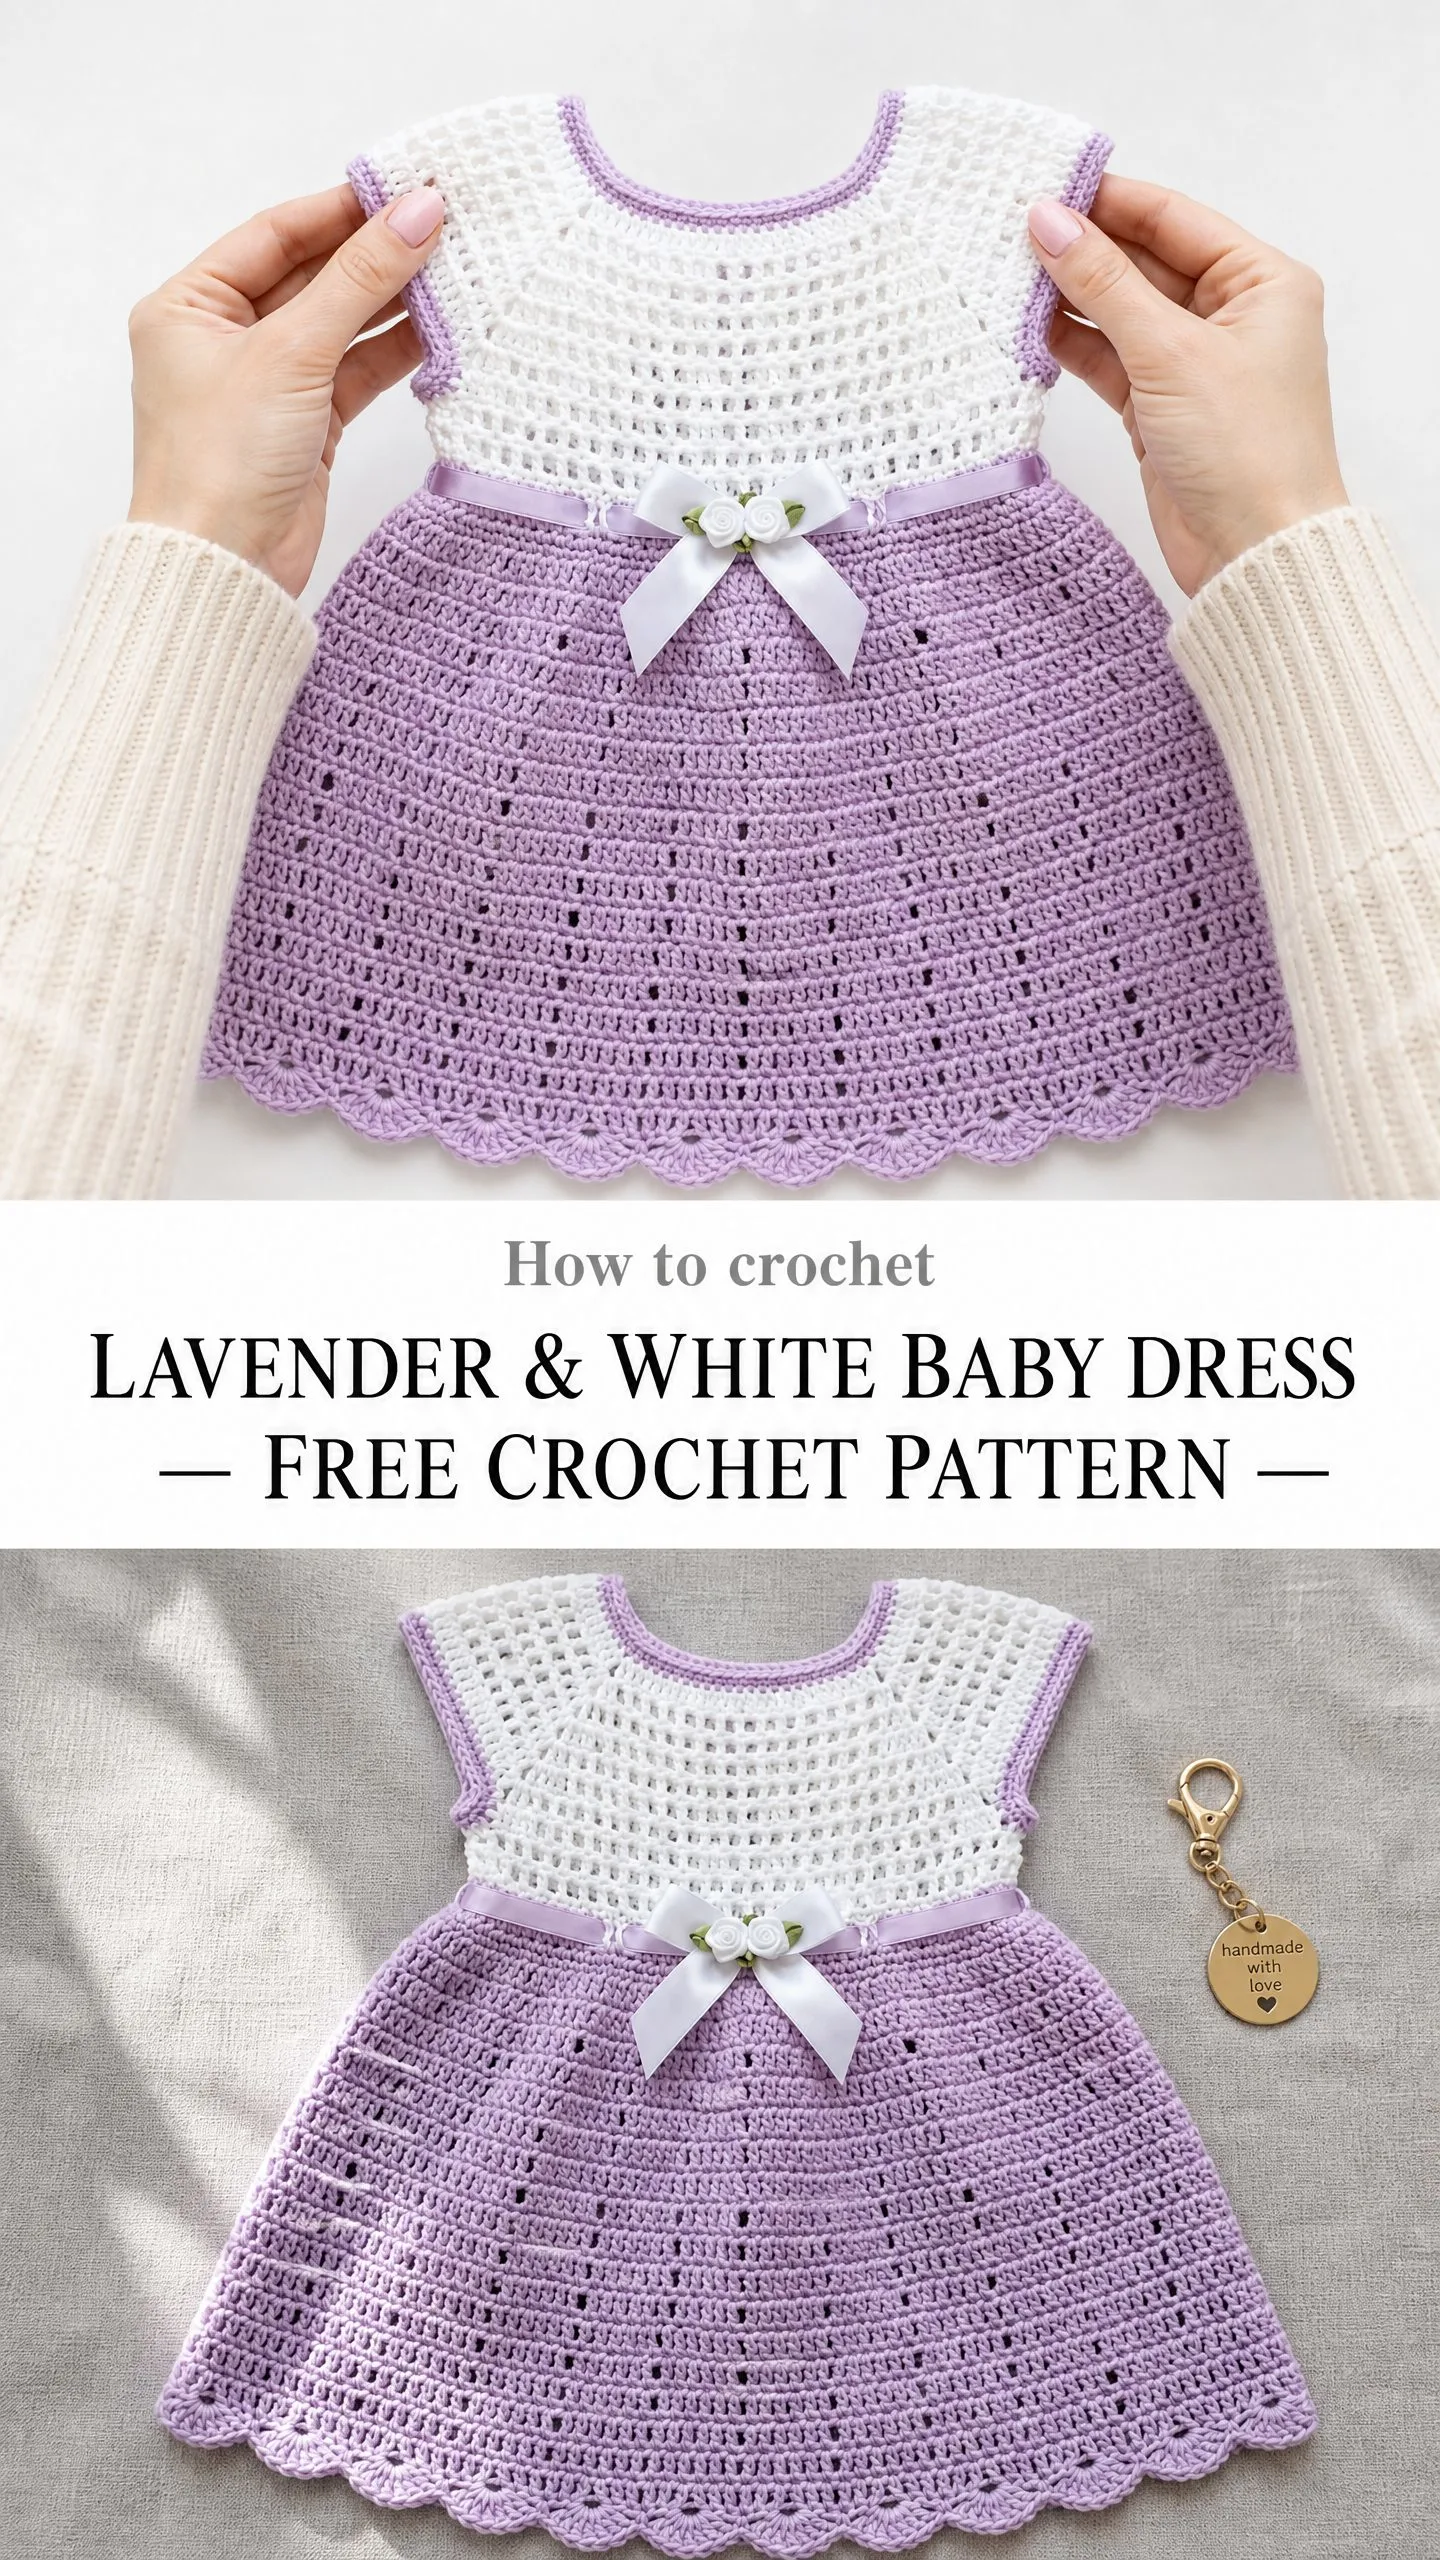
The construction is straightforward once you understand the rhythm. You start at the neckline, work raglan style increases to shape the yoke, then separate for the armholes and continue down through the bodice and skirt. A satin ribbon threads through eyelet holes at the waist for that classic heirloom look.
If you can double crochet and count stitches, you can make this dress. Let me walk you through every step.
Why This Baby Dress Pattern Works So Well
The genius of this design is the contrast between the airy mesh bodice and the solid skirt. The white mesh section creates a light, breathable top that looks intricate but uses only double crochet (dc) and chain (ch) stitches. The lavender skirt builds gradually with strategic increases, giving you that beautiful A-line flare without complicated shaping.
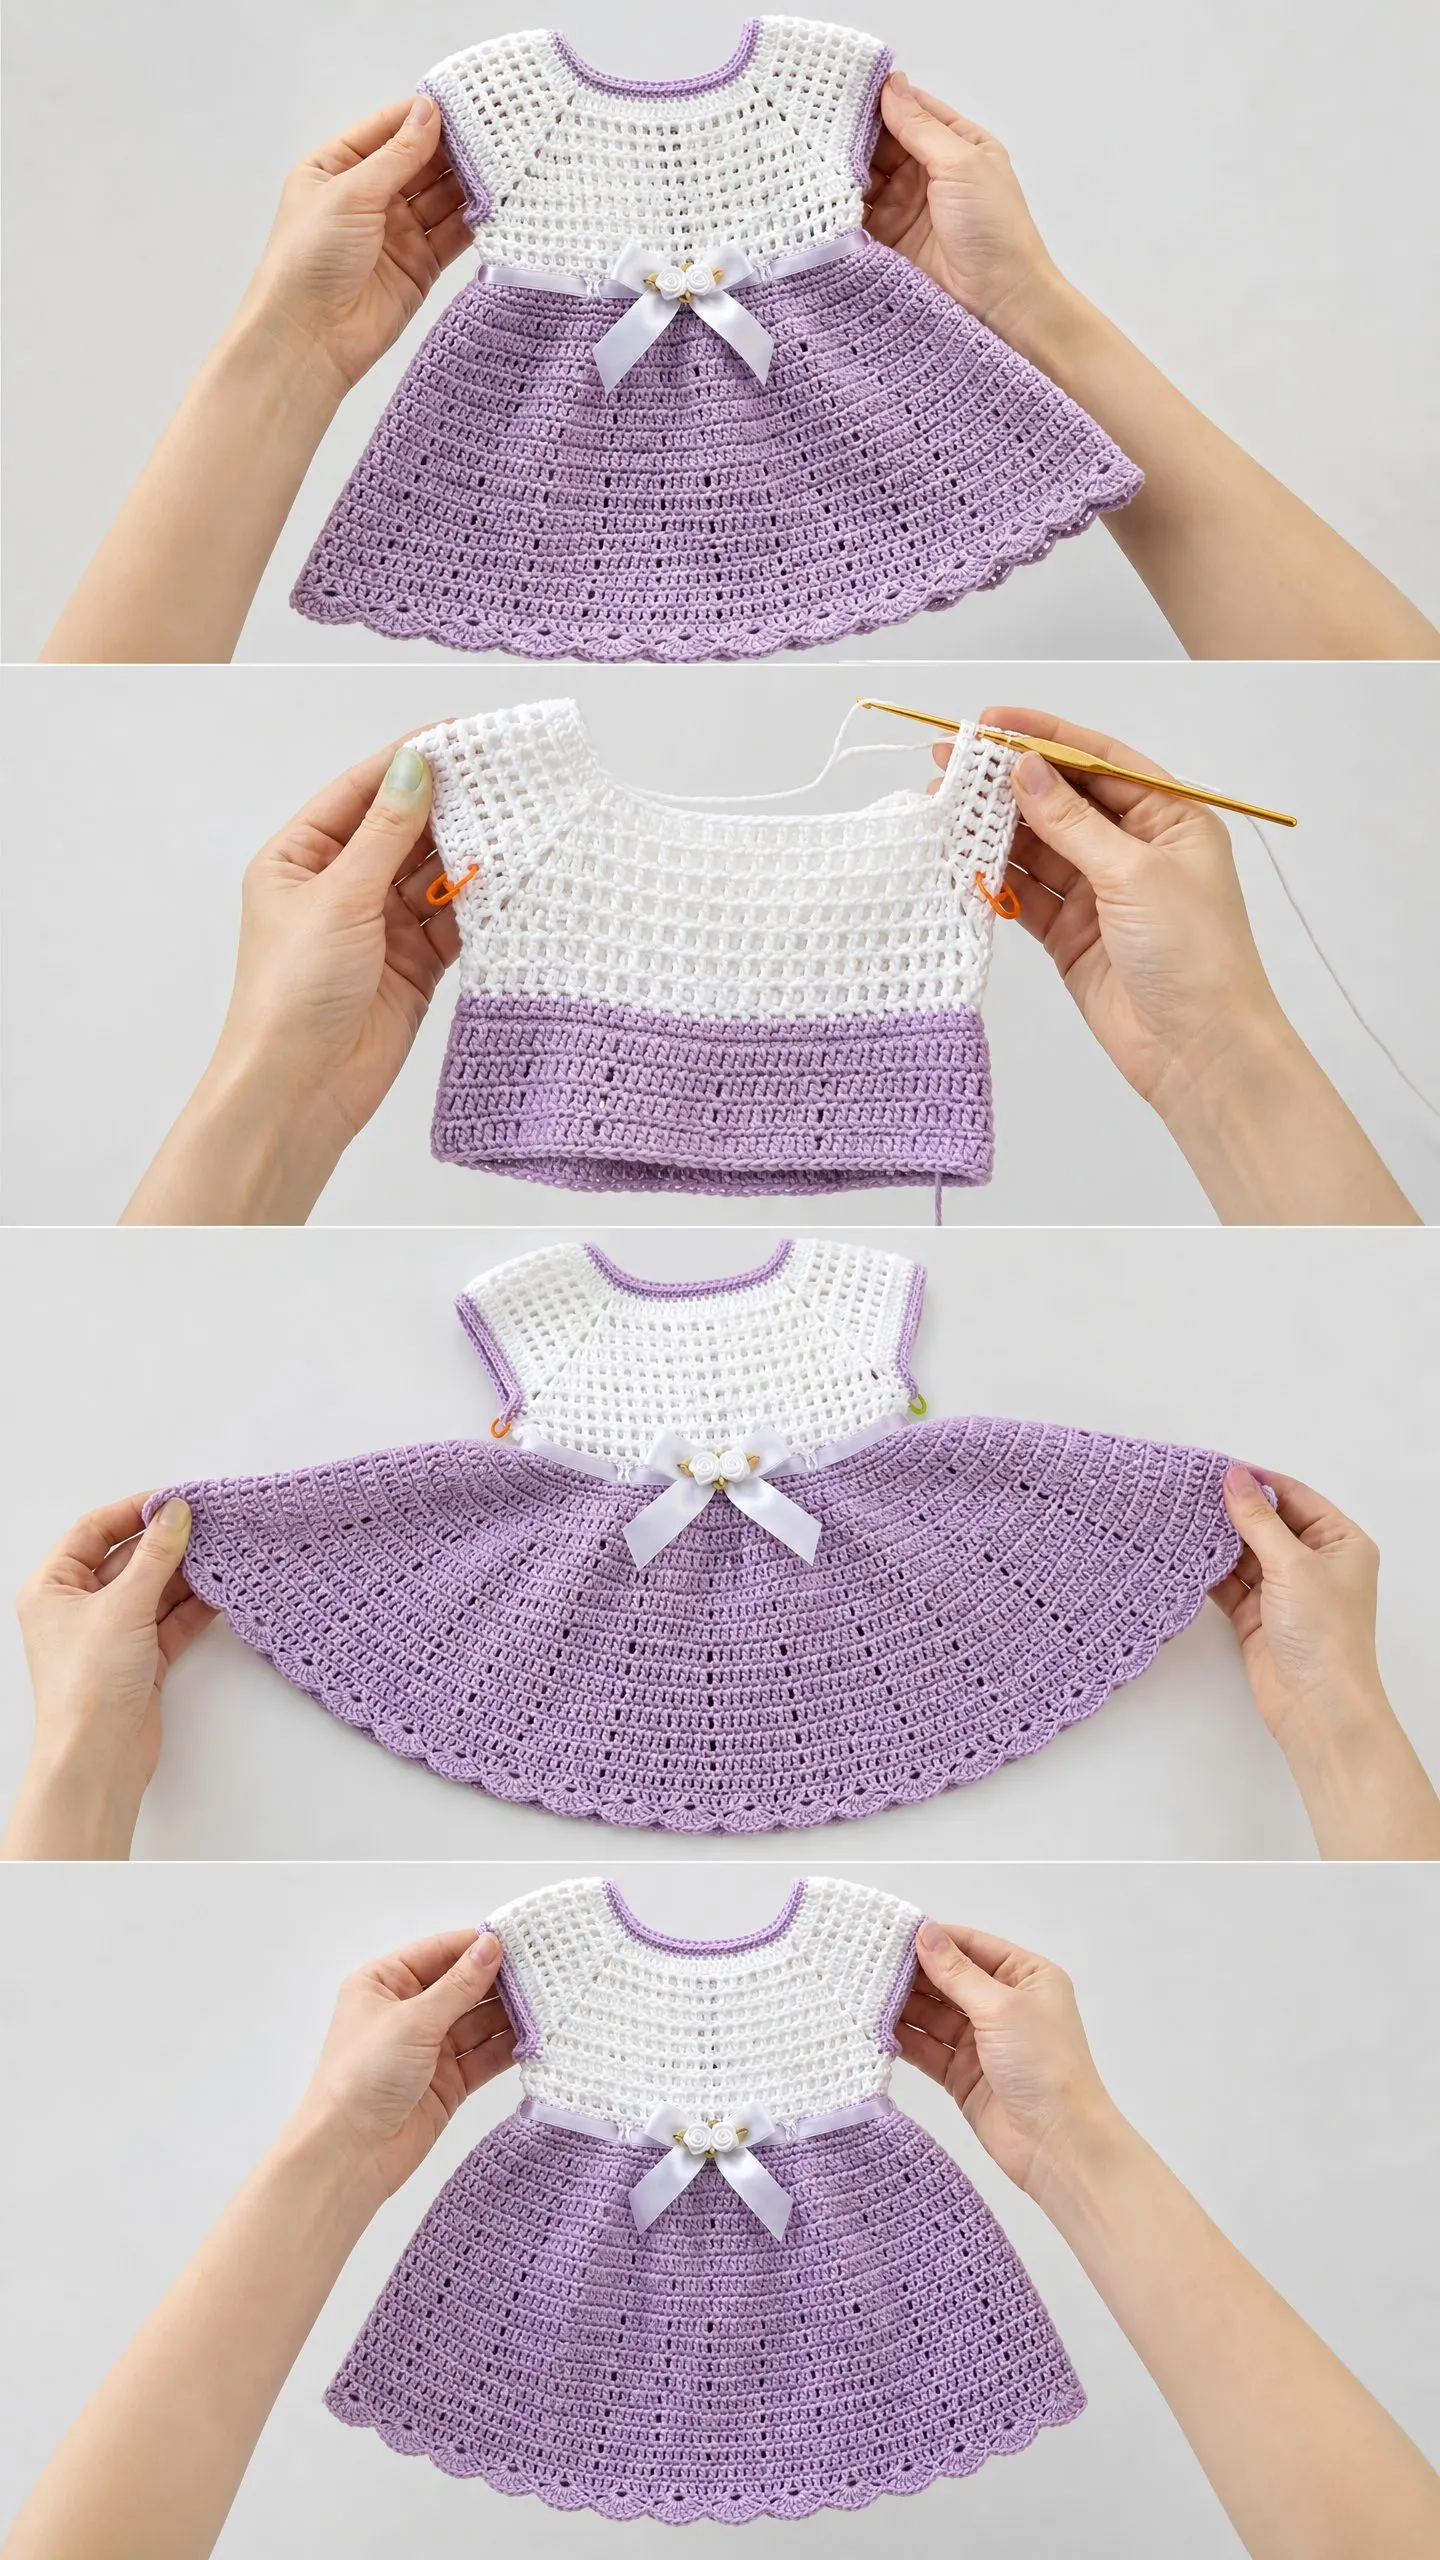
The top-down construction means you can try the dress on as you go if you have a little model available. It also means no seaming at the end. You will work in rows for the first few inches to create a small back opening, then join into rounds for the rest of the dress.
The scalloped border at the hem adds a sweet finishing touch that looks far more difficult than it actually is. Trust me on this one.
Materials You Will Need
Gather these supplies before you start:
Yarn:
Hook:
Notions:
Recommended Yarn Options:
Paintbox Yarns Simply DK works beautifully for this project. Choose Pure White and Dusty Lilac or Pansy Purple. It holds stitch definition well and is machine washable.
Drops Safran in off-white and lavender gives you 100% cotton with lovely drape. Perfect for warm weather occasions.
Lion Brand 24/7 Cotton DK in White and Lavender has a subtle mercerized sheen that makes the dress look extra special.
Important note: Avoid fuzzy or textured yarns. They will hide the pretty mesh pattern in the bodice. Stick with smooth yarns for best results.
Gauge
Getting gauge right matters for a wearable garment. Take time to swatch before you begin.
In double crochet with US E-4 / 3.5 mm hook:
18 dc and 10 rows = 4 inches / 10 cm (blocked)
For the mesh bodice:
One mesh unit (1 dc, ch 1) = approximately 0.44 inch / 1.1 cm wide
If your swatch is too big, try a smaller hook. If it is too small, go up a hook size. Reswatch until you match gauge.
Finished Measurements
This pattern is written for a 6 month size:
Size customization tips are included at the end of the pattern.
Abbreviations and Stitch Definitions
Let me break down every term you will encounter:
Special Stitches Explained
Mesh Stitch (used in bodice):
This creates the open grid pattern in the white section. Here is how it works:
1. Work a dc into the designated stitch or space
2. Chain 1
3. Skip the next stitch or chain-1 space
4. Repeat as directed
Each (dc, ch 1, skip 1) unit counts as one mesh unit. Simple as that.
Shell Increase Unit (used in yoke shaping):
This creates your raglan corners and expands the mesh:
Work (dc, ch 1, dc, ch 1, dc) all into the same stitch or space. This adds 2 mesh units at each corner point.
Fan Shell Stitch (used in hem border):
This creates the scalloped edge:
1. Skip 2 stitches
2. Work 5 dc into the next stitch (this is one fan shell)
3. Skip 2 stitches
4. Work 1 sc into the next stitch
5. Repeat around
One complete repeat uses 6 stitches.
Picot (optional for trim):
1. Chain 3
2. Slip stitch into the first chain just made
This creates a tiny decorative bump.
Pattern Notes Before You Begin
Read through these tips first. They will save you confusion later.
1. The dress is worked in the round from the neckline down. You start with white yarn for the yoke and bodice, then switch to lavender for the skirt.
2. The back has a small opening at the neckline. You work the first several rows back and forth, then join into rounds once the opening is deep enough (about 1.5 inches).
3. Place stitch markers at your 4 raglan corners. Move them up every round. These markers are your best friends for this project.
4. Chain-1 spaces count as stitches in the mesh section. Work into the chain space, not into the dc below it.
5. The ribbon gets threaded through after the dress is complete. Do not crochet it in.
Section 1: Neckline Foundation and Back Opening
With Yarn A (white), chain 64. Do not join yet.
Row 1 (RS, back opening row): Ch 3 (counts as first dc throughout), dc in 4th ch from hook and in each ch across. (64 dc total, including t-ch)
Now place your stitch markers to divide the neckline into yoke sections:
Row 2 (WS, mesh row): Ch 4, turn (counts as dc plus ch 1). Skip first st. (Dc in next st, ch 1, skip 1 st) across, ending dc in top of t-ch. (32 mesh units)
Row 3 (RS): Ch 3, turn. Work Shell Increase Unit into first corner marker space, continue mesh to next corner, work Shell Increase Unit, continue mesh to next corner, work Shell Increase Unit, continue mesh to last corner, work Shell Increase Unit, dc in last st. (40 mesh units)
Row 4 (WS): Ch 4, turn. Work in established mesh pattern across all sts and ch-sps. Work Shell Increase Unit at each of the 4 marked corners. (48 mesh units)
Row 5 (RS): Ch 3, turn. Continue mesh with Shell Increase Unit at each of the 4 corners. (56 mesh units)
Row 6 (WS): Ch 4, turn. Continue mesh with Shell Increase Unit at each of the 4 corners. (64 mesh units)
After Row 6, your back opening should be approximately 1.5 inches deep. Now join the work into a round. On the last stitch of Row 6, do not turn. Instead, chain 2 and slip stitch to the first ch-3 at the start of Row 6 to join. (65 mesh units)
Section 2: Yoke Continued in the Round
Round 7: Sl st into first ch-1 sp, ch 4 (counts as dc, ch 1). Continue mesh around, working Shell Increase Unit at each of 4 marked corners, and work (dc, ch 1, dc, ch 1) at back center join to increase 1 unit there. Join with sl st to 3rd ch of beg ch-4. (66 mesh units)
Round 8: Sl st into first ch-1 sp, ch 4. Continue mesh around, working Shell Increase Unit at each of 4 marked corners. Join. (74 mesh units)
Round 9: Sl st into first ch-1 sp, ch 4. Continue mesh around, working Shell Increase Unit at each of 4 marked corners. Join. (82 mesh units)
Round 10: Sl st into first ch-1 sp, ch 4. Continue mesh around, working Shell Increase Unit at each of 4 marked corners. Join. (90 mesh units)
Round 11: Sl st into first ch-1 sp, ch 4. Continue mesh around, working Shell Increase Unit at each of 4 marked corners. Join. (98 mesh units)
Round 12: Sl st into first ch-1 sp, ch 4. Continue mesh around, NO increases this round. Join. (98 mesh units)
Checkpoint 1: Your total mesh unit count should be 98. The yoke from neckline to current row should measure approximately 3.5 inches.
Section 3: Separating Sleeves from Body
This is where the armholes form. Take a breath and count carefully.
Round 13 (Separation Round): Sl st to first ch-1 sp after the left back marker. Ch 4. Work in mesh across the back section to the left back/sleeve corner marker (do not work into the sleeve section). Ch 6 (this bridge chains over the sleeve to form the underarm), skip all sleeve mesh units to the next sleeve/front corner marker. Work in mesh across the front section to the right front/sleeve corner marker. Ch 6, skip right sleeve section entirely, sl st to the first dc at beg of round to join. (80 mesh units)
Checkpoint 2: The body should now have 80 mesh units in the round. The total piece from neckline to current row should measure approximately 4.5 inches.
Section 4: Lower Bodice (White Mesh)
Continue working the lower bodice in mesh stitch with no shaping.
Round 14: Sl st into first ch-1 sp, ch 4. Work mesh around the entire body, working into the underarm chain bridges as though they are normal ch-1 sps. Join. (80 mesh units)
Round 15: Sl st into ch-1 sp, ch 4. Work mesh around. Join. (80 mesh units)
Round 16: Sl st into ch-1 sp, ch 4. Work mesh around. Join. (80 mesh units)
Round 17: Sl st into ch-1 sp, ch 4. Work mesh around. Join. (80 mesh units)
Checkpoint 3: The bodice from neckline to current row should measure approximately 5.5 inches. Your white bodice is complete.
Section 5: Waistband Eyelet Round and Ribbon Channel
This section creates the holes where your ribbon will thread through.
Round 18 (Eyelet/Ribbon Round): Sl st to ch-1 sp, ch 3 (counts as dc). Dc in each dc and dc in each ch-1 sp around (converting all mesh units to solid dc). Join with sl st to top of beg ch-3. (160 dc)
Round 19 (Eyelet holes): Sl st into first ch-1 sp, ch 5 (counts as dc plus ch 2). Skip 2 dc. (Dc in next dc, ch 2, skip 2 dc) around. Work 52 full repeats. For the last 4 sts: dc in next, ch 2, skip 2, sl st to top of beg ch-5 to close. (53 ch-2 eyelets)
Round 20: Sl st into ch-2 sp, ch 3 (counts as dc). 2 dc in same ch-2 sp. Dc in each dc around, 3 dc in each ch-2 sp around. Join. (212 dc)
This expansion begins the flare of the skirt. Change to Yarn B (lavender) at end of Round 20. Fasten off Yarn A. Join Yarn B to any st with sl st.
Section 6: Skirt (Lavender)
Now the fun part. Watch your skirt grow with each round.
Round 21: Ch 3 (counts as dc). Dc in each dc around. Join. (212 dc)
Round 22: Ch 3. Dc in each of next 4 dc. 2 dc in next dc (increase). (Dc in each of next 5 dc, 2 dc in next dc) around. Join. (247 dc)
Round 23: Ch 3. Dc in each dc around. Join. (247 dc)
Round 24: Ch 3. Dc in each of next 5 dc. 2 dc in next dc. (Dc in each of next 6 dc, 2 dc in next dc) around. Join. (282 dc)
Round 25: Ch 3. Dc in each dc around. Join. (282 dc)
Round 26: Ch 3. Dc in each of next 6 dc. 2 dc in next dc. (Dc in each of next 7 dc, 2 dc in next dc) around. Join. (317 dc)
Round 27: Ch 3. Dc in each dc around. Join. (317 dc)
Round 28: Ch 3. Dc in each of next 7 dc. 2 dc in next dc. (Dc in each of next 8 dc, 2 dc in next dc) around. Join. (352 dc)
Round 29: Ch 3. Dc in each dc around. Join. (352 dc)
Round 30: Ch 3. Dc in each dc around. Join. (352 dc)
Checkpoint 4: The skirt should measure approximately 6 inches from the waist join. Total dress length from neckline should be approximately 11.5 inches.
Section 7: Scallop Border Preparation
The Fan Shell Stitch uses a 6-stitch repeat. Your current count of 352 needs to be divisible by 6. It is not quite there, so we fix it in this round.
Round 31 (Adjustment Round): Ch 3. Dc in each dc around, working dc2tog at 4 evenly spaced points (approximately every 88 sts). Join. (348 dc)
To work dc2tog: yarn over, insert hook, pull up loop, yo, draw through 2 loops, yo, insert hook in next st, pull up loop, yo, draw through 2 loops, yo, draw through all 3 loops.
Section 8: Scallop Hem Border
This is the pretty finishing touch.
Round 32 (Scallop Border): Join Yarn B with sl st to any stitch. Ch 1 (does not count as st). Sc in first st. (Skip next 2 sts, 5 dc in next st, skip next 2 sts, sc in next st) around until all 348 sts are consumed. Join with sl st to first sc. Fasten off. (58 fan shells)
Section 9: Sleeve Edges (Cap Sleeve Trim)
Return to each armhole opening. With Yarn A, join yarn with sl st at the underarm chain.
Sleeve Edge Round 1: Ch 1. Sc evenly around the entire armhole opening. Aim for approximately 30 to 34 sc. Join with sl st to first sc.
Sleeve Edge Round 2 (optional picot trim): Ch 1. Sc in first st. (Picot, sc in each of next 2 sts) around. Join and fasten off.
Repeat for second sleeve edge.
Section 10: Neckline Trim
Join Yarn A at back opening right edge with sl st.
Neckline Round 1: Ch 1. Sc evenly around the neckline, working into the foundation chain loops and up each side of the back opening. Work approximately 3 sc per 2 rows along the back opening edges and 1 sc per chain along the neckline foundation. At back left top corner, work (sc, ch 3, sc) for button loop. Join with sl st. Fasten off.
Finishing Your Baby Dress
Weave in all ends using your yarn needle. Weave through at least 1 inch of fabric in two directions to secure.
Sew the button to the back right neckline edge, aligned with the button loop on the back left edge.
Add the ribbon: Cut your satin ribbon to 24 inches. Thread it through the eyelet holes of Round 19, beginning and ending at the front center. Pull both ends even and tie in a bow. Trim ribbon ends at a diagonal to prevent fraying.
Attach the ribbon roses: Hand stitch 2 small ribbon roses to the center of the bow using sewing needle and thread. Take 3 to 4 small stitches through the rose backing and ribbon only.
Blocking Your Finished Dress
Blocking makes a huge difference in how professional your dress looks. Do not skip this step.
For cotton yarn (wet blocking): Soak the dress in cool water for 15 to 20 minutes. Gently squeeze out water without wringing. Lay flat on a blocking mat or towels. Pin the neckline to shape, gently open the mesh squares of the bodice, and smooth the skirt flat with the scallop hem stretched evenly. Allow to dry completely.
For acrylic yarn (steam blocking): Hold a steam iron about 1 inch above the surface and apply steam without pressing down. Gently smooth and shape with your free hand. Allow to cool before moving.
Remove ribbon and roses before blocking. Reattach after drying.
Size Customization Tips
For smaller sizes (Newborn or 3-month):
For larger sizes (12-month or 18-month):
Every 4 additional foundation chain stitches adds approximately 0.88 inch to the chest circumference.
Care Instructions
Hand wash in cool water with gentle or baby-safe detergent. Do not wring. Roll in a clean towel to remove excess water. Lay flat to dry. Remove ribbon and roses before washing. If using machine-washable yarn, use a mesh laundry bag on gentle cycle with cold water, then lay flat to dry.
Thank you so much for choosing this pattern for your next project. I hope the little one who wears this dress feels as special as they look. If you make this baby dress, I would absolutely love to see it. Tag me on Instagram or share a photo in my Facebook group.
If this pattern made you smile, save it to your Pinterest boards so you can find it easily when you are ready to start. And please drop a comment below if you give it a try. I read every single one and it truly makes my day to see your beautiful work.
