
I call this one the Sunset Stripe jumpsuit, and it has quite the story behind it. I sketched the original concept in a travel journal about three years ago while sitting in a café somewhere warm, watching women in flowing palazzo pants walk by. The sketch sat untouched in that notebook until last summer when I finally pulled it out, covered in coffee stains and barely legible. But I could still see it clearly in my mind: a fitted bodice with thin straps, wide flowing legs in warm stripes, and that distinctive hexagon detail at the waist.
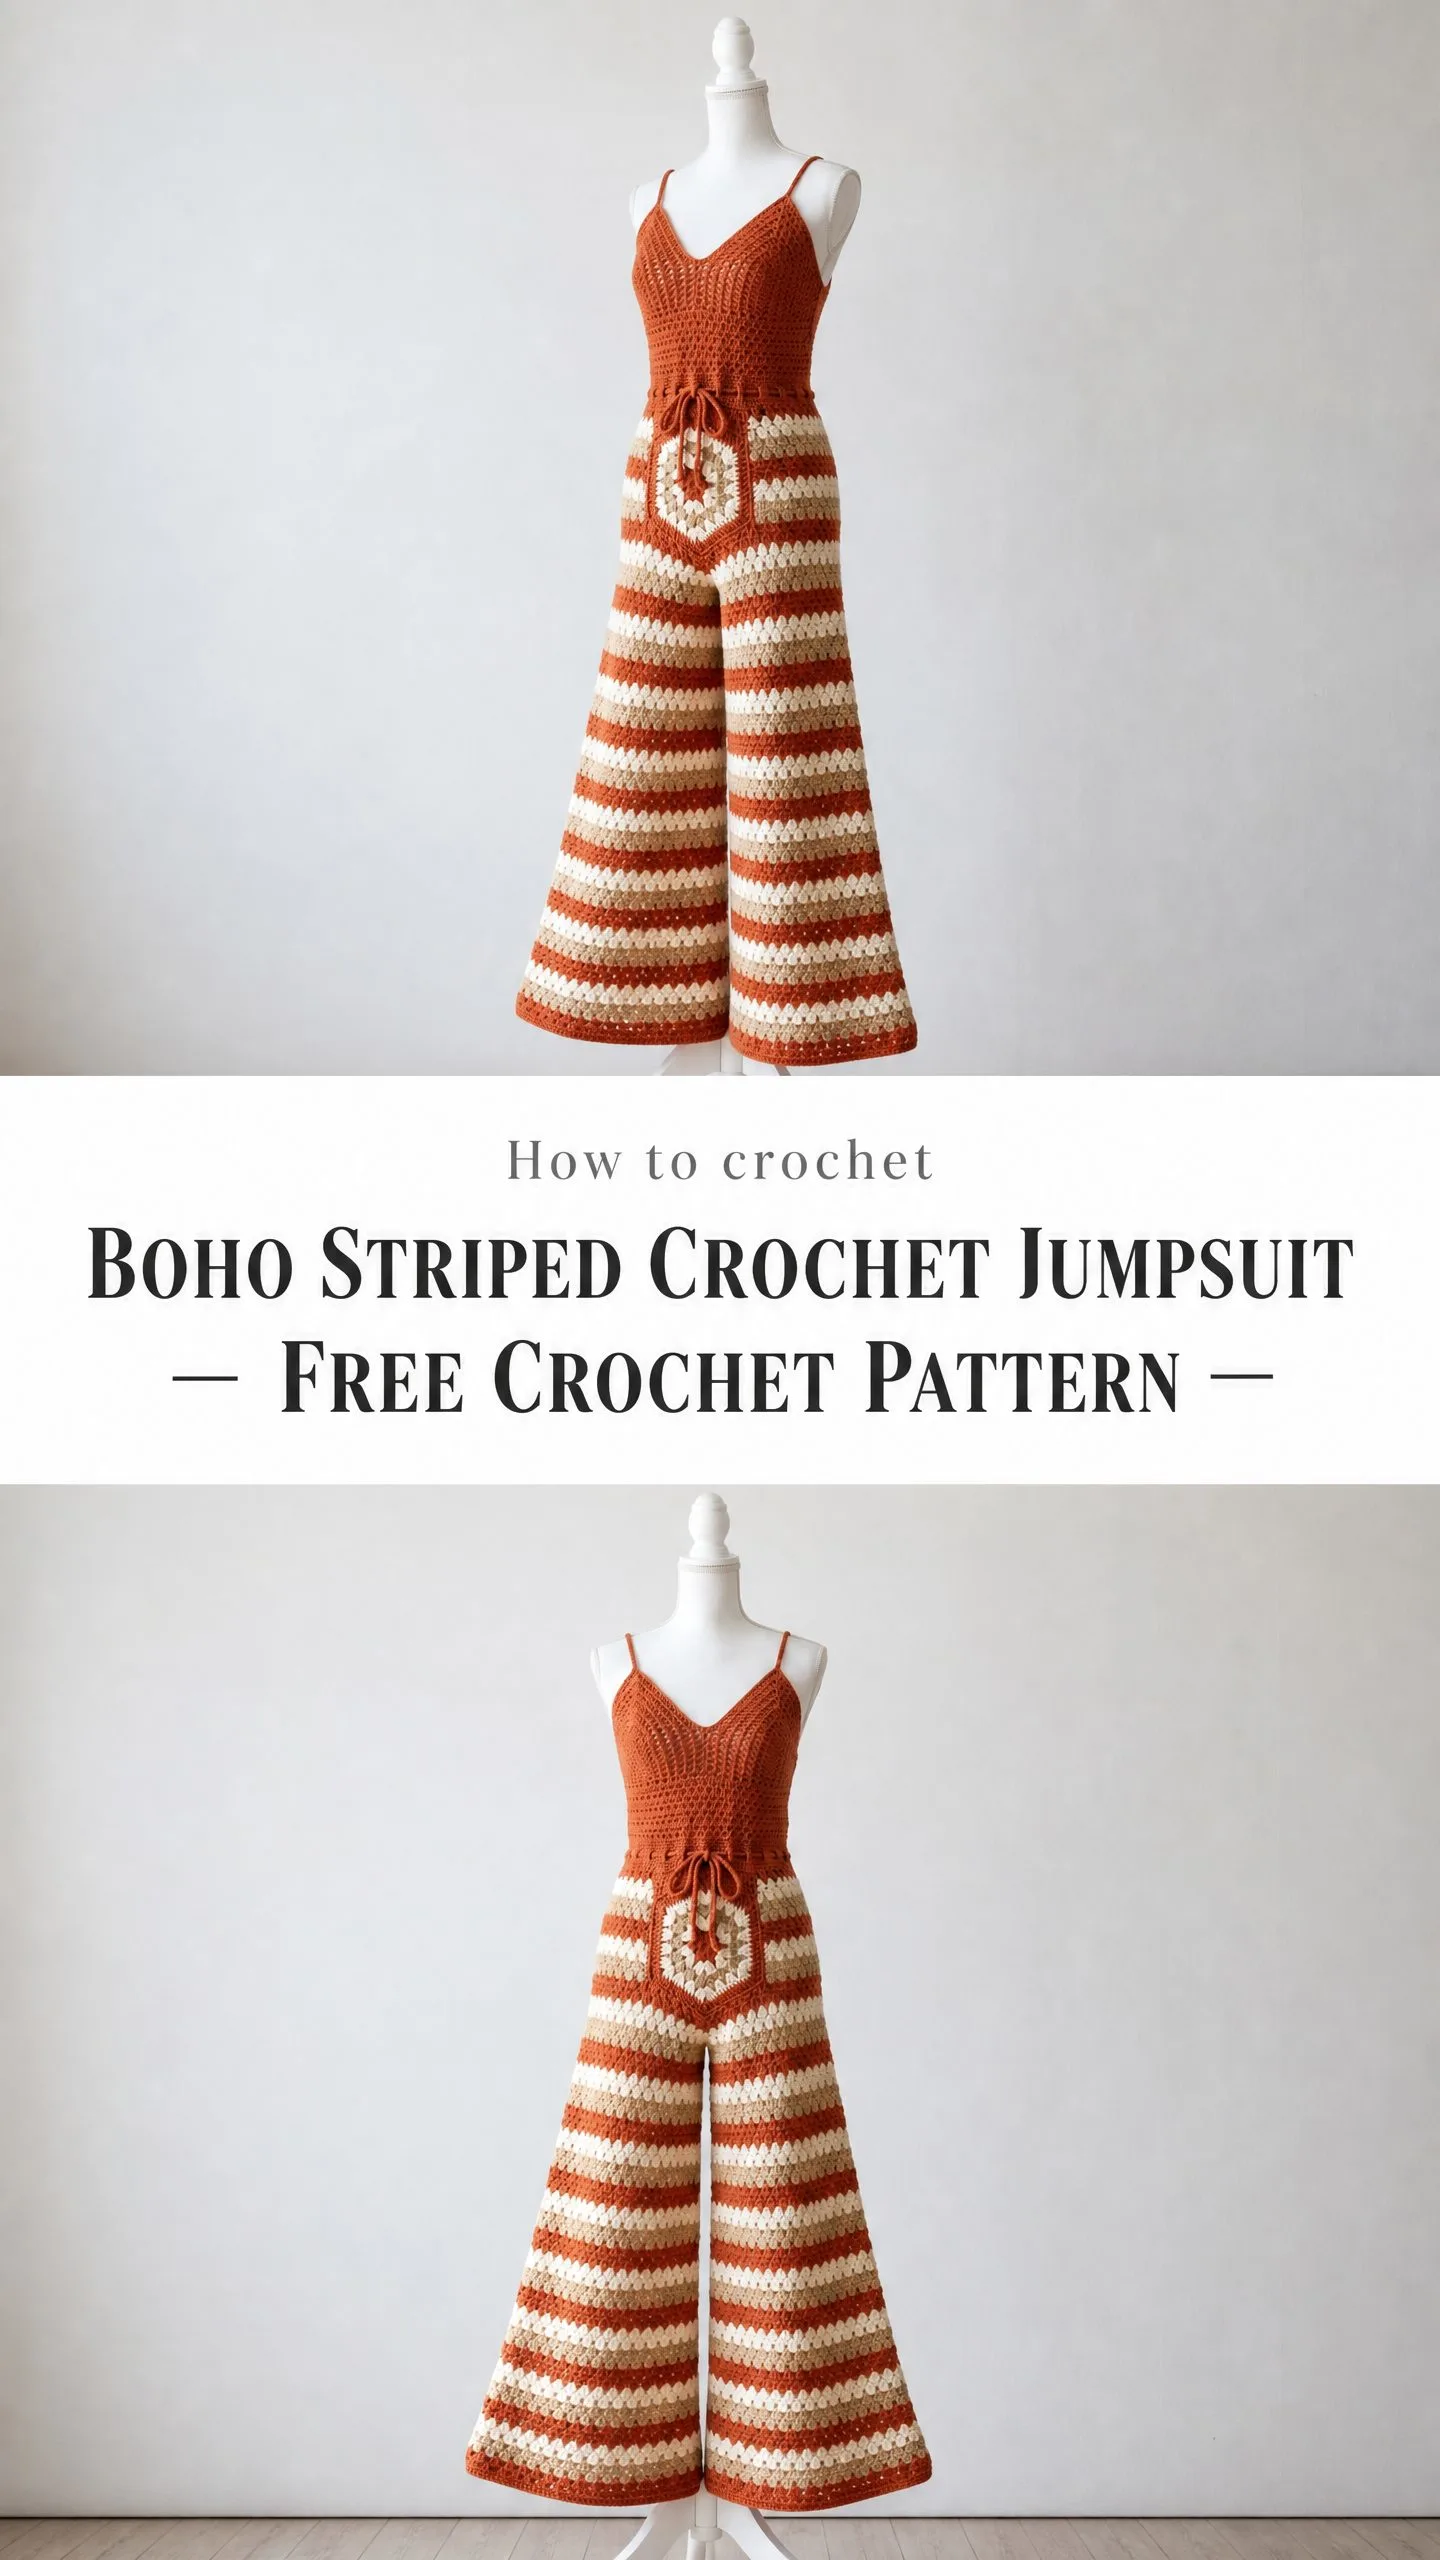
What I ended up creating captures everything I loved about that original vision. The burnt orange, cream, and tan color palette feels like a late summer sunset. The silhouette has that effortless seventies boho vibe that works for beach coverups, music festivals, or casual summer evenings.
This is not a quick weekend project. I want to be honest with you about that upfront. But if you have been craving something truly special to add to your handmade wardrobe, something you will wear for years and that people will absolutely stop you to compliment, then the Sunset Stripe jumpsuit is worth every hour you put into it.
About This Crochet Pattern
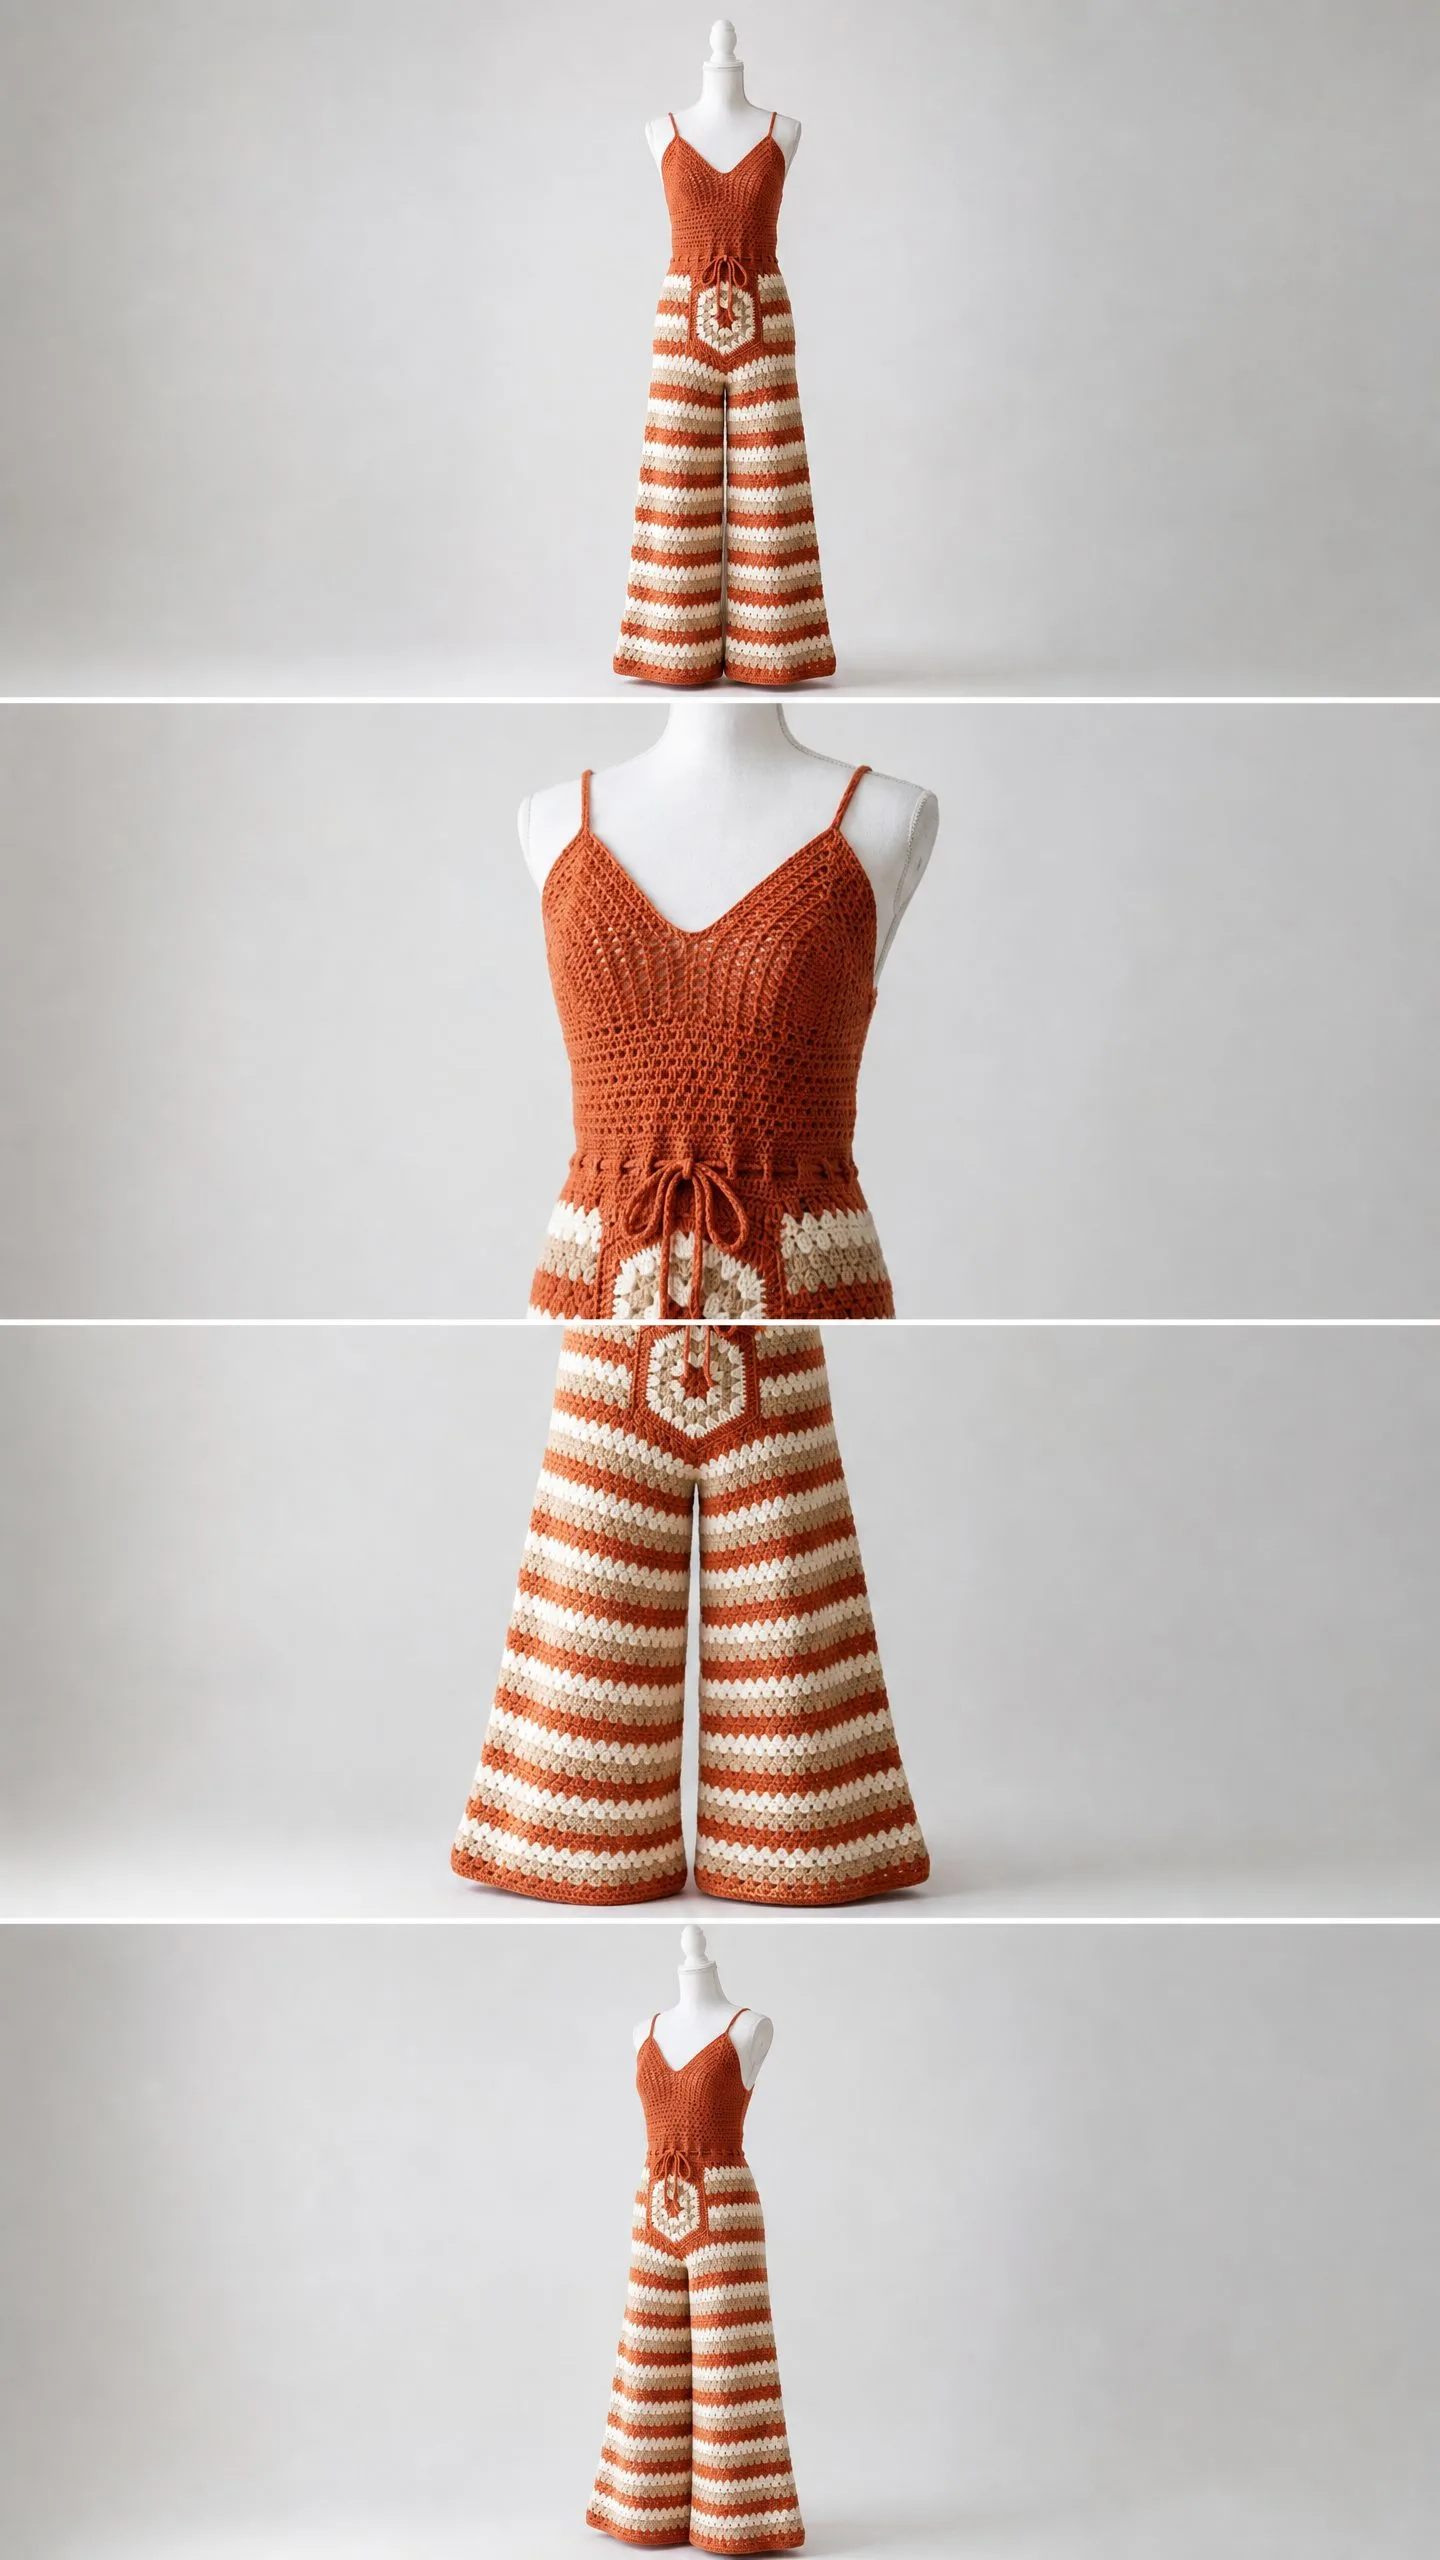
This retro-inspired crochet jumpsuit combines a fitted V-neck bodice with dramatic wide-leg palazzo pants. The bodice uses a gorgeous shell stitch pattern in solid burnt orange, while the pants feature horizontal granny stripes in three coordinating colors. A crocheted hexagon motif sits at the center front waistband as a decorative focal point, and a drawstring closure makes the fit adjustable.
The construction is clever and logical. You work the bodice flat from the bottom up, shaping for the bust and V-neckline as you go. The pants are worked in the round from the waistband down, then divided at the crotch to create two separate leg tubes. Gradual increases create that beautiful bell-bottom flare. Everything comes together at the end with careful seaming and finishing.
Skill level: Advanced Intermediate. You should be comfortable working both flat and in the round, following a multi-color stripe sequence, shaping garment pieces with increases and decreases, and seaming large sections together neatly.
Time estimate: Approximately 40 to 60 hours for an experienced crocheter. The pants take the most time due to their size and color changes.
Finished Measurements
This pattern is written for a size Medium, designed to fit:
Bodice dimensions: approximately 14 inches (35.5 cm) wide across the bust, 13 inches (33 cm) tall from bottom edge to shoulder (excluding straps)
Pants dimensions: approximately 15 inches (38 cm) wide across each leg at the hem (30 inches or 76 cm total circumference per leg), 38 inches (96.5 cm) tall from waistband to hem
Total finished garment length: approximately 51 inches (129.5 cm) from shoulder to hem
Materials Needed
Yarn (all worsted weight):
Hook: US size J / 6.0 mm crochet hook
Notions:
Yarn Suggestions
Lion Brand Pound of Love works beautifully for this project. Purchase 1 skein in Terracotta for Color A, 1 skein in Fisherman for Color B, and 1 skein in Camel for Color C. This yarn is machine washable and holds its shape well.
Paintbox Yarns Simply DK doubled throughout (or their worsted weight Simply Chunky used singly) offers excellent color options in this palette.
Cascade 220 Superwash produces a slightly drapier fabric that suits the wide-leg flare beautifully. You will need approximately 5 skeins for Color A, 3 skeins for Color B, and 2 skeins for Color C.
When substituting yarn, prioritize drape over loft. The pants need weight and movement to flare correctly. Avoid fuzzy yarns because they will obscure the granny-stripe stitch definition.
Gauge
Bodice (worked flat in shell stitch): 16 stitches and 10 rows = 4 inches (10 cm)
Pants (worked in the round in granny-stripe): 14 stitches and 8 rounds = 4 inches (10 cm)
Gauge is critical for garment fit. Please take time to swatch and adjust your hook size as needed.
Abbreviations
Special Stitches and Techniques
Shell Stitch (Bodice)
A shell is 5 double crochet stitches all worked into the same stitch or chain space. This creates a fan-shaped cluster. On following rows, the center (third) dc of each shell becomes the insertion point for the next shell above it.
V-Stitch (Neckline Shaping)
Work (dc, ch 2, dc) all into the same stitch or space. This creates a visible eyelet split used for the V-neck opening.
Granny Stripe Stitch (Pants)
Each round consists of granny clusters (3 dc worked into one chain space) with chain-1 spaces between clusters. Colors change every 2 rounds following the stripe sequence. Unlike a granny square, granny-stripe produces straight horizontal bands.
Hexagon Motif
Round 1: Magic ring or ch 4 joined. Ch 3 (counts as dc), work 2 dc into ring, ch 2, (3 dc into ring, ch 2) 5 times, join to top of beg ch-3, fasten off. (6 clusters of 3 dc, 6 ch-2 corner spaces)
Round 2: Join new color in any ch-2 sp. Ch 3, (2 dc, ch 2, 3 dc) in same sp (corner made), ch 1, (3 dc, ch 2, 3 dc) in next ch-2 sp, ch 1, rep around all 6 corners, join, fasten off. (12 clusters, 6 ch-2 corners, 6 ch-1 side spaces)
Round 3: Join Color A in any ch-2 sp. Ch 3, (2 dc, ch 2, 3 dc) in same sp, ch 1, 3 dc in next ch-1 sp, ch 1, (3 dc, ch 2, 3 dc) in next ch-2 sp, ch 1, 3 dc in next ch-1 sp, ch 1, rep around, join, fasten off. (18 clusters total, 6 corners, 12 side spaces)
Work Round 1 in Color C, Round 2 in Color B, and Round 3 in Color A.
Pattern Notes Before You Begin
1. The bodice is worked flat in rows, beginning at the lower edge. The two halves of the V-neck are worked separately once the neckline split is reached.
2. The pants are worked in joined rounds from the waistband down. After the crotch division, each leg is worked separately as a tube.
3. Color change method: Change to the new color on the last yarn-over of the final sl st join of the previous round.
4. Stripe sequence for pants: 2 rounds Color A, 2 rounds Color B, 2 rounds Color C, 2 rounds Color B, repeat.
5. Throughout the bodice, ch 3 at the start of a dc row counts as 1 dc. In the pants, ch 3 counts as the first dc of the first 3-dc cluster.
6. Block each piece before assembly. The pants legs especially need wet blocking for the flare to lie flat and the stripes to straighten.
Crochet Pattern Instructions
Section 1: Bodice Front
Lower Edge and Body
Using Color A, ch 56.
Row 1 (RS): Sc in 2nd ch from hook, sk 2 ch, 5 dc in next ch (shell made), sk 2 ch, sc in next ch, (sk 2 ch, 5 dc in next ch, sk 2 ch, sc in next ch) rep to end. Turn. (9 shells, 9 sc)
Row 2 (WS): Ch 3, turn. 2 dc in first sc (half-shell at edge), sc in center dc of first shell, (5 dc in next sc, sc in center dc of next shell) rep across to last sc, 3 dc in last sc. Turn. (8 full shells, 2 half-shells at edges)
Row 3 (RS): Ch 1, turn. Sc in first dc, (5 dc in next sc, sc in center dc of next shell) rep across, end sc in top of tch. Turn. (9 shells, 9 sc)
Rows 4 through 18: Rep Rows 2 and 3 alternately (ending after a Row 3 repeat).
Checkpoint: After Row 18, the piece should measure approximately 14 inches (35.5 cm) wide and 7 inches (18 cm) tall. Count 9 shells across.
Bust Shaping Rows
Row 19 (RS): Ch 3, turn. Dc in each st across, working dc in each dc of shells and in each sc. Turn. (54 dc)
Row 20 (WS): Ch 3, turn. Dc in each dc across. Turn. (54 dc)
Row 21: Ch 3, turn. Dc2tog over first 2 sts, dc across to last 2 sts, dc2tog. Turn. (52 dc)
Row 22: Ch 3, turn. Dc2tog, dc across to last 2 sts, dc2tog. Turn. (50 dc)
Row 23: Ch 3, turn. Dc across without shaping. Turn. (50 dc)
Row 24: Ch 3, turn. Dc across without shaping. Turn. (50 dc)
V-Neck Left Side (as worn)
Row 25 (RS, split row): Ch 3, turn. Dc across first 25 sts. Leave remaining 25 sts unworked. Turn. (25 dc)
Row 26: Ch 3, turn. Dc2tog at neckline edge, dc to end. Turn. (24 dc)
Row 27: Ch 3, turn. Dc to last 2 sts at neckline edge, dc2tog. Turn. (23 dc)
Row 28: Ch 3, turn. Dc2tog, dc to end. Turn. (22 dc)
Row 29: Ch 3, turn. Dc to last 2 sts, dc2tog. Turn. (21 dc)
Row 30: Ch 3, turn. Dc2tog, dc to end. Turn. (20 dc)
Rows 31 and 32: Ch 3, turn. Dc across without shaping. Turn. (20 dc each row)
Row 33 (armhole edge shaping): Ch 3, turn. Dc2tog at armhole edge, dc to end. Turn. (19 dc)
Row 34: Ch 3, turn. Dc to last 2 sts, dc2tog at armhole edge. Turn. (18 dc)
Rows 35 through 37: Ch 3, turn. Dc across without shaping. Turn. (18 dc each row)
Left Strap:
Row 38: Ch 3, turn. Dc in first 4 sts only. Turn. (4 dc)
Rows 39 through 48 (or until strap measures 12 inches/30.5 cm): Ch 3, turn. Dc in each of 4 dc. Turn. (4 dc)
Fasten off, leaving a 12 inch (30.5 cm) tail for sewing.
V-Neck Right Side (as worn)
Return to Row 25. Rejoin Color A in the 26th st with RS facing.
Row 25 (RS, right side): Ch 3, dc across remaining 25 sts. Turn. (25 dc)
Row 26: Ch 3, turn. Dc to last 2 sts, dc2tog at neckline edge. Turn. (24 dc)
Row 27: Ch 3, turn. Dc2tog at neckline edge, dc to end. Turn. (23 dc)
Row 28: Ch 3, turn. Dc to last 2 sts, dc2tog. Turn. (22 dc)
Row 29: Ch 3, turn. Dc2tog, dc to end. Turn. (21 dc)
Row 30: Ch 3, turn. Dc to last 2 sts, dc2tog. Turn. (20 dc)
Rows 31 and 32: Ch 3, turn. Dc across. Turn. (20 dc each row)
Row 33: Ch 3, turn. Dc to last 2 sts, dc2tog at armhole edge. Turn. (19 dc)
Row 34: Ch 3, turn. Dc2tog at armhole edge, dc to end. Turn. (18 dc)
Rows 35 through 37: Ch 3, turn. Dc across. Turn. (18 dc each row)
Right Strap:
Row 38: Ch 3, turn. Dc in last 4 sts only. Turn. (4 dc)
Rows 39 through 48: Ch 3, turn. Dc in 4 dc. Turn. (4 dc)
Fasten off with 12 inch (30.5 cm) tail.
Bodice Back
Work exactly as Bodice Front through Row 24. (50 dc at end of Row 24)
Rows 25 through 27: Ch 3, turn. Dc across all 50 sts. Turn. (50 dc each row)
Row 28: Ch 3, turn. Dc2tog, dc to last 2 sts, dc2tog. Turn. (48 dc)
Row 29: Ch 3, turn. Dc2tog, dc to last 2 sts, dc2tog. Turn. (46 dc)
Rows 30 and 31: Ch 3, turn. Dc across. Turn. (46 dc each row)
Work Left Back Strap and Right Back Strap same as front straps, working in the first 4 sts and last 4 sts respectively.
Section 2: Pants
Waistband
Using Color A, ch 100. Join with sl st to first ch to form a ring, taking care not to twist.
Rnd 1: Ch 1, sc in each ch around, pm in first sc. Join with sl st to first sc. (100 sc)
Rnd 2 (eyelet round): Ch 1, sc in first 4 sc, (ch 2, sk 2 sc, sc in next 6 sc) 9 times, ch 2, sk 2 sc, sc in last 2 sc. Join. (80 sc, 10 ch-2 eyelets)
Rnd 3: Ch 1, sc in each sc and 2 sc in each ch-2 sp around. Join. (100 sc)
Rnds 4 and 5: Ch 1, sc in each sc around. Join. (100 sc each rnd)
Granny-Stripe Setup
Rnd 6: Join Color A with sl st in any sc. Ch 3 (counts as dc), 2 dc in same st, (sk 2 sc, ch 1, 3 dc in next sc) around to last 3 sts, sk 2 sc, ch 1, join with sl st to top of beg ch-3. (33 clusters, 33 ch-1 sps)
Rnds 7 through 21: Continue in granny-stripe pattern, following the stripe sequence: 2 rounds Color A, 2 rounds Color B, 2 rounds Color C, 2 rounds Color B, repeat. (33 clusters each rnd)
Checkpoint: After Rnd 21, the pants should measure approximately 9 inches (23 cm) from the waistband eyelet round.
Leg Division
Flatten the tube with the join at one side seam. Mark front and back center points.
Continuing with Color A, work across 16 clusters to front center marker. Ch 8 (crotch bridge chain). Skip 2 clusters at center front. Work remaining 15 clusters across back. Ch 8. Join to beginning of round.
Leg 1
Starting at crotch chain, join Color A.
Rnd 1 of Leg 1: Ch 3, 2 dc in same sp, (ch 1, 3 dc in next sp) around all clusters of this leg including crotch chain. Join. (34 clusters)
Leg Rnds 1 through 10: Continue stripe sequence without increases. (34 clusters each rnd)
Flare Shaping
Increase method: At side seam ch-sp, work (3 dc, ch 1, 3 dc) instead of a single 3-dc cluster. This adds 2 clusters total every 4 rounds.
Leg Rnd 11 (increase): Work increase at both side seams. (36 clusters)
Leg Rnds 12 through 14: Work without increase. (36 clusters)
Leg Rnd 15 (increase): Increase at both sides. (38 clusters)
Leg Rnds 16 through 18: Work without increase. (38 clusters)
Continue this increase pattern every 4 rounds: Rnd 19 (40 clusters), Rnd 23 (42 clusters), Rnd 27 (44 clusters), Rnd 31 (46 clusters), Rnd 35 (48 clusters).
Leg Rnds 39 through 48: Work without increase. (48 clusters each rnd)
Hem Finishing:
Final Round: Join Color A. Ch 1, sc in each dc and 2 sc in each ch-sp around. Join, fasten off. (approximately 192 sc)
Leg 2
Work exactly as Leg 1.
Section 3: Hexagon Motif
Work following the Special Stitches instructions above using Color C for Round 1, Color B for Round 2, and Color A for Round 3. Work a sl st border in Color A around the outer edge.
The finished hexagon should measure approximately 4 inches (10 cm) from flat side to flat side.
Assembly Instructions
1. Block all pieces. Allow to dry completely.
2. With RS together, whipstitch or mattress stitch the bodice front to the bodice back along both side seams.
3. Cross the straps. Left front strap attaches to right back, right front strap attaches to left back. Try on to determine correct length before sewing.
4. Join pants to bodice. Align the bodice lower edge with the pants waistband just below the eyelet round. Pin every 2 inches around. Whipstitch together, easing the fabric evenly since stitch counts differ.
5. Attach hexagon. Center at front waistband. Thread drawstring through both hexagon corner loops and waistband eyelets, or sew hexagon flat and thread drawstring separately.
6. Make drawstring. Cut a 60 inch (152 cm) length of cord. Thread through all 10 eyelet holes around the waistband.
7. Weave in all remaining ends.
Blocking Tips
Wet blocking produces the best results for this jumpsuit. Soak each piece in lukewarm water with a small amount of wool wash for 15 to 20 minutes. Gently squeeze out excess water without wringing. Lay flat on blocking mats, pin to measurements, and allow to dry completely. The pants legs especially benefit from blocking to encourage the flare to lie flat and straighten the stripes.
Size Customization
To make a size smaller (XS/S, 32 inch bust, 24 to 25 inch waist), reduce the bodice foundation chain by 12 stitches (ch 44 instead of ch 56). Reduce the pants waistband chain proportionally and adjust cluster counts throughout.
For larger sizes, add stitches in multiples of 6 to the bodice foundation chain and adjust the pants waistband accordingly.
Thank you so much for choosing this pattern. I know it is a commitment, but I truly believe the finished jumpsuit is worth every stitch. When you complete yours, I would absolutely love to see it! Tag me on Instagram or share your photos in my Facebook group.
If this pattern is calling to you but you are not quite ready to start, go ahead and pin it to your crochet board on Pinterest so you can find it when the time is right. And please drop a comment below when you make your own Sunset Stripe jumpsuit. I cannot wait to see what color combinations you choose!
