
I’ve been searching for the perfect cropped cardigan pattern for months. You know the kind. Feminine details, vintage vibes, something that looks way harder than it actually is. This heart cutout crochet cardigan is exactly what I was looking for, and I’m thrilled to share it with you today.
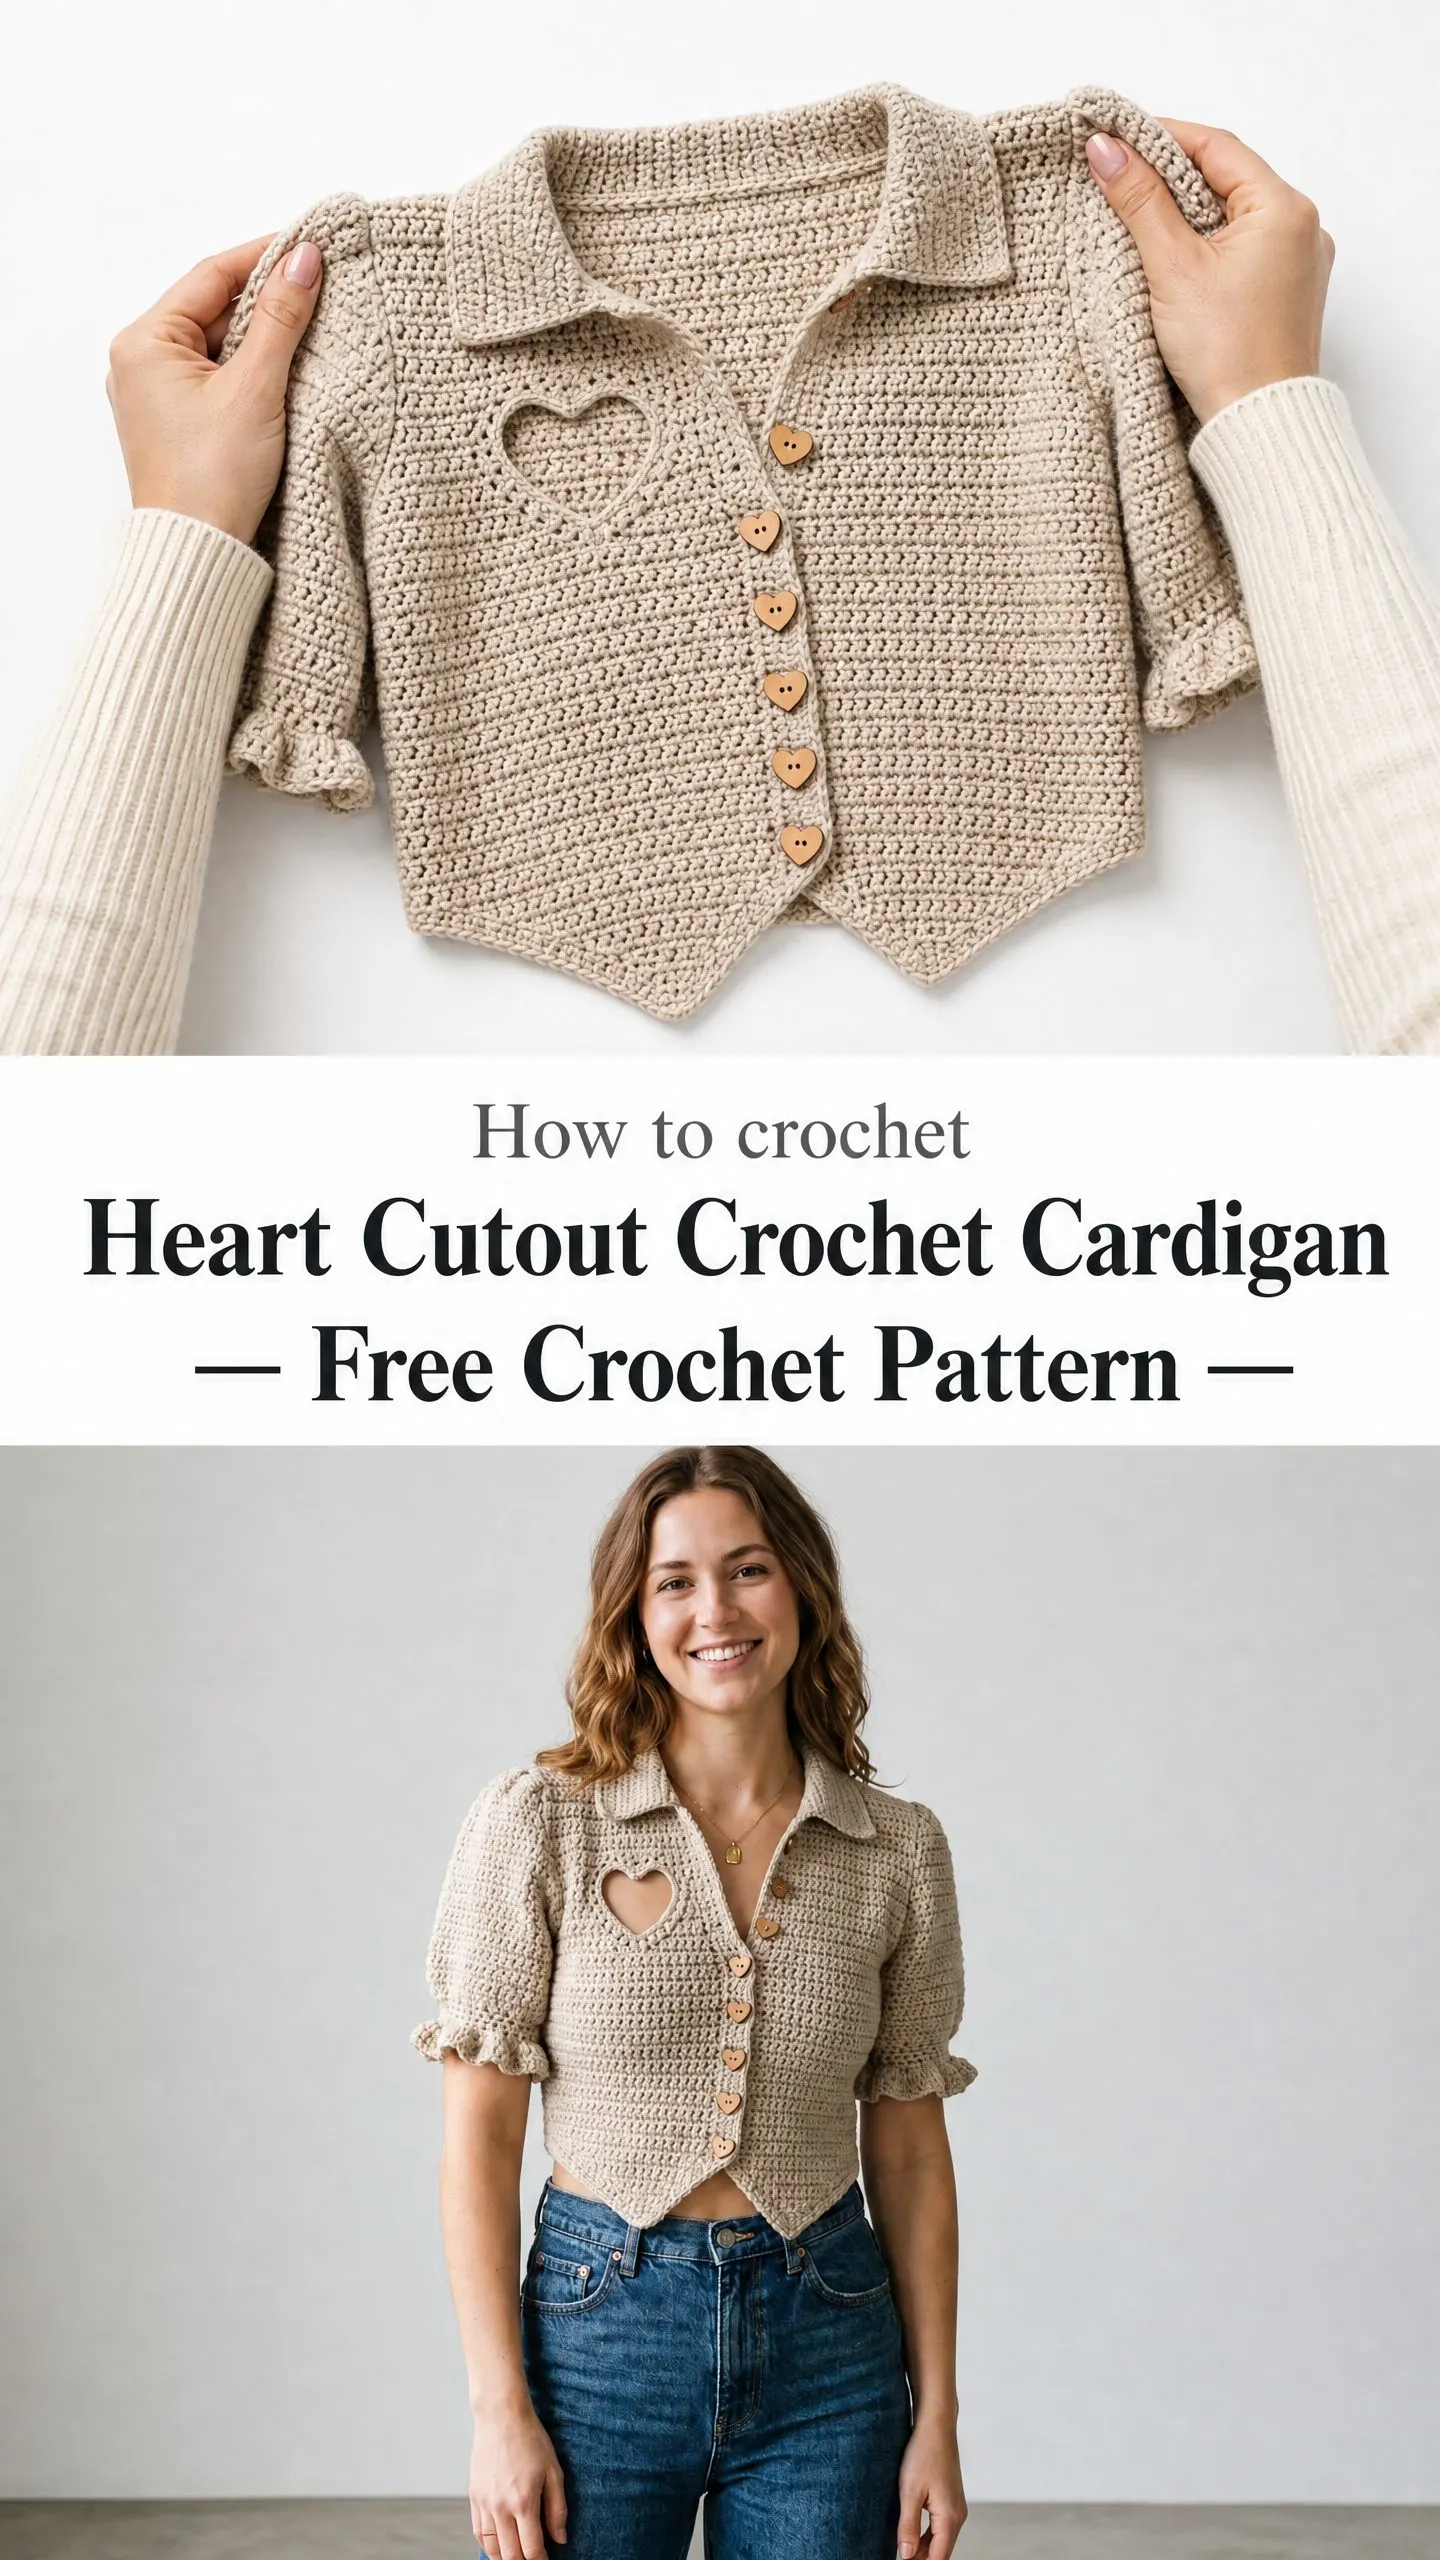
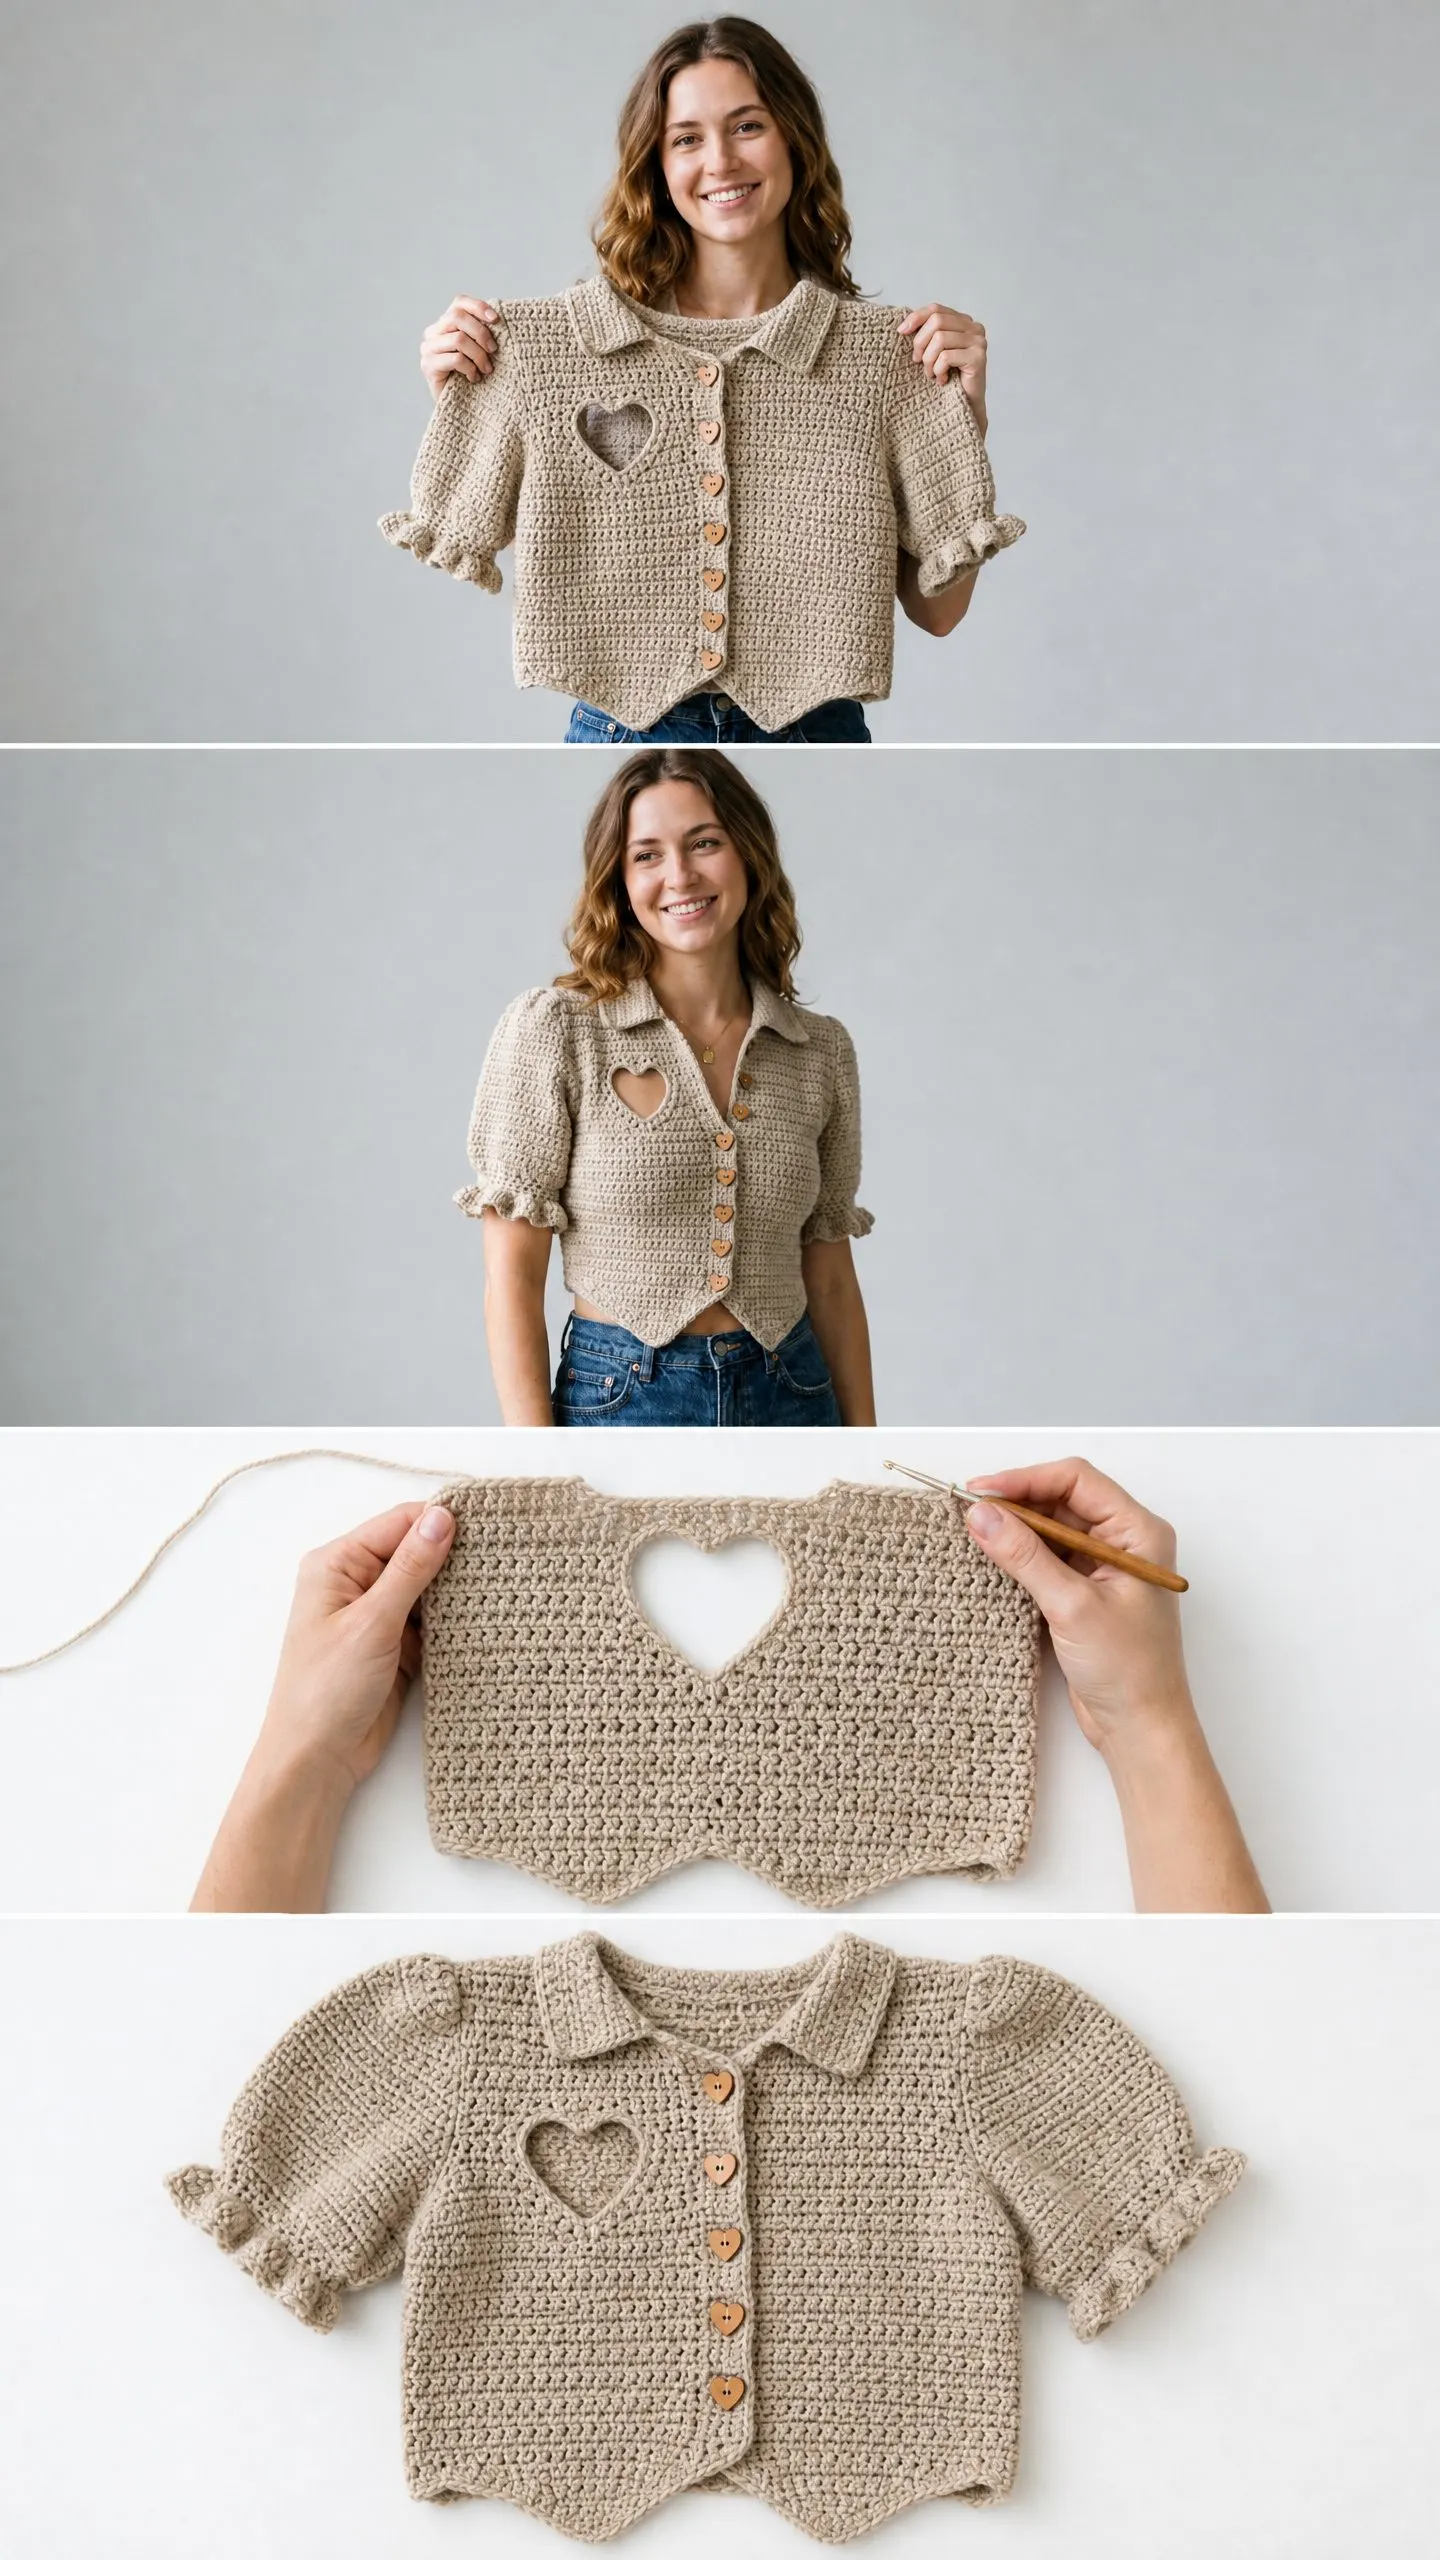
The design hits all the right notes. A fitted cropped silhouette that sits at the natural waist. Puffed short sleeves with the sweetest ruffle cuffs. Wooden heart-shaped buttons running down the front. And that heart cutout on the chest? It’s the kind of detail that makes people stop and ask where you got it.
This cardigan works up in a dense single crochet fabric that has beautiful drape and structure. Don’t let the sophisticated look intimidate you. If you can single crochet and follow row-by-row instructions, you can absolutely make this. Let me walk you through everything you need to know.
Why This Crochet Cardigan Pattern Works So Well
The construction method keeps things manageable. You’ll work five flat pieces separately: the back panel, left front panel, right front panel, and two sleeves. Then you seam everything together and add the collar and button bands as finishing touches. Breaking it into pieces means you can work on this project anywhere, anytime, without wrestling with a huge piece of fabric.
The stitch used throughout is single crochet through the back loop only. This creates a subtle horizontal ribbed texture on the right side of your work. It looks like a knit fabric from a distance but has that unmistakable crochet charm up close. The texture also gives the cardigan a bit of stretch and flexibility, which is perfect for a fitted garment.
The pointed front hem adds such a lovely vintage touch. It creates that classic sweetheart overlap at the center front when buttoned up. Combined with the spread collar and puffed sleeves, you get a piece that looks straight out of a 1940s fashion magazine but feels completely modern.
Skill Level and Time Commitment
This pattern sits solidly at the intermediate level. You’ll need to be comfortable with reading row-by-row shaping instructions, seaming crochet fabric pieces together, and picking up stitches for bands and the collar. The heart cutout requires following specific placement instructions, but I promise it’s not as tricky as it sounds.
If you’re an adventurous beginner who has completed a few projects and feels ready for a challenge, you can absolutely tackle this. Just take your time with the shaping sections and don’t be afraid to use stitch markers liberally.
Time estimate: Plan for approximately 20 to 30 hours for a size Small. Experienced crocheters who work quickly might finish closer to 18 hours. The seaming and finishing add extra time, so don’t rush that part. It makes all the difference in how professional your finished cardigan looks.
Materials You’ll Need
Yarn: Worsted weight yarn, which is weight category 4. You’ll need approximately 800 to 900 yards total, which works out to about 730 to 820 meters. Look for a warm oatmeal or natural ecru colorway to match the photos, though this design would look stunning in any solid color.
Choose a smooth yarn with minimal fuzz or halo so that heart cutout really pops. A yarn with some wool content will block more beautifully than 100 percent acrylic, giving you cleaner edges and better drape.
Yarn suggestions that work beautifully:
Hooks:
Notions:
Gauge Information
18 single crochet stitches x 22 rows = 4 inches / 10 cm in single crochet through back loop only, worked flat, with the US H-8 / 5.0 mm hook, after blocking.
I cannot stress this enough: gauge matters for fitted garments. Even a half-stitch difference per 4 inches will throw off your finished bust measurement by more than 1 inch over the full circumference. That’s the difference between a cardigan that fits perfectly and one that’s unwearably tight or baggy.
Make a swatch at least 6 x 6 inches. Wash it and block it the same way you’ll treat your finished cardigan. Then measure. Adjust your hook size up or down until you match gauge exactly.
Finished Measurements (Size Small)
The pattern includes guidance for size customization in the full instructions.
Abbreviations and Stitch Definitions
Let me break down every stitch and term you’ll encounter. Even if you’re familiar with these, a quick refresher never hurts.
Special Techniques Explained
Sc-BLO (Single Crochet Through Back Loop Only)
This is your main stitch for the entire cardigan. Instead of inserting your hook under both loops of the stitch below, you only go through the back loop. That’s the loop farthest from you when looking at your work. This leaves the front loop unworked, creating that beautiful ribbed texture.
Ruffle Stitch for the Cuffs
After the sleeves are assembled, you’ll work into the front loops that were left unworked during the sleeve body rows. Work 2 single crochet stitches into every stitch across. This doubles your stitch count and makes the edge flare outward into an adorable ruffle.
Puff Sleeve Gathering
Here’s where the magic happens for those gorgeous puffed sleeves. When you attach the sleeve to the armhole, the sleeve cap has more stitches than the armhole opening. You distribute the extra stitches by placing two sleeve stitches against one body stitch at the center of the cap. This creates that soft gathered puff without any complicated shaping.
Pattern Instructions
Back Panel
The back is worked flat from the hem up to the shoulders.
Foundation Chain: Ch 79.
Row 1 (WS): Sc in second ch from hook and in each ch across. Ch 1, turn. (78 sc)
Row 2 (RS): Sc-BLO in each st across. Ch 1, turn. (78 sc)
Rows 3 through 32: Repeat Row 2. (78 sc)
After Row 32, your piece should measure approximately 6 inches tall and 17.5 inches wide. This is your lower body section.
Armhole Shaping begins at Row 33:
Row 33 (WS): Sl st across first 5 sts, ch 1, sc-BLO in same st as last sl st and in each st to last 5 sts. Leave last 5 sts unworked. Ch 1, turn. (68 sc)
Row 34: Sc2tog over first 2 sts, sc-BLO to last 2 sts, sc2tog. Ch 1, turn. (66 sc)
Row 35: Sc2tog, sc-BLO to last 2 sts, sc2tog. Ch 1, turn. (64 sc)
Row 36: Sc2tog, sc-BLO to last 2 sts, sc2tog. Ch 1, turn. (62 sc)
Row 37: Sc2tog, sc-BLO to last 2 sts, sc2tog. Ch 1, turn. (60 sc)
Rows 38 through 70: Sc-BLO across with no shaping. Ch 1, turn. (60 sc)
Your armhole depth should now measure approximately 7 inches. Total back height is approximately 13.5 inches.
Shoulder and Neck Shaping at Row 71:
Row 71: Sc-BLO across first 18 sts. Ch 1, turn. Leave remaining sts unworked. (18 sc for right shoulder)
Row 72: Sc2tog, sc-BLO to end. Ch 1, turn. (17 sc)
Row 73: Sc-BLO to last 2 sts, sc2tog. Fasten off. (16 sc)
Right shoulder complete with 16 stitches.
Return to Row 70. Skip center 24 sts for back neck. Join yarn in next st.
Row 71 (left shoulder): Sc-BLO across 18 sts. Ch 1, turn. (18 sc)
Row 72: Sc-BLO to last 2 sts, sc2tog. Ch 1, turn. (17 sc)
Row 73: Sc2tog, sc-BLO to end. Fasten off. (16 sc)
Left shoulder complete with 16 stitches. Back panel done!
Right Front Panel
This panel has the button band along the center front edge but does not have the heart cutout.
Foundation Chain: Ch 43.
Row 1 (WS): Sc in second ch from hook and in each ch across. Ch 1, turn. (42 sc)
Rows 2 through 32: Sc-BLO across. Ch 1, turn. (42 sc)
Armhole Shaping at Row 33:
Row 33 (WS): Sl st across first 5 sts at the outer edge side. Ch 1, sc-BLO in same st and across to end. Ch 1, turn. (37 sc)
Row 34: Sc-BLO to last 2 sts, sc2tog. Ch 1, turn. (36 sc)
Row 35: Sc2tog, sc-BLO to end. Ch 1, turn. (35 sc)
Row 36: Sc-BLO to last 2 sts, sc2tog. Ch 1, turn. (34 sc)
Row 37: Sc2tog, sc-BLO to end. Ch 1, turn. (33 sc)
Rows 38 through 60: Sc-BLO across, no shaping. Ch 1, turn. (33 sc)
Neckline Shaping begins at Row 61:
Row 61: Sl st across 13 sts at neck edge, ch 1, sc-BLO across remaining 20 sts. Ch 1, turn. (20 sc)
Row 62: Sc-BLO to last 2 sts, sc2tog. Ch 1, turn. (19 sc)
Row 63: Sc2tog, sc-BLO to end. Ch 1, turn. (18 sc)
Row 64: Sc-BLO to last 2 sts, sc2tog. Ch 1, turn. (17 sc)
Row 65: Sc2tog, sc-BLO to end. Fasten off. (16 sc)
Right front shoulder: 16 stitches, matching the back.
Left Front Panel (with Heart Cutout)
This panel mirrors the right front for general shaping but includes the heart cutout on the upper portion.
Foundation Chain: Ch 43.
Row 1 (WS): Sc in second ch from hook and in each ch across. Ch 1, turn. (42 sc)
Rows 2 through 32: Sc-BLO across. Ch 1, turn. (42 sc)
Armhole Shaping at Row 33:
Row 33 (WS): Ch 1, sc-BLO across to last 5 sts, leave last 5 sts unworked. Ch 1, turn. (37 sc)
Row 34: Sc2tog, sc-BLO to end. Ch 1, turn. (36 sc)
Row 35: Sc-BLO to last 2 sts, sc2tog. Ch 1, turn. (35 sc)
Row 36: Sc2tog, sc-BLO to end. Ch 1, turn. (34 sc)
Row 37: Sc-BLO to last 2 sts, sc2tog. Ch 1, turn. (33 sc)
Rows 38 through 44: Sc-BLO across. Ch 1, turn. (33 sc)
Heart Cutout begins at Row 45:
The cutout spans approximately 12 stitches wide and 10 rows tall. It sits about 1.5 inches from the button band edge.
Row 45 (RS): Sc-BLO in first 3 sts. Ch 12, skip the next 12 sts. Sc-BLO in each remaining 18 sts. Ch 1, turn. (3 sc + 12 ch + 18 sc = 33 working sts)
Row 46 (WS): Sc-BLO in first 18 sts. Sc in each of the 12 ch. Sc-BLO in last 3 sts. Ch 1, turn. (33 sc)
Rows 47 through 54: Sc-BLO across all 33 sts. Ch 1, turn. (33 sc)
The heart shape is refined at finishing by working a single crochet outline around the opening.
Rows 55 through 60: Sc-BLO across. Ch 1, turn. (33 sc)
Neckline Shaping begins at Row 61:
Row 61 (WS): Sl st across 13 sts at neck edge. Ch 1, sc-BLO across remaining 20 sts. Ch 1, turn. (20 sc)
Row 62 (RS): Sc-BLO to last 2 sts, sc2tog. Ch 1, turn. (19 sc)
Row 63: Sc2tog, sc-BLO to end. Ch 1, turn. (18 sc)
Row 64: Sc-BLO to last 2 sts, sc2tog. Ch 1, turn. (17 sc)
Row 65: Sc2tog, sc-BLO to end. Fasten off. (16 sc)
Left front shoulder: 16 stitches, matching back.
Sleeves (Make 2)
The sleeves are worked flat from cuff to sleeve cap, with increases along both edges for width.
Foundation Chain: Ch 35.
Row 1 (WS): Sc in second ch from hook and in each ch across. Ch 1, turn. (34 sc)
Rows 2 through 4: Sc-BLO across. Ch 1, turn. (34 sc)
Sleeve Widening Increases (every 4th row):
Row 5: Inc in first st, sc-BLO to last st, inc in last st. Ch 1, turn. (36 sc)
Rows 6 through 8: Sc-BLO across. (36 sc)
Row 9: Inc, sc-BLO to last st, inc. Ch 1, turn. (38 sc)
Rows 10 through 12: Sc-BLO across. (38 sc)
Row 13: Inc, sc-BLO to last st, inc. Ch 1, turn. (40 sc)
Rows 14 through 16: Sc-BLO across. (40 sc)
Row 17: Inc, sc-BLO to last st, inc. Ch 1, turn. (42 sc)
Rows 18 through 20: Sc-BLO across. (42 sc)
Row 21: Inc, sc-BLO to last st, inc. Ch 1, turn. (44 sc)
Rows 22 through 24: Sc-BLO across. (44 sc)
Row 25: Inc, sc-BLO to last st, inc. Ch 1, turn. (46 sc)
Rows 26 through 28: Sc-BLO across. (46 sc)
After Row 28, your sleeve body measures approximately 5 inches from cuff to underarm and 10 inches wide.
Sleeve Cap Shaping:
Row 29: Sl st across first 4 sts. Ch 1, sc-BLO in same st across to last 4 sts. Leave last 4 sts unworked. Ch 1, turn. (38 sc)
Row 30: Sc2tog, sc-BLO to last 2 sts, sc2tog. Ch 1, turn. (36 sc)
Row 31: Sc2tog, sc-BLO to last 2 sts, sc2tog. Ch 1, turn. (34 sc)
Row 32: Sc2tog, sc-BLO to last 2 sts, sc2tog. Ch 1, turn. (32 sc)
Row 33: Sc2tog, sc-BLO to last 2 sts, sc2tog. Ch 1, turn. (30 sc)
Row 34: Sc2tog, sc-BLO to last 2 sts, sc2tog. Ch 1, turn. (28 sc)
Row 35: Sc2tog, sc-BLO to last 2 sts, sc2tog. Ch 1, turn. (26 sc)
Row 36: Sc2tog, sc-BLO to last 2 sts, sc2tog. Ch 1, turn. (24 sc)
Row 37: Sc2tog, sc-BLO to last 2 sts, sc2tog. Ch 1, turn. (22 sc)
Row 38: Sc2tog, sc-BLO to last 2 sts, sc2tog. Ch 1, turn. (20 sc)
Row 39: Sc2tog, sc-BLO to last 2 sts, sc2tog. Ch 1, turn. (18 sc)
Row 40: Sc2tog, sc-BLO to last 2 sts, sc2tog. Ch 1, turn. (16 sc)
Row 41: Sc2tog across to last 2 sts, sc2tog. Fasten off. (8 sc)
Assembly Instructions
Shoulder Seams: Align left back shoulder with left front shoulder, wrong sides together. Use mattress stitch or slip stitch seam through both layers. Repeat for right shoulder.
Side Seams: Align back and front panels along side edges with wrong sides together. Seam from underarm to hem using mattress stitch.
Sleeve Seams: Fold each sleeve in half lengthwise with wrong sides together. Seam along underarm edge from cuff to underarm.
Sleeve Set-In: Pin the sleeve cap into the armhole with right sides facing. Match the underarm seam of sleeve to side seam of body. Distribute extra cap stitches evenly across the crown area to create the puffed effect. Join with slip stitch seam.
Collar
Using the smaller hook (US G-6 / 4.0 mm), pick up approximately 44 single crochet stitches evenly around the neckline.
Row 1 (WS): Ch 1, sc in each picked-up st across. Ch 1, turn. (44 sc)
Row 2: Inc, sc across to last st, inc. Ch 1, turn. (46 sc)
Row 3: Sc across. Ch 1, turn. (46 sc)
Row 4: Inc in first st, sc to last st, inc. Ch 1, turn. (48 sc)
Row 5: Sc across. Ch 1, turn. (48 sc)
Row 6: Inc, sc to last st, inc. Ch 1, turn. (50 sc)
Rows 7 and 8: Sc across. Ch 1, turn. (50 sc)
Row 9: Sl st in each st across. Fasten off.
Button Bands
Using the smaller hook, pick up approximately 70 single crochet stitches along each front edge. Work 6 evenly spaced buttonholes on the right button band by chaining 2 and skipping 2 stitches.
Finishing Touches
Weave in all ends securely. Block your finished cardigan by wetting it thoroughly, squeezing out excess water, and pinning it to shape on a blocking mat. Let it dry completely before wearing.
Sew on your six wooden heart-shaped buttons opposite the buttonholes. Take a moment to refine the heart cutout by working a single crochet outline around the opening if desired.
Tips for Success with This Crochet Cardigan Pattern
Count your stitches religiously. With all the shaping in this pattern, losing or gaining a stitch throws everything off. Check your stitch count at the end of every row until you’re confident.
Use stitch markers generously. Mark the first and last stitch of every row. Mark the heart cutout position before you get there. Mark your buttonhole placement on the button band.
Block before seaming. Your pieces will lay flatter, your edges will be neater, and seaming will be so much easier.
Try it on as you go. After seaming the shoulders, hold the pieces up to yourself. Check that the armhole depth works for your body before committing to the sleeves.
I hope you love making this heart cutout crochet cardigan as much as I enjoyed sharing it with you. It’s the kind of project that feels like an accomplishment when you finish, and you’ll reach for it constantly in your wardrobe. Thank you for crocheting with me today!
If this pattern is calling your name, go ahead and save it to your Pinterest boards so you can find it when you’re ready to start. And please, please leave a comment below if you make one. I would absolutely love to see your finished cardigans and hear which yarn you chose!
