
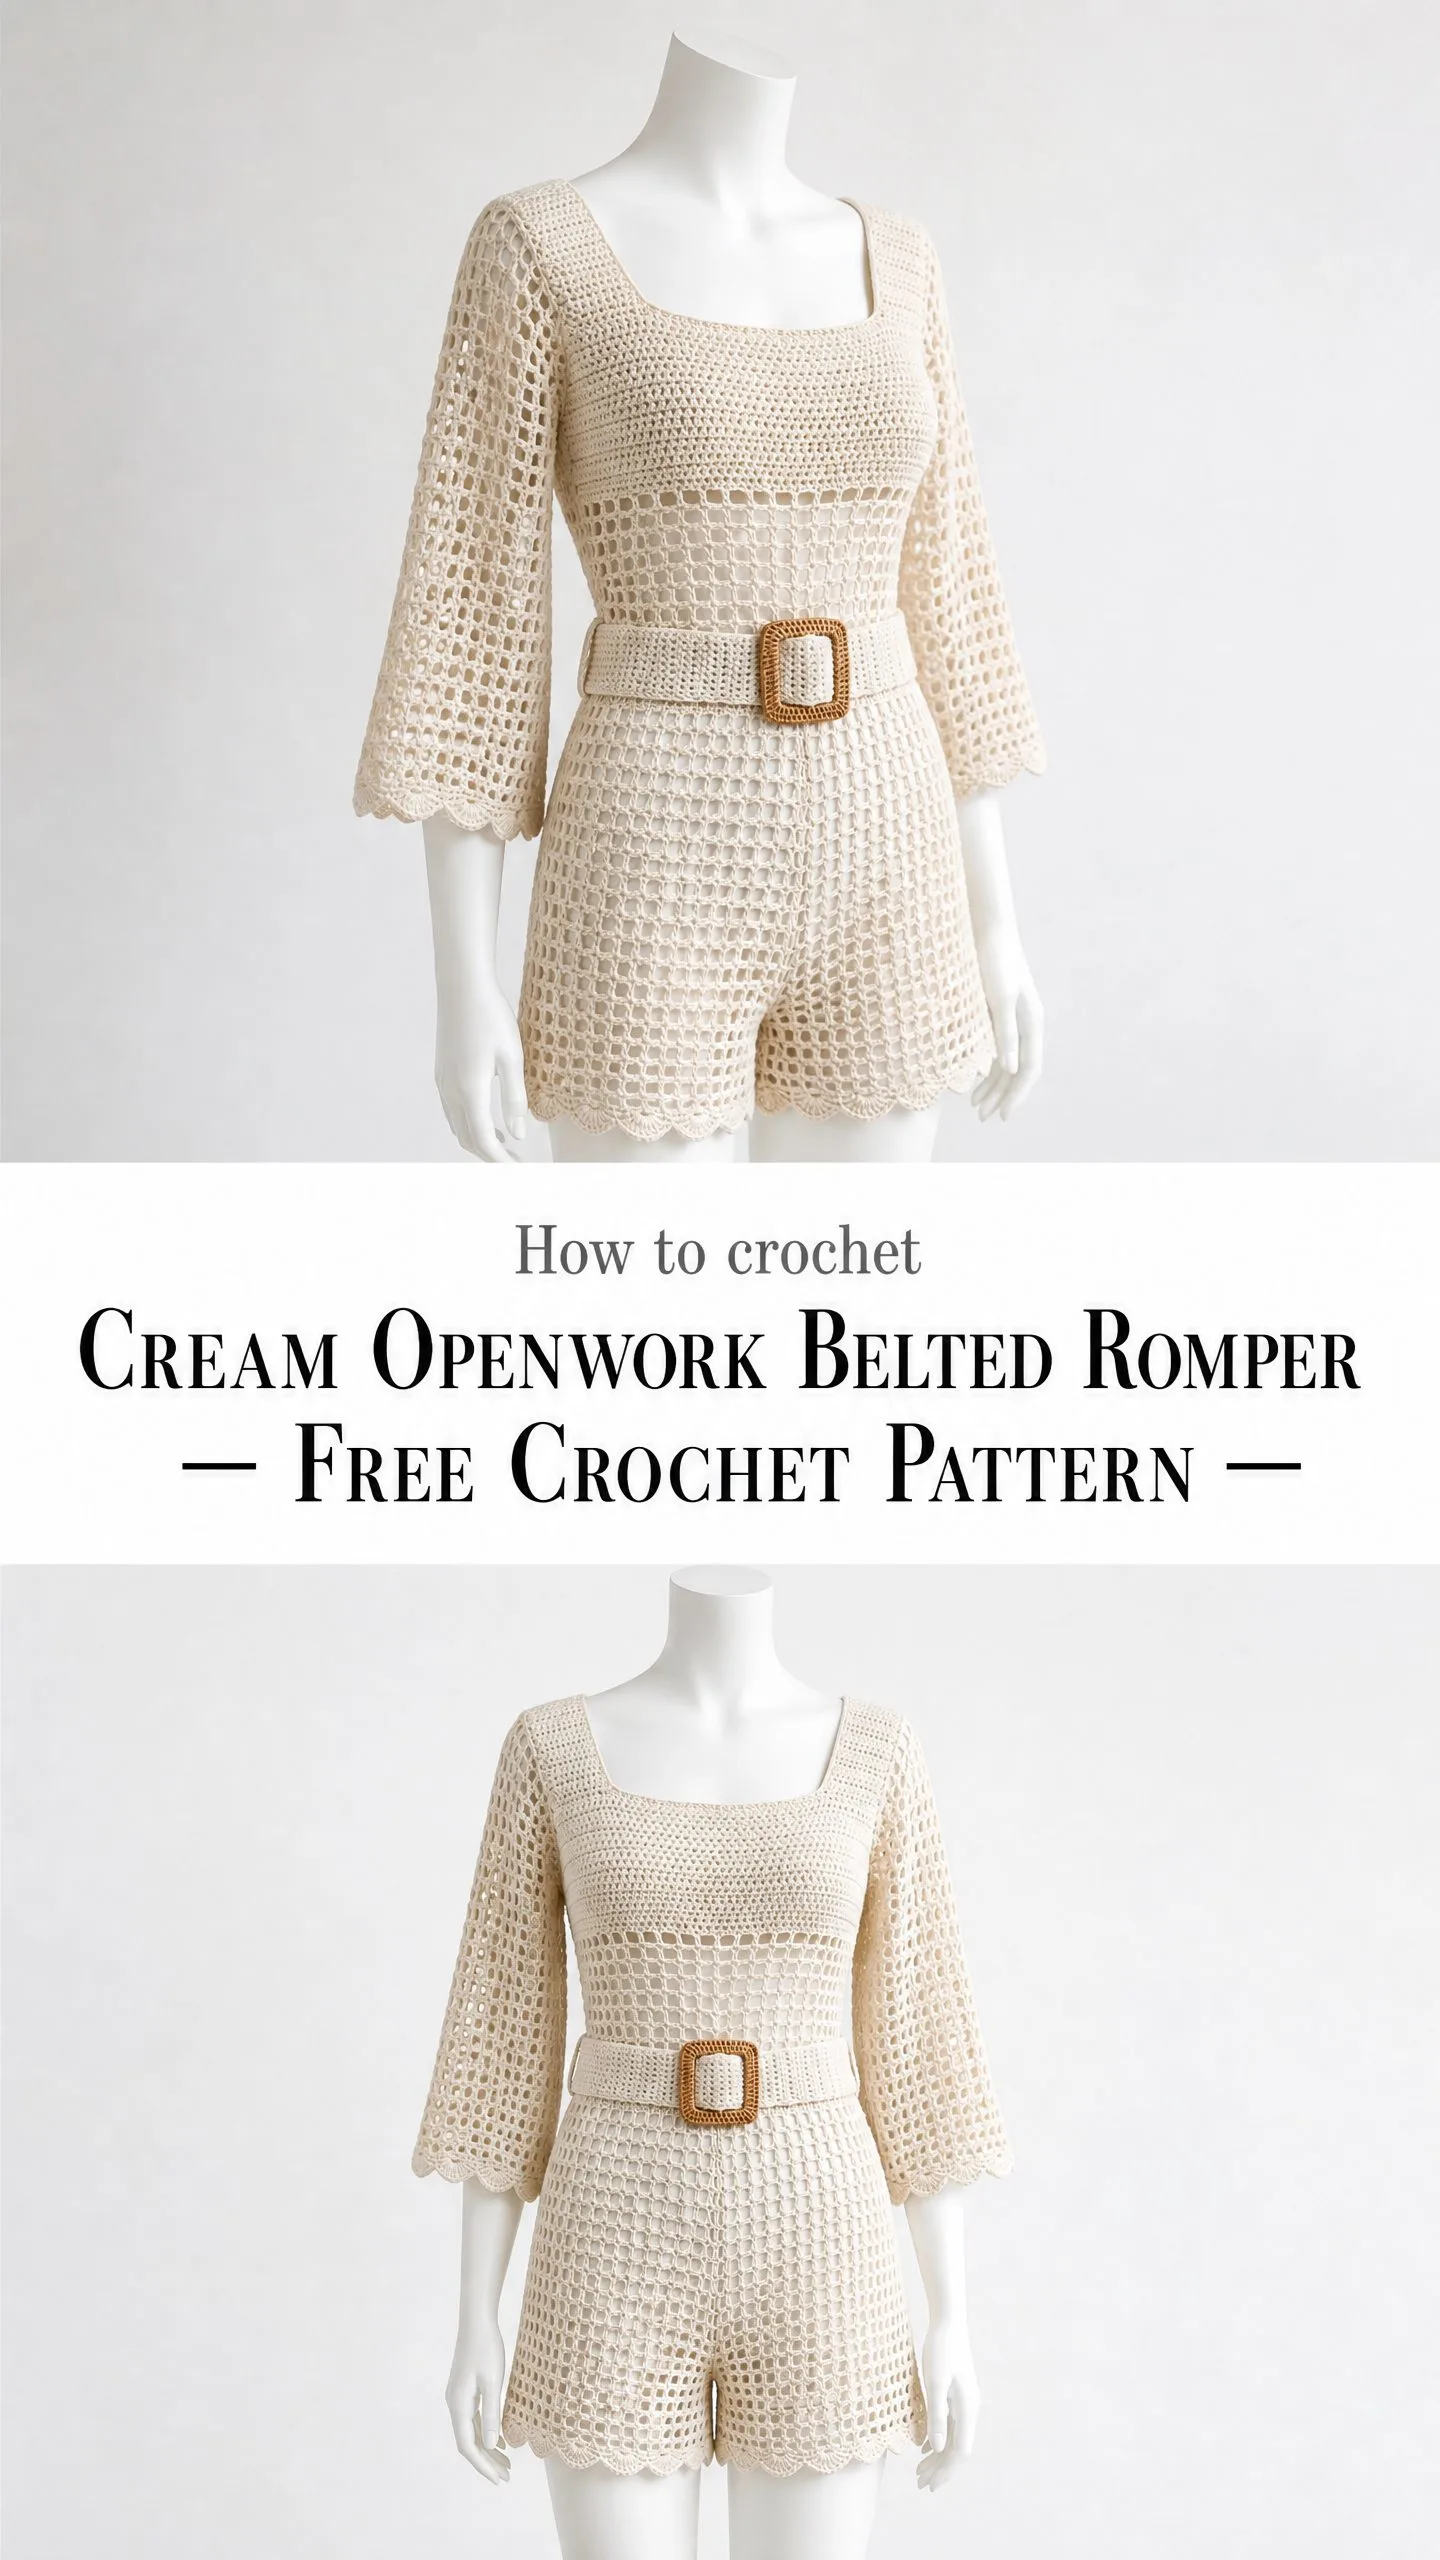
I’ve been looking for the perfect summer crochet project for months now, and this cream openwork belted romper is hands down my favourite find. The vintage silhouette, the airy mesh fabric, the elegant bell sleeves with scalloped edges. It checks every box.
If you’ve been wanting to try your hand at garment construction but felt intimidated by fitted pieces, this is your sign to dive in. The stitch pattern itself is beautifully simple and repetitive. Once you get into the rhythm, it practically works itself up.
I rounded up all the details you need below, from materials to finishing touches. Let’s make something stunning together.
About This Crochet Romper Pattern
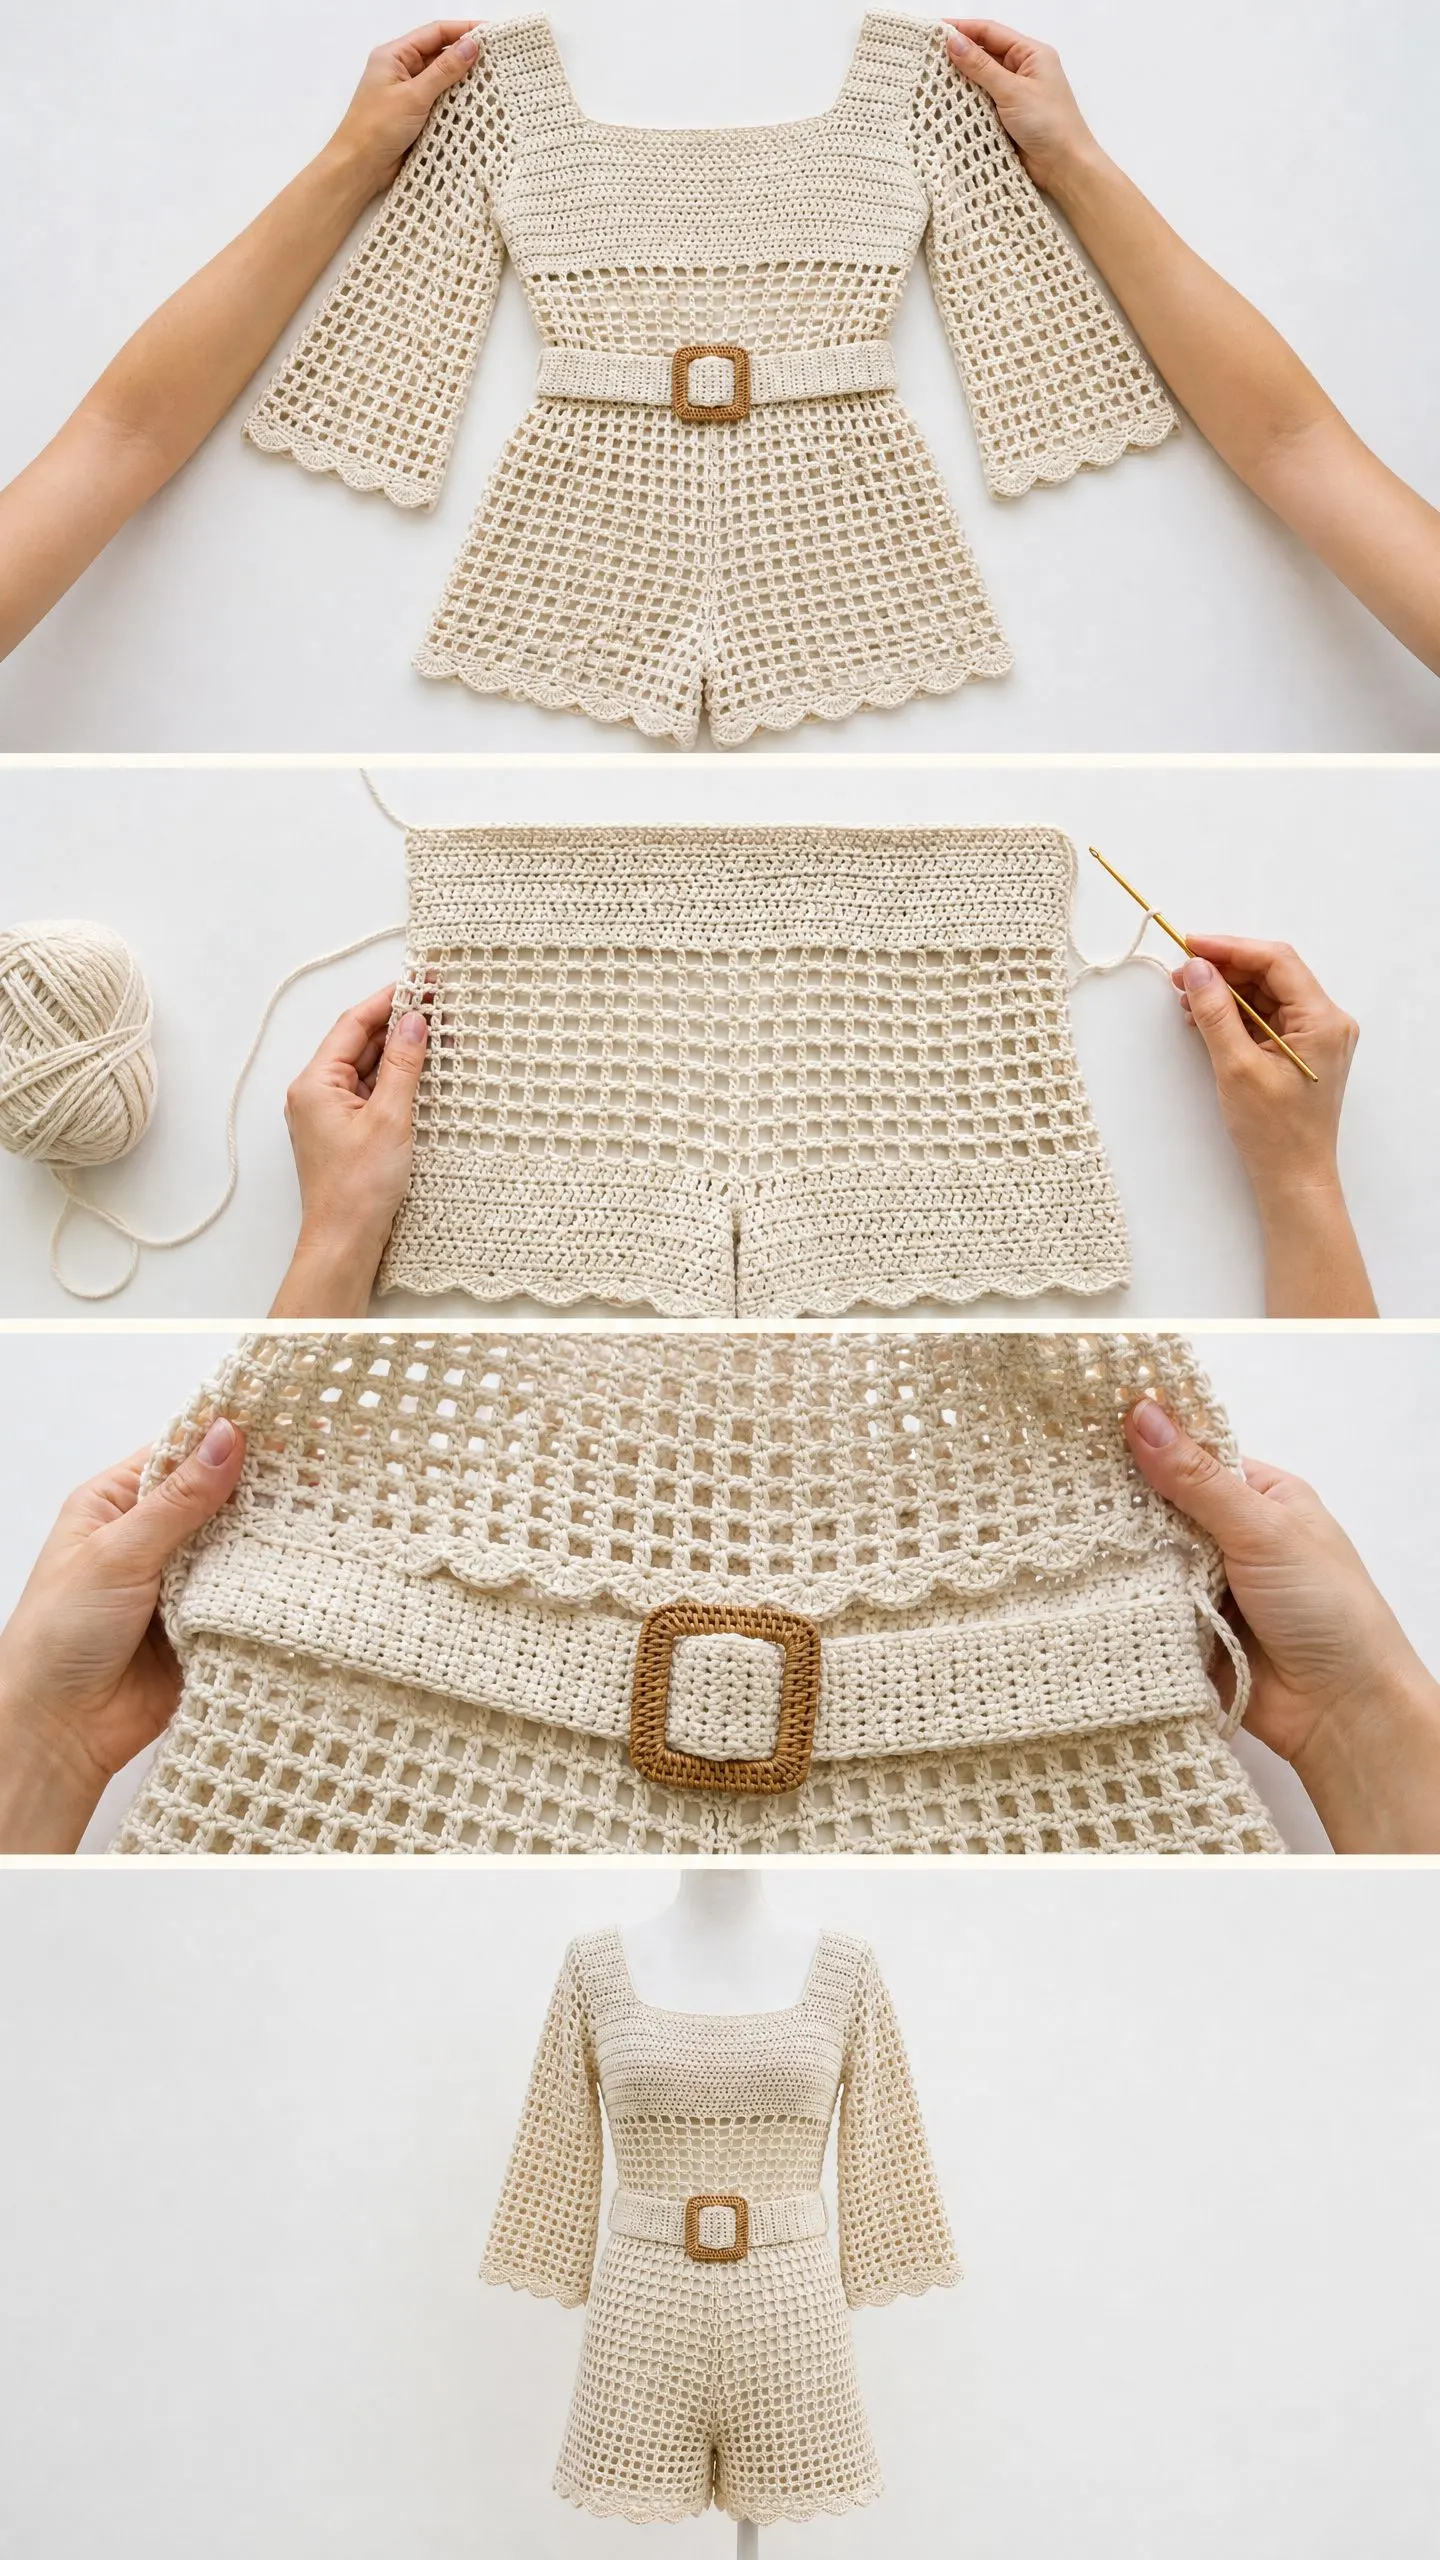
This one-piece crochet romper features a fitted square neckline bodice, three-quarter length bell sleeves with scallop edging, a wide integrated belt band at the natural waist, and shorts-length legs finished with a matching scallop border. The entire garment is constructed in a grid-style openwork mesh made from double crochet (dc) and chain spaces (ch-sp). This creates that gorgeous airy, vintage-inspired character you see in the photos.
The construction might sound complex, but I promise it’s more approachable than it looks. You’ll work the back bodice panel first, then the front, seam them at the shoulders and sides, and continue in joined rounds down through the waist band and shorts legs. Sleeves get picked up at the armhole edges and worked downward. The belt is a separate flat strip that threads through a square rattan buckle.
Skill Level: Intermediate. The stitch pattern is highly repetitive, which makes it meditative rather than challenging. However, you’ll need to be comfortable working flat panels, seaming, shaping at armholes and necklines, picking up stitches for sleeves, and maintaining stitch count discipline. If you’ve completed at least two garments before, you’ll do great here.
Time Estimate: 30 to 45 hours including finishing, blocking, and belt construction. This is a project to savour, not rush.
Finished Measurements
This pattern is written for size Small/Medium (US 4/6) with notes for customizing larger sizes.
Materials Needed
Yarn: 100% cotton, DK weight (CYCA 3), approximately 1,400 to 1,600 yards / 1,280 to 1,460 meters total in cream or natural
Yarn Suggestions:
Substitution note: Any smooth 100% cotton or cotton-blend DK yarn will work. Avoid yarns with significant elasticity such as cotton-acrylic blends, as they will distort the mesh openwork over time.
Hooks:
Notions:
Gauge
In mesh pattern stitch (dc, ch 1, skip 1, dc) blocked:
16 stitches and 9 rows = 4 inches / 10 cm square
Always check gauge. Because this is a fitted garment, even a half-stitch difference per inch will alter the finished dimensions by up to 2 inches around the circumference. If your swatch is too large, go down half a hook size. If too small, go up half a hook size.
Abbreviations and Stitch Definitions
Let me walk you through every abbreviation you’ll encounter. I’ll explain each one in plain English so there’s no confusion.
Special Stitches Explained
Mesh Square (MS)
This is the foundational unit of the entire garment. One Mesh Square = (dc in next st, ch 1, skip 1 st or ch-sp, dc in next st). When worked in rows, you’ll work dc into the dc of the row below and ch 1 over the ch-1 space below. Each Mesh Square spans 2 stitches and 1 chain, using 3 total vertical positions across the fabric.
To work a row of Mesh Squares:
1. Ch 3 to turn (counts as first dc).
2. Ch 1, skip the first ch-sp or stitch below.
3. Dc into the next dc.
4. Ch 1, skip the next ch-sp.
5. Dc into the next dc.
6. Repeat steps 4 and 5 across to end of row.
Scallop Border
This pretty edging finishes all the hems.
1. Join yarn at right corner with sl st.
2. Work 1 sc into same st.
3. Skip 1 st or sp.
4. Work 5 dc into the next st or sp (shell made).
5. Skip 1 st or sp.
6. Work 1 sc into the next st.
7. Rep steps 3 through 6 across the entire edge.
8. At corners, work (sc, 5 dc, sc) all into the corner stitch.
Belt Band Stitch (Dense DC Rib)
Work dc across in both loops of each stitch for a solid, structured band fabric. No chains between stitches. Turn with ch 3.
Dc2tog (Double Crochet Two Together)
This is your decrease stitch.
1. Yo, insert hook into first stitch, yo, pull through, yo, pull through 2 loops (2 loops remain on hook).
2. Yo, insert hook into next stitch, yo, pull through, yo, pull through 2 loops (3 loops on hook).
3. Yo, pull through all 3 loops. One decrease made.
Pattern Notes Before You Begin
A few things to keep in mind as you work through this crochet tutorial:
1. The bodice front and back are worked separately as flat panels, then seamed at the shoulders and side seams below the armhole.
2. After seaming, the body continues in joined rounds from the armhole base downward through the waist band and shorts legs.
3. Armhole shaping is minimal, consisting of 4 bound-off stitches on each side.
4. The square neckline is created by binding off a flat section of center stitches at the front.
5. Sleeves are picked up at the armhole and worked in rows downward, then the sleeve seam is sewn.
6. The belt is a separate long flat strip, then threaded through a rattan buckle.
7. The scallop edging is added last to all hem edges, sleeve cuffs, and leg openings.
8. All stitch counts represent the total number of working positions including both dc posts and ch-sp positions.
9. The pattern stitch repeat is a multiple of 2 plus 1.
10. Turning chains: Ch 3 counts as first dc throughout unless otherwise noted. Ch 1 at the start of sc rows does not count as a stitch.
Step by Step Instructions
Back Bodice Panel
Foundation: Ch 74.
Row 1 (RS): Dc in 4th ch from hook (beg ch-3 counts as first dc), ch 1, skip 1 ch, dc in next ch, rep (ch 1, skip 1 ch, dc in next ch) across to end. Turn. (36 dc, 35 ch-1 sps = 71 working positions across)
Row 2: Ch 3, turn. (Ch 1, skip first ch-sp, dc in next dc) across, ending dc in top of t-ch. Turn. (36 dc, 35 ch-1 sps)
Rows 3 through 14: Rep Row 2. (36 dc, 35 ch-1 sps each row)
After Row 14, the back bodice panel measures approximately 6.25 inches / 16 cm tall from foundation. This is your first checkpoint.
CHECKPOINT 1: Your back panel should be approximately 17.5 inches / 44.5 cm wide and 6.25 inches / 16 cm tall. If dimensions are off by more than half an inch, recheck gauge before continuing.
Armhole Shaping (Back)
Row 15 (armhole bind-off): Sl st across first 8 sts (4 dc + 4 ch-1 sps), ch 3, continue in Mesh Square pattern across until 8 sts rem, stop. Turn. (28 dc, 27 ch-1 sps = 55 working positions)
Rows 16 through 24: Work even in Mesh Square pattern across. (28 dc, 27 ch-1 sps each row)
After Row 24, back armhole section measures approximately 4 inches / 10 cm above armhole bind-off.
Back Neck Shaping
Row 25 (left shoulder): Work in pattern across first 18 working positions (9 dc, 8 ch-1 sps, ending on dc). Turn. Leave remaining sts unworked.
Row 26: Ch 3, work in pattern across. Turn. (9 dc, 8 ch-1 sps)
Row 27: Work across. Fasten off. (9 dc, 8 ch-1 sps)
Rejoin yarn at center back. Skip center 19 working positions (this creates the back neck opening). Attach to the 20th position and work right shoulder to match Rows 25 through 27. Fasten off.
Front Bodice Panel
Foundation: Ch 74.
Rows 1 through 14: Same as Back Bodice Rows 1 through 14. (36 dc, 35 ch-1 sps each row)
Armhole Shaping (Front)
Row 15: Sl st across first 8 sts, ch 3, work in pattern across until 8 sts rem, stop. Turn. (28 dc, 27 ch-1 sps)
Rows 16 through 20: Work even in pattern. (28 dc, 27 ch-1 sps)
Front Neck Shaping (Square Neck)
Row 21 (left shoulder): Work in pattern across first 18 working positions (9 dc, 8 ch-1 sps). Turn. Leave center and right unworked.
Rows 22 through 27: Work even on left shoulder only. (9 dc, 8 ch-1 sps)
Fasten off left shoulder.
Rejoin yarn at front and skip center 19 working positions (center front neck opening). Attach at 20th position, work Rows 21 through 27 for right shoulder. Fasten off.
Seaming
Place front and back panels with RS together. Using tapestry needle and yarn, whipstitch each shoulder seam (9 dc + 8 ch-1 sp edge stitches matched to corresponding back shoulder stitches). Sew side seams below armhole, joining Row 1 through Row 14 on both sides. Leave armhole openings open. Turn RS out.
CHECKPOINT 2: After seaming, you should have a sleeveless bodice shell. The armhole opening on each side should measure approximately 5.5 inches / 14 cm deep from shoulder seam to underarm. The circumference at the bust should be approximately 34 to 36 inches / 86 to 91 cm.
Body (Waist and Hip, Worked in Rounds)
Join yarn at left underarm (bottom of side seam). PM to mark beg of round.
Round 1: Ch 3 (counts as first dc), ch 1, skip 1 st, (dc in next dc, ch 1, skip 1 ch-sp) around the full circumference of the bodice base, joining with sl st to top of beg ch-3. (72 dc, 72 ch-1 sps = 144 total positions around)
Rounds 2 through 8: Ch 3, (dc in next dc, ch 1, sk ch-sp) around, sl st to beg ch-3. (72 dc, 72 ch-1 sps)
Waist Band (Solid Dense Rows)
The waist band is a section of 6 rounds worked in solid dc, pulling the waist slightly and giving structure for the belt to sit against.
Round 9 (waist band begin): Ch 3, dc in each dc and each ch-sp around (work dc into every position). Sl st to beg ch-3. (144 dc)
Rounds 10 through 14: Ch 3, dc in each dc around, sl st to beg ch-3. (144 dc each round)
CHECKPOINT 3: After Round 14, your piece should measure approximately 13.5 inches / 34 cm from the shoulder seam. The waist band section should be approximately 2.75 inches / 7 cm tall.
Hip Section (Resume Mesh)
Round 15: Ch 3, (ch 1, skip 1 dc, dc in next dc) around, sl st to beg ch-3. (72 dc, 72 ch-1 sps)
Rounds 16 through 22: Work even in mesh pattern around. (72 dc, 72 ch-1 sps)
CHECKPOINT 4: After Round 22, the body from shoulder measures approximately 19 inches / 48 cm. The hip circumference should be approximately 36 to 38 inches / 91 to 97 cm.
Leg Separation
Divide the round into two equal halves. Each half = 72 total positions (36 dc + 36 ch-1 sps). PM at center front and center back to mark crotch points.
Left Leg:
Row 1 (RS): Begin at left crotch marker. Work in mesh pattern for 72 positions (half circumference), stopping at right crotch marker. Turn. Ch 3.
Rows 2 through 9: Work in Mesh Square pattern across. Turn. (36 dc, 35 ch-1 sps)
After Row 9, left leg measures approximately 4 inches / 10 cm from crotch. Fasten off.
Right Leg:
Rejoin yarn at center back marker and work same as Left Leg Rows 1 through 9. Fasten off.
Seam each leg inseam using whipstitch with tapestry needle and yarn, joining 4 inches / 10 cm of the inner leg edges together RS to RS.
Sleeves (Make 2)
Each sleeve is picked up at the armhole opening and worked downward in rows.
Pick-up Round: With RS facing, join yarn at underarm seam. Ch 3. Work dc evenly around the entire armhole opening, placing 1 dc for each dc edge stitch and 1 dc into each 2-row side-edge unit. You should pick up 44 dc total around the armhole. Sl st to beg ch-3 to join. (44 dc)
Convert to Mesh:
Round 1: Ch 3, (ch 1, sk 1 dc, dc in next dc) around, sl st to beg ch-3. (22 dc, 22 ch-1 sps)
Rounds 2 through 6: Work even in mesh pattern. (22 dc, 22 ch-1 sps)
Bell Flare Increase (Rounds 7 through 14):
Round 7: Ch 3, work in mesh pattern for 11 reps, then in the next ch-sp work (dc, ch 1, dc) for increase, work 10 reps, then in last ch-sp work (dc, ch 1, dc) for second increase, sl st to beg ch-3. (24 dc, 24 ch-1 sps = 48 total positions)
Rounds 8 through 9: Work even. (24 dc, 24 ch-1 sps)
Round 10: Inc 2 evenly as in Round 7. (26 dc, 26 ch-1 sps)
Rounds 11 through 12: Work even. (26 dc, 26 ch-1 sps)
Round 13: Inc 2 evenly. (28 dc, 28 ch-1 sps)
Round 14: Work even. (28 dc, 28 ch-1 sps)
After Round 14, the sleeve cuff width is approximately 14 inches / 35.5 cm in circumference and the sleeve length from shoulder is approximately 13 inches / 33 cm.
CHECKPOINT 5: The sleeve should flare gradually from the shoulder pickup and end in a relaxed bell shape at Round 14.
Scallop Edging
Apply to: both leg hem edges, both sleeve cuffs, and the neckline.
Using smaller hook (US D-3 / 3.25 mm), join yarn at any corner or midpoint along the edge to be trimmed.
Round 1 (even base): Sc evenly around the entire edge, placing 1 sc in each dc, 1 sc in each ch-sp, and 2 sc at corners. Sl st to beg sc. Count should be a multiple of 3 for scallop to divide evenly. Adjust by 1 or 2 sc if needed.
Round 2 (scallop): Sl st into first sc. (Skip 1 sc, 5 dc into next sc, skip 1 sc, sc into next sc) around, ending sl st to beg. Fasten off.
Belt
The belt is worked as a long flat strip in solid dc.
Foundation: Ch 6.
Row 1: Dc in 4th ch from hook, dc in next 2 ch. Turn. (4 dc)
Rows 2 through 130 (or until belt reaches desired length plus 6 inches / 15 cm for buckle loop): Ch 3, dc in each dc across. Turn. (4 dc each row)
The finished belt before buckle attachment should be approximately 42 inches / 107 cm long.
Belt Buckle Loop End:
At one end of the belt, fold the tip 1.5 inches / 4 cm back on itself and sl st the layers together to form a loop. Thread the square buckle onto the belt before closing the loop. Pull snugly and weave in ends.
The opposite end of the belt tapers: Decrease 1 dc at each end of the last 4 rows (dc2tog at beg and end of row), finishing to a point or to 2 dc before fastening off. This creates the tongue end that fits through the buckle.
Finishing Your Crochet Romper
Weave in all ends securely, burying tails at least 2 inches through the mesh structure.
Blocking: Wet block the entire garment flat. Soak in cool water for 15 minutes, gently squeeze (do not wring) out excess moisture, then pin to finished dimensions on a foam mat. Allow to dry completely (12 to 24 hours depending on humidity). Blocking opens the mesh squares, evens the scallop border, and sets the garment dimensions.
Thread the belt through the buckle loop and position at natural waist. The belt can be worn over the outside of the solid waist band section, centering the buckle at front center.
Care: Hand wash in cool water with a gentle soap formulated for natural fibers. Lay flat to dry. Do not tumble dry, do not wring, do not hang to dry (mesh garments will stretch under their own weight when wet). Store folded, not hung.
Size Customization Tips
For a larger size (Medium/Large, US 8/10): Increase the starting chain on front and back panels from 74 to 86 (adding 12 to each panel = 6 Mesh Squares per side per panel). This adds approximately 3 inches / 7.5 cm per panel, for a total of 6 extra inches / 15 cm around the bust.
Increase starting chain for XL/2X to ch 98 (adding 24 to original, which equals 12 additional Mesh Squares per panel).
For height adjustment: add or remove rows in the hip section (Rounds 16 through 22) before leg separation. Each round adds approximately 0.44 inches / 1.1 cm of length.
For a longer short inseam: add rows to the leg section. Each row adds approximately 0.44 inches / 1.1 cm.
Thank you so much for choosing this pattern. I truly hope you love making this cream openwork belted romper as much as I loved putting together these instructions. If you make one, I would absolutely love to see it. Tag me on Instagram or share a photo on Facebook so I can celebrate your finished piece with you.
If this pattern caught your eye, go ahead and save it to your Pinterest boards so you can find it when you’re ready to start. And please drop a comment below if you make this romper. I read every single one and your photos absolutely make my day.
