
Go ahead. Dig into that stash and pull out those beautiful skeins of crochet thread you have been saving for something truly special. This elegant lace rose shawl is exactly the kind of heirloom project that deserves your finest materials and your full attention.
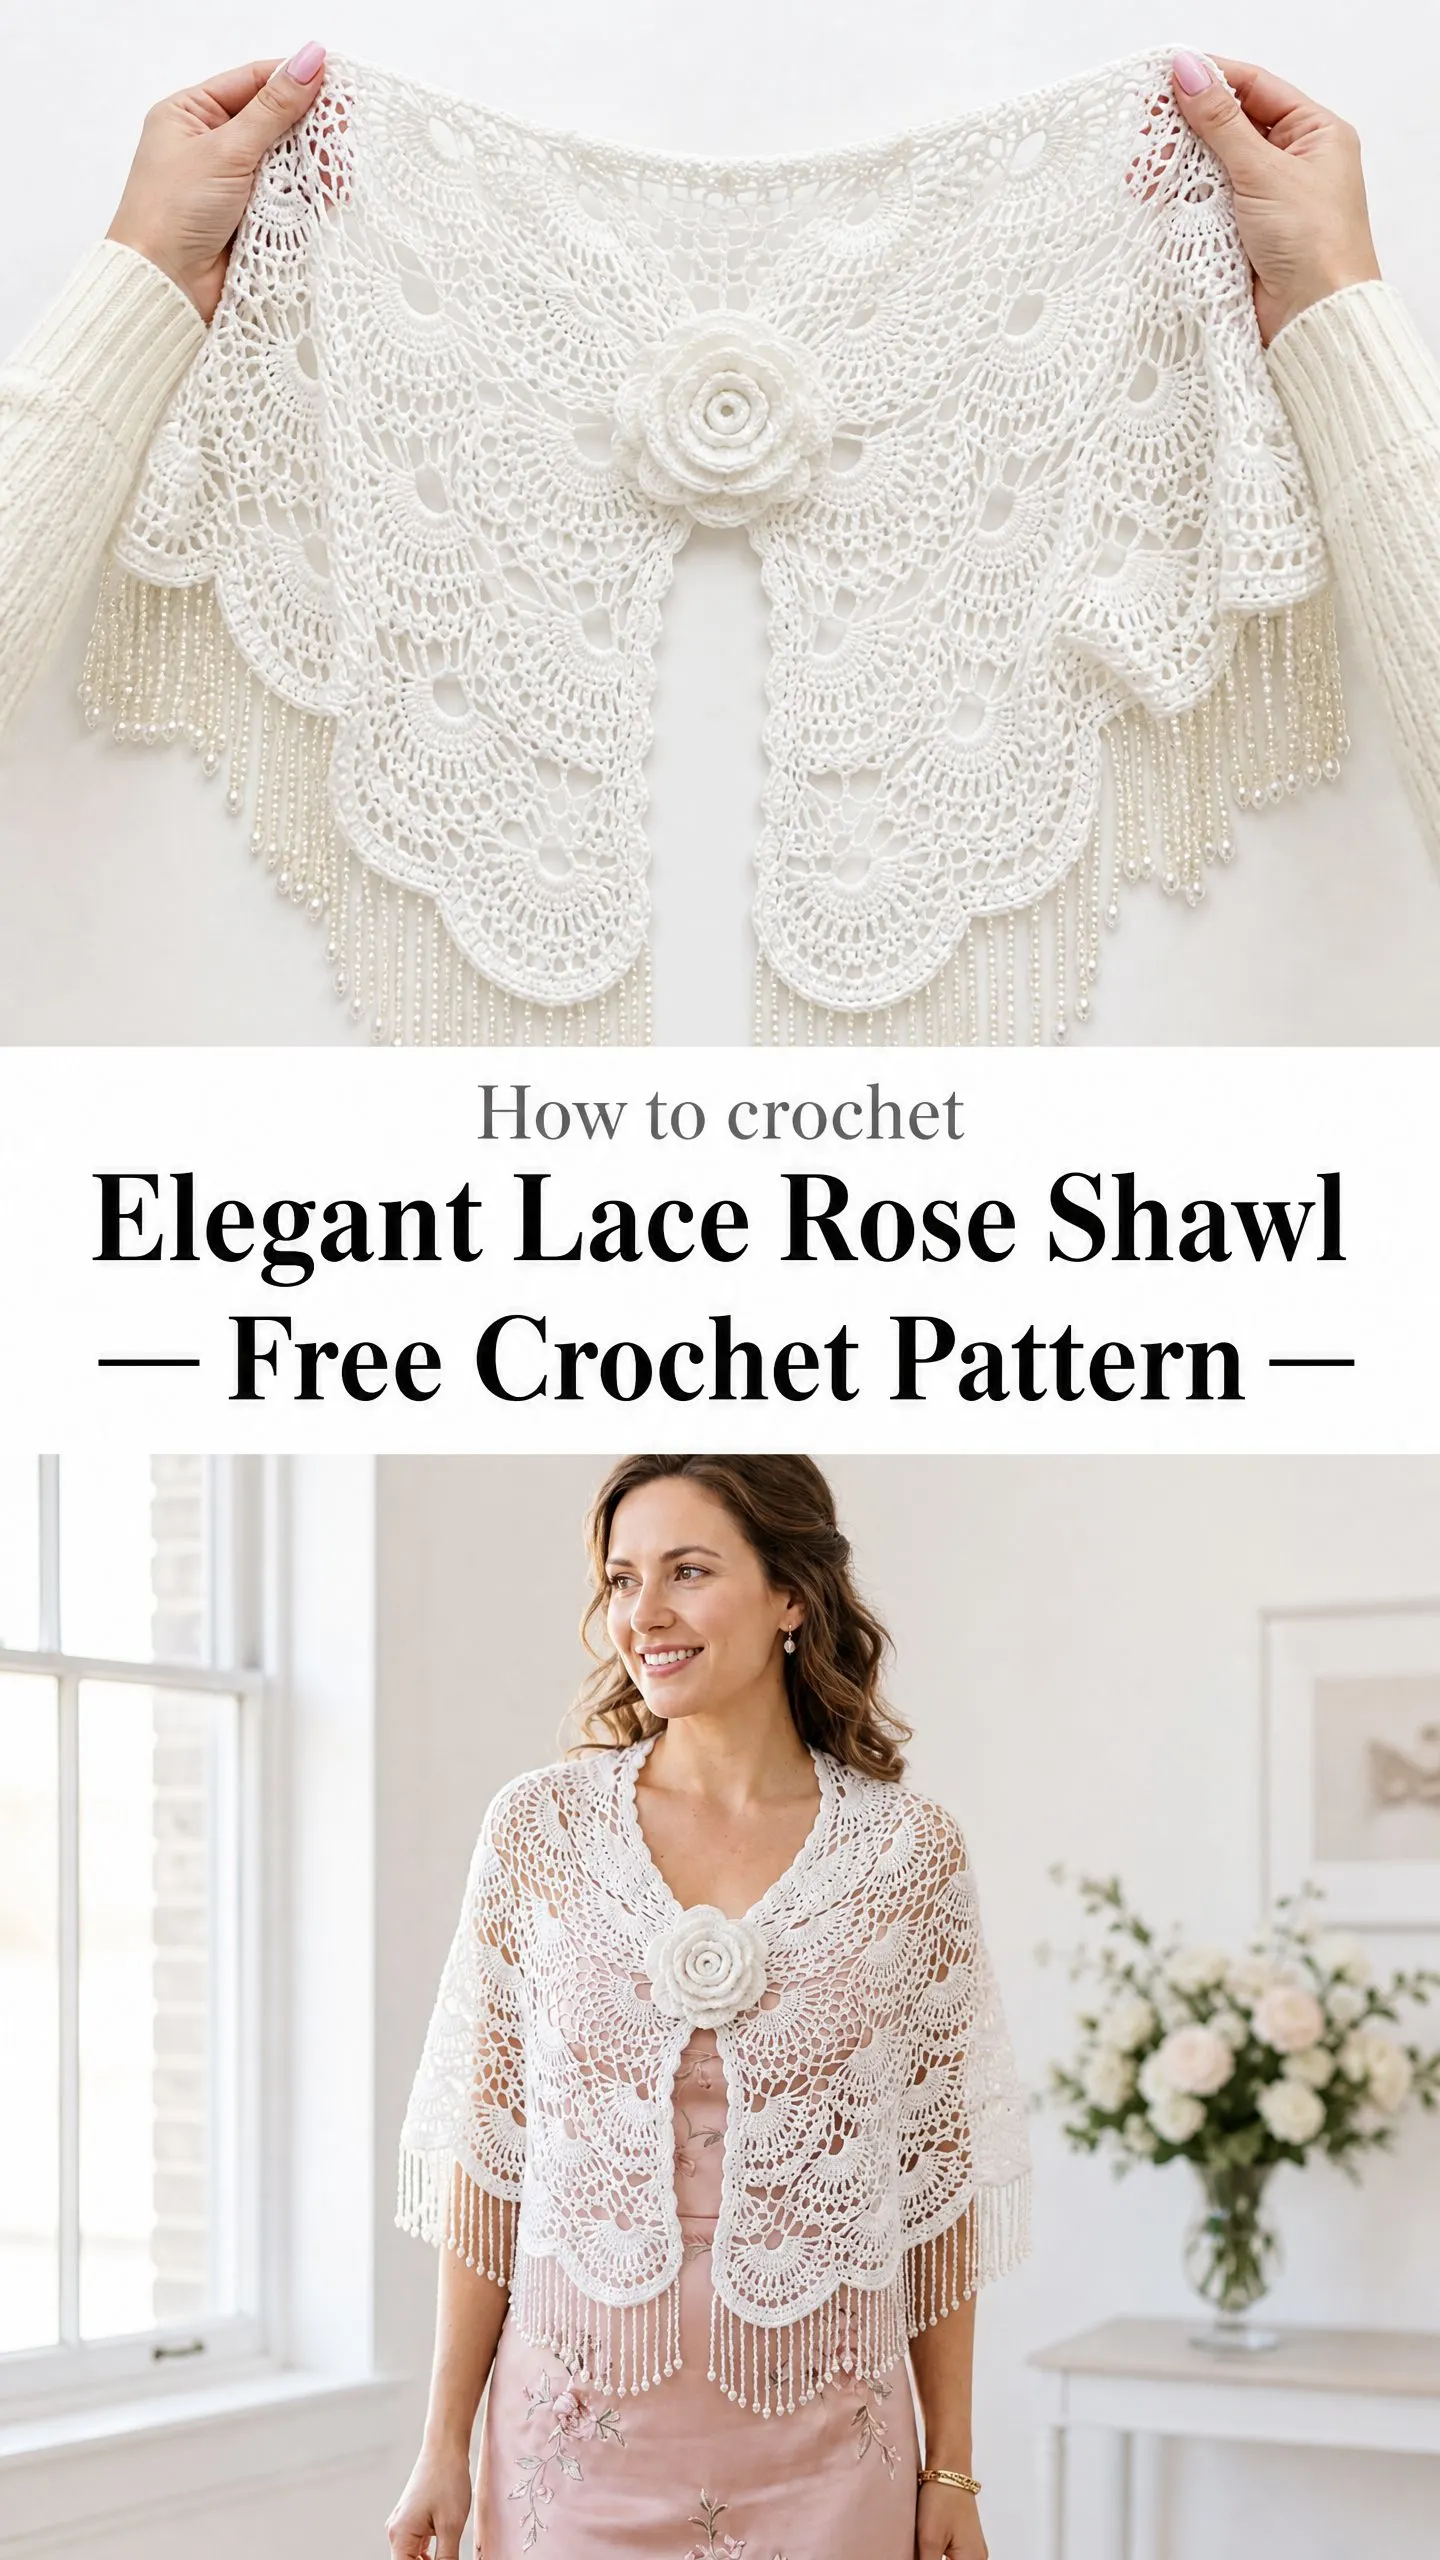
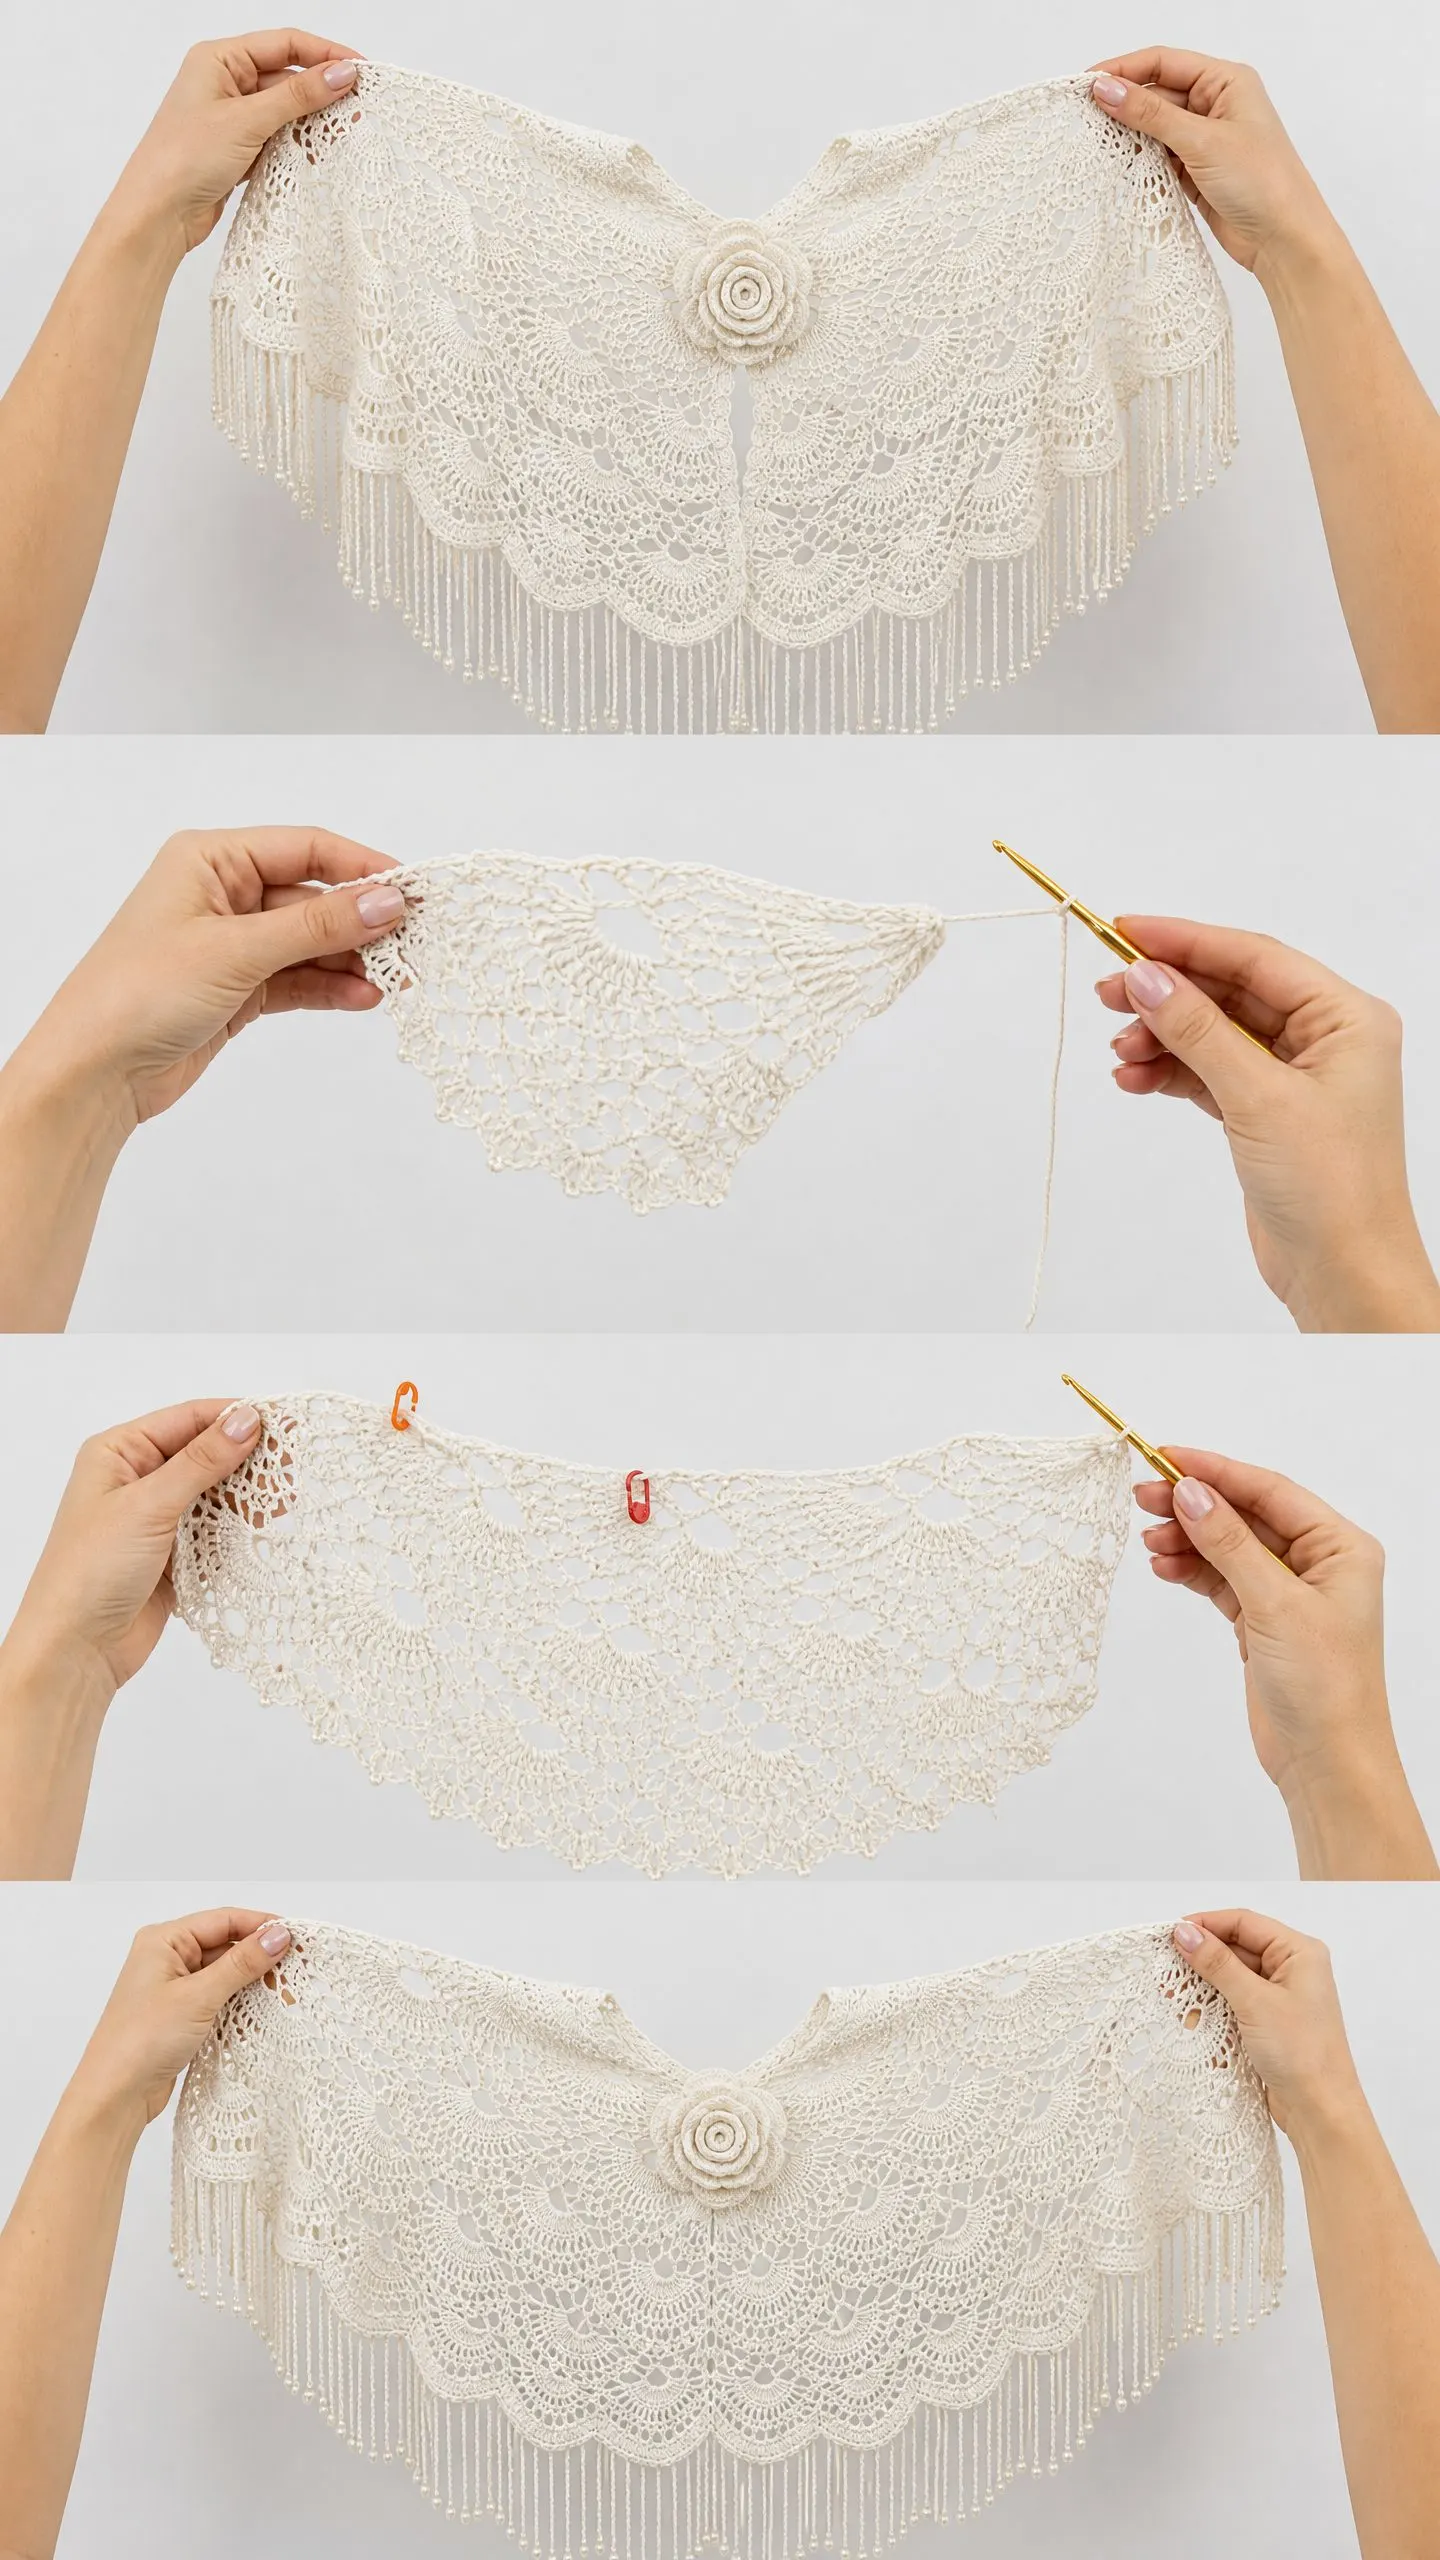
The construction here is genuinely interesting. You will work from the top neck edge downward in a semicircular shape, building repeating fan and pineapple lace motifs that radiate outward in concentric arcs. The piece grows organically as you add increases at marked points, creating that gorgeous drape across the shoulders.
I want to be honest with you about the difficulty level. This is an advanced pattern that requires confident control of shell stitches, pineapple clusters, chain loops, and picot edging. If you have completed at least one lace shawl or doily project before, you will find this manageable. If you are newer to lace work, bookmark this one for later and come back when you are ready. It will be worth the wait.
About This Lace Shawl Crochet Pattern
This romantic capelet-style shawl drapes beautifully over the shoulders and closes at the front center with a decorative crocheted rose brooch. The body features repeating fan shells and elegant pineapple motifs that create an intricate lace fabric. The lower hem finishes with a scalloped edge from which a beaded fringe hangs in cascading strands.
The piece sits on the shoulders like a short cape, covering the upper arms and ending just below the bust. It works wonderfully for weddings, special occasions, or any time you want to feel absolutely stunning.
Time estimate: Approximately 28 to 40 hours total. The body takes about 25 to 35 hours, with an additional 3 to 5 hours for the rose, fringe, and finishing.
Finished Measurements
These dimensions suit an average adult size small through extra-large with adjustable front overlap.
Materials Needed
Yarn: Size 10 crochet cotton thread or lightweight fingering weight yarn in ivory or warm white. You will need approximately 1,400 to 1,600 yards (1,280 to 1,460 meters) total.
Yarn suggestions:
Hook: US Steel Hook size 7 (1.65 mm) for thread, or US B/1 (2.25 mm) for fingering weight yarn. Choose based on your yarn selection and personal gauge.
Notions:
Gauge
With chosen hook and yarn, after blocking:
Gauge is essential for achieving the correct dimensions of this lace piece. Your gauge may be up to 10 percent tighter before blocking.
Abbreviations and Stitch Definitions
ch = chain (yarn over, pull through loop on hook)
sl st = slip stitch (insert hook, yarn over, pull through stitch and loop on hook in one motion)
sc = single crochet (insert hook, yarn over, pull up loop, yarn over, pull through both loops)
dc = double crochet (yarn over, insert hook, yarn over, pull up loop, yarn over, pull through 2 loops, yarn over, pull through remaining 2 loops)
hdc = half double crochet (yarn over, insert hook, yarn over, pull up loop, yarn over, pull through all 3 loops)
tr = treble crochet (yarn over twice, insert hook, yarn over, pull up loop, then yarn over and pull through 2 loops three times)
ch-sp = chain space (the gap created by chain stitches in the previous row)
sp(s) = space(s)
st(s) = stitch(es)
sk = skip
t-ch = turning chain
RS = right side
WS = wrong side
rep = repeat
FSU = Fan Shell Unit
Special Stitches for This Crochet Pattern
Fan Shell: Work (dc, ch 1, dc, ch 1, dc, ch 1, dc, ch 1, dc) all into the same stitch or space. This creates a 5-dc fan with ch-1 spaces between each dc. This is your primary lace shell unit throughout the body.
V-Stitch: Work (dc, ch 2, dc) all into the same stitch or space.
Picot: Ch 3, sl st into 3rd chain from hook. This forms a small decorative knot on the scallop edging.
Bobble (bo): (Yo, insert hook into indicated st or sp, yo, draw up a loop, yo, draw through 2 loops) 5 times into same st or sp, yo, draw through all 6 loops on hook.
Pattern Notes Before You Begin
The shawl is worked flat in turned rows beginning at the top neck edge. The piece is shaped as a semicircle with the center back as the apex. The two front panels hang from either side.
Increases occur at four marked points every other row during the first section, then every row during the lace fan section. This maintains the flat semicircular spread.
Right side of work faces you on odd-numbered rows.
All turning chains count as indicated in each row. When a turning chain counts as a stitch, work into the top of that chain at the end of the following row.
Place stitch markers at the four increase points at the beginning of the project and move them up as you work.
Step by Step Instructions
Foundation
Chain 6, slip stitch to first chain to form a ring.
Row 1 (RS): Ch 5 (counts as dc + ch 2), (dc, ch 2) 7 times into ring, dc into ring, turn. (9 dc, 8 ch-2 spaces)
Row 2 (WS): Ch 3 (counts as dc), dc into first ch-2 sp, ch 1, (dc, ch 1, dc, ch 1, dc) into next ch-2 sp, ch 1, dc into next ch-2 sp, ch 1, (dc, ch 1, dc, ch 1, dc) into next ch-2 sp, ch 1, dc into next ch-2 sp, ch 1, (dc, ch 1, dc, ch 1, dc) into next ch-2 sp, ch 1, dc into next ch-2 sp, ch 1, (dc, ch 1, dc, ch 1, dc) into next ch-2 sp, ch 1, dc into 3rd ch of t-ch, turn. (4 partial fan groups + edge dc stitches = 30 dc total across row)
Row 3 (RS): Ch 5 (counts as dc + ch 2), dc into first st, ch 1, sk 1, Fan Shell into center dc of next fan group, ch 1, sk 1, V-stitch into next dc, ch 1, Fan Shell into center dc of next fan group, ch 1, V-stitch into next dc, ch 1, Fan Shell into center dc of next fan group, ch 1, V-stitch into next dc, ch 1, Fan Shell into center dc of next fan group, ch 1, (dc, ch 2, dc) into top of t-ch, turn. (4 FSU, 4 V-stitches, 2 edge V-stitches)
Section 1: Establishing the Shoulder Yoke (Rows 4-12)
Row 4 (WS): Ch 3, dc into ch-2 sp of first edge V-st, ch 1, Fan Shell into center ch-1 sp of first FSU, ch 1, dc into ch-2 sp of first V-st, ch 1, Fan Shell into center ch-1 sp of second FSU, ch 1, dc into ch-2 sp of second V-st, ch 1, Fan Shell into center ch-1 sp of third FSU, ch 1, dc into ch-2 sp of third V-st, ch 1, Fan Shell into center ch-1 sp of fourth FSU, ch 1, dc into ch-2 sp of last edge V-st, dc into 3rd ch of t-ch, turn. (4 FSU, 6 single-dc dividers, 2 edge dc)
Row 5 (RS): Ch 5, dc into first dc (edge V-st formed), ch 1, Fan Shell into center sp of first FSU, ch 1, V-st into next dc, ch 1, Fan Shell into center sp of second FSU, ch 1, V-st into next dc, ch 1, Fan Shell into center sp of third FSU, ch 1, V-st into next dc, ch 1, Fan Shell into center sp of fourth FSU, ch 1, (dc, ch 2, dc) into top of t-ch, turn. (4 FSU, 3 interior V-sts, 2 edge V-sts)
Row 6 (WS): Repeat Row 4 pattern. (4 FSU)
Row 7 (RS): Ch 5, dc into first dc, ch 1, Fan Shell into center sp of first FSU, ch 1, V-st into next dc, ch 2, Fan Shell into center sp of second FSU, ch 2, V-st into next dc, ch 2, Fan Shell into center sp of third FSU, ch 2, V-st into next dc, ch 2, Fan Shell into center sp of fourth FSU, ch 1, (dc, ch 2, dc) into top of t-ch, turn. (4 FSU, expanded ch-2 arches between)
Row 8 (WS): Ch 3, dc into ch-2 sp of edge, ch 2, Fan Shell into center sp of first FSU, ch 2, V-st into ch-2 arch, ch 2, Fan Shell into center sp of second FSU, ch 2, V-st into ch-2 arch, ch 2, Fan Shell into center sp of third FSU, ch 2, V-st into ch-2 arch, ch 2, Fan Shell into center sp of fourth FSU, ch 2, dc into ch-2 sp of last edge, dc into t-ch top, turn. (4 FSU, 3 interior V-sts, 2 edge dc)
Row 9 (RS): Ch 5, dc into first dc, ch 2, Fan Shell into center sp of first FSU, ch 2, Fan Shell into ch-2 sp of first V-st (INCREASE), ch 2, Fan Shell into center sp of second FSU, ch 2, Fan Shell into ch-2 sp of second V-st (INCREASE), ch 2, Fan Shell into center sp of third FSU, ch 2, Fan Shell into ch-2 sp of third V-st (INCREASE), ch 2, Fan Shell into center sp of fourth FSU, ch 2, (dc, ch 2, dc) into t-ch top, turn. (7 FSU)
Row 10 (WS): Ch 3, 2 dc into ch-2 sp of edge, ch 2, (Fan Shell into center sp of each FSU, ch 2) across to last edge sp, 2 dc into ch-2 sp, dc into t-ch top, turn. (7 FSU, edge groups)
Row 11 (RS): Ch 5, dc into first dc, ch 2, (Fan Shell into center sp of FSU, ch 2, V-st into ch-2 arch between FSUs, ch 2) across to last FSU, Fan Shell into center sp of last FSU, ch 2, (dc, ch 2, dc) into t-ch top, turn. (7 FSU, 6 V-sts between, 2 edge V-sts)
Row 12 (WS): Repeat Row 10 structure: Ch 3, 2 dc into edge ch-2 sp, ch 2, (Fan Shell into center sp, ch 2) repeat across, working Fan Shell into ch-2 sp of each V-st AND into center of each existing FSU, ch 2, 2 dc into last edge sp, dc into t-ch top, turn. (13 FSU total)
Checkpoint after Row 12: Your piece should measure approximately 5 to 6 inches (12.5 to 15 cm) from foundation ring to current row, and approximately 22 to 24 inches (56 to 61 cm) wide. You should have 13 Fan Shell units.
Section 2: Pineapple Band Transition (Rows 13-20)
This section introduces the pineapple motif between fan shells and continues widening.
Row 13 (RS): Ch 4 (counts as tr), tr into same st, ch 3, sc into center sp of first FSU, ch 3, (2 tr into ch-2 arch, ch 3, sc into center sp of next FSU, ch 3) across, 2 tr into last edge sp, turn. (13 sc, 14 pairs of 2-tr)
Row 14 (WS): Ch 1, sc into first tr, ch 5, (sc into next sc, ch 5) across, sc into top of t-ch, turn. (14 sc, 13 ch-5 arches)
Row 15 (RS): Ch 1, sc into first sc, (ch 3, Fan Shell into 3rd ch of ch-5 arch, ch 3, sc into next sc) across, turn. (13 FSU, 14 sc)
Row 16 (WS): Sl st across to center sp of first FSU, ch 3, (dc, ch 1, dc, ch 1, dc, ch 1, dc, ch 1, dc) into center sp, ch 3, sc into sc, ch 3, (Fan Shell into center sp of next FSU, ch 3, sc into sc, ch 3) across, ending Fan Shell into center sp of last FSU, ch 3, sl st into last sc, turn. (13 FSU)
Row 17 (RS): Ch 1, sc into sl st, ch 3, (sc into ch-1 sp of FSU, ch 3) 4 times across first FSU, sc into sc between FSUs, ch 3, rep across, turn. (52 arches total + 13 connecting sc)
Row 18 (WS): Sl st to first ch-3 sp, ch 3, (sc into next ch-3 sp, ch 3) across all arches, with sc at base of each pineapple grouping, turn. (3 arches per group now, 13 groups)
Row 19 (RS): Sl st to first ch-3 sp, ch 3, (sc into next ch-3 sp, ch 3) twice per group, sc into connector, ch 5, rep across, turn. (26 pineapple arches, 13 ch-5 transition arches)
Row 20 (WS): Ch 1, sc into first sp, ch 3, sc into next sp (pineapple tip closed), ch 5, Fan Shell into center of ch-5 arch, ch 5, (sc into first arch of next pineapple, ch 3, sc into second arch same pineapple, ch 5, Fan Shell into ch-5 arch, ch 5) across, turn. (13 FSU, 13 pineapple tips closed)
Checkpoint after Row 20: Your piece should measure approximately 9 to 10 inches (23 to 25.5 cm) from the foundation, and approximately 36 to 38 inches (91 to 97 cm) wide. You should have 13 Fan Shell units.
Section 3: Lower Lace Fan Expansion (Rows 21-30)
Row 21 (RS): Ch 5, dc into same st, ch 2, (Fan Shell into center sp of FSU, ch 2, V-st into sc at pineapple tip, ch 2) across, Fan Shell into last FSU center sp, ch 2, (dc, ch 2, dc) into last edge st, turn. (13 FSU, 12 V-sts between FSUs, 2 edge V-sts)
Row 22 (WS): Ch 3, 2 dc into edge ch-2 sp, ch 2, (Fan Shell into center sp of FSU, ch 2) across all 13 FSU, working Fan Shell also into ch-2 sp of each V-st to add new units, ch 2, 2 dc into last edge sp, dc into t-ch top, turn. (25 FSU total)
Row 23 (RS): Ch 5, dc into first dc, ch 2, (Fan Shell into center sp, ch 2) across all 25 FSU, (dc, ch 2, dc) into t-ch top, turn. (25 FSU, 2 edge V-sts)
Row 24 (WS): Ch 3, dc into edge ch-2 sp, ch 1, (Fan Shell into center sp of FSU, ch 1, dc into ch-2 arch, ch 1) across, dc into last ch-2 sp, dc into t-ch top, turn. (25 FSU, 26 single-dc markers)
Row 25 (RS): Ch 5, dc into first dc, (ch 2, Fan Shell into center sp of FSU, ch 2, V-st into next dc) across to last FSU, ch 2, Fan Shell into last FSU center sp, ch 2, (dc, ch 2, dc) into t-ch top, turn. (25 FSU, 24 V-sts, 2 edge V-sts)
Row 26 (WS): Ch 3, 2 dc into edge sp, (ch 2, Fan Shell into center of each FSU, ch 2, Fan Shell into ch-2 sp of each V-st) across to add new FSUs, ch 2, 2 dc into last edge sp, dc into t-ch top, turn. (49 FSU)
Row 27 (RS): Ch 5, dc into first dc, ch 2, (Fan Shell into center sp, ch 2) across all 49 FSU, (dc, ch 2, dc) into t-ch top, turn. (49 FSU, 2 edge V-sts)
Row 28 (WS): Ch 3, dc into edge sp, ch 1, (Fan Shell into center sp of FSU, ch 1, dc into arch between FSUs, ch 1) across, dc into last edge sp, dc into t-ch top, turn. (49 FSU, single-dc bridges)
Row 29 (RS): Ch 4 (counts as tr), tr into same st, ch 3, sc into center sp of first FSU, ch 3, (2 tr into bridge dc, ch 3, sc into center sp of next FSU, ch 3) across, 2 tr into last edge sp, turn. (49 sc, 50 pairs of 2-tr)
Row 30 (WS): Ch 1, sc into first 2-tr pair, ch 4, (sc into next sc, ch 4) across, sc into top of last 2-tr, turn. (50 sc, 49 ch-4 arches)
Checkpoint after Row 30: Your piece should measure approximately 13 inches (33 cm) from foundation, and approximately 48 inches (122 cm) wide. You should have 49 Fan Shell units represented through the arch structure.
Section 4: Scallop Hem Preparation (Rows 31-34)
Row 31 (RS): Ch 1, sc into first sc, (ch 3, Fan Shell into 3rd ch of ch-4 arch, ch 3, sc into next sc) across, turn. (49 FSU, 50 sc)
Row 32 (WS): Sl st across to center sp of first FSU, ch 3, work Fan Shell into center sp, ch 3, sc into sc between FSUs, ch 3, (Fan Shell into center sp of next FSU, ch 3, sc into sc, ch 3) across, sl st into last sc, turn. (49 FSU)
Row 33 (RS): Ch 1, sc into sl st, (ch 3, sc into each ch-1 sp of FSU fan, ch 3, sc into connector sc) across, turn. (245 ch-3 arches total, 50 edge/connector sc)
Row 34 (WS): Ch 1, sc into first st, (ch 3, sc into next ch-3 sp) across, working 1 sc + 1 picot at each arch, ending sc into last st, turn.
Scallop Edging
After Row 34, do not turn. Rotate work to begin edging across the live lower hem edge.
Edging Row 1: Ch 1, sc into first st, (ch 4, skip 2 arches, sc into next arch) across lower hem, turn. (Approximately 82 ch-4 arches)
Edging Row 2: Ch 3, (4 dc + picot + 4 dc) all into each ch-4 arch across, sc into last sc. Fasten off. (82 scallop shells)
Neck and Front Edge Finishing
With RS facing, join yarn at back neck center of foundation ring.
Round 1: Ch 1, sc evenly across the back neck chain, down the right front edge to the hem point, sc into the corner picot, then sc evenly up the left front edge back to the center, join with sl st. Do not fasten off.
Round 2: Ch 1, sc into each sc, working (sc, ch 2, sc) at the two bottom front corner points to prevent pulling, join with sl st.
Round 3: Sl st into each st, working a picot into every 5th st around the front and neck edges. Fasten off.
Beaded Fringe Instructions
Pre-string beads: Cut 3 strands of yarn each 10 inches (25.5 cm) long per fringe bundle. Fold each bundle in half to form 5-inch (12.5 cm) hanging lengths. Thread 5 beads onto each strand: 1 bead at the fold point and 1 bead every 0.75 inches (2 cm) down each strand, securing each bead with an overhand knot below it.
Attachment: Using a crochet hook, pull the folded loop of each bundle through the picot at the base of every other scallop shell along the hem edging, then pass the tails through the loop and pull to secure. Attach fringe to every other picot tip across the full hem. Approximately 41 bundles total.
Trim all fringe ends evenly at 4.5 inches (11.5 cm) below the hem edge.
Rose Brooch Instructions
The rose is worked in a continuous spiral of increasing double crochet petals.
Foundation: Ch 6, sl st to first ch to form ring.
Round 1: Ch 1, 12 sc into ring, sl st to first sc. (12 sc)
Round 2: Ch 3, dc into same st, 2 dc into each sc around, sl st to top of ch-3. (24 dc)
Round 3: Ch 1, sc into first dc, ch 5, sk 2 dc, (sc into next dc, ch 5, sk 2 dc) around, sl st to first sc. (8 ch-5 arches)
Round 4: Into each ch-5 arch work (sc, hdc, 3 dc, hdc, sc) to form 8 small petals. Sl st to first sc. (8 petals)
Round 5: Working behind petals of Round 4, sl st into skipped dc of Round 2, ch 6, sk 2 dc behind petals, (sl st into next dc, ch 6, sk 2 dc) around. (8 ch-6 arches behind petals)
Round 6: Into each ch-6 arch work (sc, hdc, 5 dc, hdc, sc) to form 8 medium petals. Sl st to first sc. (8 petals)
Round 7: Working behind Round 6 petals, sl st into base st of Round 5, ch 7, (sl st into next base st, ch 7) around. (8 ch-7 arches)
Round 8: Into each ch-7 arch work (sc, hdc, 7 dc, hdc, sc) to form 8 large petals. Sl st to first sc. (8 petals)
Fasten off, leaving an 18-inch (46 cm) tail.
Rose finishing: Coil the rose gently from the outside inward, allowing the petals to fold naturally into a rounded shape. Secure the base with the tail by running the yarn through the back layers several times. Sew pin back to the wrong side if desired.
Attach the rose to the center front V-opening of the shawl by sewing through the back layers with the tail, or use the attached pin back to clip it in place.
Size Customization Tips
To make the shawl wider: Add additional Fan Shell units in Section 1 by working more increase rows before transitioning to Section 2. Each additional FSU adds approximately 0.7 inches (1.8 cm) to the overall width.
To make the shawl longer: Add one or two additional rows of the fan shell and arch pattern in Section 3 before beginning Section 4. Each added arch row adds approximately 0.5 inches (1.3 cm) of length.
To shorten for a collar-like look: Eliminate Rows 26 through 30 and proceed directly from Row 25 to the scallop hem section. This produces approximately 49 fewer FSU and reduces the width by 10 to 12 inches (25 to 30 cm).
Blocking and Finishing
This piece requires wet blocking for best results.
Step 1: Hand wash the finished shawl gently in cool water with a small amount of wool wash or mild soap. Press out excess water in a clean towel without wringing.
Step 2: Lay the shawl flat on blocking mats. Pin the neck edge in a straight horizontal line. Pin the two front edges downward at a 45-degree angle from the neck center. Pin the back center point downward to achieve the correct semicircular silhouette.
Step 3: Pin each scallop along the hem edge to open the points fully. Leave fringe hanging freely downward.
Step 4: Allow to dry completely (12 to 24 hours). Remove pins.
The lace pattern will open dramatically after blocking, revealing the full fan and pineapple motifs.
Care Instructions
Machine wash delicate cycle in a mesh laundry bag, cold water, if using cotton thread. Hand wash only in cold water if using silk or silk-blend yarn. Lay flat to dry and do not tumble dry. Do not iron directly. Steam lightly if needed, holding iron 2 inches above the fabric. Store flat or rolled, not folded sharply, to avoid creasing the lace motifs. Remove rose brooch before washing if it contains a metal pin back.
You Did It!
Thank you so much for choosing this elegant lace rose shawl crochet pattern for your next project. I know this one takes time and focus, but the finished piece is absolutely worth every hour you invest. The combination of fan shells, pineapple motifs, and that gorgeous beaded fringe creates something truly special.
I would absolutely love to see your finished shawl! Tag me on Instagram or share a photo in our Facebook group. Seeing your beautiful work makes my whole day.
If this pattern caught your eye, go ahead and save it to your Pinterest boards so you can find it easily when you are ready to start. And please drop a comment below if you make this shawl. I would love to hear how it turns out for you!
