
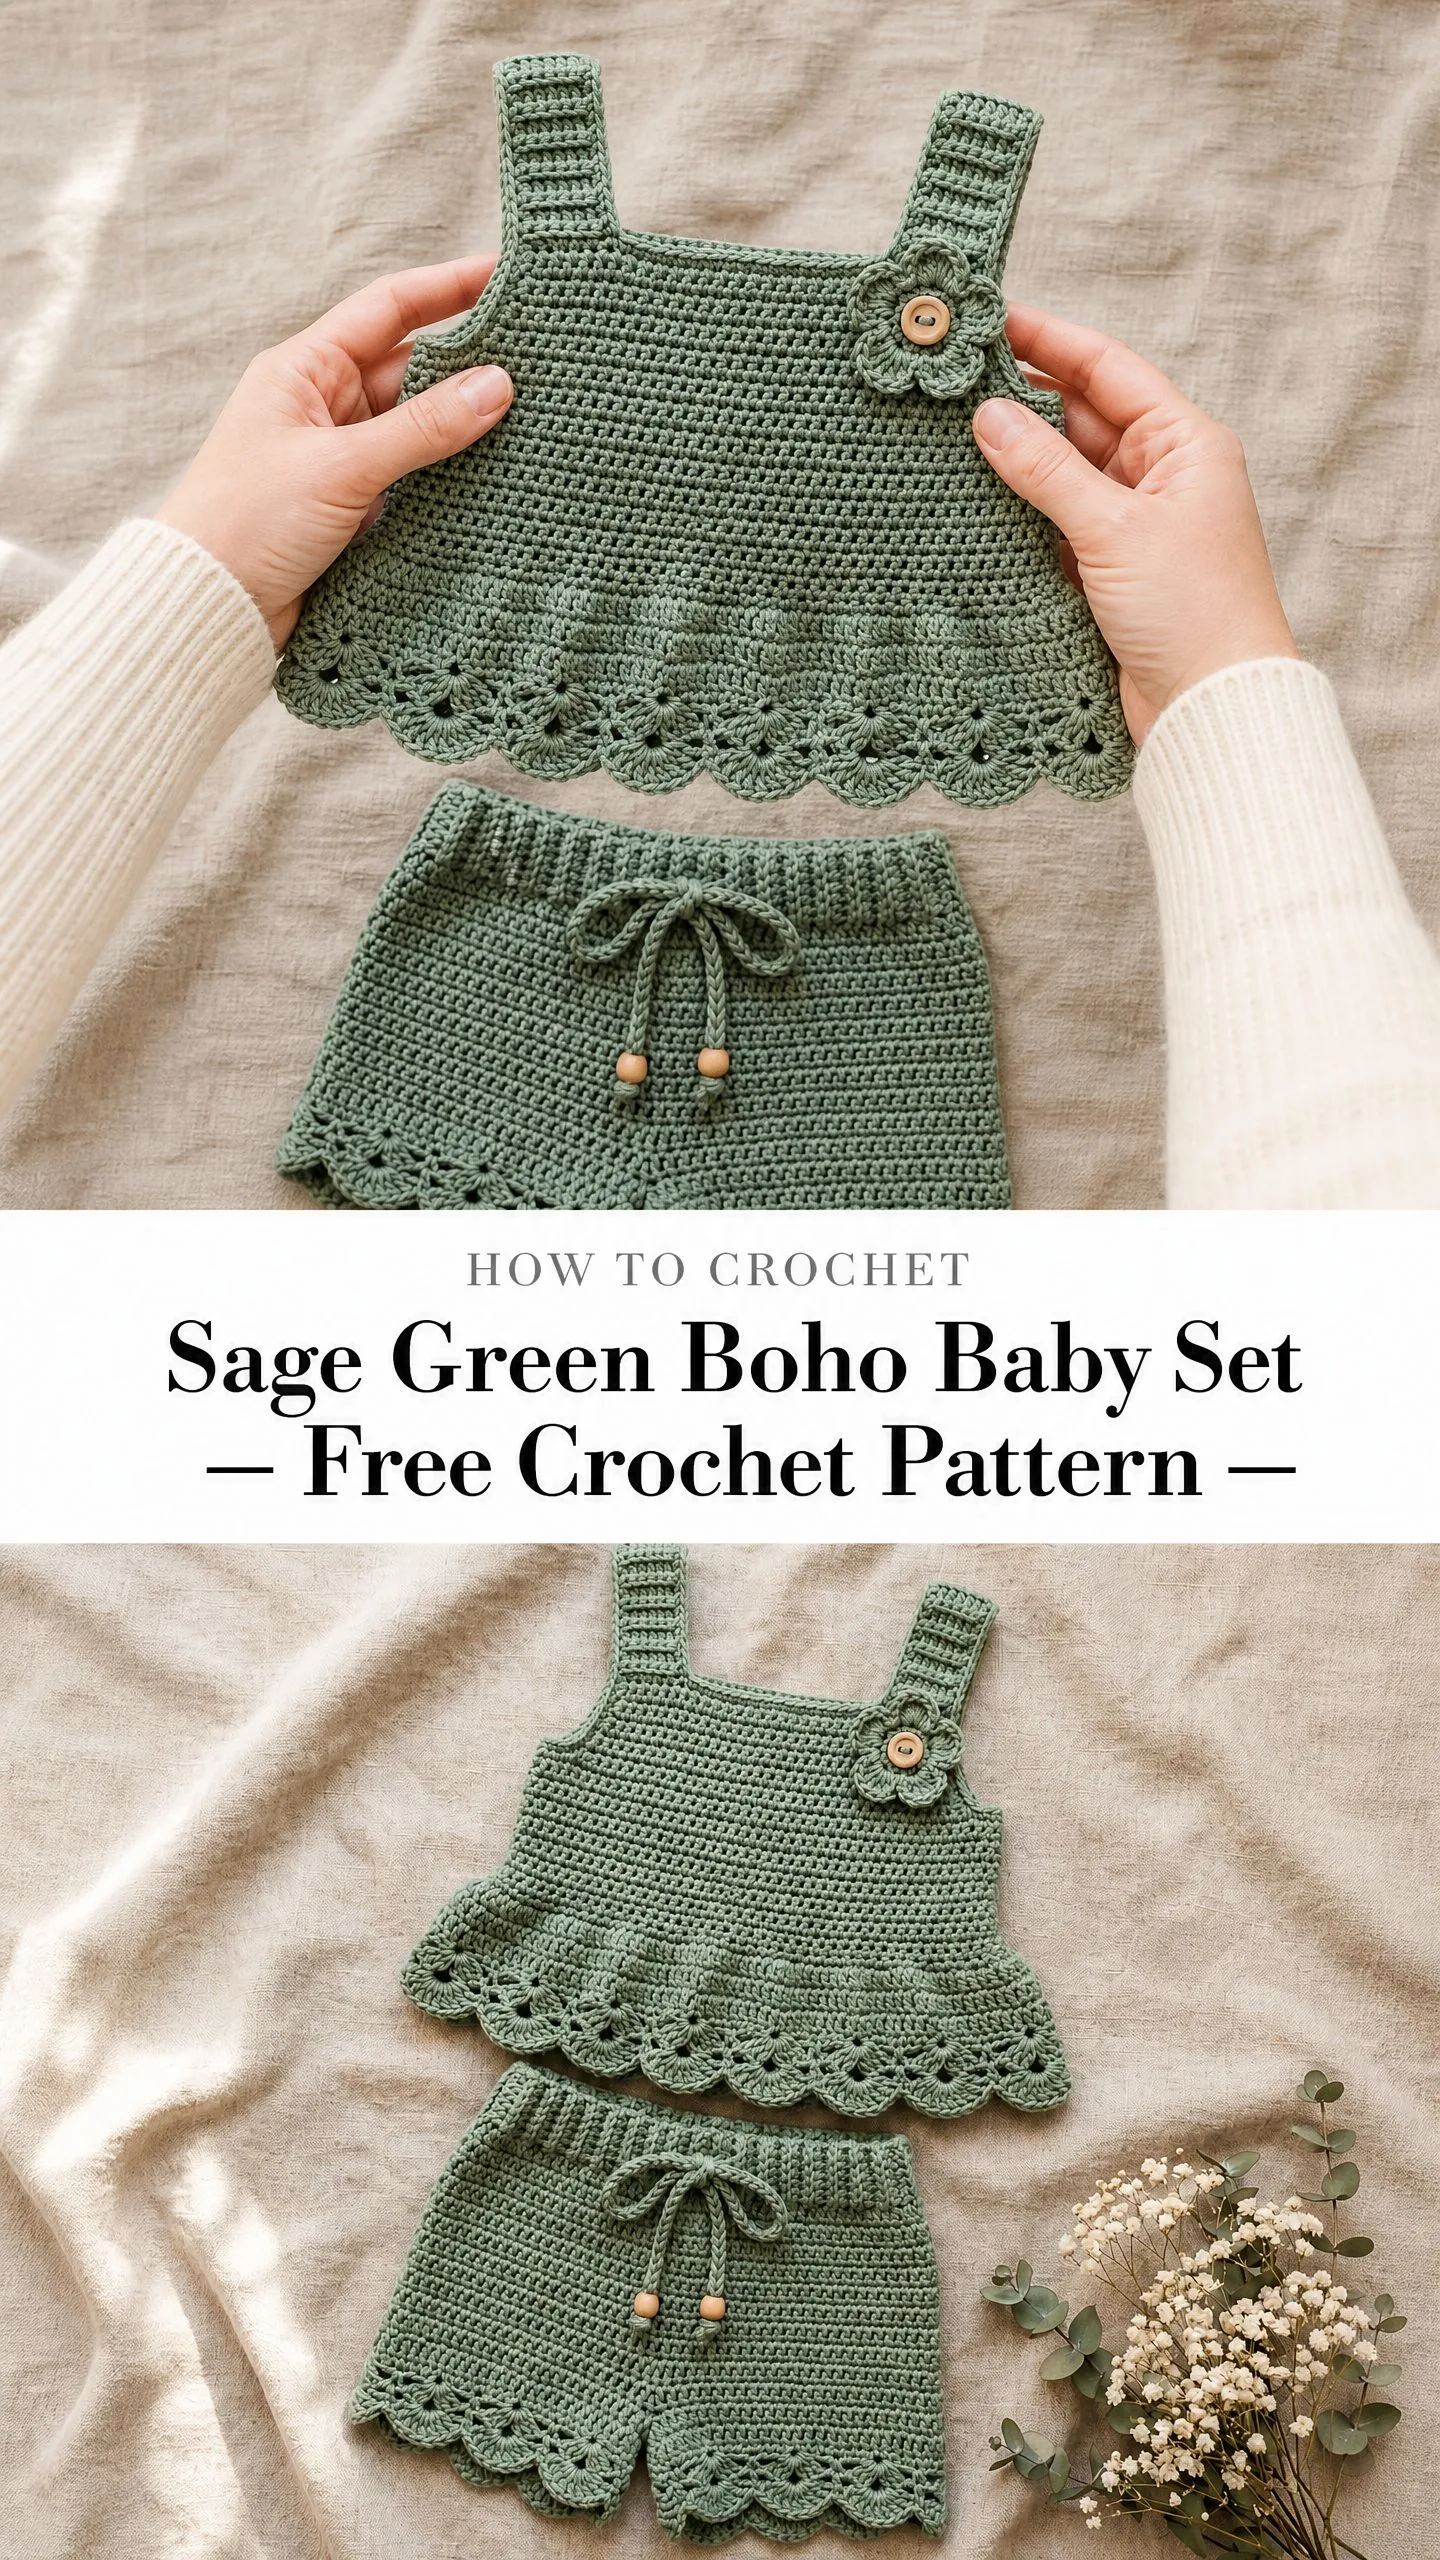
I call this one the "Garden Party Set" because it reminds me of those lazy summer afternoons spent on a blanket with little ones crawling around in the grass. This pattern has been living in my notebook for almost two years now. I originally designed it for my niece’s first birthday, wanting something that felt handmade and special but also practical enough for her to actually wear. The scalloped edges and that tiny flower detail made my sister cry when she opened the gift box.
After dozens of requests from friends and family who saw photos, I finally sat down to write out every single stitch. I tested it across four sizes and worked through the math more times than I can count to make sure those scallop shells land perfectly every time.
If you have been searching for a matching baby outfit that looks boutique-worthy but works up in a weekend, this is the one. The construction is clever but not complicated, and the finished set photographs beautifully for those milestone pictures.
Why This Boho Baby Set Works So Well
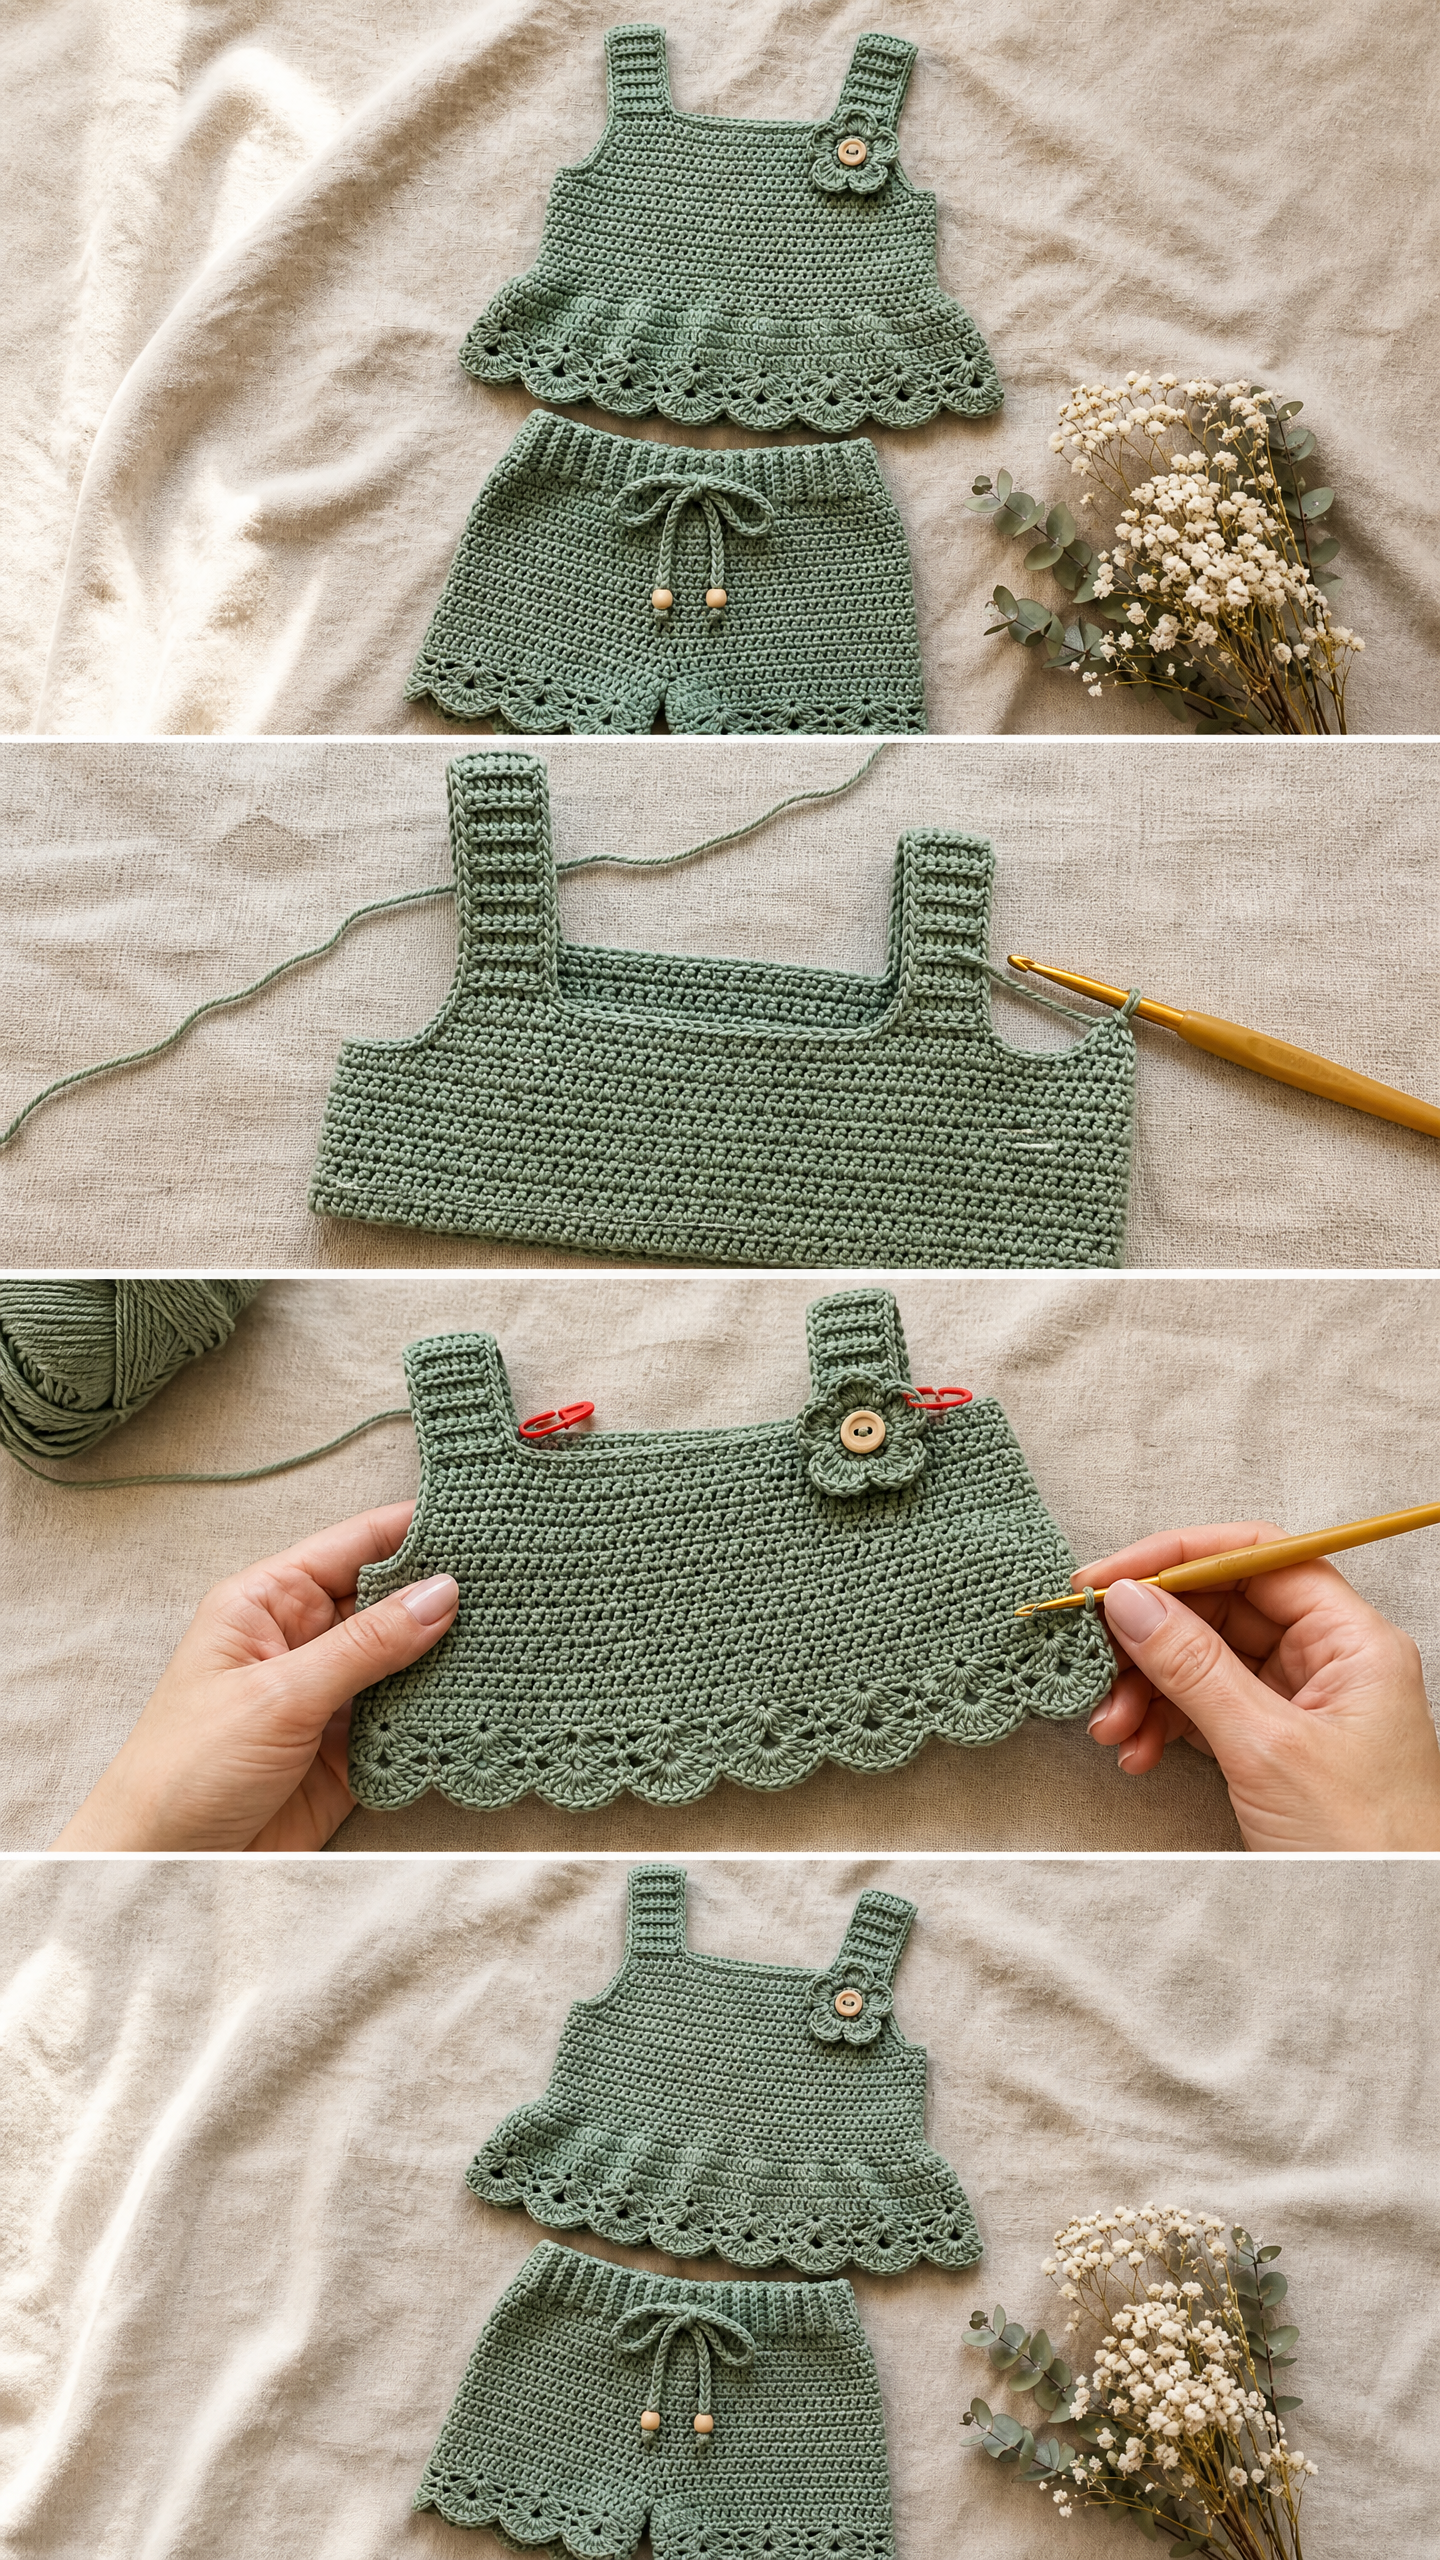
This two-piece set includes a sleeveless top with wide ribbed straps and matching pull-on shorts. Both pieces feature a gorgeous scalloped lace hem that gives the whole outfit a bohemian, vintage feel. The top has a sweet crochet flower embellishment with a wooden button center, and the shorts have a braided drawstring with wooden bead tips at the waist.
What I love most about this design is how the construction makes sense. The top is worked from the straps down, which means you can try it on as you go and adjust the length easily. The shorts start with a ribbed waistband worked flat, then you join it into a tube and work down to the legs. No complicated seaming, no confusing assembly at the end.
The sage green color in the photos is absolutely perfect for spring and summer babies, but this pattern works beautifully in any solid color. I have seen it made in dusty rose, butter yellow, and even a soft terracotta. Avoid variegated yarns though. The scallop stitch definition gets lost in busy color changes.
Skill Level and Time Investment
I would call this an intermediate pattern. You need to be comfortable working in the round, joining separate pieces, and following a multi-step lace edging. If you have completed a few basic projects and feel ready to level up, this is a great choice.
The time investment is approximately 8 to 12 hours total for both pieces in the 6 to 12 month size. I usually work the top in one sitting over a movie night and tackle the shorts the next day. The flower takes maybe 10 minutes and is oddly satisfying to make.
Finished Sizes for This Crochet Baby Set
This pattern includes four sizes to fit babies from newborn through toddler age.
Size 0 to 3 months: Top chest circumference 14 inches, top length 7 inches. Shorts waist circumference unstretched 13 inches, shorts length 6 inches.
Size 6 to 12 months: Top chest circumference 16 inches, top length 8 inches. Shorts waist circumference unstretched 15 inches, shorts length 7 inches.
Size 12 to 18 months: Top chest circumference 17 inches, top length 8.5 inches. Shorts waist circumference unstretched 16 inches, shorts length 7.5 inches.
Size 18 to 24 months: Top chest circumference 18 inches, top length 9 inches. Shorts waist circumference unstretched 17 inches, shorts length 8 inches.
The pattern is written for size 6 to 12 months throughout, with changes for other sizes shown in parentheses in this order: 0 to 3 months, 6 to 12 months, 12 to 18 months, 18 to 24 months.
Materials You Will Need
Yarn: DK weight yarn, approximately 200 to 280 yards total for both pieces, in sage green. DK weight (sometimes called light worsted or 8-ply) is that perfect middle-ground thickness that creates nice stitch definition without being too heavy for baby skin.
Recommended yarns:
Hooks: US size E-4 (3.5 mm) for body sections and US size D-3 (3.25 mm) for ribbed waistband and straps. Using the smaller hook for the ribbing creates that nice stretchy texture.
Notions: 4 stitch markers, yarn needle, scissors, one wooden button approximately 15 mm diameter for the flower, two wooden beads for drawstring ends, approximately 20 inches of braided cord for drawstring (or make your own from project yarn).
Gauge Swatch Information
18 single crochet stitches and 22 rows equals 4 inches, worked in single crochet, blocked, using the E-4 hook.
I cannot stress this enough. Gauge matters for garments. A swatch that is even half a stitch off per inch will throw your sizing completely. Make the swatch, measure it, and adjust your hook size if needed. Go up a hook size if your swatch is too small, down if it is too big.
Abbreviations and Stitch Definitions
Let me walk you through every abbreviation used in this pattern. I define each one on first use so you never have to guess.
ch (chain): The foundation stitch. Yarn over, pull through the loop on your hook.
sl st (slip stitch): Insert hook, yarn over, pull through both the stitch and the loop on your hook in one motion. Used for joining rounds.
sc (single crochet): Insert hook into stitch, yarn over and pull up a loop (two loops on hook), yarn over and pull through both loops. This is the main stitch for the body sections.
hdc (half double crochet): Yarn over, insert hook, pull up a loop (three loops on hook), yarn over and pull through all three loops.
dc (double crochet): Yarn over, insert hook, pull up a loop, yarn over and pull through two loops, yarn over and pull through remaining two loops. Used in the scallop edging.
sk (skip): Pass over the indicated number of stitches without working into them.
st/sts (stitch/stitches): The individual units of fabric you are working into.
BLO (back loop only): Instead of inserting your hook under both loops at the top of a stitch, insert under only the back loop. This creates the ribbed texture.
FLO (front loop only): Insert under only the front loop. Used when creating the ruffle effect.
inc (increase): Work 2 single crochet stitches into the same stitch.
sc2tog (single crochet two together): A decrease. Insert hook into next stitch, yarn over, pull up a loop. Insert hook into following stitch, yarn over, pull up a loop. You now have three loops on your hook. Yarn over and pull through all three loops at once.
Special Stitches Explained
Scallop Shell Stitch
This creates those beautiful fan-shaped scallops along the hem edges. It works over a multiple of 6 stitches plus 1.
Here is how it works: Single crochet in the first stitch. Skip the next 2 stitches. Work 5 double crochet all into the next stitch (this forms the shell or fan shape). Skip 2 stitches. Single crochet in the next stitch. Repeat this sequence across. At the end of the round, join with a slip stitch to the first single crochet.
The result is a row of rounded fan scallops separated by single crochet anchors. It looks impressive but becomes rhythmic once you get going.
Crochet Flower
This sweet little embellishment is worked in the round.
Round 1: Make a magic ring. Chain 1, work 6 single crochet into the ring, join with slip stitch to first single crochet. (6 sc)
Round 2: Chain 1. In each single crochet, work the following petal sequence: slip stitch into the stitch, chain 3, work 3 double crochet into the same stitch, chain 3, slip stitch into the same stitch. Join with slip stitch after the last petal. (6 petals)
Fasten off leaving a 10-inch tail for sewing. Thread a button through the center from the front before attaching to the garment.
Ribbing Technique
Ribbing is simply single crochet worked in the back loop only across every row, with a chain 1 and turn at the end of each row. This creates a stretchy, textured fabric perfect for straps and waistbands.
Pattern Instructions: The Top
Making the Straps (Make 2)
Using the smaller hook (D-3) and sage green yarn, chain 7.
Row 1 (RS): Single crochet in 2nd chain from hook and in each chain across. Turn. (6 sc)
Row 2: Chain 1, single crochet in back loop only across. Turn. (6 sc)
Repeat Row 2 until the strap measures 3 inches for size 0-3 months, 3.5 inches for size 6-12 months, 3.75 inches for size 12-18 months, or 4 inches for size 18-24 months.
For size 6 to 12 months, this is approximately 19 rows of ribbing. Fasten off the first strap. Do not fasten off the second strap. Leave it attached to continue joining.
Joining Straps and Forming the Chest Panel
With the right side facing and using the larger hook (E-4), begin at one short end of one strap. You will pick up stitches along the long edge of each strap and chain across the back to connect them.
Setup Row: With yarn attached to the second strap (the one you did not fasten off), rotate the strap so the long edge faces you. Work 1 single crochet evenly into each row-end along one long edge of the second strap. (19 sc for size 6-12 months)
Chain 13 for size 0-3 months, 15 for size 6-12 months, 16 for size 12-18 months, or 17 for size 18-24 months. This creates the back panel bridge between straps.
Now work 1 single crochet evenly into each row-end along one long edge of the first strap. (19 sc for size 6-12 months)
For size 6 to 12 months, you now have 53 stitches across the top of the garment: 19 sc from strap 1 plus 15 chains for the back bridge plus 19 sc from strap 2.
Chest Panel and Body
Turn work so the right side faces up.
Row 1 (RS, front): Chain 1, single crochet across all stitches including into each chain of the bridge. Turn. (53 sc for size 6-12 months)
Row 2: Chain 1, single crochet across. Turn. (53 sc)
After Row 2 of the chest panel, do not turn. Instead, chain 1 and slip stitch into the first single crochet of Row 1 to join into a round. The piece now forms a rectangular tube with the straps at the top.
Round 1: Chain 1, single crochet in each stitch around the full circumference of the tube. For size 6 to 12 months, the circumference at this point is 72 single crochet. Join with slip stitch. (72 sc)
Round 2: Chain 1, single crochet in each single crochet around. Join. (72 sc)
Repeat Round 2 until the body measures 3.5 inches for size 0-3 months, 4 inches for size 6-12 months, 4.25 inches for size 12-18 months, or 4.5 inches for size 18-24 months from the underarm join to the last round.
For size 6 to 12 months, this is approximately 22 rounds of single crochet from the underarm.
Ruffle Preparation
The stitch count on the final round must be a multiple of 6 plus 1 for the scallop edging to work correctly.
Final Body Round (increase round): Chain 1, single crochet in first 35 single crochet, work 2 single crochet in next stitch (increase), single crochet in each remaining stitch around. Join. (73 sc)
Scallop Ruffle Edging
Round 1 (Ruffle, worked in front loops only): Do not turn. Chain 1. Working in front loop only of each single crochet on the final body round: Single crochet in first stitch, (skip 2 stitches, 5 double crochet in next stitch, skip 2 stitches, single crochet in next stitch) 12 times. Join with slip stitch to first single crochet. (12 scallop shells complete)
Fasten off and weave in the end.
Flat Underlay Edging
Rejoin yarn to any back loop of the final body round.
Round 1 (Underlay): Chain 1, single crochet in each back loop around. Join. (73 sc)
Fasten off and weave in the end. The ruffle fans forward while the underlay lies flat beneath it, creating that lovely peplum appearance.
Pattern Instructions: The Shorts
Making the Waistband
Using the smaller hook (D-3) and sage green yarn, chain 11.
Row 1: Single crochet in 2nd chain from hook and in each chain across. Turn. (10 sc)
Row 2: Chain 1, single crochet in back loop only across. Turn. (10 sc)
Repeat Row 2 until the ribbed waistband strip measures 13 inches for size 0-3 months, 15 inches for size 6-12 months, 16 inches for size 12-18 months, or 17 inches for size 18-24 months when gently stretched. For size 6 to 12 months, this is approximately 68 rows.
Fold the waistband strip so the short ends meet. Slip stitch through both ends together to join into a ring. Do not fasten off.
Creating the Drawstring Channel
Rotate the waistband so the long edge faces you (this will be the top of the shorts). Using the larger hook, join yarn at the seam.
Round 1: Chain 1, single crochet evenly around the top long edge of the waistband, placing 1 single crochet per row-end. For size 6 to 12 months, this produces 68 single crochet. Join with slip stitch. (68 sc)
Round 2 (eyelet round for drawstring): Chain 3 (counts as double crochet), double crochet in next single crochet, (chain 1, skip 1 single crochet, double crochet in next 2 single crochet) around, ending chain 1, skip 1, join with slip stitch to top of beginning chain-3.
Round 3: Chain 1, single crochet in each double crochet and 1 single crochet in each chain-1 space around. Join. (68 sc)
Working the Shorts Body
Switch to the larger hook if not already using it.
Round 1: Chain 1, single crochet in each single crochet around. Join. (68 sc)
Repeat Round 1 for 10 more rounds for size 0-3 months, 12 for size 6-12 months, 13 for size 12-18 months, or 14 for size 18-24 months.
Splitting for the Legs
Setup Round: Chain 1, single crochet in first 34 single crochet, place marker in the last stitch worked (this marks the front crotch). Do not continue around. Turn.
The 34 single crochet just worked form the front of the shorts. The remaining 34 single crochet on hold form the back.
Working Leg One
Chain 3 for the crotch gusset. Skip to the other side (the back 34 stitches). Single crochet across the 34 back stitches, then single crochet into the 3 chains of the bridge to close the leg into a round. Place marker and join.
Leg One Round 1: 34 single crochet (front) plus 3 single crochet (gusset) equals 37 single crochet per round. (37 sc)
Round 2 onward: Chain 1, single crochet in each single crochet around. Join. (37 sc)
Repeat until the leg measures 1.5 inches for size 0-3 months, 2 inches for size 6-12 months, 2.25 inches for size 12-18 months, or 2.5 inches for size 18-24 months from the crotch split.
Leg One Scallop Edging
Round 1: Chain 1, single crochet in first stitch, (skip 2, 5 double crochet in next stitch, skip 2, single crochet in next stitch) 6 times. Join. (6 scallop shells)
Fasten off and weave in the end.
Working Leg Two
Rejoin yarn at the crotch bridge on the opposite side (the remaining 34 stitches of the body back that were skipped during Leg One).
Round 1: Chain 1, single crochet in each of the 34 remaining single crochet of the back, then single crochet in each of the 3 chains of the existing crotch bridge (working into the underside). Join. (37 sc)
Work the same number of rounds as Leg One, then add the scallop edging exactly as you did for Leg One.
Making the Flower Embellishment
Follow the crochet flower instructions from the special stitches section. Thread the wooden button through the center of the flower from front to back. Using the tail, sew the flower with the button to the left strap of the top (as worn) at the point where the strap meets the body. Tack through both the flower base and button holes securely.
Creating the Drawstring
Cut 3 lengths of yarn, each 30 inches long. Fold all three in half. Attach the folded midpoint to a safety pin or bobby pin. Braid or twist the strands until you have a cord approximately 20 inches long. Knot each end. Thread one wooden bead onto each end and tie a final overhand knot below the bead to secure.
Thread the drawstring through the eyelet round of the waistband, beginning and ending at center front. Adjust so both bead ends hang evenly.
Finishing and Blocking Your Baby Set
Weave in all ends securely using a yarn needle. Work the ends through several stitches in different directions before trimming.
Wet block both pieces by soaking in cool water for 10 to 15 minutes. Gently press out excess water without wringing. Lay flat on a blocking mat or clean towel. Pin the scallop edging scallops open to their full width and allow to dry completely.
Blocking makes a huge difference with this pattern. It really opens up those scallop fans and gives the whole set that professional, finished look.
Care Instructions
Hand wash in cool water with gentle soap. Do not wring or twist. Press gently between clean towels to remove excess moisture and lay flat to dry. If your specific yarn is labeled machine washable, use a delicate cold cycle in a mesh laundry bag. Avoid high heat in the dryer. Store folded rather than hung to preserve the shape.
Tips for Customizing Sizes
To size up or down beyond the written sizes, measure the baby’s chest circumference and add 1 to 2 inches for ease. Divide your desired chest circumference by your gauge (stitches per inch) to determine how many stitches to work across the chest panel.
Remember that the scallop edging requires a stitch count of 6n plus 1, so round your final body stitch count to the nearest number that fits this formula. For the shorts waistband, multiply the desired waist circumference by your stitch gauge, then subtract 10 to 15 percent for negative ease in the stretchy ribbing.
To lengthen either piece, simply add more rounds before the scallop edging. Each additional round adds approximately 0.18 inches of length at the given gauge.
Final Thoughts on This Crochet Baby Set Pattern
This Garden Party Set has become one of my most requested patterns, and I think you will see why once you complete your first set. The scallop detail is just stunning, and the matching pieces make for an unforgettable baby gift or photo outfit.
Thank you so much for choosing this pattern. I hope you enjoy every stitch. If you make this set, I would absolutely love to see your finished project. Tag me on Instagram or share in our Facebook group. Seeing your color choices and happy babies wearing these little outfits makes my whole week.
If this pattern is going on your must-make list, go ahead and pin it to your favorite Pinterest board so you can find it when you are ready to cast on. And please drop a comment below if you make this set. I read every single one and love hearing which sizes and colors you chose!
