
A sturdy market tote is one of those projects that pulls its weight long after you weave in the last end. This one keeps groceries corralled, library books organized, and craft supplies contained. It earns its spot on your hook.
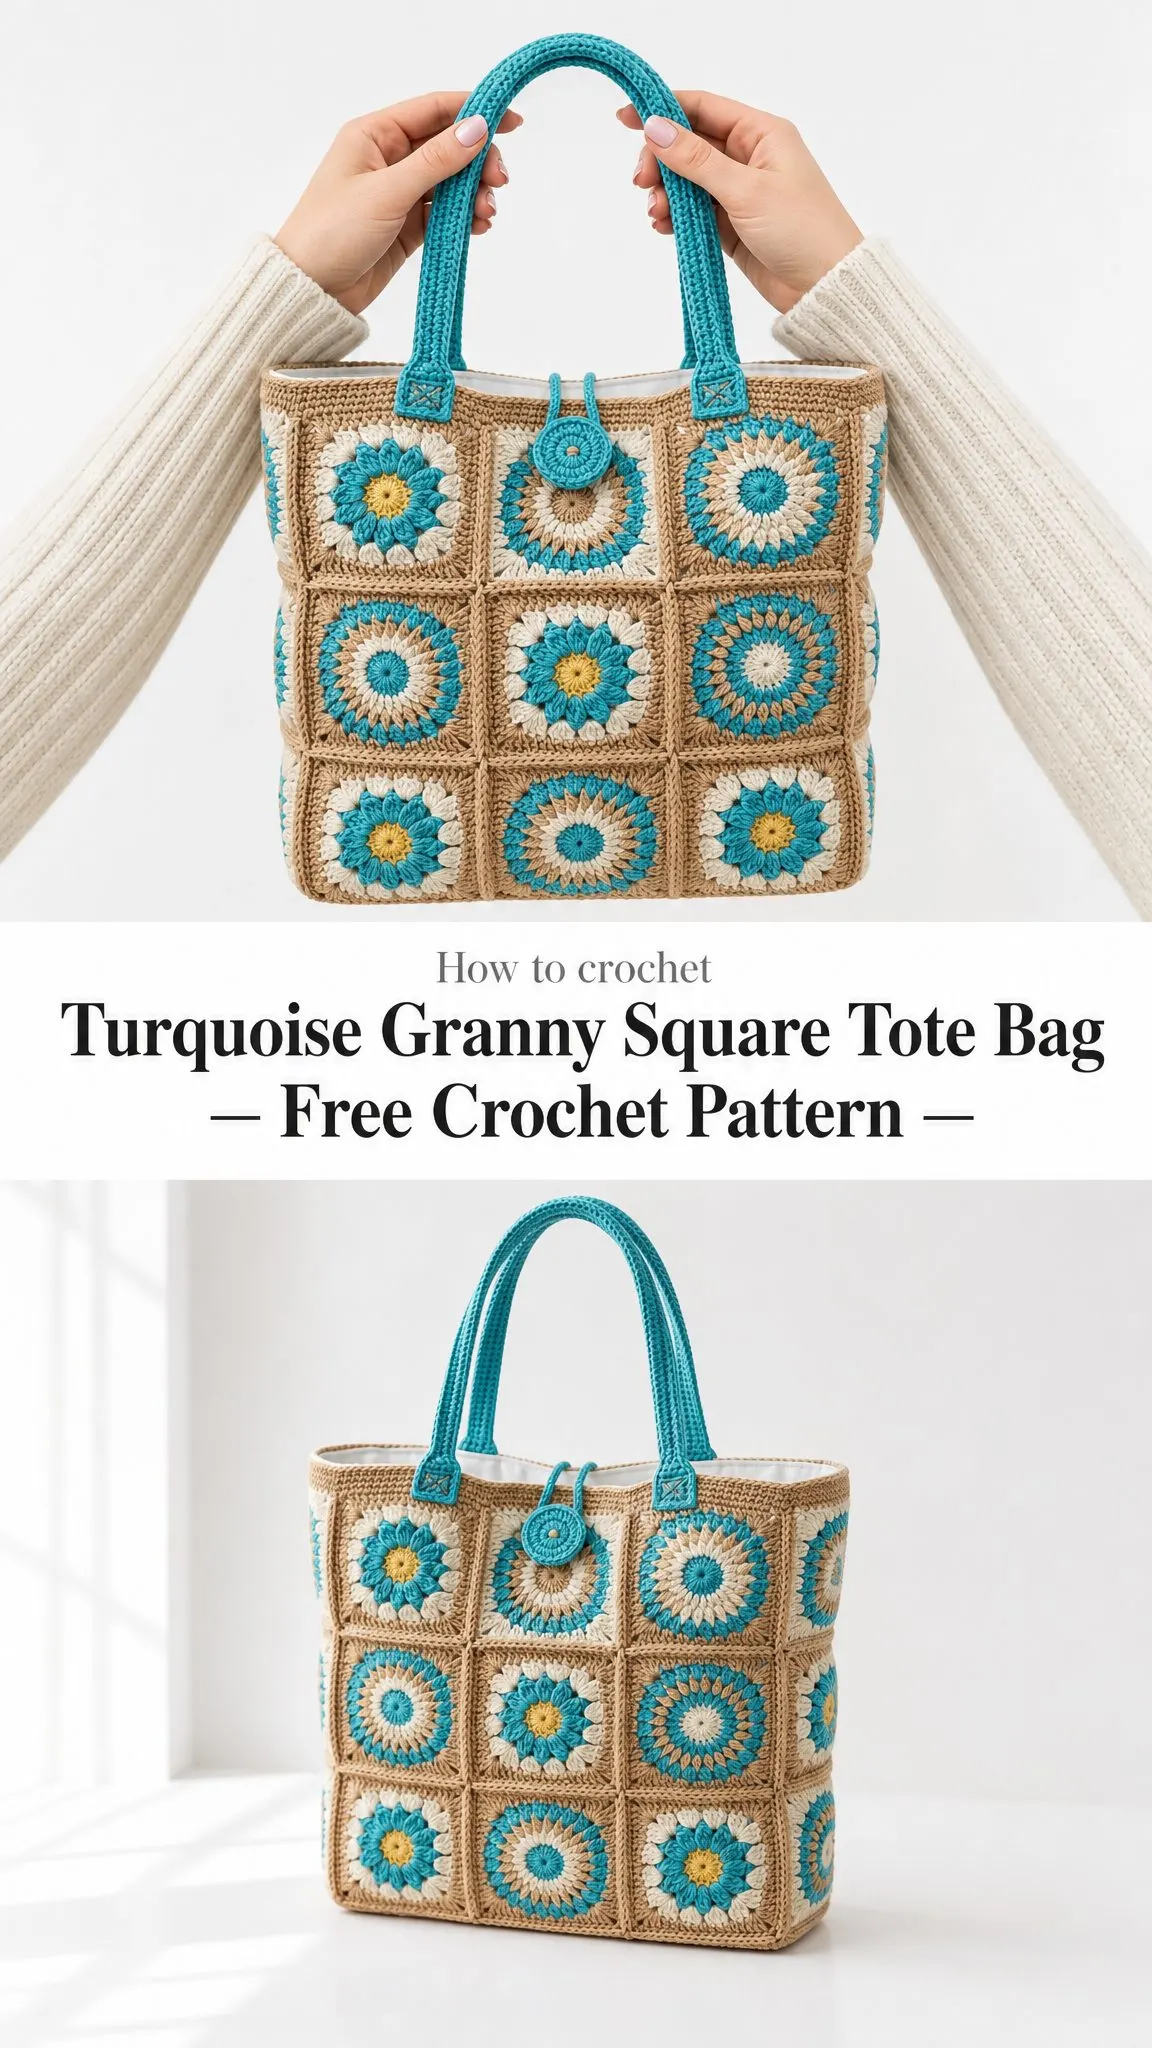
This sunburst granny square tote works up in firm aran-weight cotton using double crochet (dc), single crochet (sc), and a simple corner cluster technique. The construction is straightforward: you make 24 individual squares, join them into a tube, attach a solid base, then add rope-style handles and a button loop closure. The whole bag measures 12 by 12 by 4 inches when finished.
If you need a handmade gift that looks impressive but follows a logical assembly process, this tote delivers. It takes 15 to 20 hours spread across a week or two, and the modular squares mean you can pick it up and put it down easily. Let me walk you through everything.
Why This Granny Square Tote Works So Well
The sunburst granny square at the heart of this design creates a beautiful floral motif with concentric rings of color. Each square uses all four yarn colors, building from a golden yellow center through cream and turquoise petals, finished with a tan border that frames the flower perfectly.
What makes this bag practical rather than floppy is the yarn choice. Firm cotton holds its shape under weight, and working at a slightly tighter tension than usual creates a dense fabric. The solid base panel adds stability on the bottom, so your tote stands upright even when empty.
The jute or tan color acts as a visual frame connecting all 24 squares into one cohesive piece. You can swap out the flower colors if you want a scrappier look, but keeping that outer border consistent ties everything together.
Materials You Will Need
Gather these supplies before you start. Having everything ready makes the process smoother.
Yarn (Aran or Worsted Weight Cotton):
Suggested Yarns: Paintbox Yarns Cotton Aran, Lily Sugar’n Cream worsted cotton, or Hobbii Rainbow Cotton 8/8. Any firm aran-weight cotton that produces a stiff structured fabric works well.
Hook: 4.0 mm (US G/6)
Notions:
Gauge: One sunburst square equals 4 inches or 10 centimeters. Rounds 1 through 2 should form a flat disc measuring 2 inches or 5 centimeters across.
Check your gauge before making all 24 squares. If your square measures larger, try a smaller hook. If smaller, try a larger hook.
Abbreviations and Special Stitches
This pattern uses US crochet terminology. UK equivalents are noted where they differ.
Special Stitches
Corner Cluster: Work (2 dc, ch 2, 2 dc) all in one stitch or space. This creates the four corners that transform each circle into a square.
Whip-Stitch Join: Hold two squares with right sides facing together. Using a tapestry needle and Color A, sew through the back loops of both edges. This creates a flat firm seam.
Pattern Notes
Each square is worked in joined rounds with the right side facing throughout. Change color at the join of each round and fasten off the old color. Weave in ends as you go. A tote has many yarn tails, and tidying as you work saves a marathon weaving session at the end.
The Sunburst Granny Square Pattern
Make 24 squares total. Each square uses all four colors.
Round 1 (Golden Yellow, Color D)
With Color D, make a magic ring. Chain 3 (this counts as your first dc), then work 11 dc into the ring. Join with a slip stitch to the top of the beginning ch-3. Pull the magic ring closed.
Stitch count: 12 dc
Fasten off Color D.
Round 2 (Cream, Color C)
Join Color C in any stitch. Chain 3, dc in the same stitch. Work 2 dc in each stitch around. Join with a slip stitch to the top of the ch-3.
Stitch count: 24 dc
Fasten off Color C.
Round 3 (Turquoise, Color B)
Join Color B in any stitch. Chain 3, dc in the next stitch. Work 2 dc in the next stitch, then dc in the next 2 stitches. Repeat from * around, working 2 dc in the last stitch. Join with a slip stitch.
You are making 8 increases evenly spaced around this round.
Stitch count: 32 dc
Fasten off Color B.
Round 4 (Tan, Color A)
Join Color A in any stitch. Work a corner cluster (2 dc, ch 2, 2 dc) in the next stitch, then dc in the next 7 stitches. Repeat from * 4 times total. Join with a slip stitch.
You now have a square with four distinct corners.
Fasten off Color A.
Repeat this entire square 23 more times for 24 squares total.
The Base Panel
A solid jute base gives the tote a flat stable bottom. This piece is worked flat in rows, and then the body attaches around it.
Using Color A (Tan) and your 4.0 mm hook:
Foundation: Chain 41. (40 working chains plus 1 turning chain)
Row 1: Single crochet in the 2nd chain from the hook and in each chain across. Turn.
Stitch count: 40 sc
Rows 2 through 13: Chain 1, sc in each stitch across. Turn.
Stitch count: 40 sc each row
Border Round: Do not fasten off. Chain 1 and work sc evenly around all four sides of the rectangle. Place 3 sc in each corner to help the piece lie flat. Join with a slip stitch.
Stitch count: 112 sc (40 + 16 + 40 + 16)
The finished base measures approximately 12 by 4 inches or 30 by 10 centimeters. This matches three squares along the front and back, and one square along each side.
Optional tip: For an even firmer ridged bottom, work the base rows in BLO (back loops only).
Joining the Body
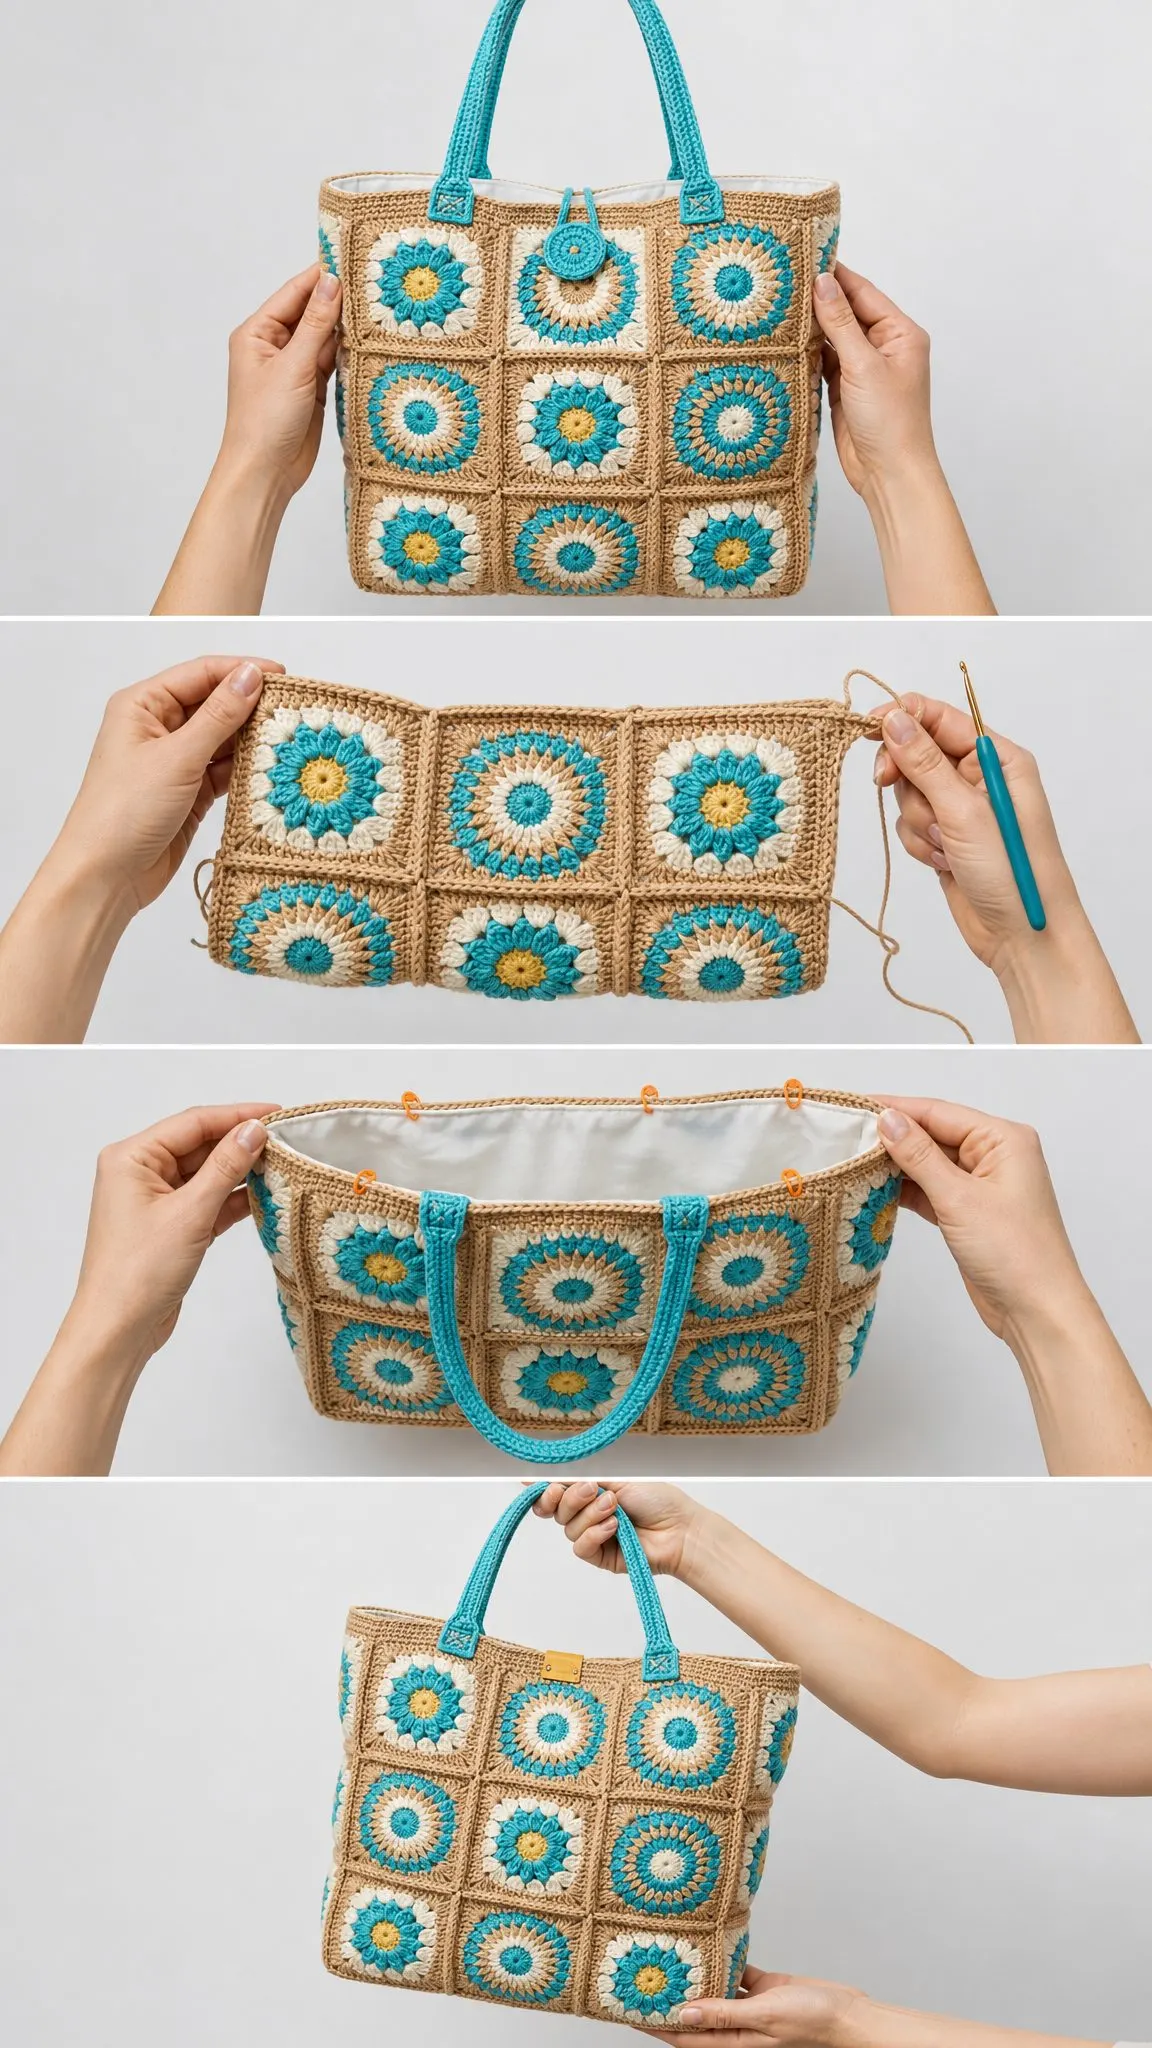
The 24 squares join into a ring that is 8 squares wide and 3 squares tall, then attach to the base.
Step 1: Lay Out Your Squares
Arrange the squares in the order they will sit around the bag:
Front (3 squares) → Side (1 square) → Back (3 squares) → Side (1 square)
That gives you 8 squares around. Repeat this layout for 3 rows high. You will use all 24 squares.
Step 2: Join Into Horizontal Rows
Using the whip-stitch join (or sc join if you prefer), connect the 8 squares of each row side by side with Color A. Then close each row into a ring by joining the first and last squares.
Step 3: Stack the Rows
Join the three rings on top of one another to form a tube that is 8 squares around and 3 squares tall. Keep your tension even so the corners meet neatly.
Step 4: Attach the Base
Hold the tube’s lower edge and the base border together. Using Color A, single crochet through both layers all the way around. Join with a slip stitch and fasten off.
Stitch count: 112 sc around
Seam tip: Join through back loops only. This creates seams that lie flat on the outside and lets the jute lattice between squares stay crisp and visible.
Top Edge, Handles, and Closure
Top Edge
With Color A (Tan), join at the top edge of the bag. Work sc evenly around the entire opening. Join with a slip stitch. Work 1 more round of sc. Join and fasten off.
Stitch count: 128 sc per round
Handles (Make 2)
With Color B (Turquoise), chain 61. (60 working chains)
Row 1: Single crochet in the 2nd chain from the hook and across. Turn.
Rows 2 through 5: Chain 1, sc in each stitch across. Turn.
Stitch count: 60 sc per row
Fold the piece lengthwise so the long edges meet. Single crochet the long edges together to form a firm round strap. Fasten off, leaving a long tail for sewing.
Each handle measures approximately 20 inches or 51 centimeters.
Attaching the Handles
Sew each handle end firmly to the inside top edge of the bag. Position them across the second square in from each side, on both the front and back panels. Reinforce each attachment point with an X of stitches for durability.
Button Loop
With Color B (Turquoise), chain 14. Slip stitch into the first chain to form a loop. Sew this loop to the center top of the back edge.
Sew a matching button to the center top of the front edge.
Loop size: 14 chains
Finishing and Care Instructions
Finishing Steps
1. Weave in every remaining yarn end and trim close to the fabric.
2. Steam block or wet block the entire bag, gently easing it into a square shape. Let it dry stuffed with a towel to hold the form.
3. For extra structure, cut fabric lining to size and hand-sew it just below the top edge.
4. A cut-to-fit plastic or buckram base panel keeps the bottom rigid if desired.
Care Instructions
A Note About Cotton
Cotton yarn relaxes with use and weight over time. Working at a firm tension from the very beginning helps the tote hold its shape for years.
Customizing Your Tote Size
Every square is a 4 inch tile, so resizing is simple math.
For a bigger tote: Add a row of squares for more height. Or widen the front and back to 4 squares each and lengthen the base chain to 53 (which creates 52 sc rows wide).
For a smaller bag or clutch: Use 2 rows tall and 2 squares per face. Shorten the handles to approximately 12 inches or 30 centimeters.
If you change your gauge: A heavier yarn and larger hook produces larger squares. Recalculate your base as: (number of front squares × 10 stitches) + 1 chain. Base rows equal: (number of side squares × 10). Keep corners at 3 sc so the body sits square on the base.
Color play idea: Keep the tan (Color A) as your steady frame and swap the three flower colors for each square. This creates a scrappy garden-bright version with lots of variety.
Quick Reference Summary
I hope this tote becomes a favorite in your rotation. It is the kind of project that looks beautiful sitting by the door and works hard every time you grab it. If you make one, save this pattern to your Pinterest boards so you can find it again later. And please leave a comment below to share your finished bag. I would love to see which colors you chose!
