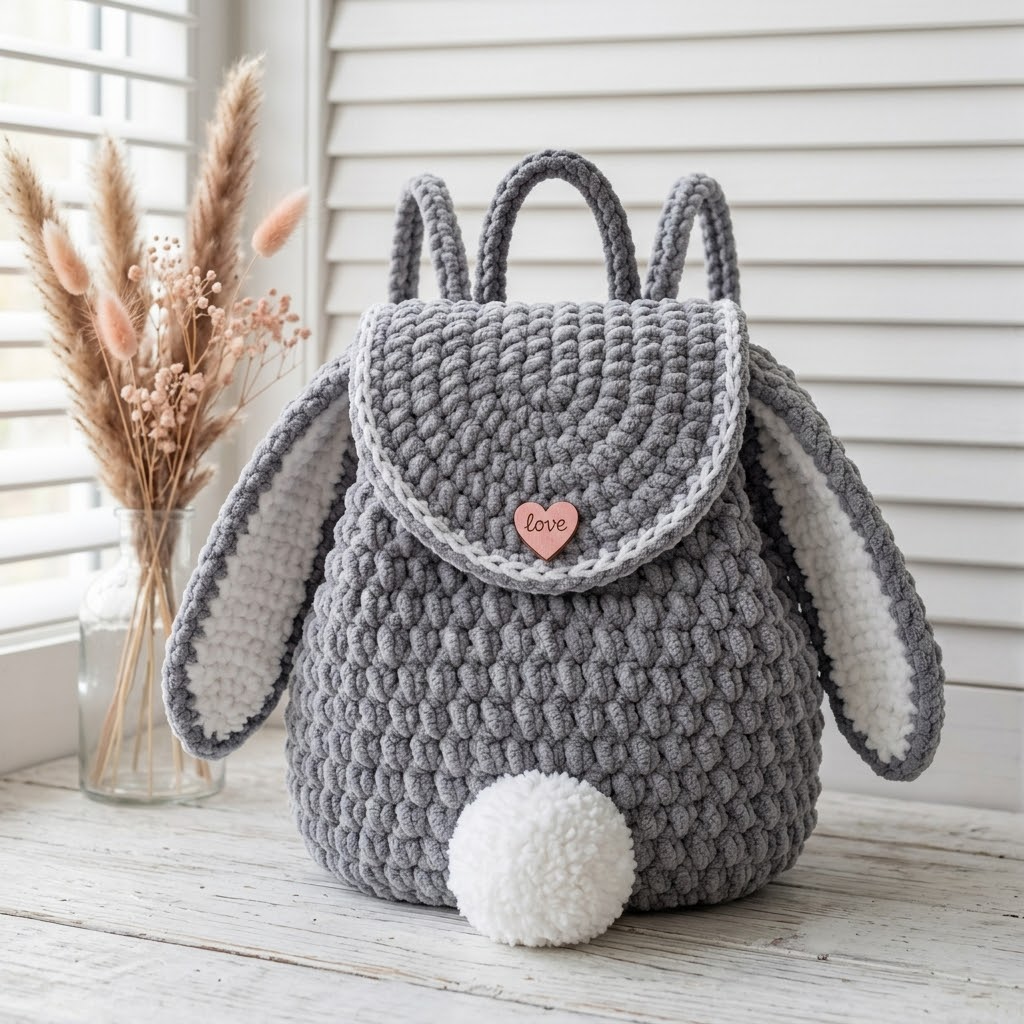
This adorable gray bunny ears backpack is one of those projects that looks impressive but comes together faster than you might think. The chunky yarn does most of the heavy lifting here. You end up with a sturdy, squishy bag that kids absolutely adore and adults secretly want for themselves.
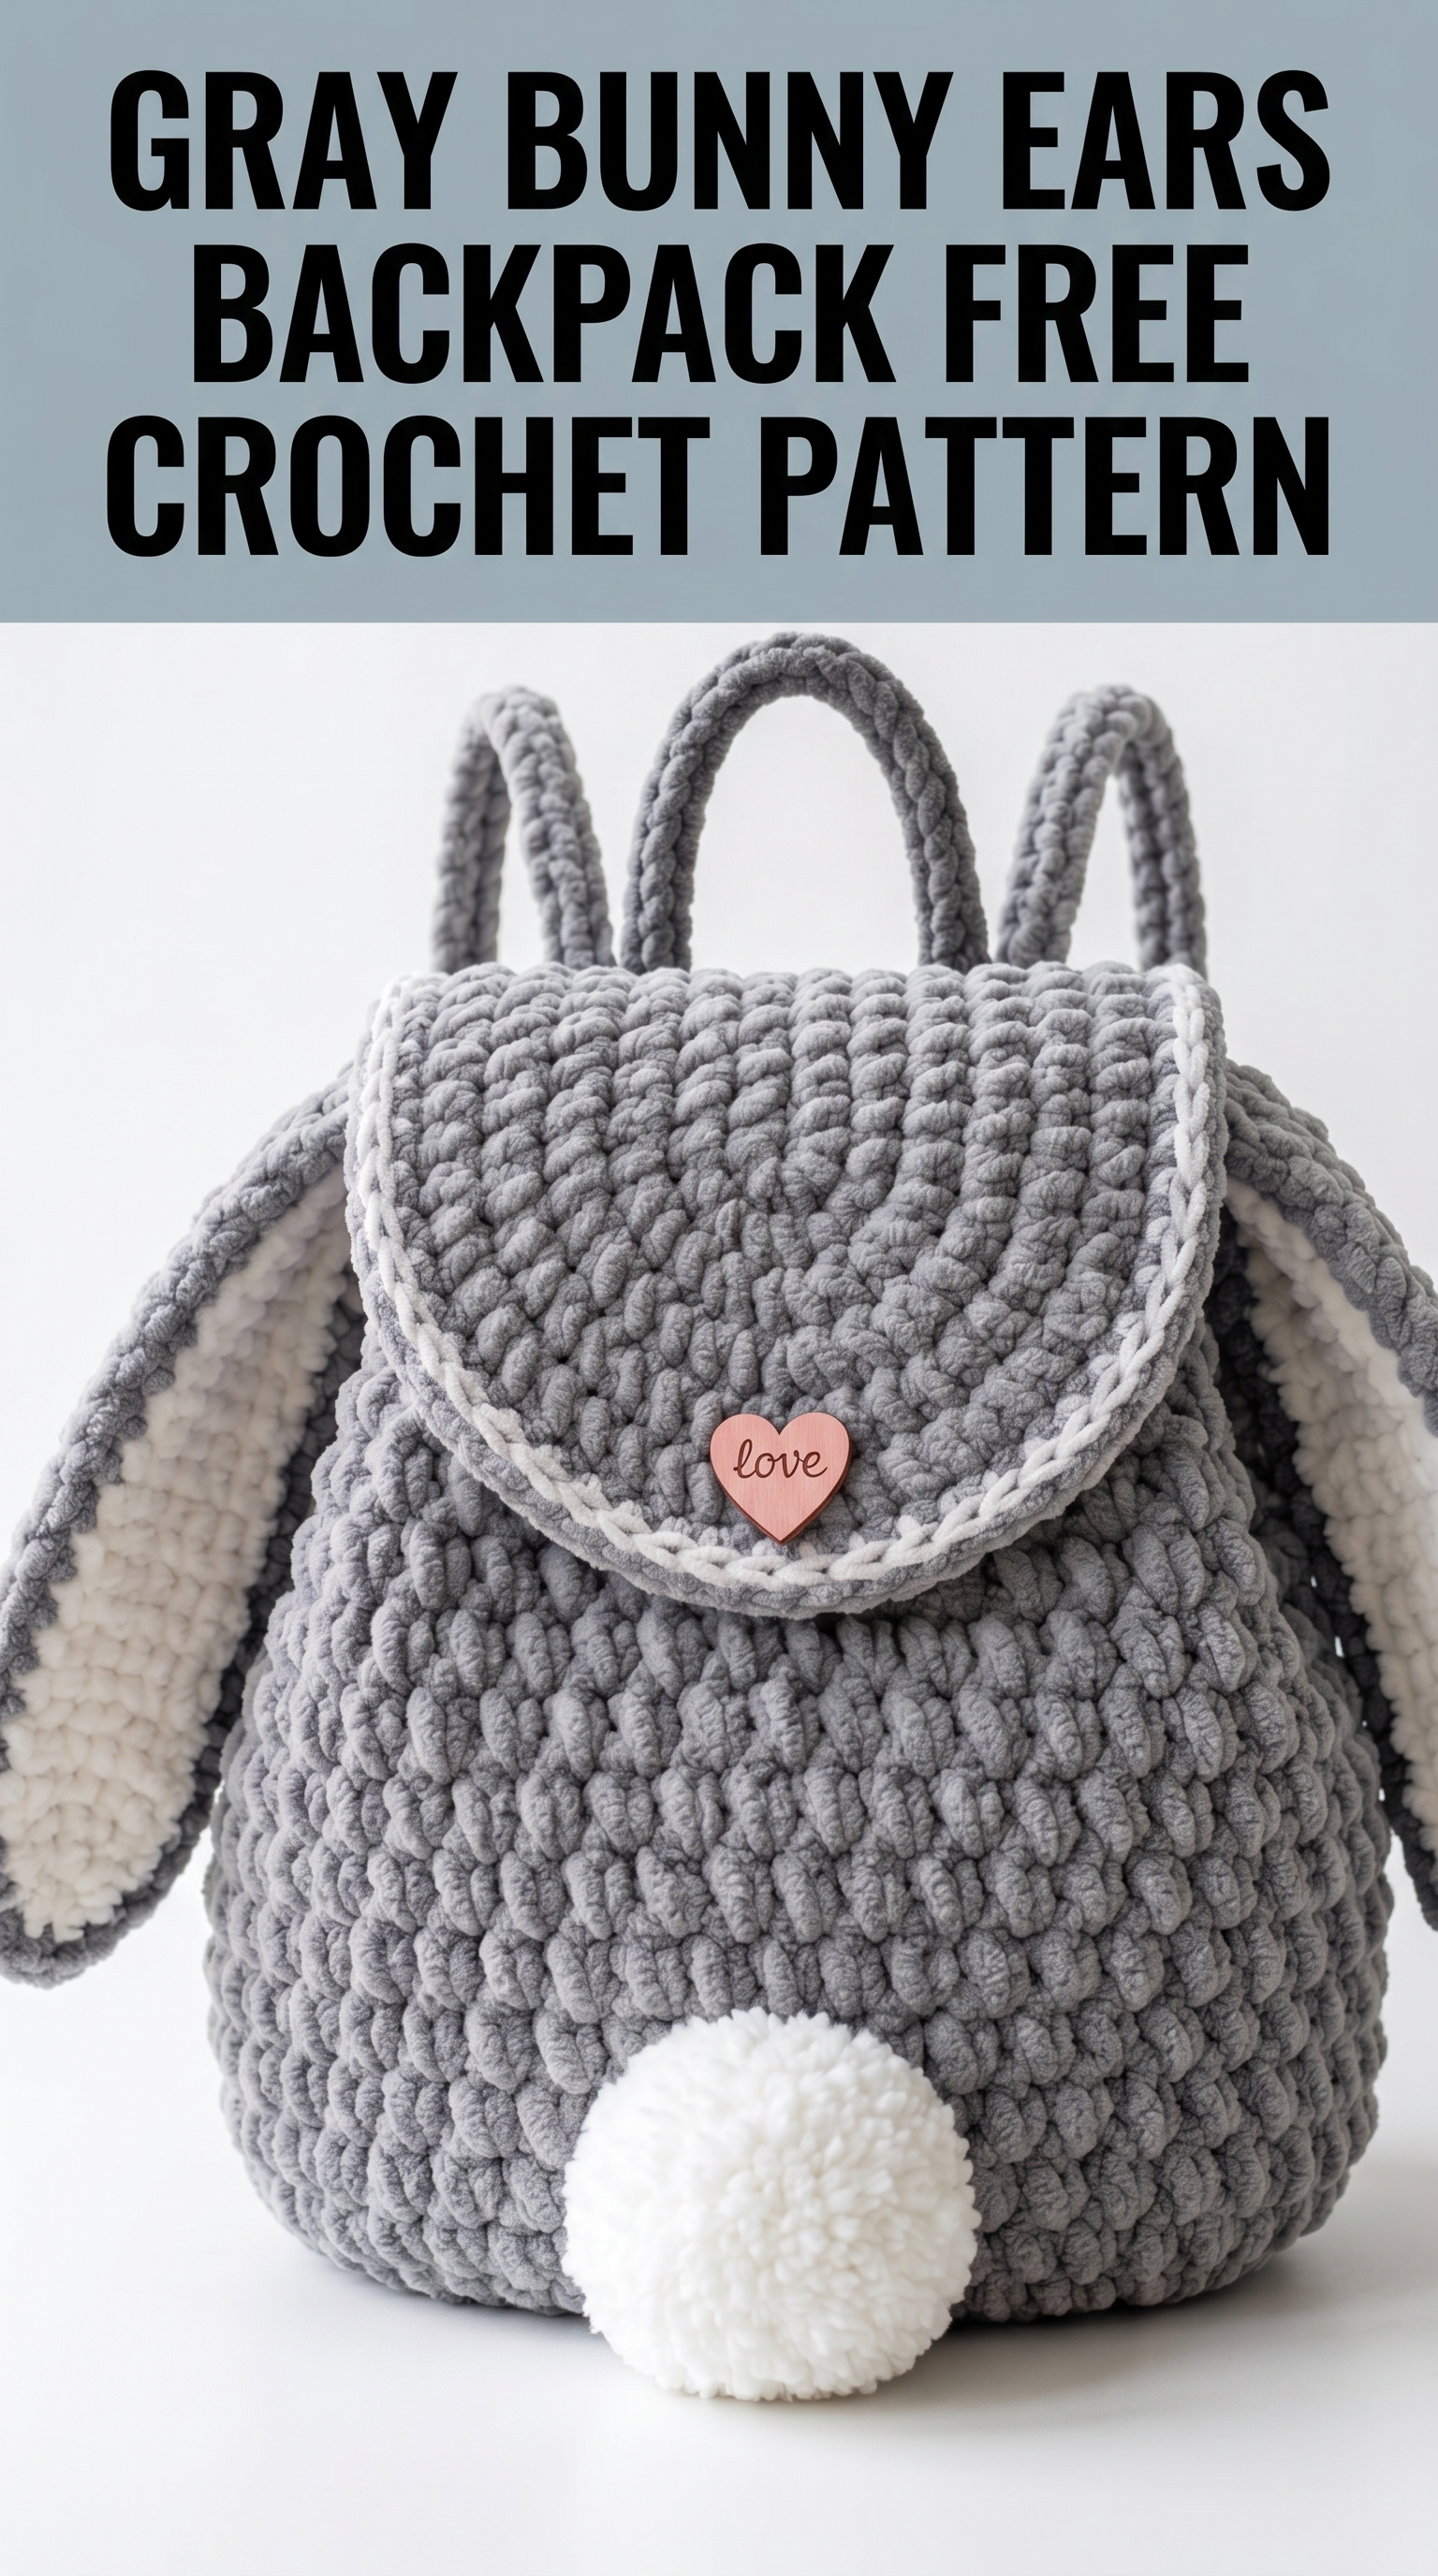
I designed this crochet pattern with intermediate beginners in mind. If you can work in the round and know your basic stitches, you can absolutely make this. The bunny ears, floppy and perfectly oversized, attach separately. The fluffy pom pom tail adds that finishing touch that makes everyone smile.
Let me walk you through every step of this crochet tutorial so you can create your own bunny backpack from scratch.
Why This Bunny Backpack Works So Well
The construction here is clever but not complicated. You work the main body in continuous rounds from the bottom up. The textured stitch pattern you see comes from working in the back loop only, which creates those horizontal ridges running across the bag.
The flap curves naturally because of strategic decreases. Those long bunny ears are flat pieces worked separately, then folded and stitched to create the two-tone effect with white inner ears and gray outer edges.
Yarn choice matters here. This pattern uses super bulky chenille-style yarn, sometimes called blanket yarn or velvet yarn. Bernat Blanket, Loops and Threads Chunky Cuddly, or similar brands work beautifully. The plush texture hides any slight stitch inconsistencies, which is very forgiving for newer crocheters.
Materials You Will Need
Yarn:
Hook:
Notions:
Gauge:
Working in single crochet with this yarn and hook, you should get approximately 8 stitches and 8 rows per 4 inches. Gauge is not critical for this project, but it affects your final bag size.
Stitch Abbreviations and Definitions
Before we begin, let me define every stitch you will use:
Chain (ch): The foundation stitch. Yarn over, pull through the loop on your hook. This creates one chain.
Slip Stitch (sl st): Insert hook, yarn over, pull through both the stitch and the loop on your hook in one motion. Used for joining and creating invisible seams.
Single Crochet (sc): Insert hook into stitch, yarn over and pull up a loop (2 loops on hook), yarn over and pull through both loops. Creates a short, tight stitch.
Single Crochet Decrease (sc2tog): Insert hook into first stitch, pull up a loop. Insert hook into next stitch, pull up a loop (3 loops on hook). Yarn over and pull through all 3 loops. This turns 2 stitches into 1.
Single Crochet Increase (inc): Work 2 single crochets into the same stitch. This adds 1 stitch to your count.
Back Loop Only (BLO): Instead of inserting your hook under both top loops of the stitch, insert it under only the back loop. The back loop is the one furthest from you. This creates the ridged texture you see in the bag.
Magic Ring (MR): An adjustable starting loop that closes completely with no hole. If you prefer, you can substitute by chaining 2 and working your first round stitches into the second chain from the hook.
Step by Step Crochet Pattern
Part 1: Backpack Base
The base is a flat oval worked in continuous rounds. Place a stitch marker at the start of each round and move it up as you go.
With gray yarn and 9.0mm hook:
Round 1: Ch 7. Starting in 2nd ch from hook, sc in each of the next 5 ch. Work 3 sc into the last ch (this turns the corner). Rotate your work to continue along the opposite side of the foundation chain. Sc in each of the next 4 ch. Work 2 sc into the last ch. Do not join. (14 sts)
Round 2: Inc in first st, sc in next 4 sts, inc in each of next 3 sts, sc in next 4 sts, inc in each of next 2 sts. (20 sts)
Round 3: Sc in first st, inc in next st, sc in next 4 sts, [sc in next st, inc in next st] 3 times, sc in next 4 sts, [sc in next st, inc in next st] 2 times. (26 sts)
Round 4: Sc in next 2 sts, inc in next st, sc in next 4 sts, [sc in next 2 sts, inc in next st] 3 times, sc in next 4 sts, [sc in next 2 sts, inc in next st] 2 times. (32 sts)
Round 5: Sc in next 3 sts, inc in next st, sc in next 4 sts, [sc in next 3 sts, inc in next st] 3 times, sc in next 4 sts, [sc in next 3 sts, inc in next st] 2 times. (38 sts)
Your base should now measure approximately 5 inches long and 4 inches wide. It will be an oval shape.
Part 2: Backpack Body
Now you will build the walls of the backpack by working in the back loop only. This creates the ridged texture and helps the bag stand upright.
Round 6: Working in BLO only, sc in each st around. (38 sts)
Rounds 7-25: Continue working sc in BLO around for 19 more rounds. (38 sts per round)
Your bag body should now stand approximately 8 to 9 inches tall from the base.
Round 26: Sc in each st around through both loops (not BLO). Sl st to first st to join. Fasten off and weave in ends.
Part 3: Drawstring Channel (Optional)
If you want a drawstring closure, work this round before fastening off:
Channel Round: Ch 2, skip 1 st, dc in next st, *ch 1, skip 1 st, dc in next st* around. Sl st to join.
Thread a crocheted cord or ribbon through these holes to cinch the bag closed.
Part 4: Backpack Flap
The flap is worked flat in rows, then attached to the back of the bag opening.
With gray yarn:
Row 1: Ch 19. Sc in 2nd ch from hook and in each ch across. Ch 1, turn. (18 sts)
Rows 2-6: Sc in each st across. Ch 1, turn. (18 sts)
Row 7: Sc2tog, sc in each st to last 2 sts, sc2tog. Ch 1, turn. (16 sts)
Row 8: Sc in each st across. Ch 1, turn. (16 sts)
Row 9: Sc2tog, sc in each st to last 2 sts, sc2tog. Ch 1, turn. (14 sts)
Row 10: Sc in each st across. Ch 1, turn. (14 sts)
Row 11: Sc2tog, sc in each st to last 2 sts, sc2tog. Ch 1, turn. (12 sts)
Row 12: Sc in each st across. Ch 1, turn. (12 sts)
Row 13: Sc2tog, sc to last 2 sts, sc2tog. (10 sts)
Do not fasten off. Continue with the border.
Border: Ch 1, work sc evenly around the entire flap edge, placing 3 sc in each corner to keep it flat. Sl st to join. Fasten off.
Contrast Edging: Join white yarn to any point on the flap edge. Sl st in each st around the entire flap. Fasten off.
Part 5: Bunny Ears (Make 2)
Each ear has an outer gray section and an inner white section that get stitched together.
Outer Ear (Gray) – Make 2:
Row 1: Ch 6. Sc in 2nd ch from hook and in each ch across. Ch 1, turn. (5 sts)
Rows 2-14: Sc in each st across. Ch 1, turn. (5 sts)
Row 15: Sc2tog, sc in next st, sc2tog. Ch 1, turn. (3 sts)
Row 16: Sc3tog (insert hook in first st, pull up loop, insert in second, pull up loop, insert in third, pull up loop, yarn over and pull through all 4 loops). (1 st)
Fasten off, leaving a long tail for sewing.
Inner Ear (White) – Make 2:
Work the same as the outer ear, but make it slightly smaller:
Row 1: Ch 5. Sc in 2nd ch from hook and in each ch across. Ch 1, turn. (4 sts)
Rows 2-12: Sc in each st across. Ch 1, turn. (4 sts)
Row 13: Sc2tog twice. Ch 1, turn. (2 sts)
Row 14: Sc2tog. (1 st)
Fasten off.
Assembly: Place the white inner ear on top of the gray outer ear. Whip stitch around the edges to join. The gray will frame the white, creating the two-tone effect.
Part 6: Straps (Make 2)
With gray yarn:
Row 1: Ch 61. Sc in 2nd ch from hook and in each ch across. (60 sts)
Row 2: Ch 1, turn. Sc in each st across. (60 sts)
Fasten off. Each strap should measure approximately 20 inches long and 1 inch wide.
Part 7: Top Handle Loop
With gray yarn:
Ch 25. Sl st in 2nd ch from hook and in each ch across. Fasten off.
Fold in half to create a loop.
Part 8: Pom Pom Tail
Using white yarn and a 3-inch pom pom maker, create a fluffy pom pom. Trim it into a round shape. Leave long tails for attaching to the backpack.
Assembly Instructions
Now comes the satisfying part where everything comes together.
1. Attach the flap: Position the straight edge of the flap along the back of the bag opening. Whip stitch securely using gray yarn.
2. Attach the ears: Position both ears at the top back corners of the backpack, just behind the flap. The ears should flop forward and slightly outward. Stitch the base of each ear firmly to the bag.
3. Attach the straps: Position the bottom of each strap at the lower back corners of the backpack, about 2 inches up from the base. Stitch securely. Position the top of each strap about 1 inch below where the ears attach. Stitch in place.
4. Attach the handle loop: Center the folded loop at the very top back of the bag, between the two ears. Stitch both ends securely.
5. Attach the pom pom tail: Position the pom pom at the center lower back of the bag. Use the long tails to stitch it firmly in place.
6. Add embellishment (optional): Stitch or glue a decorative button or wooden tag to the center of the flap. A heart shape works perfectly for the bunny theme.
Tips for Success
Working with chenille yarn: This yarn can be slippery and sometimes splits. Go slowly and make sure your hook catches the full strand with each stitch. Good lighting helps tremendously.
Keeping your rounds even: Because you work in continuous rounds, your stitch marker is essential. Move it every round without fail.
Making sturdy straps: If you want extra structure in your straps, you can work a third row or crochet them in half double crochet instead.
Sizing adjustments: For a smaller bag, use worsted weight yarn with a 5.0mm hook and reduce your starting chain and stitch counts proportionally.
You Did It
This bunny backpack makes such a special handmade gift. Whether for Easter, a birthday, or just because, the recipient will treasure something made with this much love and attention.
I hope this step by step crochet pattern gave you everything you need to create your own version. I would absolutely love to see your finished backpacks. Please share your photos with me on Instagram or Facebook and tag me so I can celebrate your beautiful work.
Thank you so much for crocheting with me today. Happy stitching, and give those bunny ears an extra flop from me.
