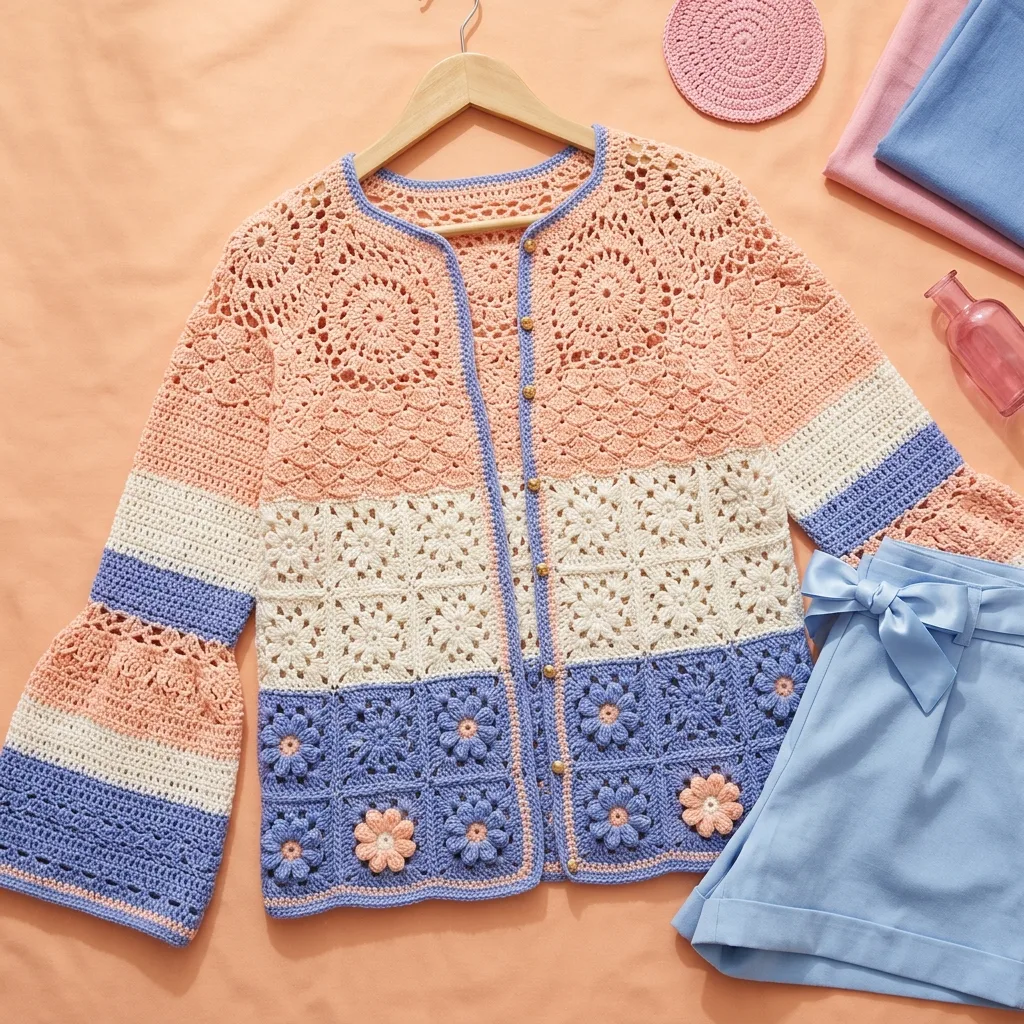
I pulled this design out of my ideas folder last spring, and honestly, I had forgotten how much I loved it. The original sketch was called "sunset layers" because I kept thinking about those soft gradient skies you see in early summer. I made the first version for my sister’s birthday a few years back, and she still wears it constantly. There is something about the way the peach, cream, and periwinkle blue flow into each other that feels both vintage and completely modern at the same time. I finally sat down, wrote out every stitch, and now I get to share it with you.
Get the Ad-Free PDF Pattern
You can find the free pattern below, or you can purchase the ad-free printable PDF from my shop.
Get the Printable PDF →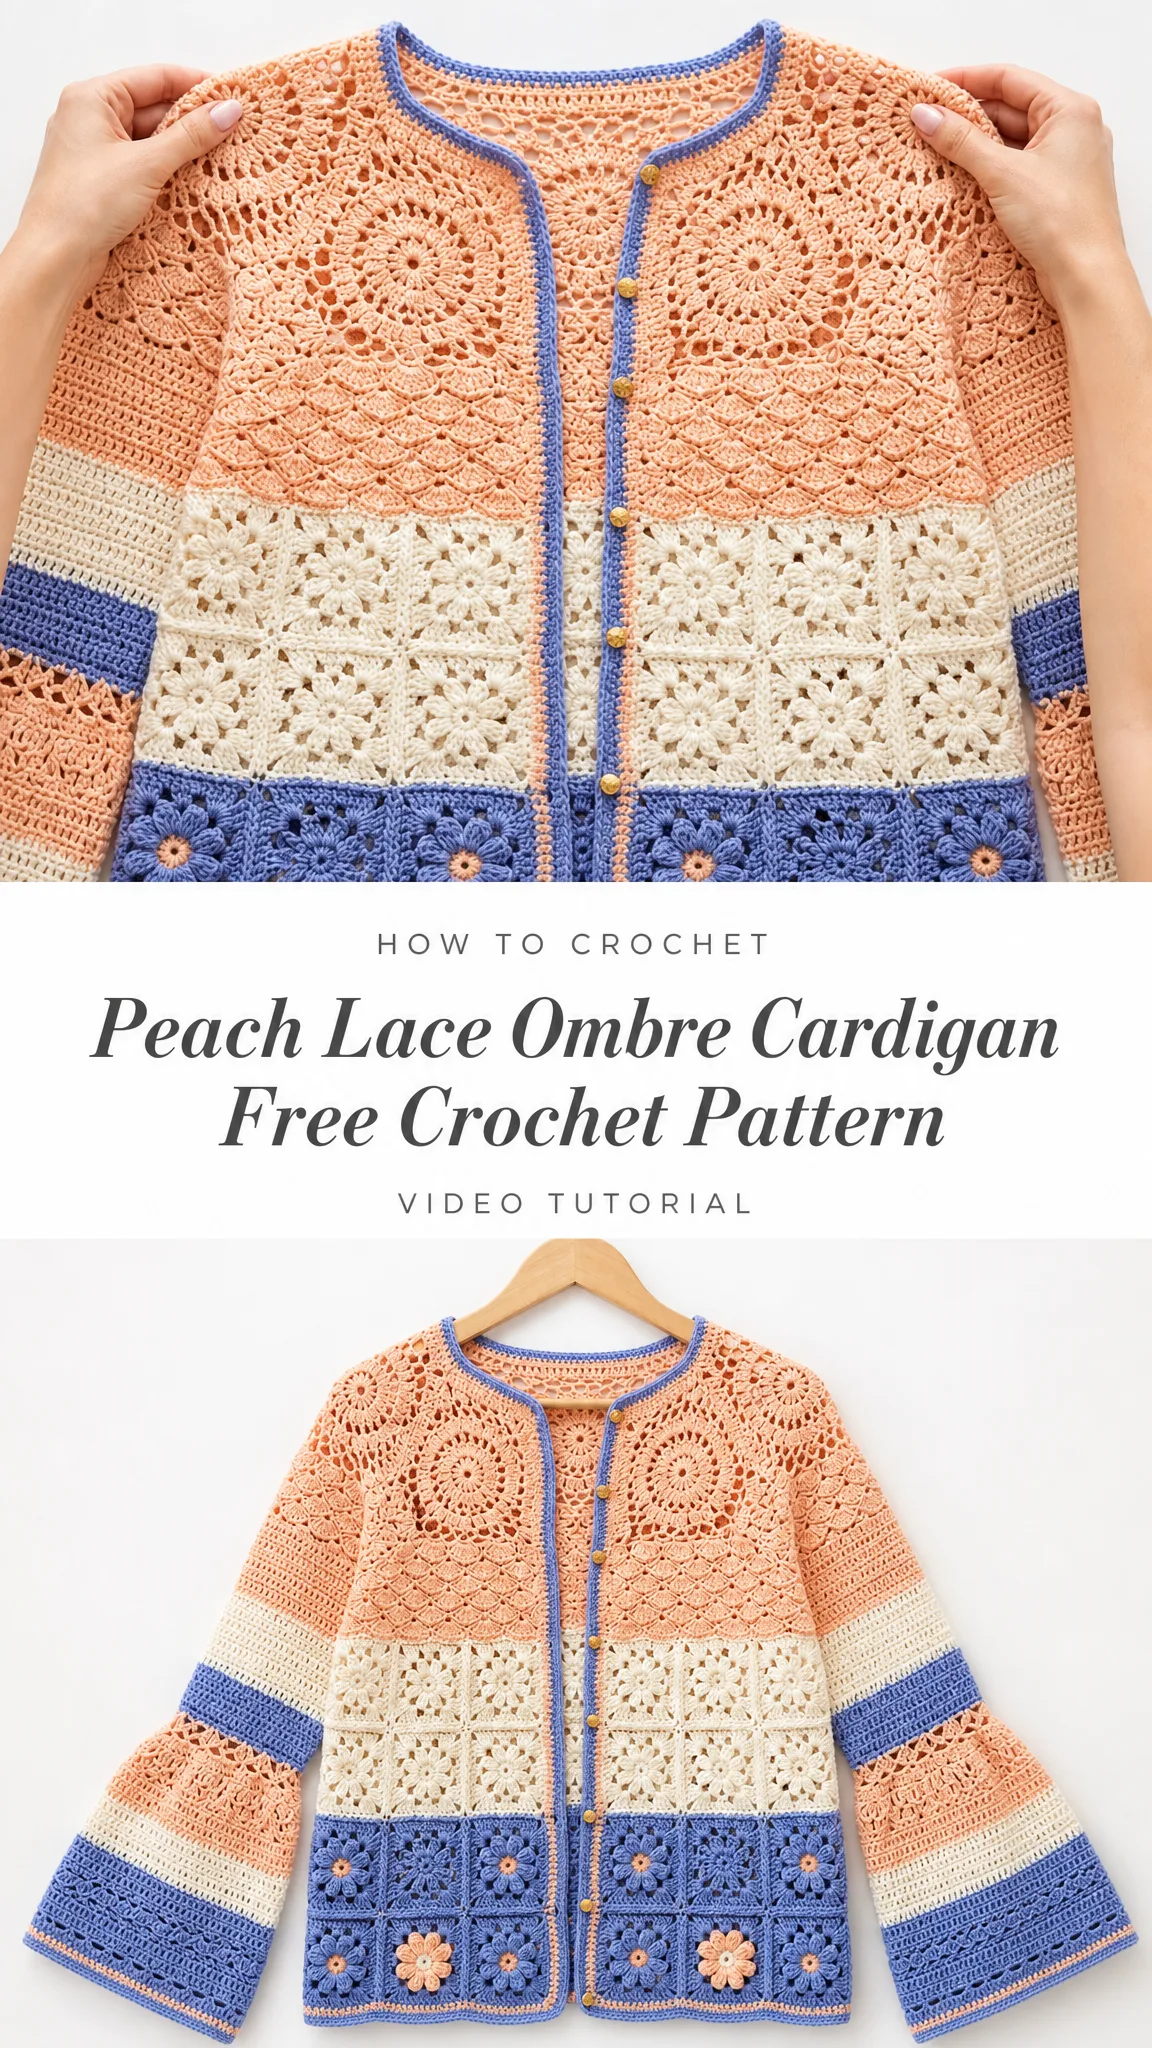
About This Peach Lace Ombre Cardigan Crochet Pattern
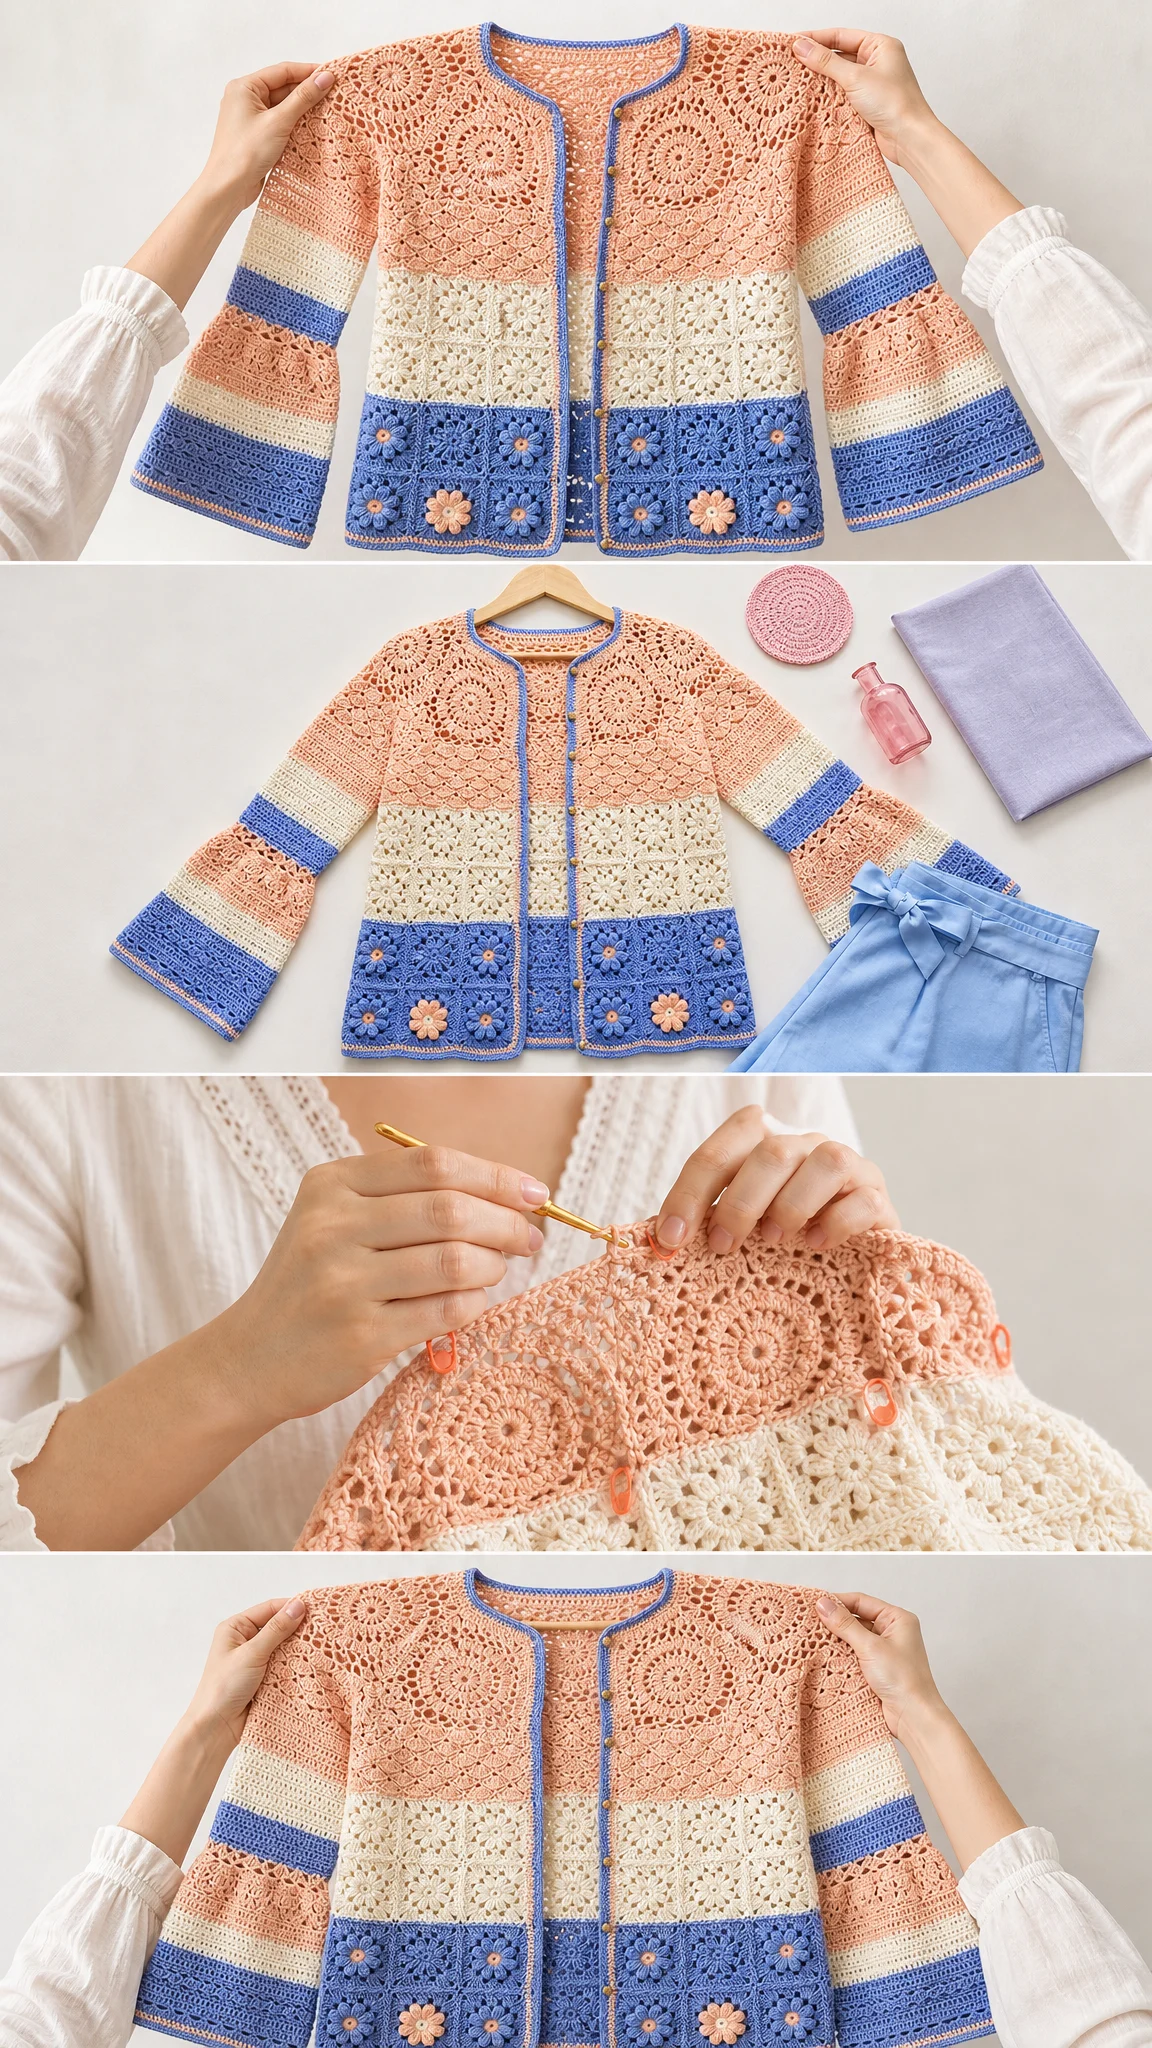
This cropped, open-front cardigan combines floral square motifs at the lower body with simple lace panels for the upper yoke. The sleeves are worked flat from a wide bell cuff up to the upper arm, then seamed into straight armholes. The construction is modular, which means you will work separate pieces and join them together rather than crocheting the whole thing in one go.
The drop-shoulder design keeps assembly approachable. You will not need to shape a fitted sleeve cap, which removes one of the trickiest parts of garment making. If you have made granny squares before and feel comfortable with basic decreases, you can absolutely handle this project.
Skill level: Intermediate
You will use motif rounds, joining squares, mirrored neckline shaping, button bands, and sleeve decreases. None of these techniques are advanced on their own, but putting them all together requires attention to detail and patience.
Finished measurements:
Time estimate: 22 to 30 hours depending on your motif speed and finishing style.
Materials You Will Need
Gather everything before you start. Having your supplies ready makes the process so much smoother.
Yarn:
DK weight or light worsted cotton or cotton-bamboo yarn, approximately 1,150 yards (1,052 meters) total:
Yarn suggestions:
When substituting yarn, choose something that blocks to the same motif size and fabric gauge. A springy acrylic may make the bands thicker. A plant fiber gives the closest drape to what you see in the photos.
Tools:
Gauge
Getting gauge right matters for garments. Take time to make a swatch before diving in.
| Gauge Item | Target |
|---|---|
| Lace fabric, blocked | 16 dc x 8 rows = 4 inches (10 cm) |
| Flower square, blocked | 5.5 inches (14 cm) square |
| Body width math | Back 88 sts = 22 inches; each front 44 sts = 11 inches |
| Sleeve math | 76 sts = 19 inches cuff; 56 sts = 14 inches upper arm |
If your motifs come out smaller, try going up a hook size. If they come out larger, go down a hook size. The flower squares must block to 5.5 inches (14 cm) for the math to work out.
Abbreviations and Stitch Guide
This pattern uses US crochet terms throughout. Here is what each abbreviation means:
Special Stitches
Puff petal: [Yarn over, insert hook in indicated stitch or space, yarn over and pull up a loop] 4 times, yarn over and pull through all loops on hook, chain 1 to close. This creates a puffy, rounded petal shape.
dc2tog (double crochet two together): Yarn over, insert hook in next stitch, yarn over and pull up a loop, yarn over and pull through 2 loops. Yarn over, insert hook in next stitch, yarn over and pull up a loop, yarn over and pull through 2 loops. Yarn over and pull through all loops on hook. This decreases your stitch count by one.
Mesh row: Chain 3 counts as first double crochet. Work double crochet in next stitch, then *chain 1, skip 1, double crochet in next stitch* across as written. Count each chain-1 as one stitch.
Reverse single crochet: Work single crochet from left to right around the edge for a corded finish. Left-handed makers may work it in the opposite direction.
Left-handed note: Work the same stitch counts. Your front shaping will mirror automatically if you place the neckline decreases on the center-front edge named in the instructions.
Flower Square Motifs
Make 8 blue-background flower squares and 8 cream-background flower squares. Block every square to 5.5 inches (14 cm) before joining. Each finished square has 72 single crochets around, or 18 single crochets per side.
| Round | Instruction | Count |
|---|---|---|
| 1 | With flower-center color, ch 4, join to ring. Ch 3, work 15 dc in ring, join. | 16 dc |
| 2 | Change to petal color. Ch 2, puff petal in each dc around, join. | 16 puff petals |
| 3 | Change to background color. Sl st into first ch-1 sp, ch 3, 2 dc in same sp, ch 1. Work 3 dc, ch 1 in each sp around, join. | 16 clusters |
| 4 | Square the motif: *(3 dc, ch 2, 3 dc) in next sp, [3 dc in next sp] 3 times; rep from * 4 times, join. | 60 dc + 4 corner sps |
| 5 | Ch 1. Sc in each dc and 3 sc in each corner ch-2 sp, join and fasten off. | 72 sc |
Join layout: The back lower body uses 4 blue squares in the bottom row and 4 cream squares above. Each front uses 2 blue squares in the bottom row and 2 cream squares above. Join with mattress stitch or slip-stitch seams through the outer loops.
Take your time with the joining. Neat seams make a huge difference in how professional the finished cardigan looks.
Body Panels
Work all upper panels in peach. Chain 3 counts as 1 double crochet throughout this section. Counts are shown at the end of every row.
Back Upper Panel
| Rows | Instruction | Count |
|---|---|---|
| Foundation | Ch 89. Dc in 4th ch from hook and each ch across. | 88 dc |
| 2 | Mesh row across. | 88 sts |
| 3 | Dc in each dc and ch-1 sp across. | 88 dc |
| 4-15 | Rep Rows 2-3 six more times. | 88 sts each row |
| 16 | Dc across. Mark 36 sts for right shoulder, 16 center sts for back neck, 36 sts for left shoulder. | 88 dc |
Each Front Upper Panel
| Rows | Instruction | Count |
|---|---|---|
| Foundation | Ch 45. Dc in 4th ch from hook and each ch across. | 44 dc |
| 2-8 | Work mesh and dc rows as for back, ending after Row 8. | 44 sts each row |
| 9 | At center-front edge, dc2tog twice, dc across. | 42 dc |
| 10 | Dc across. | 42 dc |
| 11 | At center-front edge, dc2tog twice, dc across. | 40 dc |
| 12 | Dc across. | 40 dc |
| 13 | At center-front edge, dc2tog twice, dc across. | 38 dc |
| 14 | Dc across. | 38 dc |
| 15 | At center-front edge, dc2tog twice, dc across. | 36 dc |
| 16 | Dc across. | 36 dc |
Checkpoint: Back upper panel should measure about 22 inches (56 cm) wide and 8 inches (20 cm) tall. Each front upper panel should begin at 11 inches (28 cm) wide and finish with a 9 inch (23 cm) shoulder edge.
Join the Body
Now comes the satisfying part where everything comes together.
Assembly Steps
1. Sew each peach upper panel to its matching cream motif row: back to 4 squares, each front to 2 squares. Ease lightly and keep edges flat.
2. Sew shoulders: each 36-stitch front shoulder to the matching 36-stitch back shoulder. Leave the 16-stitch back neck open.
3. Sew side seams from hem upward for 13 inches (33 cm), leaving the upper 7 inches (18 cm) open for each armhole.
4. Try on before sleeves. The front edges should meet or sit slightly open, depending on desired ease.
Bands and Edges
| Band/Edge | Instruction | Count/Checkpoint |
|---|---|---|
| Front bands | With blue, pick up 76 sc evenly along each front edge: 18 sts per motif row plus 40 sts along upper panel. Work 2 more sc rows. | 76 sc each side |
| Buttonholes | On right front Row 2, make 7 buttonholes: sc 4, *ch 2, sk 2, sc 10; rep 6 times, ch 2, sk 2, sc to end. | 7 holes |
| Neckband | Pick up 96 sc around neckline: 36 left front, 16 back neck, 36 right front, plus 8 corner-balancing sts. Work 2 sc rows. | 96 sc |
| Hem edge | Work 1 sc round in blue, placing 3 sc in lower front corners. Add reverse sc if desired. | Flat edge |
Pick-up ratio: Along row ends, pick up about 3 single crochets for every 4 rows. Along motif edges, use the existing 18 single crochets per side. This keeps bands from waving or pulling.
Bell Sleeves
Make 2 alike. Work flat from cuff to upper arm. Chain 3 counts as first double crochet. Seam after blocking.
| Row(s) | Color | Instruction | Count |
|---|---|---|---|
| Foundation | Blue | Ch 77. Dc in 4th ch from hook and each ch across. | 76 dc |
| 2-5 | Blue | Alternate mesh row and dc row, ending with dc row. | 76 sts |
| 6 | Blue | Dc row; dc2tog at marked pairs 9-10, 27-28, 49-50, 67-68. | 72 dc |
| 7-11 | Cream | Alternate mesh and dc rows. | 72 sts |
| 12 | Cream | Dc row; dc2tog at pairs 8-9, 25-26, 47-48, 64-65. | 68 dc |
| 13-17 | Peach | Alternate mesh and dc rows. | 68 sts |
| 18 | Peach | Dc row; dc2tog at pairs 8-9, 24-25, 44-45, 61-62. | 64 dc |
| 19-23 | Cream | Alternate mesh and dc rows. | 64 sts |
| 24 | Cream | Dc row; dc2tog at pairs 7-8, 23-24, 42-43, 58-59. | 60 dc |
| 25-29 | Blue | Alternate mesh and dc rows. | 60 sts |
| 30 | Blue | Dc row; dc2tog at pairs 7-8, 21-22, 39-40, 54-55. | 56 dc |
| 31-32 | Peach | Dc across; fasten off after Row 32. | 56 dc |
Checkpoint: Block sleeve to 19 inches (48 cm) at cuff, 14 inches (35.5 cm) at upper edge, and 16 inches (40.5 cm) long. Seam sleeve, then sew upper edge into the 14 inch (35.5 cm) armhole opening.
Finishing Your Cardigan
Almost there! These final steps make all the difference.
Size Customization
This pattern comes in one relaxed adult size, but you can adjust it to fit your body.
Troubleshooting Common Issues
| Issue | Fix |
|---|---|
| Motifs cup inward | Block more aggressively. Check that Round 4 corners have ch-2 spaces and Round 5 has 3 sc in each corner. |
| Front band ripples | Use fewer picked-up stitches. Aim for 3 stitches per 4 rows along vertical edges. |
| Sleeve feels tight at armhole | Leave a slightly deeper body armhole or block upper sleeve to full 14 inches (35.5 cm). |
| Lace is too open | Go down a hook size and re-swatch. Keep motif size at 5.5 inches (14 cm). |
Care Instructions
Hand wash or machine wash gentle in cool water, depending on your yarn label. Lay flat to dry. Re-shape bands and sleeves while damp. Store folded rather than hung to protect the shoulder seams.
You Did It!
Thank you so much for choosing this peach lace ombre cardigan crochet pattern. I hope you love making it as much as I loved designing it. The combination of flower squares and lacy panels creates something truly special, and those bell sleeves add just the right amount of drama.
If you make this cardigan, I would absolutely love to see it! Save this pattern to your Pinterest boards so you can find it whenever you are ready to start. And please leave a comment below if you give it a try. Seeing your finished projects honestly makes my whole week.
Want a Quick & Easy Printable Version?
Get a clean, beautifully formatted PDF of this pattern — easy to follow step by step, ready to print or save on any device. No scrolling, no distractions, just the pattern.
Get the Printable PDF →