Last fall, I found myself standing in a craft store, holding the most beautiful skein of deep burgundy cotton yarn. I had no idea what I wanted to make with it. I just knew I needed it. Sound familiar? That yarn sat in my stash for months until I spotted a vintage handbag at a thrift store with the most gorgeous quilted texture. Something clicked. I wanted to recreate that plush, structured look in crochet. After weeks of swatching and frogging and swatching again, this little beauty was born. And honestly? I think it might be my new favorite thing I have ever designed.
Get the Ad-Free PDF Pattern
You can find the free pattern below, or you can purchase the ad-free printable PDF from my shop.
Get the Printable PDF →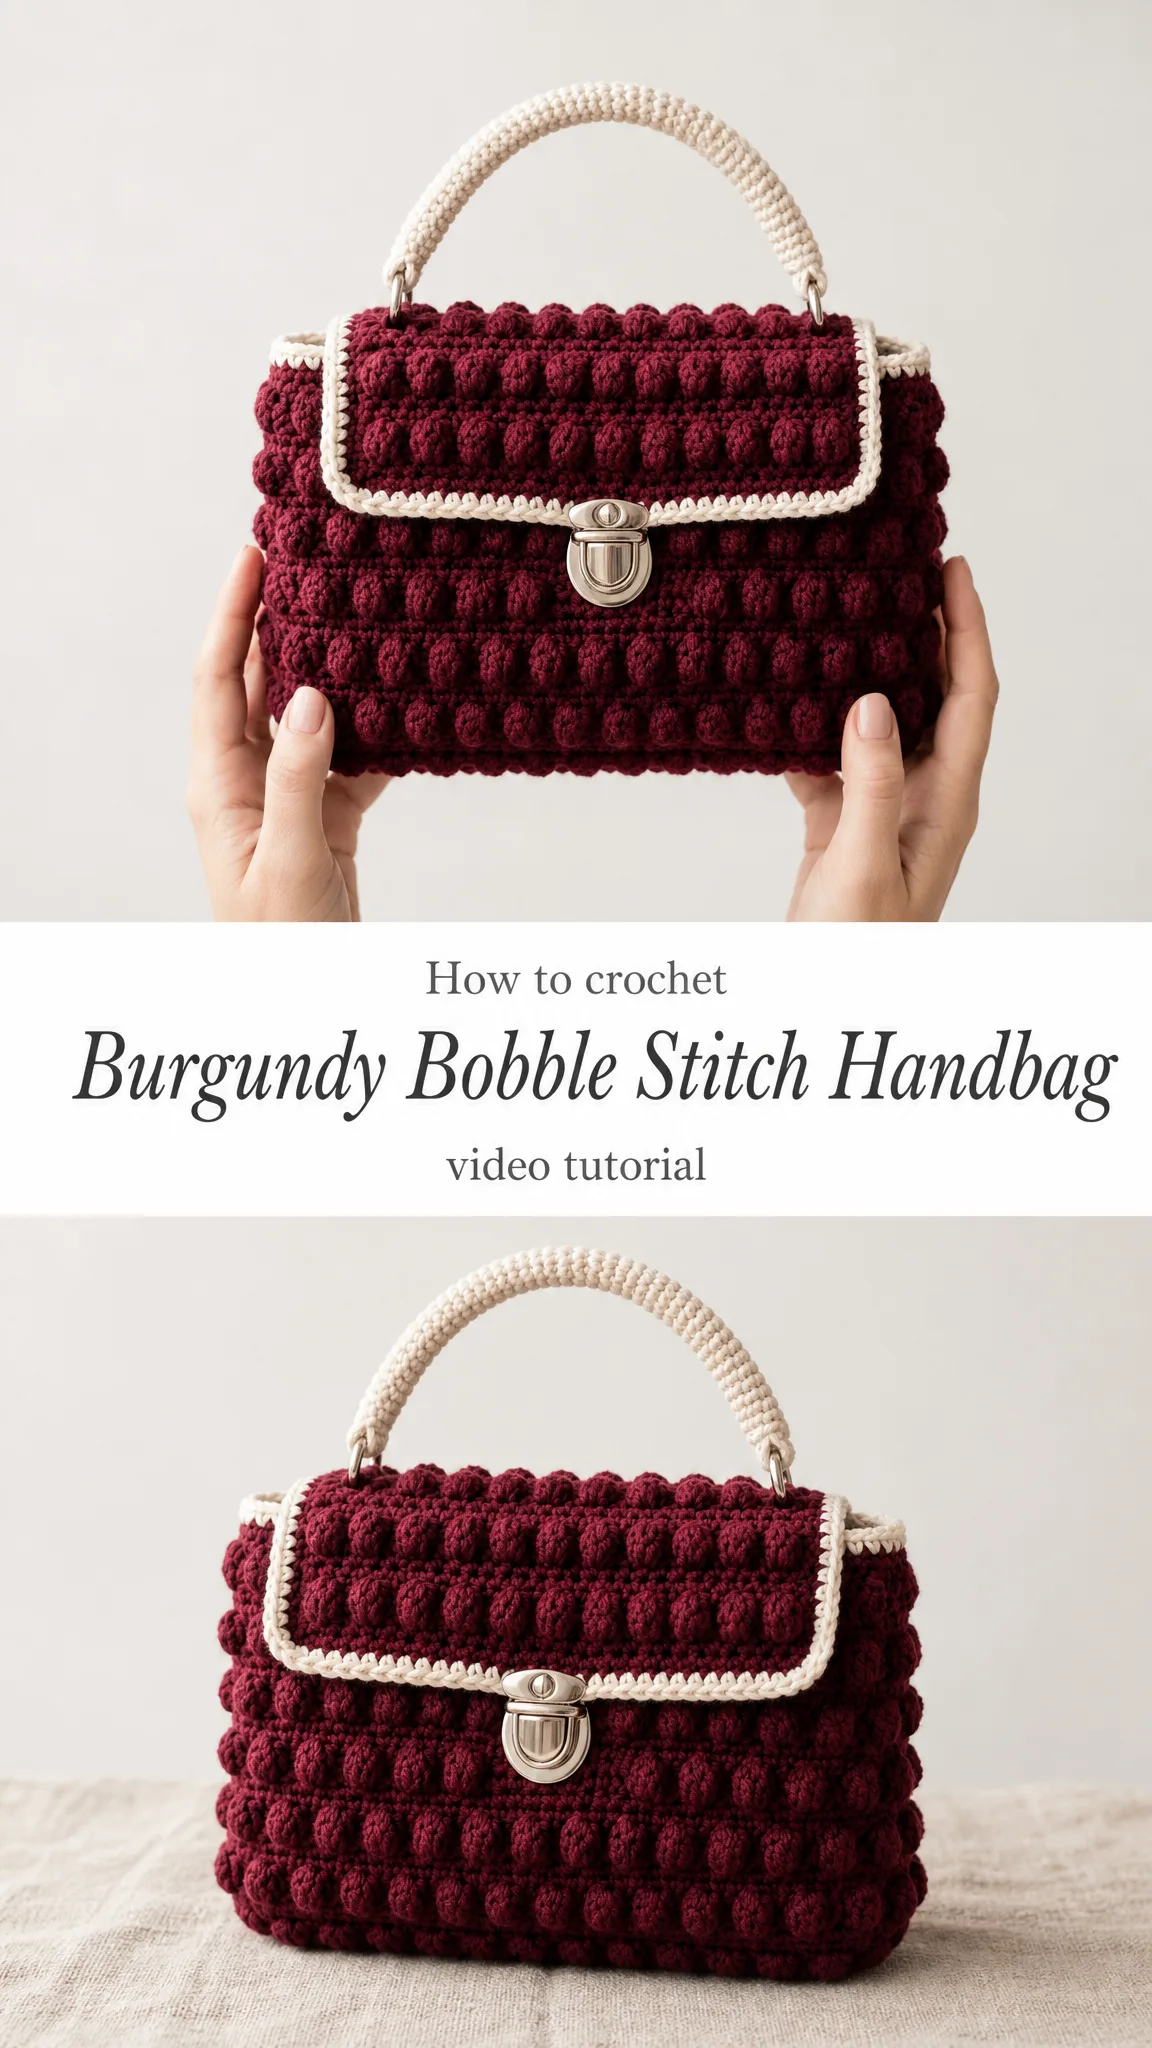
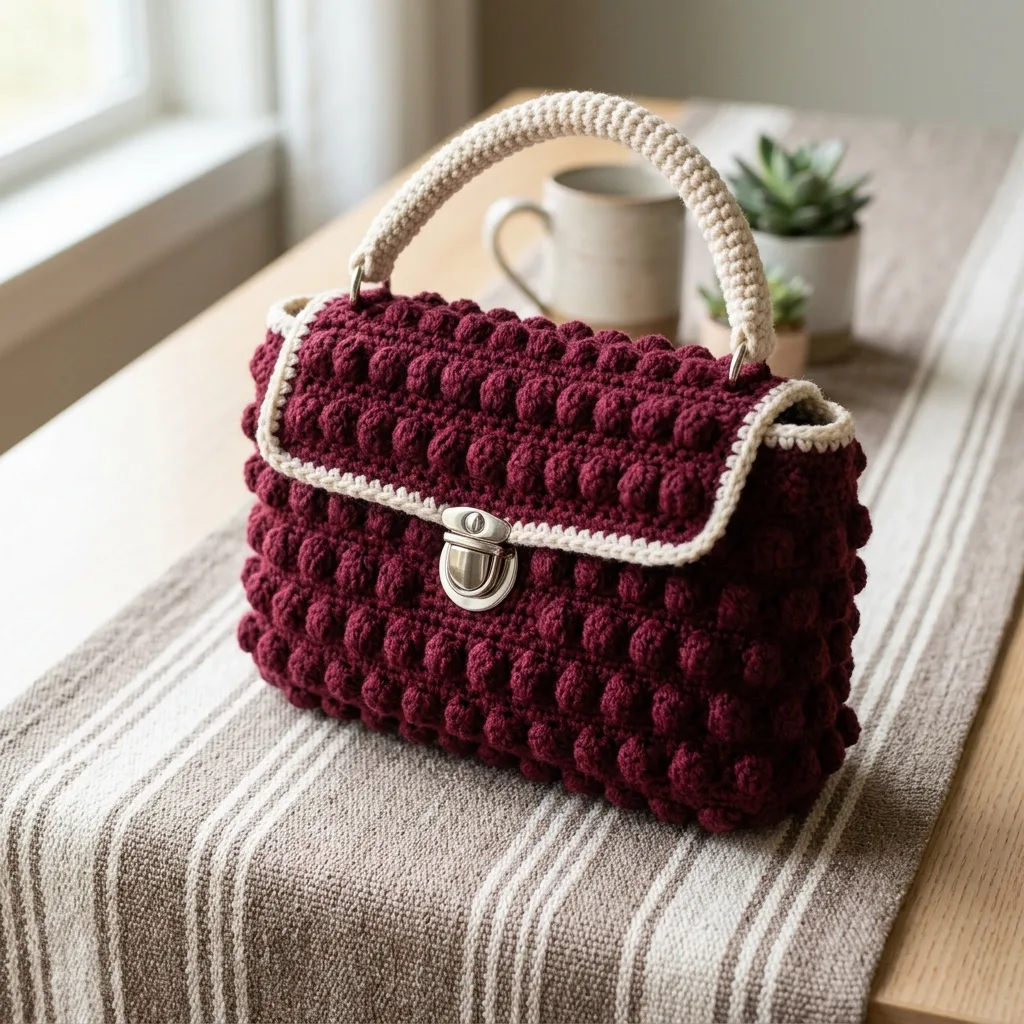
This Burgundy Bobble Stitch Handbag has everything I love in a handmade accessory. It stands up on its own. The bobble texture gives it that almost quilted, designer look. The crisp ivory trim frames the flap like professional piping. And that arched top handle? It just makes me happy every time I pick it up.
Why You Will Love This Crochet Handbag Pattern
This is not your average slouchy crochet bag. This structured handbag has real presence. The bobble stitch creates a dense, tactile fabric that holds its shape beautifully without any special interfacing or lining (though you can add a base insert if you want extra crispness).
The construction is seamless and worked from the bottom up in joined rounds. That means minimal sewing at the end, which is always a win in my book. The flap gets worked flat with turned rows, then finished with a gorgeous reverse single crochet (also called crab stitch) border that gives it that corded, piped edge.
Skill level: Intermediate. Now, before you click away, let me explain. The stitches themselves are totally approachable. You only need to know single crochet (sc) and the bobble stitch. The intermediate rating comes from working the bobble fabric in joined rounds, keeping those offset bobble columns aligned, shaping an oval base, and attaching the hardware neatly. If you have made a few projects and feel comfortable reading patterns, you can absolutely do this.
Finished dimensions: 9 inches wide × 6 inches tall × 3.5 inches deep (23 × 15 × 9 cm)
Time to complete: 10 to 14 hours
Materials You Will Need
Here is everything you need to gather before you start. I recommend getting all your supplies ready so you can work uninterrupted once you get going.
Yarn:
Recommended yarns:
Substitution note: Any aran or worsted cotton that meets gauge will work. Cotton keeps the structure you need for this bag. Skip soft, drapey acrylics for this project. They will not hold the bobbles or the bag shape.
Hooks:
Notions:
Gauge
10 sc × 11 rows = 4 inches / 10 cm in single crochet, using aran cotton and the H/8 hook.
Please swatch and match gauge before you begin. The bag’s finished size depends on it. If your swatch is too big, go down a hook size. Too small? Go up a hook size.
Stitch Abbreviations and Definitions
Let me walk you through every stitch and abbreviation you will see in this pattern.
ch = chain: Wrap yarn over hook, pull through loop on hook. This creates the foundation for your work.
sc = single crochet: Insert hook in stitch, yarn over and pull up a loop (2 loops on hook), yarn over and pull through both loops.
sl st = slip stitch: Insert hook, yarn over, pull through stitch and loop on hook in one motion. Used for joining rounds.
BO = bobble: This is your special stitch. Here is how to work it:
1. Yarn over, insert hook in the stitch, yarn over and pull up a loop, yarn over and pull through 2 loops.
2. Repeat step 1 four more times in the same stitch. You will have 6 loops on your hook.
3. Yarn over, draw through all 6 loops, and push the bobble to the front with your thumb.
That pushing motion is key. It is what makes the bobbles pop out and gives this bag its signature plushness.
rev sc = reverse single crochet (crab stitch): Work single crochet, but move in the opposite direction (left to right for right-handed crocheters). This creates a corded, rope-like edge.
sc2tog = single crochet 2 together (decrease): Insert hook in next stitch, pull up a loop, insert hook in following stitch, pull up a loop (3 loops on hook), yarn over, pull through all 3 loops.
BLO = back loop only: Instead of inserting your hook under both loops at the top of the stitch, insert it only through the back loop (the one farthest from you).
rnd = round
rep = repeat
st(s) = stitch(es)
UK crocheters: US single crochet (sc) = UK double crochet (dc) throughout this pattern.
Pattern Notes Before You Begin
Read through these notes before you start. They will save you confusion later.
Left-handed makers: Work every round and row in mirror image. Right-to-left simply becomes left-to-right. Stitch counts and bobble placement are identical. Only your direction of travel flips.
The Oval Base
Using burgundy yarn and the H/8 hook, you will start from the bottom and work your way up.
Round 1: Chain 23. Single crochet in 2nd chain from hook, sc 20, 3 sc in last chain. Working back along the chain’s opposite side, sc 20, 2 sc in starting chain, join. (46 sc)
Round 2: Ch 1, 2 sc in next st, sc 20, 2 sc in each of next 3 sts, sc 20, 2 sc in each of next 2 sts, join. (52 sc)
Round 3: Ch 1, increase 4 stitches evenly around the two curved ends (work 2 sc in a stitch to increase), sc across the straight sides, join. (56 sc)
Round 4: Ch 1, sc in each st around, join. (56 sc)
Checkpoint: Your base should sit flat and measure about 8½ × 3 inches / 21.5 × 7.5 cm.
Building the Sides
Now you will turn the corner and start working upward to create the walls of your bag.
Round 5: Ch 1, working in back loops only, sc in each st around, join. (56 sc)
This creates a crisp upright edge that defines where the base ends and the sides begin.
Round 6: Ch 1, [BO, sc] around for 28 repeats, join. (28 BO + 28 sc = 56 sts)
Round 7: Ch 1, sc in each st around, join. (56 sc)
Round 8: Ch 1, [sc, BO] around for 28 repeats (offset from Round 6), join. (56 sts)
Round 9: Ch 1, sc in each st around, join. (56 sc)
Rounds 10 through 17: Repeat Rounds 6 through 9 twice more. You will have bobble bands on Rounds 10, 12, 14, and 16.
Rounds 18 and 19: Work one more bobble round [BO, sc] around, then one plain sc round, join. (56 sts)
You now have 7 bobble bands total.
Checkpoint: Your body should measure about 6 inches / 15 cm tall and 18 inches / 46 cm around.
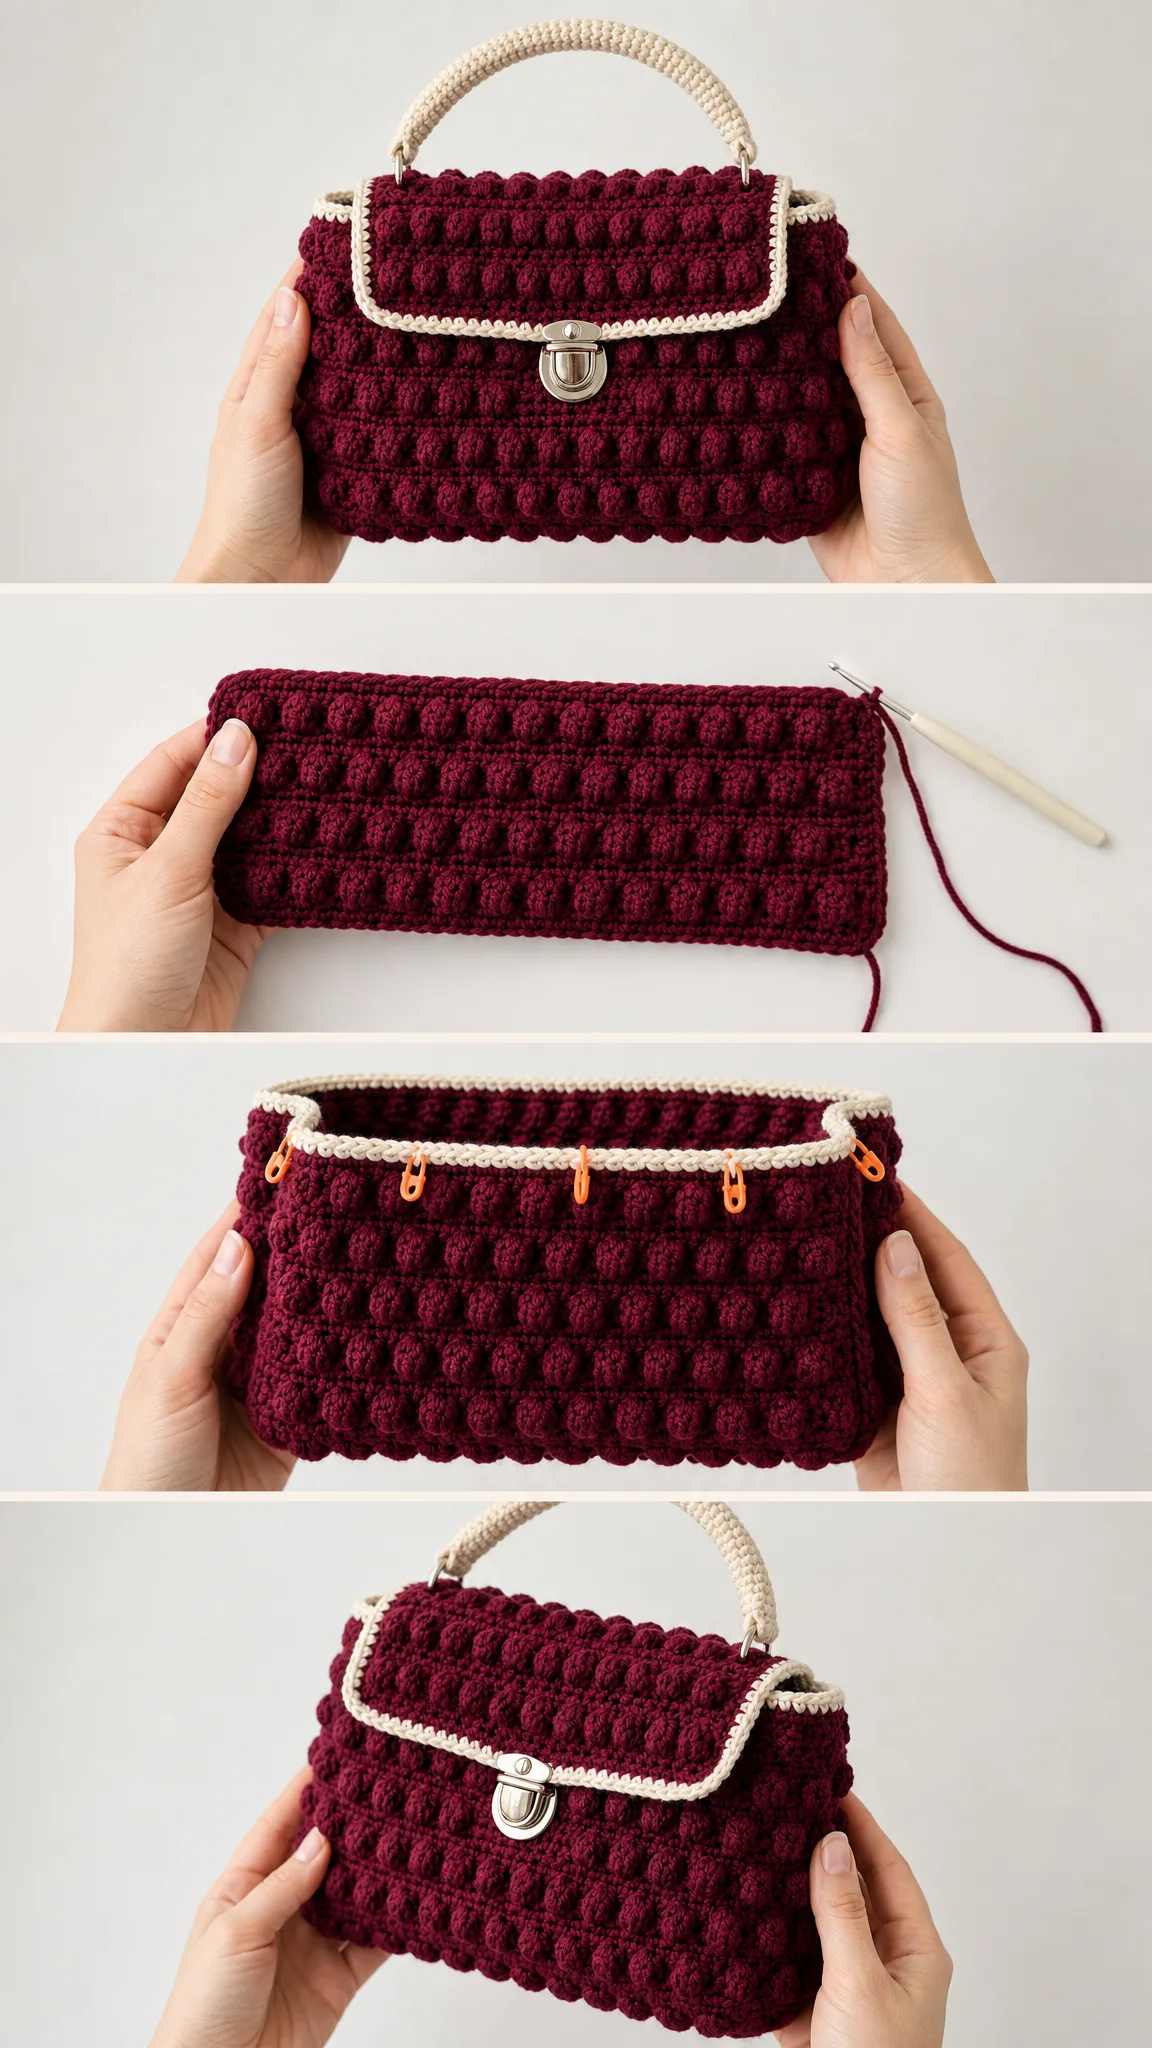
Opening Trim
Switch to ivory yarn for a clean contrast edge around the top opening.
Round 20: Join ivory. Ch 1, sc in each st around, join. (56 sc)
Round 21: Ch 1, reverse sc (crab stitch) in each st around, join, fasten off. (56 rev sc)
This creates that beautiful corded trim you see in the photos.
The Flap
The flap is worked flat in turned rows. With right side facing, rejoin burgundy yarn across the back 28 stitches.
Row 1: Ch 1, sc across. (28 sc)
Row 2: Ch 1, sc across. (28 sts)
Row 3: Ch 1, [BO, sc] across for 14 repeats. (28 sts)
Row 4: Ch 1, sc across. (28 sts)
Row 5: Ch 1, [sc, BO] across, offset from Row 3. (28 sts)
Row 6: Ch 1, sc across. (28 sts)
Row 7: Ch 1, [BO, sc] across. (28 sts)
Row 8: Ch 1, sc2tog, sc 24, sc2tog. (26 sts)
Row 9: Ch 1, sc2tog, sc 22, sc2tog, fasten off. (24 sts)
These decreases round the lower corners of your flap for a polished look.
Flap Edging
Join ivory at a top corner. Single crochet evenly down the side, across the shaped bottom, and up the other side. Leave the top fold open.
Work one row of reverse single crochet back over the same edge for the corded ivory frame.
The Handle
Switch to the smaller G/6 hook for a firmer handle. Use ivory yarn.
Row 1: Ch 5. Sc in 2nd ch from hook and across. (4 sc)
Rows 2 through 30: Ch 1, sc across each row until your strip measures about 11 inches / 28 cm. (4 sc)
Fold the strip lengthwise and whipstitch closed into a firm cord.
Putting It All Together
Step 1: Sew the two D-rings to the inside of the back top edge, about 1 inch / 2.5 cm in from each side.
Step 2: Thread each handle end through a D-ring, fold back about 1 inch, and seam securely.
Step 3: Center the tuck-lock catch plate on the front body, about 2½ inches / 6 cm below the opening. Fix the tongue on the flap underside to align.
Finishing and Blocking
Weave in all ends securely on the wrong side. Insert the optional base stiffener for a crisper, upright shape.
Lightly steam the burgundy body to even out the bobbles. Hover the iron over the fabric. Never press the bobbles flat or you will lose that gorgeous texture.
Care Instructions
Hand wash cool, reshape, and dry flat. Spot-clean around hardware, or remove the clasp before washing if possible. Never wring the bobble fabric.
Troubleshooting Tips
Bobbles sinking in? Push each one firmly to the front as you close it. You can also try a half-size smaller hook.
Top flaring out? Your plain rounds may be too loose. Size down your hook.
Columns drifting? Make sure every bobble lands in the single crochet gap of the round below, not stacked directly on top of another bobble.
Want to customize? Handle length, flap depth, and base stiffness are all yours to fine-tune to your preferences.
Size Customization
Want a wider bag? Add foundation chains in pairs. Each extra 2 stitches adds about ½ inch / 1.3 cm of width.
Want a taller bag? Add a matched pair of bobble plus plain rounds. That adds about 1 inch / 2.5 cm each. Keep the body count even so the bobble repeat always divides cleanly.
Final Thoughts on This Crochet Handbag Pattern
This Burgundy Bobble Stitch Handbag is one of those projects that looks way more complicated than it actually is. Yes, it takes some time. Yes, you need to pay attention to your bobble placement. But the result is a bag that looks like it came from a boutique, not your craft room.
I hope you love making this as much as I loved designing it. That burgundy and ivory combination is classic, but imagine this in navy and white, or forest green with cream trim. The possibilities are endless.
Thank you so much for choosing this pattern. It means the world to me that you are here, ready to create something beautiful with your own hands.
If you make this bag, I would absolutely love to see it. Tag me on Instagram or share a photo in my Facebook group. Seeing your finished projects is honestly the best part of my job.
Save this pattern to your Pinterest boards so you can find it when you are ready to cast on. And if you make this handbag, please leave a comment below. I love hearing how your projects turn out, and your tips always help other makers in the community.
Want a Quick & Easy Printable Version?
Get a clean, beautifully formatted PDF of this pattern — easy to follow step by step, ready to print or save on any device. No scrolling, no distractions, just the pattern.
Get the Printable PDF →