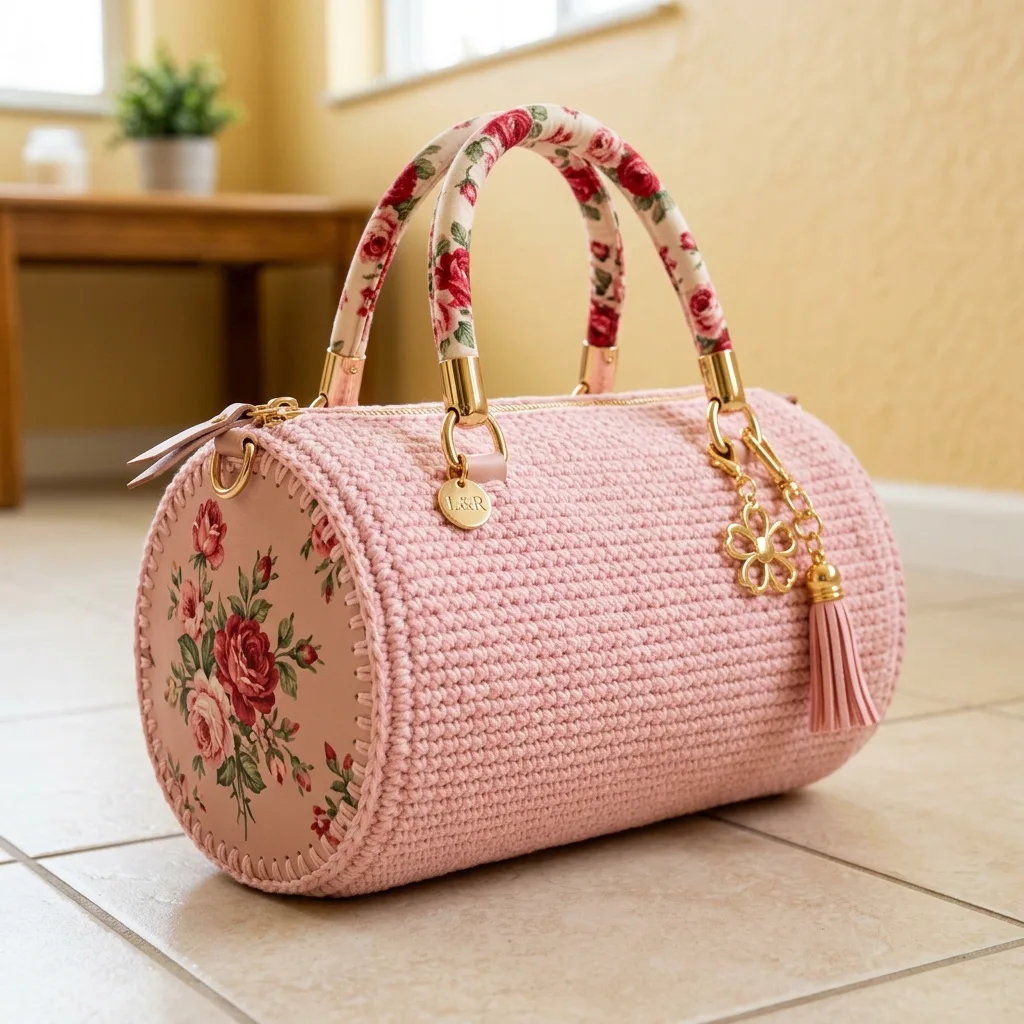
This is SUCH a satisfying make! If you’ve been wanting to create something that looks totally boutique-worthy but works up faster than you’d think, this Pink Floral Barrel Handbag is about to become your new favorite project. We’re talking 8 to 12 hours of crochet time for a bag that genuinely looks like something you’d find in a high-end shop window. The single crochet body is pure relaxation, and the floral fabric end panels add that designer touch without any complicated colorwork. This makes an absolutely stunning gift, or honestly, just keep it for yourself. You’ve earned it!
Get the Ad-Free PDF Pattern
You can find the free pattern below, or you can purchase the ad-free printable PDF from my shop.
Get the Printable PDF →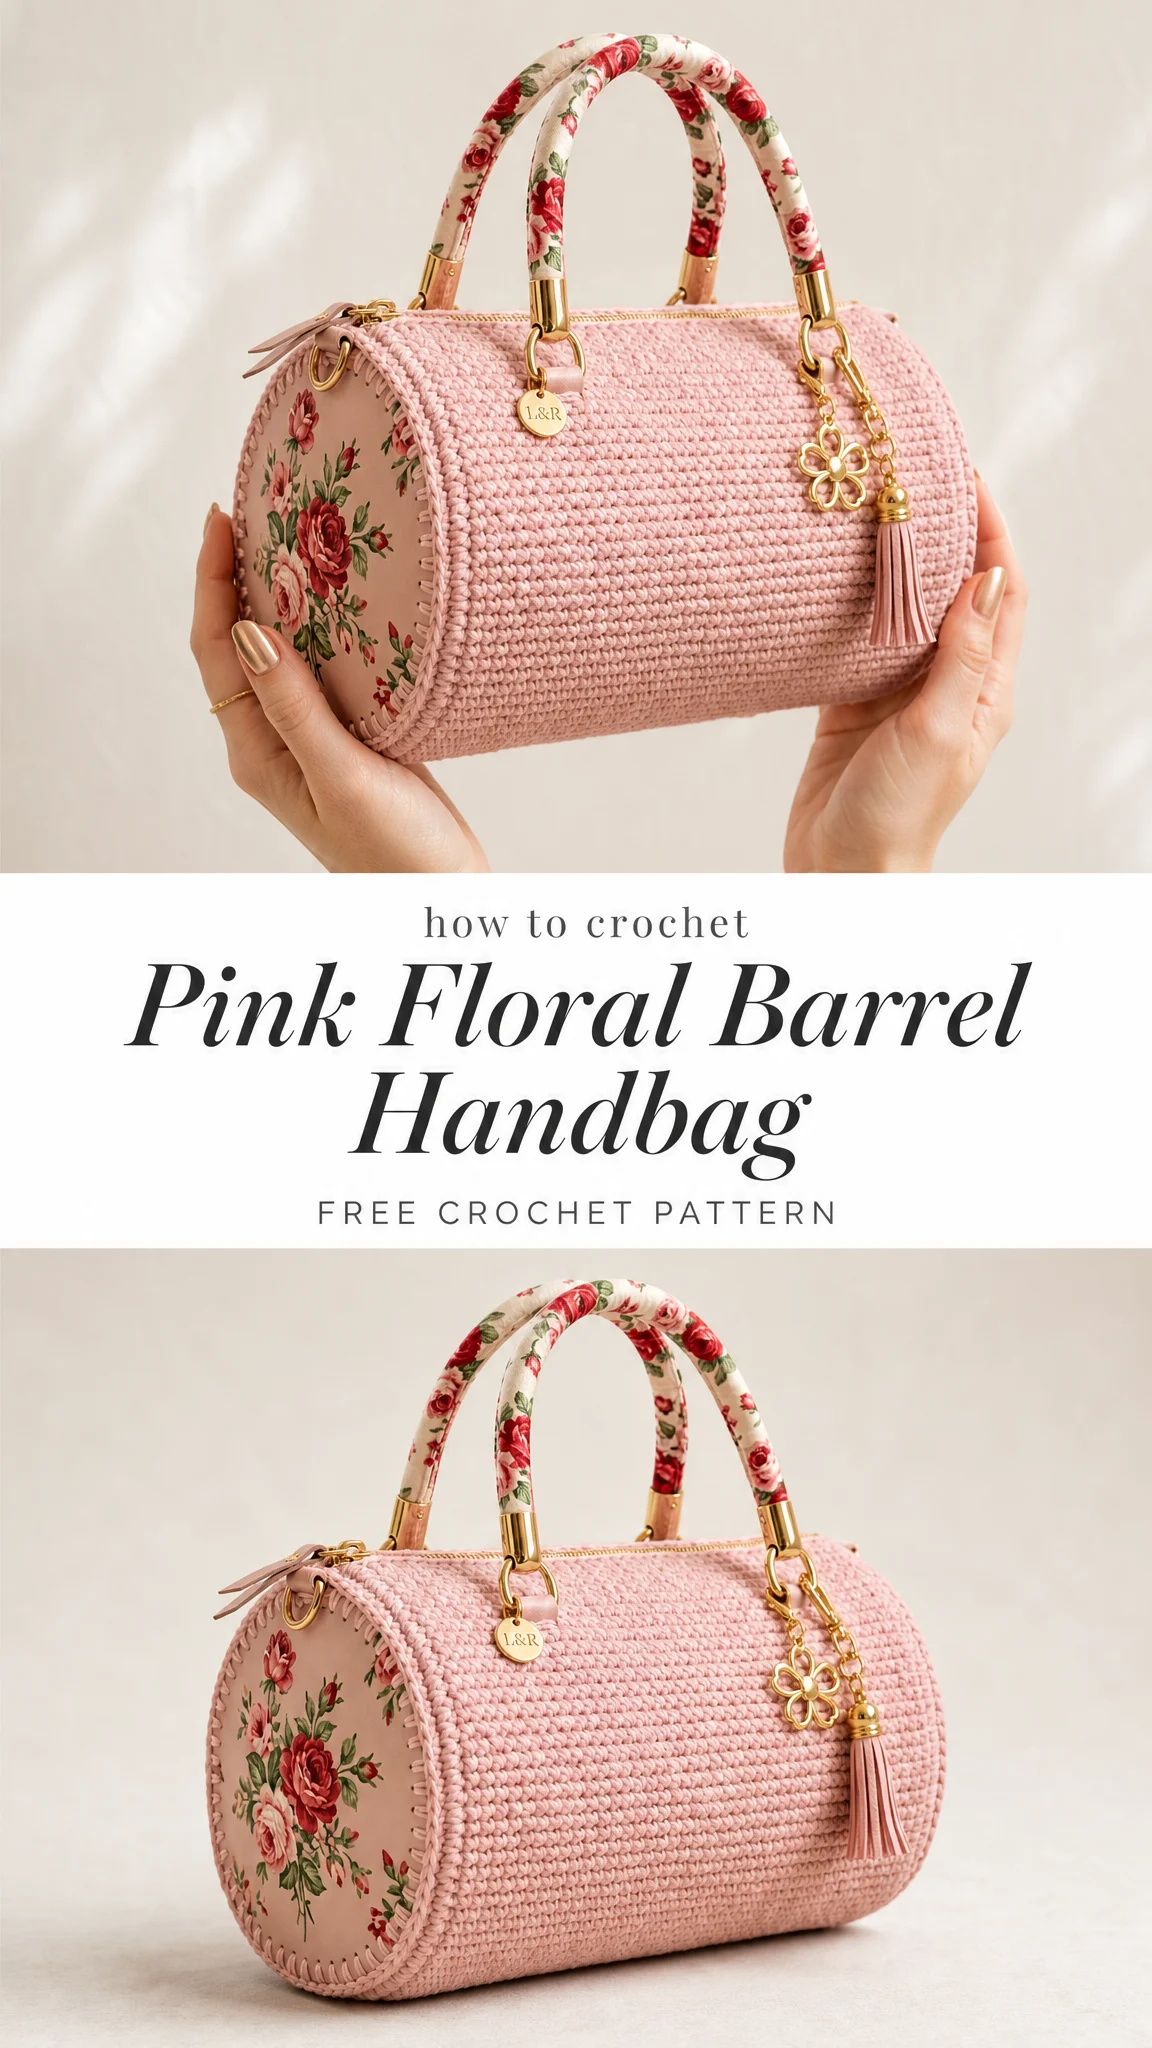
Why You’ll Love This Barrel Handbag Pattern
This structured barrel bag combines simple crochet technique with fabric elements for a polished, professional result. The body uses only single crochet (sc), which means you can work on it while watching your favorite show without losing your place. The real magic comes from the construction. You’ll create a firm tube, attach beautiful floral fabric circles to each end, install a zipper, and add gorgeous gold-tone hardware with wrapped handles.
The finished bag measures approximately 9.45 inches long by 5.5 inches in diameter (24 cm x 14 cm), with a total height of about 9.84 inches (25 cm) including the handles. It’s the perfect size for everyday essentials without being bulky.
What I especially love about this design is how it bridges crochet and sewing. You don’t need to be an expert seamstress. If you can whipstitch and hand-sew a zipper with basic backstitches, you’ve got this.
Skill Level
This pattern is rated Intermediate, but I’d describe it as perfect for a confident beginner who’s comfortable with basic sewing and zipper installation. The crochet portion is genuinely simple. It’s the finishing work that requires a bit more attention.
Materials You’ll Need
Before you start, gather everything so you’re not hunting for supplies mid-project.
Yarn
You’ll need approximately 328 yards (300 meters) of medium weight cotton yarn in dusty pink. Choose a smooth, tightly twisted cotton for the firmest handbag fabric. If your chosen yarn has shorter yardage per skein, buy 2 skeins to be safe.
Recommended yarns:
Pro tip: For extra structure, you can hold one strand of sport weight cotton together with a thin nylon crochet thread. Just make sure to swatch first!
Hook
3.5 mm (US E-4) crochet hook, or whatever size you need to achieve a firm gauge.
Fabric and Notions
Tools
Gauge
18 sc x 18 rounds = 4 inches (10 cm) in single crochet, worked firmly.
Gauge matters a lot here because you need a dense, structured fabric. If your swatch feels floppy or has visible holes, go down a hook size. The bag should hold its shape without sagging.
Abbreviations (US Terms)
Let me break down every stitch and term you’ll encounter:
Construction Overview
Here’s how this bag comes together:
1. Crochet a firm tube (the barrel body)
2. Create two floral fabric circles backed with lining
3. Whipstitch the fabric panels to each end of the tube
4. Install the zipper along the top opening
5. Add the lining inside
6. Attach handles with D-rings and hardware
7. Add optional charms and tassel
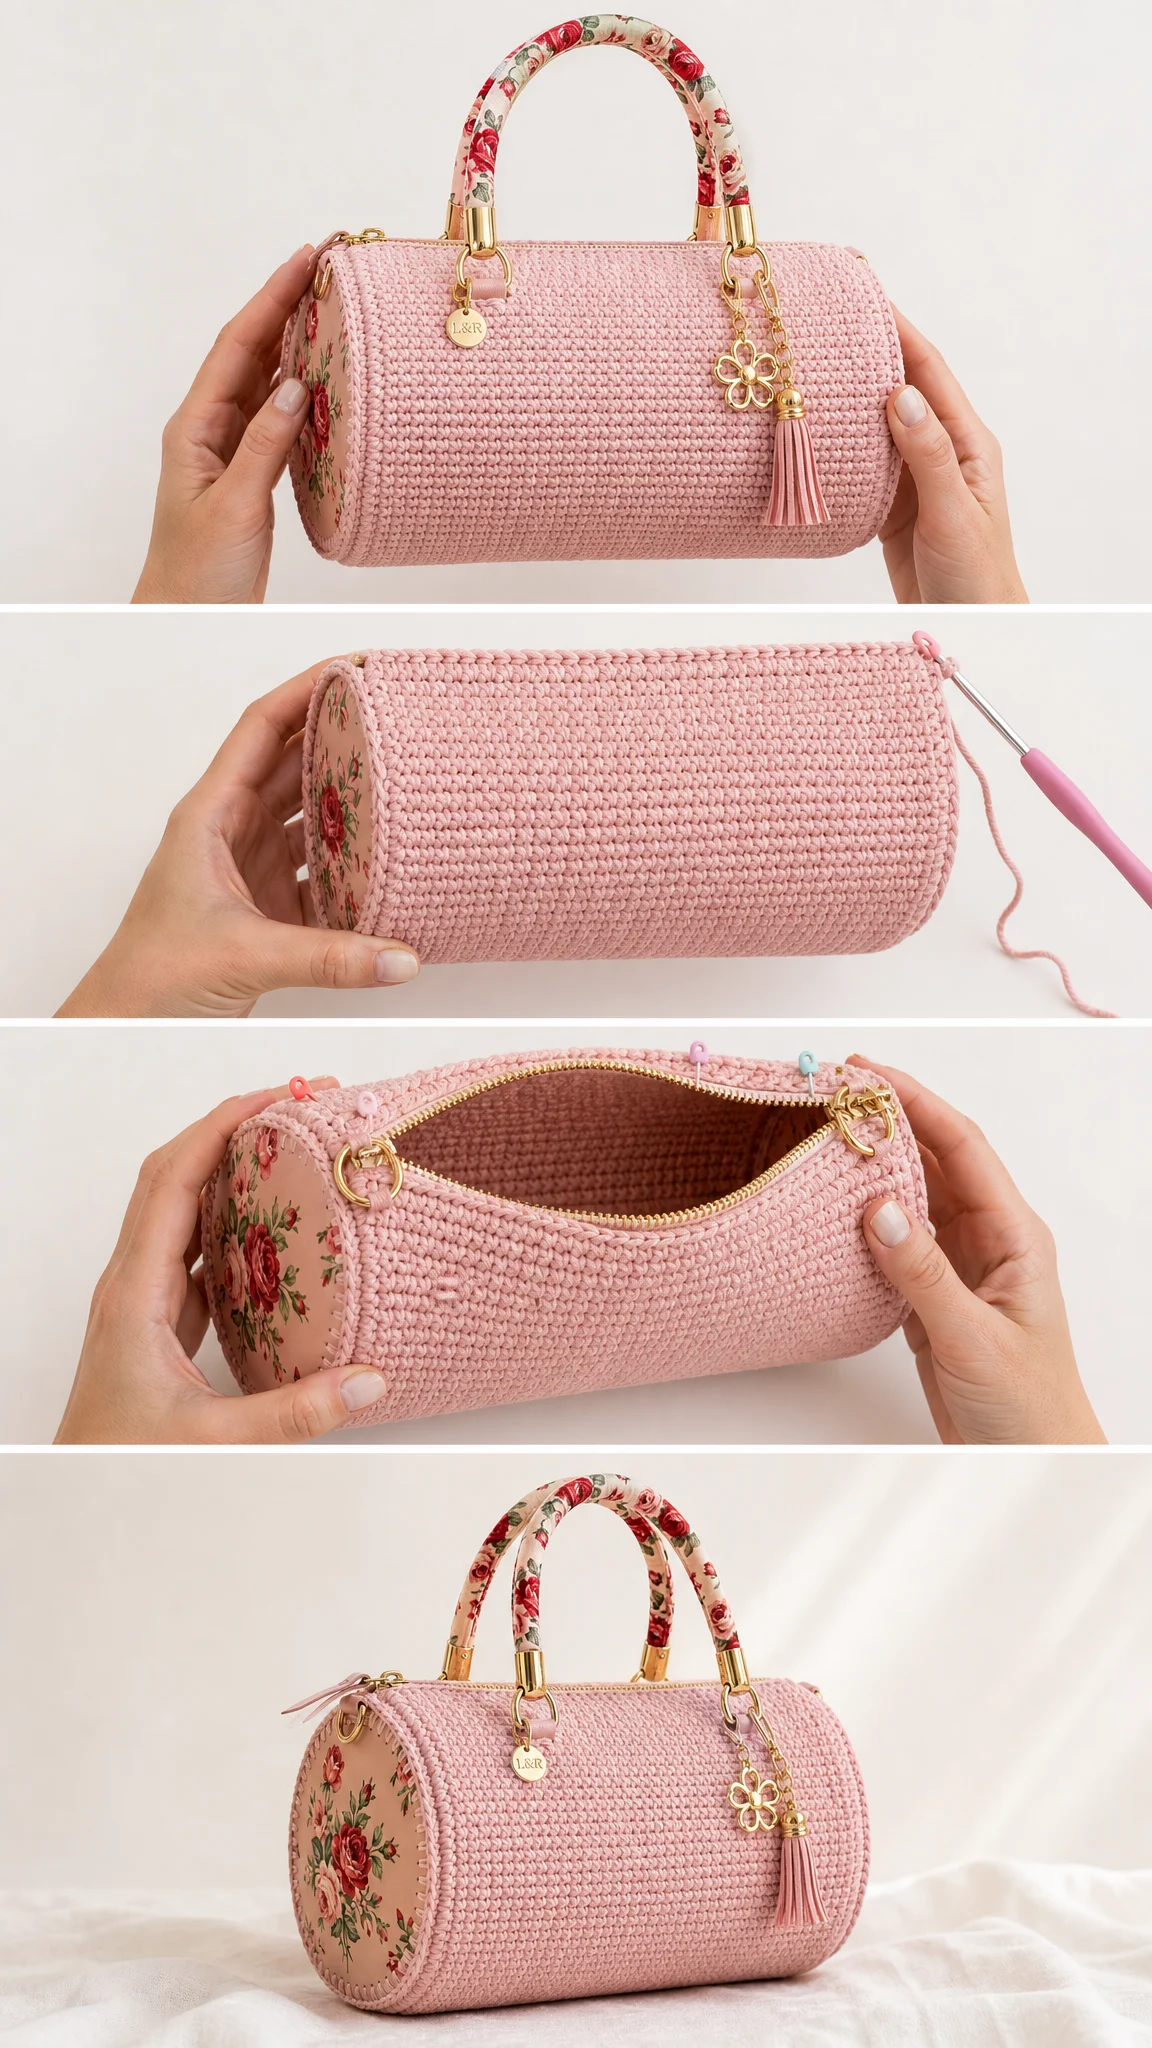
Crochet Body Instructions: The Barrel Tube
Work tightly throughout. The tube is crocheted in continuous rounds, then lightly blocked around a cylinder or stuffed towel to maintain that rounded barrel shape.
Foundation
Chain 44. Without twisting the chain, join with a slip stitch to form a ring.
Place a stitch marker in the first stitch of the round. When gently flattened into a circle, this opening should measure close to 14 cm (5.5 inches) across.
Round 1
Ch 1, sc in each ch around. Do not turn. Do not join. Continue working in a spiral.
Stitch count: 44 sc
Rounds 2-54
Sc in each st around, moving your stitch marker up at the start of each round.
Continue working until the tube measures 24 cm (9.45 inches) long from edge to edge. You may need to add or remove a few rounds depending on your personal gauge. The important thing is maintaining a firm fabric while hitting that length measurement.
Top Shaping Line
On your final round, mark where the zipper will go. You want a 20 cm (7.9 inch) opening centered along the upper side of the barrel. Keep the first and last 2 cm (0.8 inches) at each end closed for a neat barrel edge.
Final Round
Slip stitch loosely in the next 6 stitches to smooth out the spiral step that naturally forms in continuous rounds.
Fasten off, leaving a 12 inch (30 cm) tail. Weave this tail in on the inside of the tube.
Optional Internal Structure
For extra rigidity, cut a rectangle of plastic canvas or firm interfacing to fit inside the body. The insert should sit behind the crochet without forcing the tube to stretch larger.
Size Check
After completing Round 54, your tube should measure approximately 24 cm (9.45 inches) long and 14 cm (5.5 inches) across the circular end. Remember, achieving a dense gauge matters more than hitting the exact round count.
Floral End Panels (Make 2)
Use the circular end of your crocheted tube as your template so the panels fit your personal gauge perfectly.
Step 1: Cut the Circles
Cut two floral fabric circles measuring 15.2 cm (6 inches) across.
Cut two lining fabric circles the same size.
If using interfacing, cut two interfacing circles at 14 cm (5.5 inches).
Step 2: Layer Each Panel
Place your floral fabric with the right side facing down. Add interfacing on top if you’re using it. Then place your lining fabric with the right side facing up.
Baste around the circle 0.6 cm (1/4 inch) from the edge to hold the layers together.
Step 3: Prepare the Edge
Fold the raw edge toward the lining by 0.6 cm (1/4 inch) and press with an iron. Clip or baste in place.
Your finished circle should be about 14 cm (5.5 inches) across, matching your tube opening.
Step 4: Mark Quarters
Mark top, bottom, left, and right on each fabric panel. Do the same on each crochet tube opening.
These marks help you distribute the fabric evenly around the crochet edge without creating puckers.
Step 5: Attach to Barrel
With the right side of your bag facing out, align one fabric panel to one tube end. Match up your quarter marks.
Whipstitch through the folded fabric edge and the outer loops of the crochet edge. Keep your stitches close together and even.
Step 6: Repeat
Attach the second panel to the opposite end.
Important: Check that both floral prints face upright when the handbag is viewed from the front. You want the roses right-side-up on both ends!
Zipper, Lining, Handles, and Hardware
Now for the finishing touches that take this from "nice crochet project" to "wait, you MADE that?!"
Step 1: Install the Zipper
Pin the zipper along the marked top opening with zipper teeth centered.
Hand sew the zipper tape to the inside top edge using small backstitches. Alternatively, you can whipstitch carefully through the inner crochet loops.
Step 2: Make the Lining
Cut a rectangle measuring 25.5 x 45 cm (10 x 17.75 inches).
Sew the short edges together to form a tube. Turn under the upper edge by 1 cm (3/8 inch) and press.
Step 3: Insert the Lining
Place the lining inside the bag with wrong sides together (so the seams are hidden between the lining and crochet).
Hand stitch the folded lining edge just below the zipper tape. This hides both the zipper tape and your inner seams for a clean finish.
Step 4: Attach Handle Anchors
At the top of each end, sew or crochet small reinforced tabs around D-rings.
Place one D-ring on each side of each end panel, close to the upper curve. That’s four D-rings total.
Step 5: Clip Handles
Attach your handles using O-rings or clips.
If your handles have metal end caps, make sure the opening faces inward so the front view stays clean and polished.
Step 6: Add Charm and Tassel
Clip your floral charm and tassel to one front-side ring.
Tip: Keep decorations removable so you can clean the bag gently when needed.
Finishing Tips
Steam blocking: Hold your steamer or iron at a distance without touching the hardware. Never press directly on the crochet or hardware.
Shaping: While the bag is still slightly damp or warm, insert a rolled towel inside and let it sit until completely cool and dry. This helps the barrel hold its shape.
Fit, Care, and Troubleshooting
Care Instructions
Common Issues and Fixes
If the tube is too soft: Switch to a smaller hook, add stabilizer inside, or work the body in BLO (back loop only) for a slightly tighter ribbed surface.
If end panels pucker: Remove a few stitches, re-mark your quarters, and ease the fabric in gradually. The fabric circle should match the crochet edge, not stretch it.
If the zipper waves: Baste first, then sew from the center outward on both sides. Don’t pull the zipper tape while stitching.
If your gauge differs: Adjust the starting chain to fit the 14 cm (5.5 inch) diameter. Use an even stitch count. Work the tube to 24 cm (9.45 inches) in length regardless of round count.
Note for Left-Handed Crocheters
Left-handed crocheters can follow all stitch counts exactly as written. Your spiral direction and whipstitch direction may mirror the photos, and that’s completely fine. Just keep the right side facing out and place the zipper centered along the top seam.
Customization Ideas
Want to make this bag your own? Here are some ideas:
Final Thoughts on This Pink Floral Barrel Handbag Crochet Pattern
This barrel handbag really is one of those projects that impresses everyone who sees it. The combination of crochet and fabric creates such a unique, high-end look, and honestly, the construction is much simpler than it appears. Once you’ve made one, you’ll probably want to make more in different colors and fabrics!
The key to success is working with firm tension and taking your time with the finishing details. The actual crochet portion is meditative and straightforward. It’s the assembly where you’ll want to slow down and be precise.
Thank you so much for choosing this pattern for your next project! I really hope you love making it as much as I loved designing it. If you give this Pink Floral Barrel Handbag a try, I’d absolutely love to see your finished bag. Tag me on Instagram or share in our Facebook group. Nothing makes my day like seeing your beautiful creations!
If this pattern caught your eye, go ahead and save it to your Pinterest boards so you can find it when you’re ready to start. And if you do make this gorgeous bag, please drop a comment below. I’d love to hear which fabric you chose and how it turned out!
Want a Quick & Easy Printable Version?
Get a clean, beautifully formatted PDF of this pattern — easy to follow step by step, ready to print or save on any device. No scrolling, no distractions, just the pattern.
Get the Printable PDF →