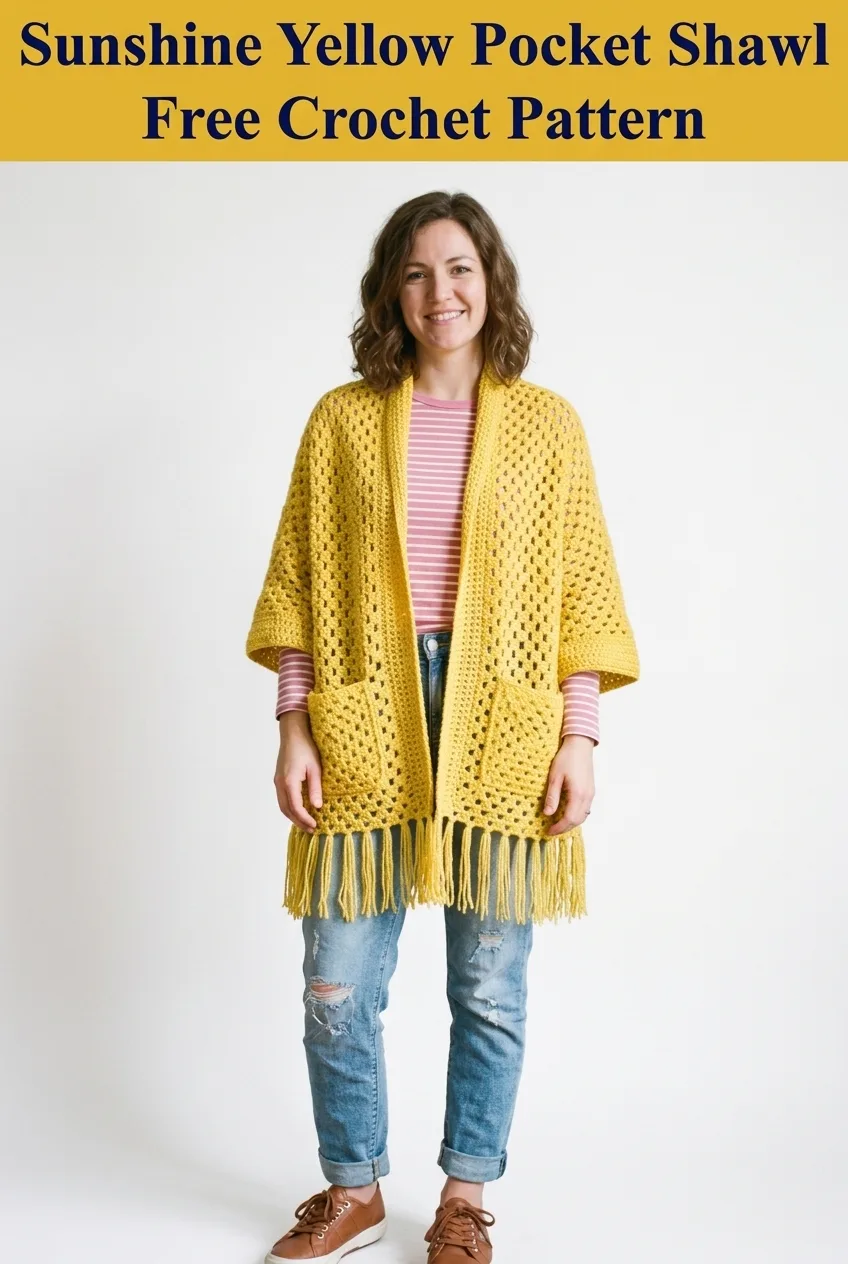
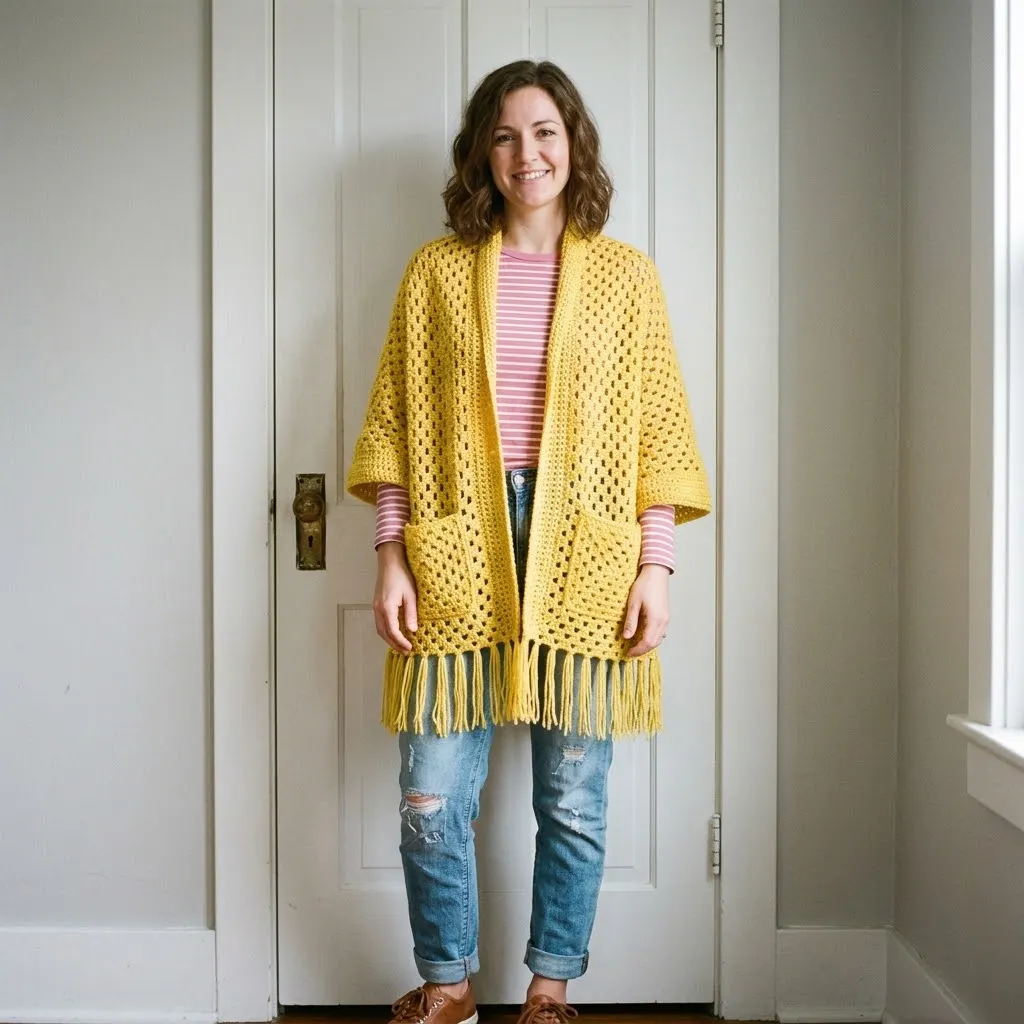
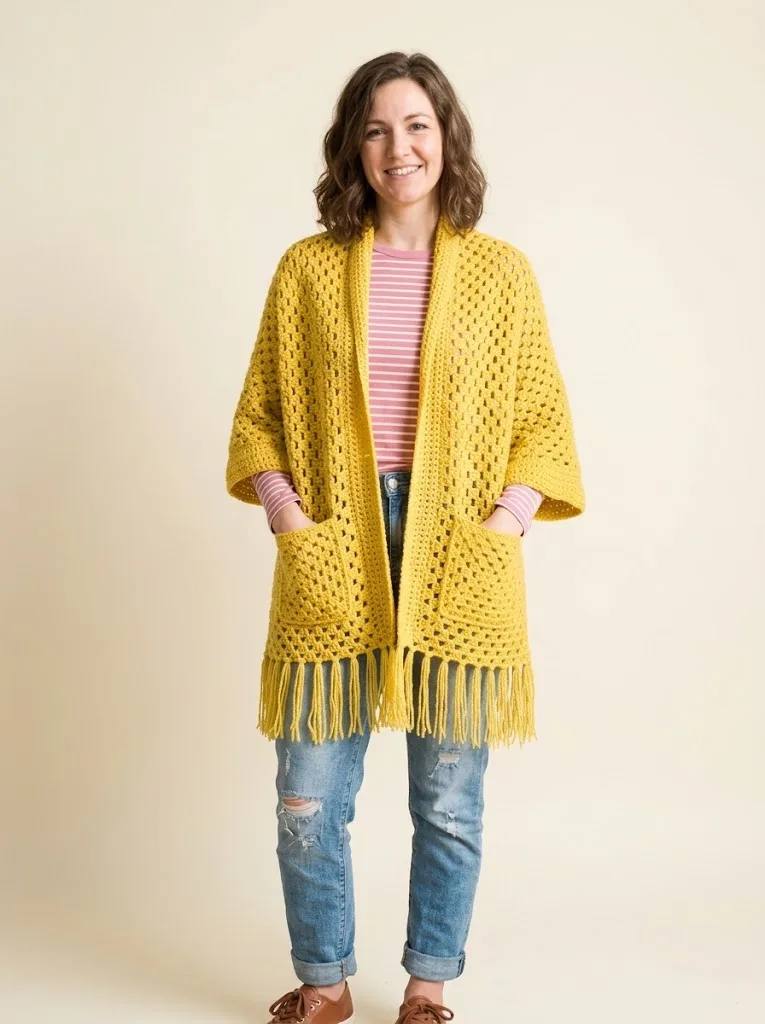
When I sat down to design this pocket shawl, I had three goals in mind. I wanted something that would work across multiple body types without complicated sizing. I wanted a stitch pattern that beginners could master but that would still look impressive. And I wanted pockets, because who doesn’t love pockets? I am SO pleased with how this turned out! The granny stitch creates beautiful drape while the fringe adds that perfect boho touch. This sunshine yellow pocket shawl has become my go-to layering piece, and I cannot wait for you to make your own.
Why This Pocket Shawl Pattern Works
This crochet pocket shawl combines the classic granny stitch with modern wearable design. The construction is straightforward. You work the main body as one large rectangle, add two matching pockets, then finish with fringe along the bottom edge. No complicated seaming or shaping required.
The granny stitch creates a lacy, open texture that makes this shawl lightweight enough for indoor wear but still provides warmth when you need it. The stitch pattern is repetitive and easy to memorize, so you can work on this while watching your favorite shows.
What makes this pocket shawl special is the versatility. Wear it draped over your shoulders like a traditional shawl. Wrap it around yourself like a cozy cardigan. The wide sleeves give you full range of motion while the pockets keep your hands warm or hold your phone and keys.
Skill Level
This crochet pattern is beginner friendly with some intermediate elements. If you can chain, double crochet, and count stitches, you can make this shawl. The granny stitch cluster is easy to learn and very forgiving.
The pocket attachment requires basic seaming skills, but I walk you through every step. The fringe is simple cutting and knotting.
Materials Needed
Yarn:
Hook:
Notions:
Gauge
14 stitches and 8 rows = 4 inches in granny stitch pattern
Gauge matters for this project because it affects the final size. Take time to make a small swatch before starting. If your swatch is too small, try a larger hook. If too large, try a smaller hook.
Finished Measurements
Abbreviations and Stitch Definitions
Ch = Chain. Wrap yarn over hook and pull through the loop on your hook. This creates one chain stitch.
Sl st = Slip stitch. Insert hook into stitch, yarn over, pull through both the stitch and the loop on your hook in one motion.
Dc = Double crochet. Yarn over, insert hook into stitch, yarn over and pull up a loop (3 loops on hook), yarn over and pull through 2 loops (2 loops remain), yarn over and pull through remaining 2 loops.
Ch-sp = Chain space. The gap or hole created by chain stitches in the previous row. You will work into this space rather than into individual stitches.
Granny cluster = 3 dc worked into the same stitch or space. This creates the signature look of granny stitch fabric.
Sk = Skip. Pass over the indicated number of stitches without working into them.
Special Techniques
The Granny Stitch Pattern
The granny stitch is a cluster of three double crochets separated by chain stitches. Instead of working into the top of stitches from the previous row, you work into the chain spaces. This creates the characteristic holes and gives the fabric wonderful drape.
Here is how the basic rhythm works: 3 dc in ch-sp, ch 1, skip to next ch-sp, repeat across.
Do not stress if your first row looks a bit wonky. The pattern really starts to show itself after a few rows.
Step by Step Crochet Pattern for the Pocket Shawl
Main Body
Foundation Row:
Ch 206.
Row 1:
Dc in 4th ch from hook (the skipped chains count as your first dc). Dc in next ch. *Ch 1, sk 1 ch, dc in next 3 ch.* Repeat from * to * across. Turn. (204 sts total including chain spaces)
Row 2:
Ch 3 (counts as first dc here and throughout). Dc in next 2 dc. *Ch 1, sk ch-sp, dc in next 3 dc.* Repeat from * to * across. Turn.
Rows 3 through 52:
Repeat Row 2.
Your main body should now measure approximately 26 inches from top to bottom. If you want a longer shawl, continue repeating Row 2 until you reach your desired length. Just remember this will require more yarn.
Fasten off and weave in ends.
Border for Main Body
The border creates a clean finished edge and provides structure for attaching pockets later.
Round 1:
Join yarn at any corner with a sl st. Ch 1. Work sc evenly around entire rectangle. At corners, work 3 sc in same stitch to turn the corner smoothly. Sl st to first sc to join.
Work approximately 3 sc for every 2 rows along the sides. Work 1 sc in each stitch along the top and bottom edges. Aim for your border to lie flat without puckering or ruffling.
Fasten off and weave in ends.
Pockets (Make 2)
The pockets use the same granny stitch pattern as the main body so everything matches beautifully.
Foundation Row:
Ch 26.
Row 1:
Dc in 4th ch from hook. Dc in next ch. *Ch 1, sk 1 ch, dc in next 3 ch.* Repeat from * to * across. Turn. (24 sts)
Row 2:
Ch 3. Dc in next 2 dc. *Ch 1, sk ch-sp, dc in next 3 dc.* Repeat from * to * across. Turn.
Rows 3 through 14:
Repeat Row 2.
Your pocket should measure approximately 6 inches wide and 7 inches tall.
Pocket Border
Work a single crochet border around the top edge of each pocket only. This creates a neat finished edge that will be visible when worn.
Top Edge Border:
Join yarn at corner of top edge. Ch 1. Sc in each st and ch-sp across top edge. Fasten off.
Leave the sides and bottom without a border since these edges will be sewn to the main body.
Pocket Placement and Attachment
Lay your main body flat with the right side facing up. Position each pocket approximately 8 inches from the center opening and about 4 inches up from the bottom edge.
Pin or use stitch markers to hold pockets in place. Make sure both pockets are positioned symmetrically.
Using your tapestry needle and matching yarn, whipstitch the side and bottom edges of each pocket to the main body. Leave the top edge open so you can actually use the pockets!
Take your time with this step. Neat stitching makes a professional looking finished piece.
Adding the Fringe
The fringe adds movement and that perfect bohemian vibe to this pocket shawl.
Cutting the Fringe:
Cut strands of yarn approximately 14 inches long. You will need roughly 100 to 120 strands total, depending on how full you want your fringe.
Attaching the Fringe:
Fold 2 strands in half to create a loop. Insert your crochet hook through a stitch along the bottom edge of the shawl. Grab the folded loop with your hook and pull it through the stitch. You now have a loop on one side and four tail ends on the other. Pull the tail ends through the loop and tug gently to secure.
Repeat across the entire bottom edge, spacing fringe bundles approximately 1 inch apart. Aim for consistent spacing for the best look.
Trimming:
Once all fringe is attached, lay the shawl flat and trim the ends so they are even. The finished fringe should hang about 6 inches.
Customization Ideas
Size Adjustments:
For a wider shawl, add chains in multiples of 4 to your foundation chain. For a narrower shawl, subtract chains in multiples of 4.
Length Changes:
Simply add or remove rows from the main body until you reach your preferred length.
Color Options:
This pattern looks stunning in solid colors that show off the stitch definition. It also works beautifully in ombre or gradient yarns for a more dramatic effect.
Skip the Fringe:
If fringe is not your style, leave it off entirely or substitute a simple scallop border instead.
Larger Pockets:
Add more rows to your pocket pieces if you want deeper pockets for bigger items.
Care Instructions
Most acrylic yarns can be machine washed on a gentle cycle with cold water. Lay flat to dry to maintain the shape. If using natural fibers, check your yarn label for specific care instructions.
The fringe may tangle slightly in the wash. Consider placing your shawl in a mesh laundry bag to minimize this.
Troubleshooting Tips
My edges are wavy:
Your turning chain might be too loose or too tight. Try adjusting your tension or going up or down a hook size just for the turning chain.
My stitch count keeps changing:
Count your stitches at the end of each row until the pattern becomes second nature. Place a stitch marker in your first and last stitch of each row if counting is challenging.
My pockets don’t match:
Check your gauge between the two pockets. Crochet tension can vary from day to day depending on mood, stress level, or tiredness. If one pocket is significantly different, consider remaking it.
The fringe looks uneven:
Use a piece of cardboard cut to your desired fringe length as a wrapping guide. Wrap yarn around the cardboard, then cut along one edge for perfectly uniform strands every time.
Why You Will Love This Crochet Tutorial
This sunshine yellow pocket shawl pattern gives you a wearable, functional piece that looks far more complicated than it actually is. The granny stitch rhythm becomes meditative once you get going. The pockets are genuinely useful. And the finished shawl makes an incredible gift for birthdays, holidays, or just because.
The step by step instructions break everything down so you know exactly what to do next. Whether you are newer to crochet or have been hooking for years, this pattern delivers satisfying results.
Thank you so much for choosing this pattern! I truly hope you love making your own sunshine yellow pocket shawl as much as I loved designing it. If you make one, I would absolutely love to see it. Tag me on Instagram or share a photo on Facebook so I can cheer you on!
If this pocket shawl pattern is calling your name, go ahead and save it to your Pinterest boards so you can find it whenever you are ready to start. And please drop a comment below if you make one. I love hearing from you and seeing your beautiful creations!
