If you have ever scrolled past a gorgeous crocheted plant arrangement and thought "that looks way too complicated for me," I need you to stop right there. This lavender bouquet in its sweet little pot looks incredibly intricate, but I promise you it is built from simple, repetitive techniques stacked together. The bobble stitches that form those beautiful purple buds? Just yarn overs and pull throughs you probably already know. The pot itself? Basic single crochet worked in the round. Even if you consider yourself a beginner, you can absolutely make this stunning piece. I designed this project to be approachable for crafters at every skill level, and I am going to walk you through every single step so you feel confident from start to finish.
Why You Will Love This Crochet Lavender Bouquet Pattern
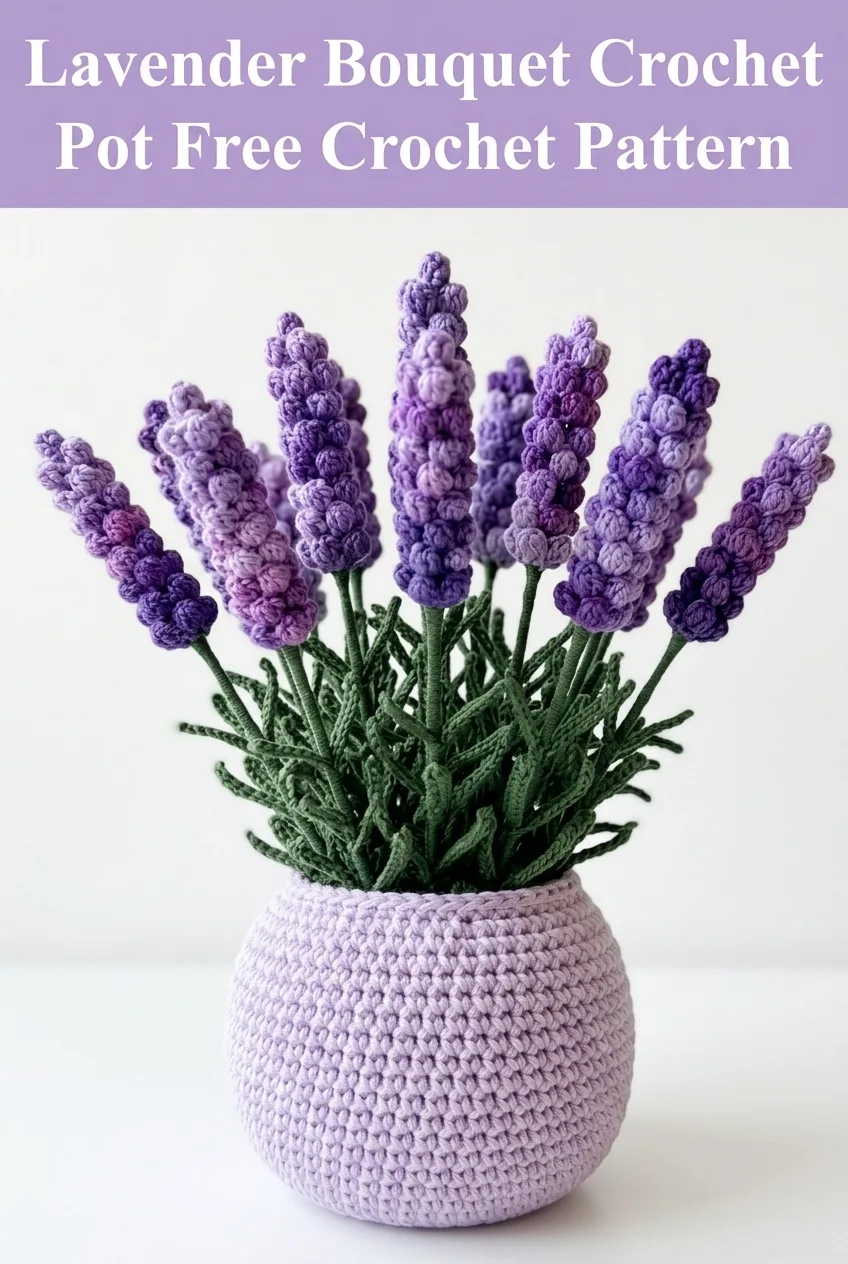
This crochet lavender bouquet makes the perfect everlasting floral arrangement for your home or as a heartfelt handmade gift. Unlike real lavender that wilts and needs replacing, your crocheted version will stay beautiful on a windowsill, desk, or shelf for years to come.
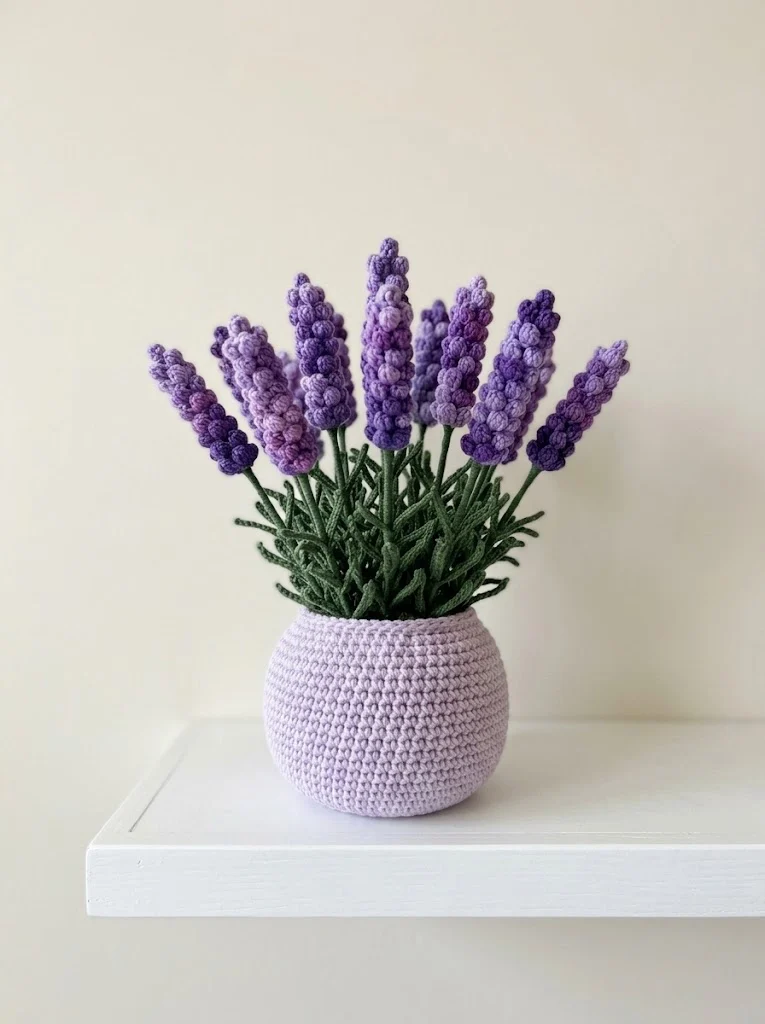
The finished arrangement stands approximately 8 to 10 inches tall and features multiple lavender stems in varying shades of purple, lush green foliage, and a rounded pot cover that fits over a small container or can be stuffed to stand alone. Each component uses stitches you likely already have in your repertoire, just combined in clever ways.
This crochet tutorial breaks everything down into manageable pieces. You will make the pot first, then the stems and leaves, and finally the lavender flower spikes. By the time you assemble everything, you will have a gorgeous botanical display that looks like it took months to create.
Materials You Will Need
Yarn:
I recommend using 100% cotton yarn for this project. Cotton holds its shape beautifully and gives the finished piece a sturdy, structured look. Acrylic works fine too, but cotton gives you that crisp definition you see in the photos.
Tools:
Stitch Abbreviations and Definitions
Before we dive into the step by step pattern, let me explain every stitch you will use. Even if you know these already, a quick refresher never hurts.
Ch = Chain: Yarn over, pull through the loop on your hook. This creates a foundation stitch.
Sl st = Slip stitch: Insert hook, yarn over, pull through both the stitch and the loop on your hook in one motion. Used for joining rounds.
Sc = Single crochet: Insert hook into stitch, yarn over and pull up a loop (2 loops on hook), yarn over and pull through both loops.
Inc = Increase: Work 2 single crochet stitches into the same stitch. This adds one stitch to your count.
Dec = Decrease (invisible decrease): Insert hook through front loops only of the next 2 stitches, yarn over and pull through both, yarn over and pull through remaining 2 loops.
Bobble = Bobble stitch: Yarn over, insert hook, pull up a loop, yarn over, pull through 2 loops. Repeat this 4 more times in the same stitch (6 loops on hook), then yarn over and pull through all 6 loops. This creates a textured bump that pops out from the fabric.
Hdc = Half double crochet: Yarn over, insert hook into stitch, yarn over and pull up a loop (3 loops on hook), yarn over and pull through all 3 loops.
The Crochet Pot Pattern
The pot is worked in continuous rounds using a spiral method. Do not join at the end of each round. Instead, use a stitch marker to track your first stitch and move it up as you go.
Using lilac/light purple yarn and 3.5mm hook:
Round 1: Create a magic ring. Work 6 sc into the ring. Pull tight. (6 sts)
Round 2: Inc in each st around. (12 sts)
Round 3: *Sc 1, inc* repeat around. (18 sts)
Round 4: *Sc 2, inc* repeat around. (24 sts)
Round 5: *Sc 3, inc* repeat around. (30 sts)
Round 6: *Sc 4, inc* repeat around. (36 sts)
Round 7: *Sc 5, inc* repeat around. (42 sts)
Round 8: *Sc 6, inc* repeat around. (48 sts)
This completes your flat circular base. Now we build the sides.
Round 9: Working in back loops only, sc in each st around. (48 sts)
This creates a defined edge where the base meets the walls.
Rounds 10 to 14: Sc in each st around. (48 sts)
Round 15: *Sc 6, dec* repeat around. (42 sts)
Rounds 16 to 18: Sc in each st around. (42 sts)
Round 19: *Sc 5, dec* repeat around. (36 sts)
Rounds 20 to 22: Sc in each st around. (36 sts)
Here is where we create the rounded belly shape of the pot.
Round 23: *Sc 4, dec* repeat around. (30 sts)
Rounds 24 to 25: Sc in each st around. (30 sts)
Round 26: Sc in each st around. Sl st to first st to join. Fasten off and weave in ends.
Your pot should have a lovely rounded shape with a slightly narrowed opening at the top. If you are using a small container inside, test the fit now. If stuffing instead, wait until assembly.
Lavender Stem Pattern
Each lavender stem consists of a crocheted tube worked around floral wire. This gives the stems structure and allows you to bend and arrange them naturally.
Using dark green yarn and 3.0mm hook:
Make 12 to 15 stems for a full bouquet.
Foundation: Ch 4, sl st to first ch to form a ring.
Round 1: Ch 1, work 6 sc into the ring. Do not join. (6 sts)
Rounds 2 to 35: Sc in each st around, working in a continuous spiral. (6 sts)
The length can vary. Make some stems 30 rounds, some 35 rounds, and some 40 rounds for natural variation in height.
Finishing the stem: Before fastening off, insert a piece of floral wire into the tube. Leave about half an inch of wire exposed at the bottom. Sl st to close. Fasten off, leaving a long tail for attaching the flower spike.
Lavender Flower Spike Pattern
The flower spikes use bobble stitches to create those beautiful textured buds. Work these directly onto the top of each stem for best results.
Using purple yarn (alternate between dark, medium, and light purple for variety) and 3.0mm hook:
Continuing from the top of your stem without fastening off, or join purple yarn to the top of a completed stem.
Round 1: *Sc 1, bobble in next st* repeat around. (3 bobbles, 3 sc = 6 sts)
Round 2: Sc in each st around. (6 sts)
Round 3: *Bobble in next st, sc 1* repeat around. (3 bobbles, 3 sc = 6 sts)
Round 4: Sc in each st around. (6 sts)
Round 5: *Sc 1, bobble in next st* repeat around. (3 bobbles, 3 sc = 6 sts)
Round 6: Dec 3 times around. (3 sts)
Round 7: Sc in each st, then pull yarn through all loops to close.
Fasten off and weave in ends. The bobbles should spiral around the spike, creating that characteristic lavender bud texture.
Quick tip: For a more realistic look, start with darker purple at the base of the spike and switch to lighter purple halfway up. This mimics how real lavender flowers open from bottom to top.
Leaf and Foliage Pattern
The narrow green leaves fill out the arrangement beautifully. These are simple chains with single crochet worked back along them.
Using dark green yarn and 3.0mm hook:
Make 20 to 30 leaves in varying lengths.
Small Leaf:
Ch 15. Starting in second ch from hook, sc in each ch across. (14 sts)
Fasten off, leaving a tail for attachment.
Medium Leaf:
Ch 20. Starting in second ch from hook, sc in each ch across. (19 sts)
Fasten off, leaving a tail for attachment.
Large Leaf:
Ch 25. Starting in second ch from hook, sc in each ch across. (24 sts)
Fasten off, leaving a tail for attachment.
Branching Leaf:
Ch 20. Starting in second ch from hook, sc 8. Ch 8, turn, sc back along the 8 ch. Continue sc along remaining main chain.
Fasten off. This creates a Y-shaped leaf for added interest.
Assembly Instructions
Now comes the rewarding part. Putting everything together.
Step 1: If using fiberfill, stuff your pot firmly so it holds its shape. If using a small container, place it inside the crocheted pot cover.
Step 2: Cut a circle of cardboard or foam to fit inside the pot opening. This will be your base for inserting stems. Hot glue it in place if desired.
Step 3: Begin inserting lavender stems into the center of the pot, pushing the wire ends into the foam or stuffing. Arrange taller stems in the center and shorter ones toward the edges.
Step 4: Bend the stems gently to create natural curves. Real lavender does not stand perfectly straight, so embrace the organic movement.
Step 5: Fill gaps with leaves. Use your tapestry needle to sew leaf bases to the top edge of the pot, or hot glue them in place. Layer leaves around the stems, allowing some to drape over the pot edge.
Step 6: Step back and assess the fullness. Add more stems or leaves if needed. The beauty of this crochet pattern is that you control the density of your bouquet.
Customization Ideas
This beginner friendly crochet pattern adapts beautifully to your personal style.
Color Variations: Try pink yarn for a spring cherry blossom feel, or use white and pale yellow for a wildflower meadow vibe.
Pot Options: Work the pot pattern in terracotta orange, sage green, or creamy white. You could even add texture with a row of front post stitches.
Scented Version: Tuck a lavender sachet inside the pot stuffing for an aromatherapy bonus.
Mini Version: Use fingering weight yarn and a 2.5mm hook to create a tiny desktop version.
Care and Display Tips
Your finished lavender bouquet crochet pot requires minimal care. Dust gently with a soft brush or use a hair dryer on cool setting. Avoid direct sunlight for extended periods to prevent fading, especially if using cotton yarn.
Display ideas include bathroom shelves where real plants struggle with humidity, office desks, nursery decor, or as a centerpiece for a rustic tablescape. This piece also makes a thoughtful housewarming gift or a lovely addition to a memorial arrangement.
Troubleshooting Common Issues
Bobbles looking flat? Make sure you are completing all 5 partial double crochets before pulling through. The bobble needs bulk to pop out.
Pot not holding its shape? Try going down a hook size for tighter stitches, or add a cardboard circle to the base.
Stems flopping over? Use thicker gauge wire, or double up your floral wire inside each stem.
Flower spikes looking uneven? This actually adds to the natural appearance. Real lavender is not perfectly uniform.
I hope this crochet lavender bouquet pattern brings a beautiful touch of handmade charm to your home or becomes a treasured gift for someone special. Each stem you complete will build your confidence, and before you know it, you will have a stunning botanical display that showcases your skills.
If you make this pattern, please save it to your Pinterest boards so you can find it again later and share it with fellow crafters who might love it too. I would absolutely love to see your finished bouquets, so drop a comment below or tag me on social media with your photos. Happy crocheting, friend!
