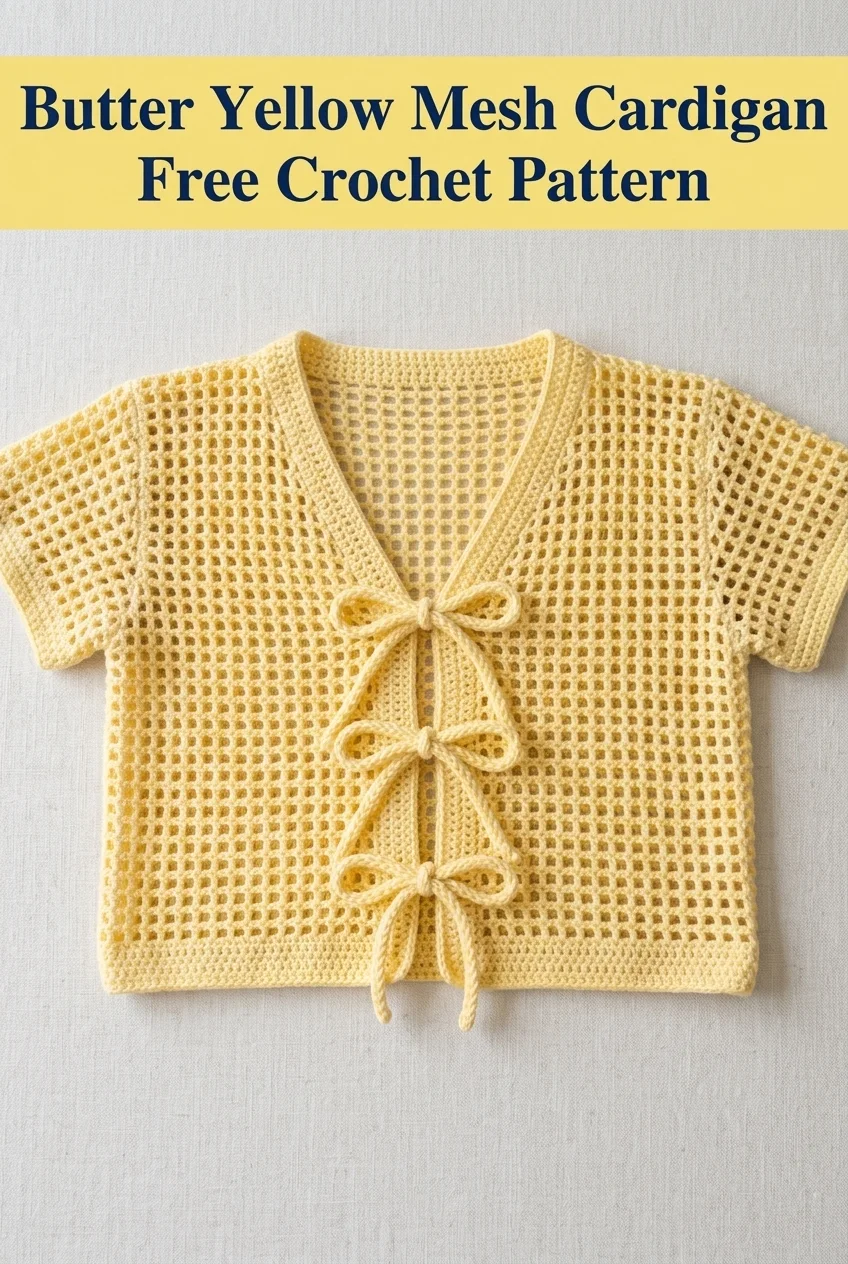
I don’t know about you, but I’ve been searching for the perfect lightweight cardigan that actually looks put together without making me overheat the second the sun comes out. Something breezy, feminine, and a little bit fancy. This butter yellow mesh cardigan is exactly that. All the style with none of the bulk, plus those sweet little bow ties down the front make it feel special without being fussy.
This cardigan came together faster than I expected, and the open mesh stitch pattern means you’ll fly through the rows once you get your rhythm going. The construction is straightforward, working the back and fronts as separate panels before joining at the shoulders and adding those adorable sleeves. If you’ve ever been intimidated by garment construction, this is a wonderful project to dip your toes in. The boxy shape and simple shaping make it approachable even if you’ve never made a wearable before.
Why This Mesh Cardigan Works for Summer
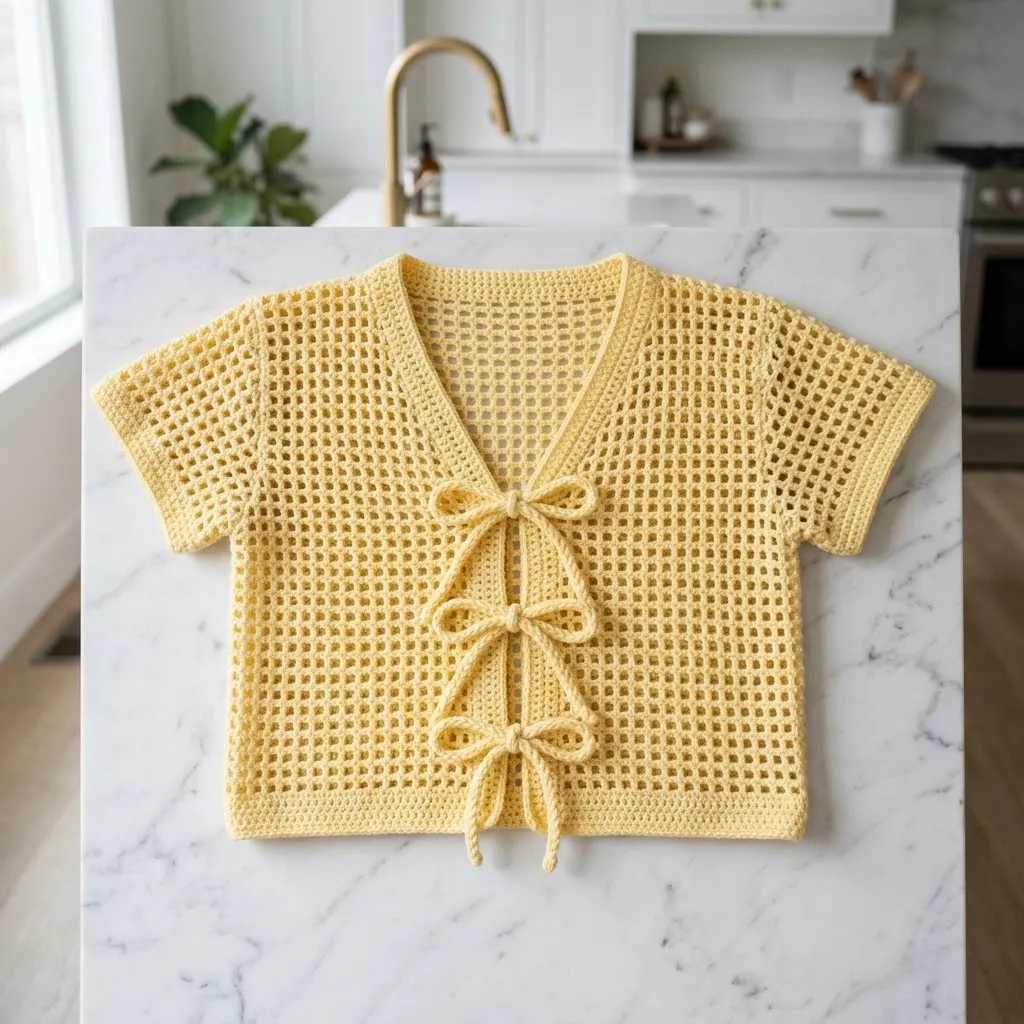
The open grid pattern creates natural ventilation, making this cardigan perfect for air conditioned offices, cool summer evenings, or layering over a tank top when you want a little extra coverage. The butter yellow color feels fresh and modern, but you could easily make this in white, sage green, dusty pink, or any color that speaks to you.
The V-neckline adds a flattering shape without any complicated decreases. It’s created simply by working two separate front panels that angle toward the center. The bow closures replace traditional buttons or a zipper, which means no sewing on hardware and no hunting for the perfect buttons to match your yarn.
Skill Level
Intermediate beginner to confident beginner. If you can chain, single crochet, and double crochet with confidence, you can absolutely make this cardigan. The mesh stitch is repetitive and easy to memorize. The construction involves seaming panels together, which I’ll walk you through step by step.
Materials Needed
Yarn: Approximately 800 to 1000 yards of DK weight cotton or cotton blend yarn (weight category 3). The sample appears to be made with a smooth, tightly spun cotton in a soft butter yellow shade. I recommend looking for yarn with good stitch definition since the mesh pattern relies on clean, visible stitches.
Suggested yarns that would work beautifully:
Hook: 4.0mm (US G/6) crochet hook, or size needed to achieve gauge
Notions:
Gauge
18 stitches and 10 rows = 4 inches in the mesh stitch pattern after blocking.
Please, please check your gauge before starting. I know it’s tempting to skip this step, but garments fit so much better when your gauge matches. Make a small swatch, measure it, and adjust your hook size up or down if needed.
Finished Measurements
This pattern is written for size Small/Medium with an approximate finished bust of 36 to 40 inches with a relaxed, slightly cropped fit. The cardigan has about 2 to 3 inches of positive ease built in for that effortlessly breezy look.
Length from shoulder: Approximately 18 inches
Sleeve length: Approximately 6 inches (short sleeve)
Abbreviations and Stitch Definitions
Before we dive into the pattern, let me break down every stitch and term you’ll encounter:
Ch = Chain. Wrap yarn over hook and pull through the loop on your hook. This creates the foundation for your work.
Sl st = Slip stitch. Insert hook, yarn over, pull through both the stitch and the loop on your hook in one motion. Used for joining and creating invisible connections.
Sc = Single crochet. Insert hook into stitch, yarn over and pull up a loop (2 loops on hook), yarn over and pull through both loops.
Dc = Double crochet. Yarn over, insert hook into stitch, yarn over and pull up a loop (3 loops on hook), yarn over and pull through 2 loops, yarn over and pull through remaining 2 loops. This is the main stitch used in the mesh pattern.
Ch-1 sp = Chain 1 space. The small gap created when you chain 1 between stitches.
Sk = Skip. Pass over the indicated stitch without working into it.
St(s) = Stitch(es)
Rep = Repeat
Special Stitch: Mesh Stitch Pattern
The mesh pattern for this cardigan is created by alternating double crochets with chain 1 spaces. Here’s how it works:
Foundation: Chain a multiple of 2, plus 1
Row 1: Dc in 4th ch from hook, *ch 1, sk 1 ch, dc in next ch*, repeat from * across. Turn.
Row 2: Ch 3 (counts as dc), *dc in ch-1 sp, ch 1*, repeat from * across, ending with dc in top of turning chain. Turn.
Repeat Row 2 for pattern. The grid forms naturally as you work double crochets into the spaces below.
Butter Yellow Mesh Cardigan Crochet Pattern
Back Panel
Ch 83 (or adjust for your size, keeping the stitch count as an odd number)
Row 1: Dc in 4th ch from hook, *ch 1, sk 1 ch, dc in next ch*, rep from * across. Turn. (40 dc, 39 ch-1 sps)
Row 2: Ch 3 (counts as first dc here and throughout), *dc in next ch-1 sp, ch 1*, rep from * across, ending with dc in top of turning ch. Turn. (40 dc, 39 ch-1 sps)
Rows 3 through 44: Rep Row 2.
Your back panel should measure approximately 18 inches long and 18 inches wide. Fasten off and weave in ends.
Left Front Panel
Ch 43
Row 1: Dc in 4th ch from hook, *ch 1, sk 1 ch, dc in next ch*, rep from * across. Turn. (20 dc, 19 ch-1 sps)
Row 2: Ch 3, *dc in next ch-1 sp, ch 1*, rep from * across, ending with dc in top of turning ch. Turn.
Rows 3 through 20: Rep Row 2.
Begin V-Neck Shaping (Row 21):
Ch 3, *dc in next ch-1 sp, ch 1*, rep from * to last 2 ch-1 sps. Leave remaining stitches unworked. Turn. (18 dc, 17 ch-1 sps)
Row 22: Ch 3, *dc in next ch-1 sp, ch 1*, rep from * across. Turn.
Row 23: Ch 3, *dc in next ch-1 sp, ch 1*, rep from * to last ch-1 sp. Leave remaining stitch unworked. Turn. (17 dc, 16 ch-1 sps)
Continue decreasing 1 stitch at the neckline edge every other row until you have approximately 12 dc remaining, or until your front panel matches the length of your back panel.
Rows 24 through 44: Continue in pattern, maintaining the angled neckline edge.
Fasten off.
Right Front Panel
Work the same as the Left Front Panel, but reverse the shaping. Your decreases will happen at the opposite edge to create a mirror image.
Rows 1 through 20: Work the same as Left Front.
Row 21 (Begin V-Neck Shaping): Sl st across first 2 ch-1 sps to move your starting point inward. Ch 3, *dc in next ch-1 sp, ch 1*, rep from * across. Turn.
Continue decreasing at the neckline edge (beginning of rows) every other row until the piece matches your Left Front.
Fasten off.
Joining the Panels
Lay your back panel flat with the right side facing up. Place your front panels on top, right sides together, aligning the shoulder edges.
Using your yarn needle and a length of yarn, whip stitch or mattress stitch the shoulder seams together. Leave approximately 8 to 9 inches open in the center back for your neck opening.
Next, seam the side edges of the front and back panels together, leaving approximately 8 inches open at the top of each side for the armholes.
Sleeves (Make 2)
The sleeves are worked directly into the armhole openings, picking up stitches around the edge.
Round 1: Join yarn at the underarm seam. Ch 3 (counts as dc), work approximately 36 dc evenly around the armhole opening. Join with sl st to top of ch 3. (36 dc)
Round 2: Ch 3, *ch 1, sk 1 dc, dc in next dc*, rep from * around. Join with sl st. (18 dc, 18 ch-1 sps)
Rounds 3 through 10: Ch 3, *dc in ch-1 sp, ch 1*, rep from * around. Join with sl st.
Round 11 (Edging): Ch 1, sc in each dc and each ch-1 sp around. Join with sl st. Fasten off. (36 sc)
Repeat for the second sleeve.
Neckline and Front Edging
This edging creates the clean border you see along the neckline and down both front openings.
Row 1: Join yarn at the bottom right front corner. Ch 1, sc evenly up the right front edge, around the neckline, and down the left front edge. Work approximately 3 sc for every 2 rows to keep the edging flat and smooth. Turn.
Row 2: Ch 1, sc in each sc across. Fasten off.
Bow Ties (Make 4)
These adorable bow closures are simply crocheted chains that you tie into bows.
For each tie: Ch 80. Fasten off, leaving a 6 inch tail for attaching.
Placement: Attach one end of each tie to the left front panel and the corresponding end to the right front panel. Space them evenly down the front opening. I recommend placing them at the bust line, waist, and two spots in between.
When you put on the cardigan, simply tie each pair into a bow.
Bottom Edging
Row 1: Join yarn at a side seam along the bottom edge. Ch 1, sc evenly around the entire bottom hem. Join with sl st.
Row 2: Ch 1, sc in each sc around. Join and fasten off.
Finishing Your Mesh Cardigan
Weave in all your ends securely. I like to weave through several stitches, then double back in the opposite direction for extra security.
Blocking will transform your finished cardigan. Wet block by soaking the garment in cool water for 15 to 20 minutes, then gently squeeze out excess water (don’t wring). Lay flat on a blocking mat or clean towels, shaping the mesh pattern so all the little squares are open and even. Pin the edges if needed. Allow to dry completely before wearing.
Tips for Success
If your mesh looks uneven, try loosening up your tension slightly. The chain spaces need room to breathe.
If your front panels curl, blocking will fix this. Cotton yarn especially loves to relax and flatten out after a good soak.
For a longer cardigan, simply add more rows to your back and front panels before beginning the neckline shaping.
For a looser fit, add one or two extra mesh repeats to your foundation chain on each panel.
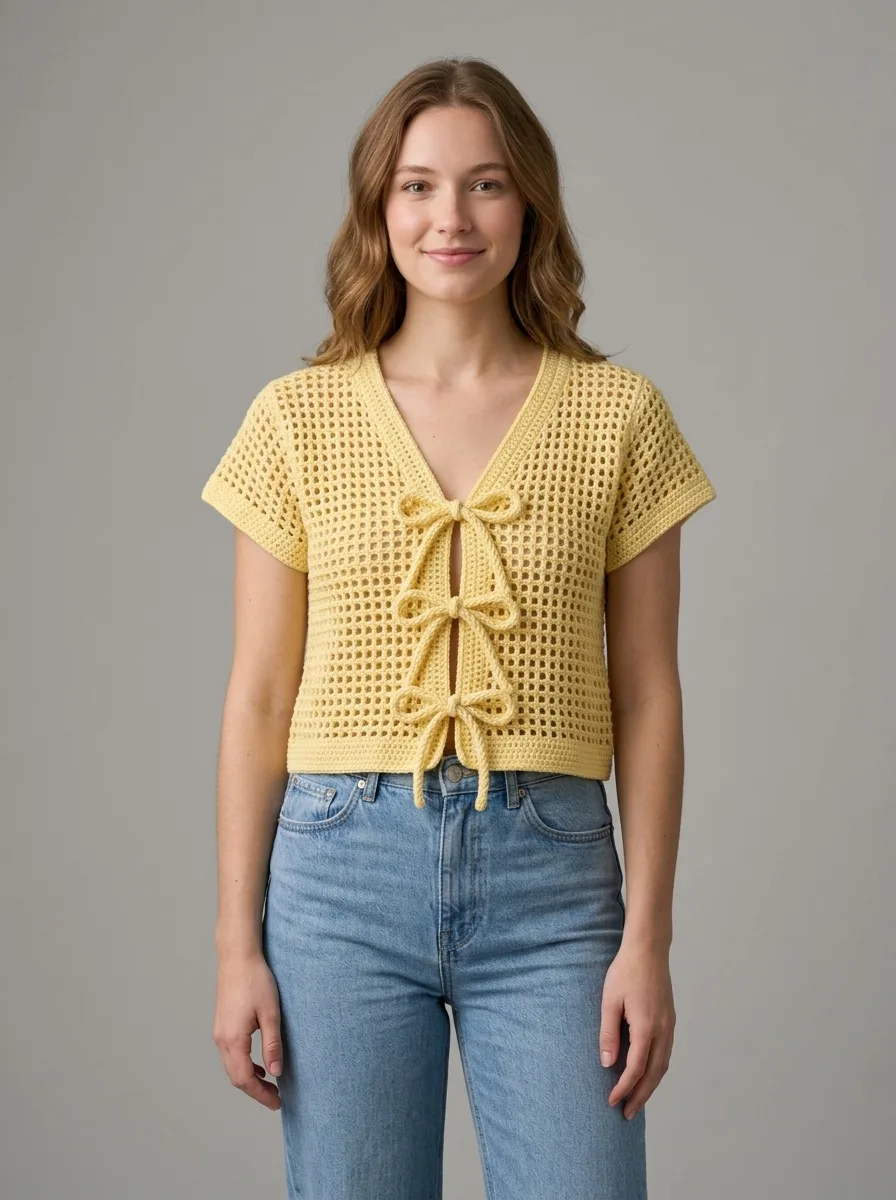
Styling Your Butter Yellow Mesh Cardigan
This cardigan looks beautiful over a white tank top or camisole, letting the mesh pattern show through. Pair it with high waisted jeans for a casual weekend look, or dress it up with a linen skirt for brunch. The bow ties add a feminine touch that works perfectly for spring and summer occasions.
I really hope you love making this butter yellow mesh cardigan as much as I loved designing it. It’s the kind of project that looks impressive but feels relaxing to crochet, and you’ll reach for it constantly once it’s finished. Thank you so much for choosing this pattern. If you make one, I’d absolutely love to see it! Tag me on Instagram or share a photo on Facebook so I can admire your work.
If this pattern is calling your name but you’re not quite ready to start today, go ahead and save it to your Pinterest boards so you can find it easily later. And please drop a comment below if you make this cardigan. I love hearing which colors you choose and how it turns out for you!
