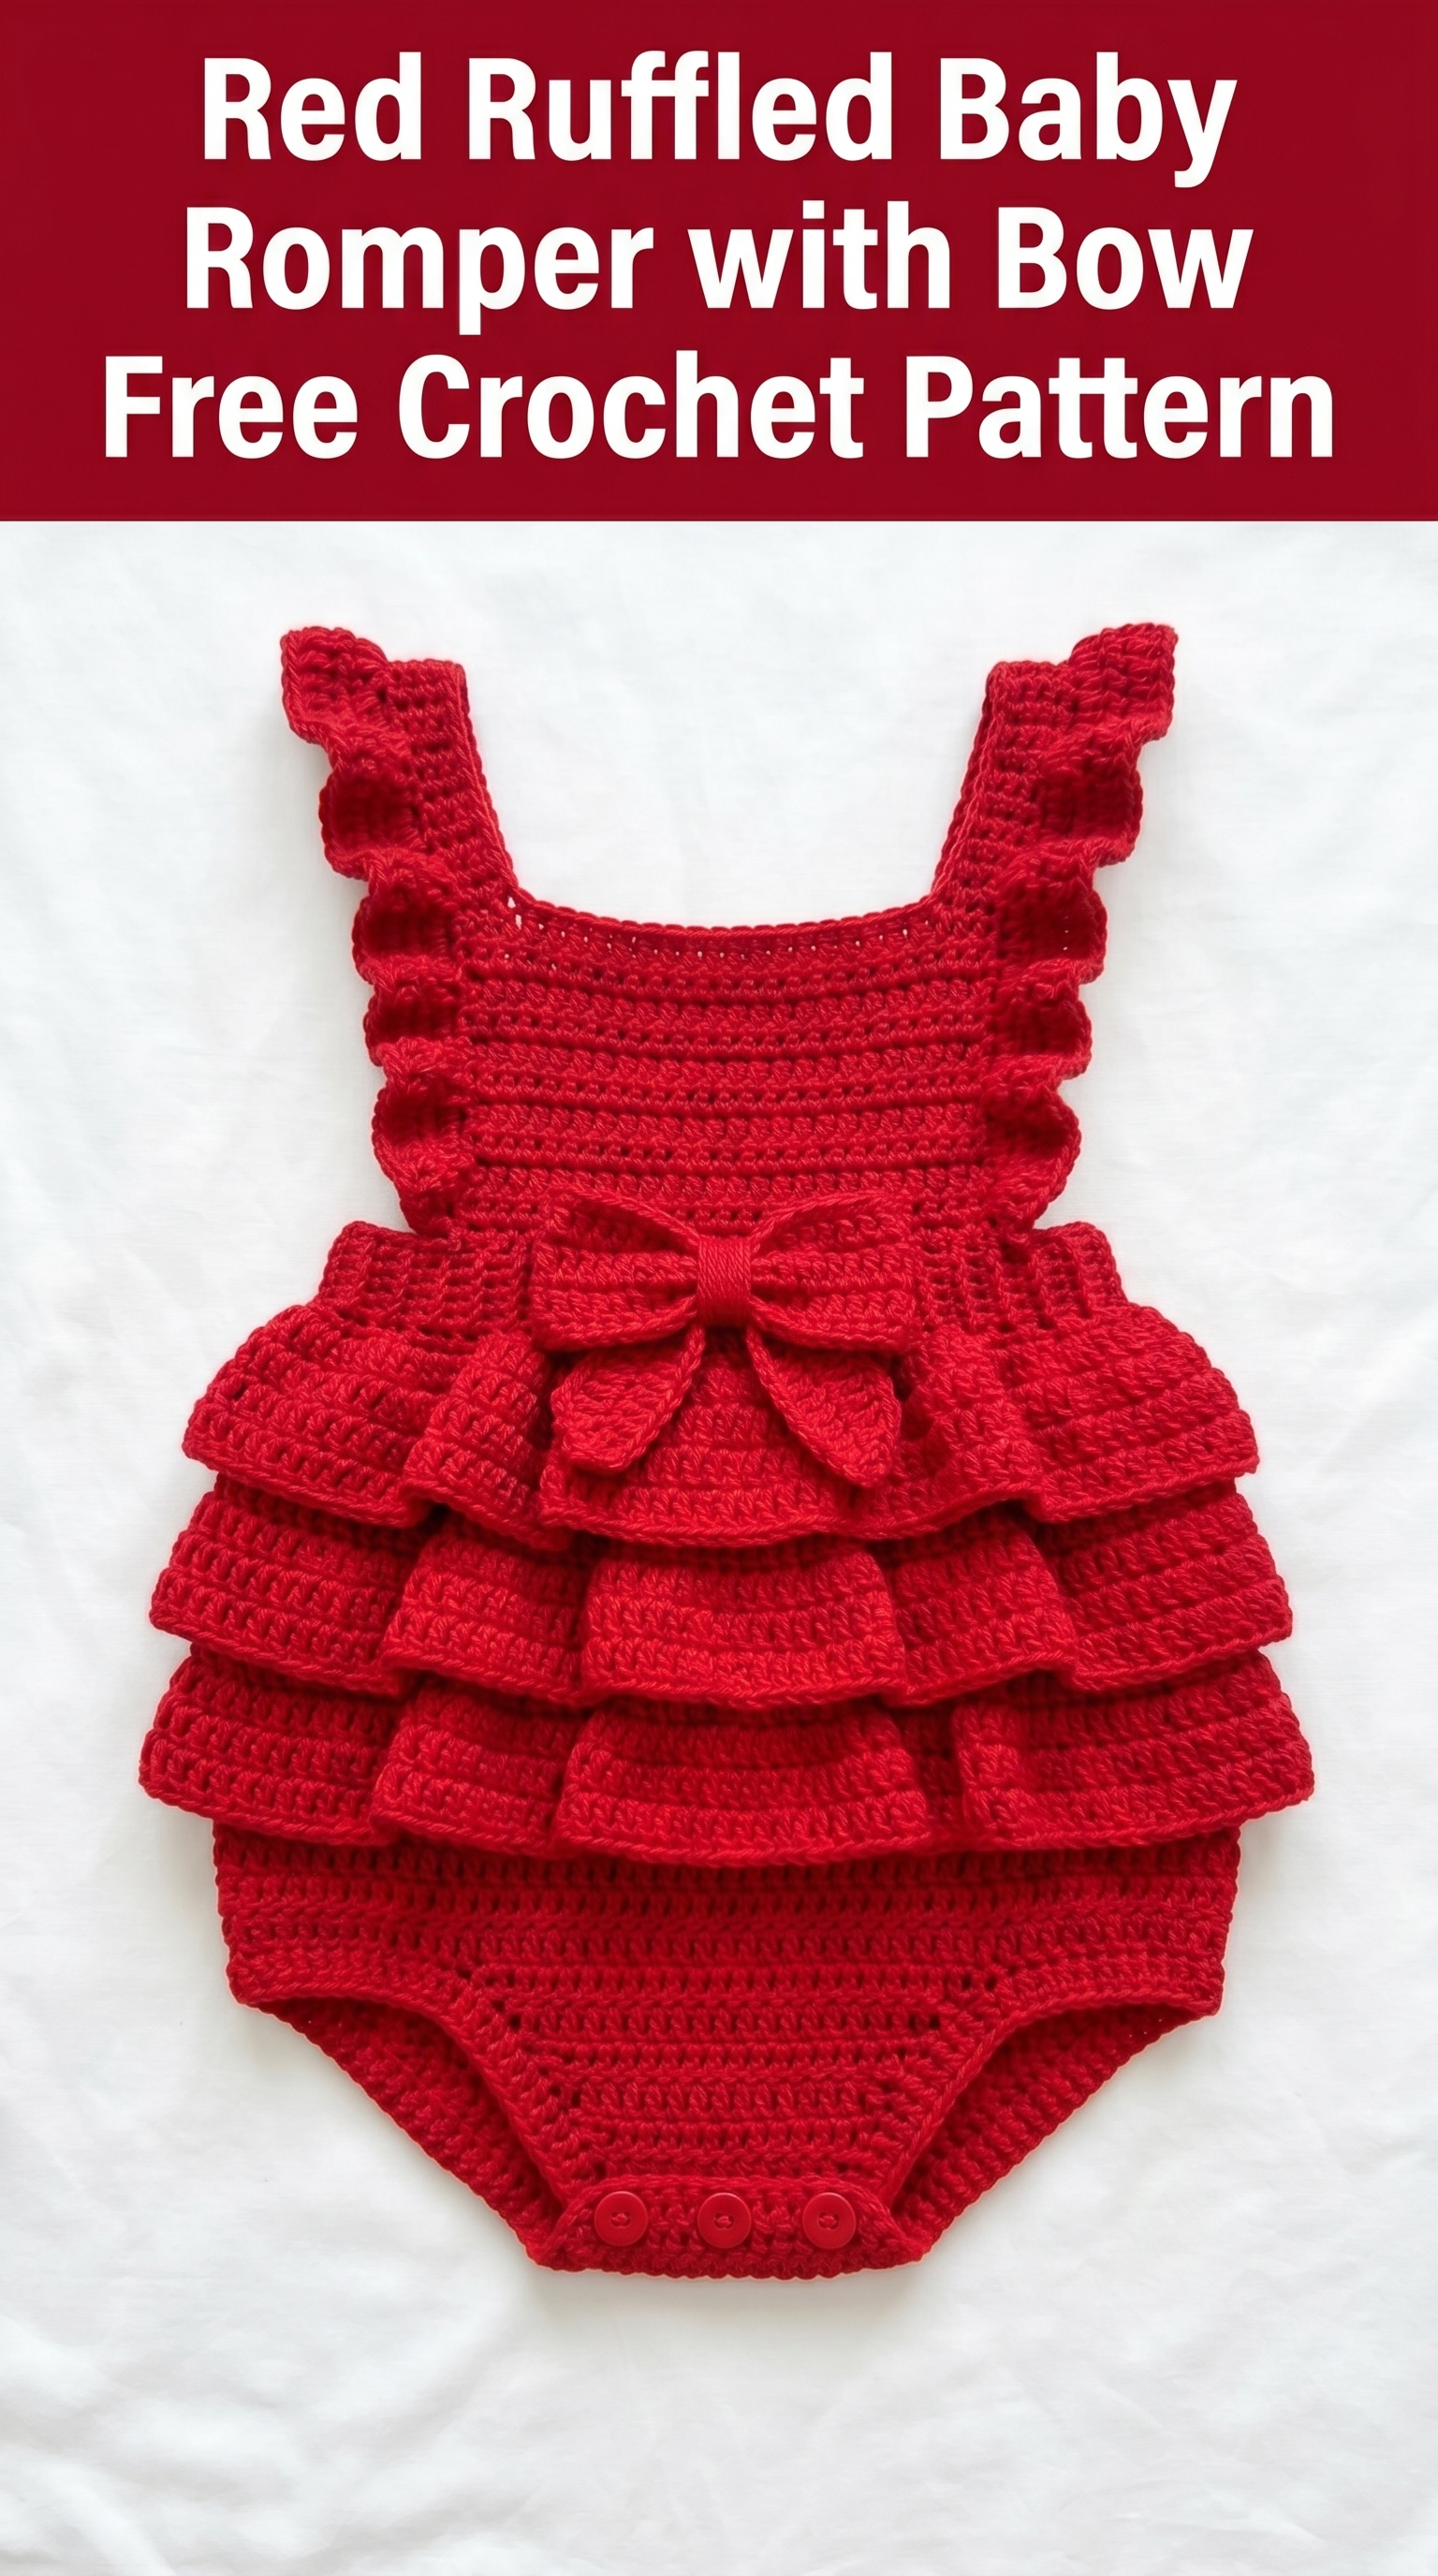
There is something utterly magical about creating a tiny outfit for a little one. This red ruffled baby romper with bow is exactly the kind of project that makes your heart flutter as you work each stitch. With its layered ruffles, sweet crocheted bow, and charming shoulder straps with flutter details, this romper is perfect for holiday photos, birthday celebrations, or any special occasion that calls for maximum cuteness.
I designed this crochet pattern to look impressive while remaining completely achievable for confident beginners and intermediate crocheters alike. The construction is straightforward. You will work the body in rows, add ruffles separately, and finish with a darling bow that ties the whole look together. If you can work basic stitches and follow a simple shaping pattern, you can absolutely make this romper.
Let me walk you through everything you need to bring this adorable baby romper crochet pattern to life.
Why You Will Love This Crochet Baby Romper Pattern
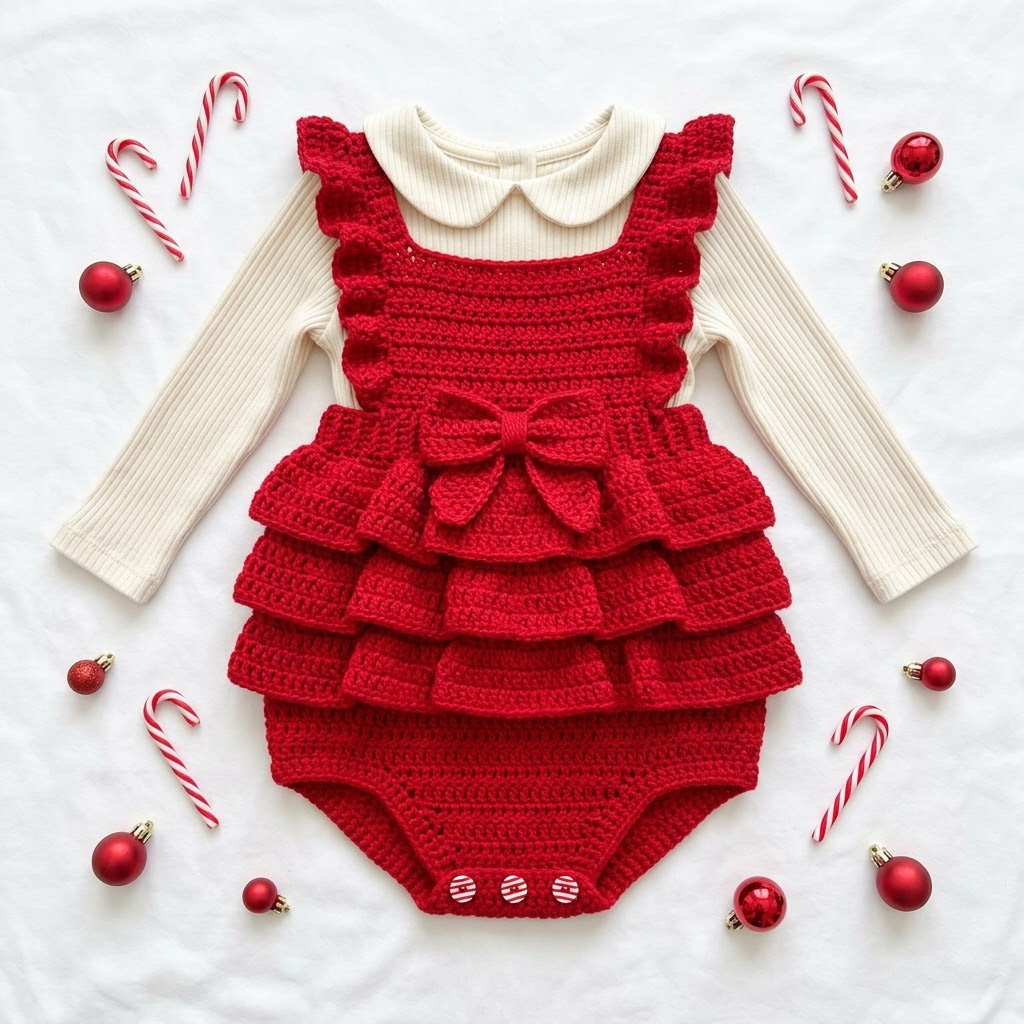
This ruffled romper hits all the right notes. The classic red yarn makes it ideal for Christmas or Valentine’s Day, but honestly, it works year round in any color you choose. Pink for a baby shower gift. Cream for a vintage look. Navy for something a bit more understated.
The tiered ruffle skirt adds so much visual interest without requiring complicated techniques. Each ruffle is simply crocheted separately and attached to the main body. The crocheted bow at the waist gives it that finished, boutique-quality appearance that makes handmade items so special.
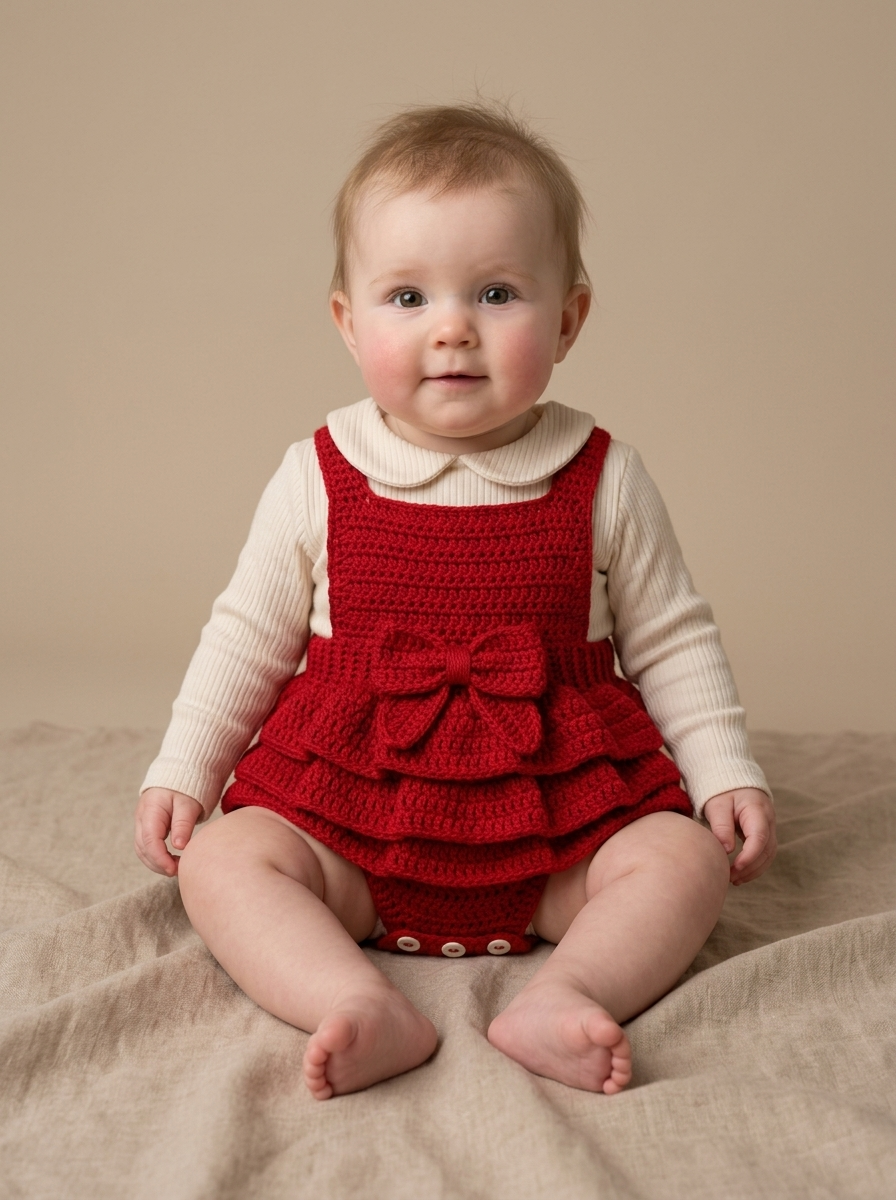
What I love most is how practical this piece is. It works beautifully layered over a long sleeve onesie or worn alone in warmer weather. The button closure at the bottom makes diaper changes quick and easy. This is a romper that looks precious in photos and functions well in real life.
Materials Needed for Your Crochet Romper
Gather these supplies before you begin. Having everything ready makes the process smooth and enjoyable.
Yarn:
Hook:
Notions:
Gauge:
Skill Level and Techniques Used
This step by step crochet pattern is rated intermediate but is absolutely approachable for adventurous beginners. You should be comfortable with the following techniques:
Stitches used in this pattern:
Chain (ch): The foundation stitch. Wrap yarn over hook, pull through the loop on your hook. This creates the base row you will crochet into.
Slip Stitch (sl st): Insert hook, yarn over, pull through both the stitch and the loop on your hook in one motion. Used for joining and moving across stitches invisibly.
Single Crochet (sc): Insert hook into stitch, yarn over and pull up a loop (two loops on hook), yarn over and pull through both loops. A short, tight stitch that creates sturdy fabric.
Half Double Crochet (hdc): Yarn over, insert hook into stitch, yarn over and pull up a loop (three loops on hook), yarn over and pull through all three loops. Slightly taller than single crochet.
Double Crochet (dc): Yarn over, insert hook into stitch, yarn over and pull up a loop, yarn over and pull through two loops, yarn over and pull through remaining two loops. Creates a taller stitch with nice drape.
Back Loop Only (BLO): Instead of inserting your hook under both loops at the top of a stitch, insert it only under the back loop. This creates a ridged texture.
Size Information
This pattern is written for size 6 to 12 months.
Finished measurements:
For a smaller size (0 to 6 months), use a 3.5mm hook. For a larger size (12 to 18 months), use a 4.5mm hook. Adjust your starting chain as needed to achieve proper fit.
Red Ruffled Baby Romper Pattern Instructions
Part One: Romper Body Front Panel
The body is worked flat in rows from the top down.
Row 1: Ch 37. Sc in second ch from hook and in each ch across. Turn. (36 sts)
Row 2: Ch 1 (does not count as stitch here and throughout). Sc in each st across. Turn. (36 sts)
Rows 3 to 6: Repeat Row 2. (36 sts)
This creates the bib portion of the romper front.
Row 7 (Increase Row): Ch 1. 2 sc in first st, sc in each st to last st, 2 sc in last st. Turn. (38 sts)
Row 8: Ch 1. Sc in each st across. Turn. (38 sts)
Rows 9 to 14: Repeat Rows 7 and 8 three more times. (44 sts after Row 13)
Rows 15 to 30: Ch 1. Sc in each st across. Turn. (44 sts)
This forms the torso section where the ruffles will attach.
Part Two: Crotch Shaping
Row 31: Ch 1. Sc in first 18 sts. Turn, leaving remaining stitches unworked. (18 sts)
Row 32: Ch 1. Sc2tog over first 2 sts, sc in each st to last 2 sts, sc2tog. Turn. (16 sts)
Single Crochet Two Together (sc2tog): Insert hook in first stitch, pull up a loop, insert hook in next stitch, pull up a loop (three loops on hook), yarn over and pull through all three loops. This decreases by one stitch.
Rows 33 to 36: Repeat Row 32. (8 sts after Row 36)
Rows 37 to 40: Ch 1. Sc in each st across. Turn. (8 sts)
Fasten off and weave in ends. This completes one leg opening.
Rejoin yarn to Row 31 at the center, skip 8 center stitches, and work the second leg opening identically on the remaining 18 stitches.
Part Three: Romper Body Back Panel
Work exactly as the Front Panel through Row 30.
For the crotch shaping on the back, follow the same instructions but add buttonholes:
Row 37 (Buttonhole Row): Ch 1. Sc in first 2 sts, ch 2, skip 2 sts, sc in next 4 sts, ch 2, skip 2 sts, sc in last 2 sts. Turn. (8 sts including chains)
Row 38: Ch 1. Sc in each st and 2 sc in each ch-2 space across. Turn. (8 sts)
Continue through Row 40. Fasten off.
Part Four: Shoulder Straps with Flutter Edge
Make two identical straps.
Row 1: Ch 41. Sc in second ch from hook and in each ch across. Turn. (40 sts)
Rows 2 to 4: Ch 1. Sc in each st across. Turn. (40 sts)
Flutter Edging:
Work along one long side of the strap.
Round 1: Ch 1. Working into row ends, work 3 sc evenly into each row end across the long side. (12 sc)
Round 2: Ch 3 (counts as dc). 4 dc in same st. 5 dc in each st across. Sl st to top of ch-3 to join.
This creates the charming flutter ruffle along the strap edges. Repeat on the other long side of the strap. Make second strap.
Part Five: Tiered Ruffles
This romper features three gorgeous tiered ruffles. Each ruffle is made separately and sewn onto the body.
First Ruffle (Top, Smallest):
Row 1: Ch 71. Dc in fourth ch from hook (skipped chains count as first dc). Dc in each ch across. Turn. (68 dc)
Rows 2 to 4: Ch 3 (counts as dc). Dc in each st across. Turn. (68 dc)
Row 5: Ch 1. Working in BLO, sc in each st across. (68 sts)
Fasten off leaving a long tail for sewing.
Second Ruffle (Middle):
Row 1: Ch 81. Dc in fourth ch from hook. Dc in each ch across. Turn. (78 dc)
Rows 2 to 5: Work as First Ruffle Rows 2 to 5. (78 sts)
Fasten off.
Third Ruffle (Bottom, Largest):
Row 1: Ch 91. Dc in fourth ch from hook. Dc in each ch across. Turn. (88 dc)
Rows 2 to 6: Ch 3. Dc in each st across. Turn. (88 dc)
Row 7: Work as First Ruffle Row 5. (88 sts)
Fasten off.
Part Six: Crocheted Bow
The bow adds that perfect finishing touch to your crochet baby romper.
Bow Loop (Make 2):
Row 1: Ch 21. Sc in second ch from hook and in each ch across. Turn. (20 sts)
Rows 2 to 8: Ch 1. Sc in each st across. Turn. (20 sts)
Fasten off, leaving a long tail. Fold the rectangle in half lengthwise and sew the short ends together to form a loop.
Bow Center:
Row 1: Ch 6. Sc in second ch from hook and in each ch across. Turn. (5 sts)
Rows 2 to 8: Ch 1. Sc in each st across. Turn. (5 sts)
Fasten off with long tail.
Assembly: Pinch both bow loops in the center. Stack them with one slightly angled. Wrap the center piece tightly around the middle and sew securely in back.
Assembly and Finishing
Now comes the satisfying part. Putting it all together.
Step 1: Block all pieces lightly with steam or wet blocking. This evens out your stitches and makes assembly easier.
Step 2: Place front and back panels with right sides together. Using a yarn needle and matching yarn, seam the side edges from the bottom of the armhole area down to where the leg shaping begins.
Step 3: Attach shoulder straps to the front bib, positioning them about 8 stitches in from each edge. Sew securely. Cross the straps in the back and attach to the back panel in corresponding positions.
Step 4: Seam the inner leg edges of the crotch, aligning front and back pieces.
Step 5: Position your three ruffles on the front of the romper, starting just below the bib. Space them evenly, each overlapping the one below by about one inch. Pin in place and sew along the top edge of each ruffle using a whip stitch.
Step 6: Attach the crocheted bow at the center front waist, just above the first ruffle. Sew securely through all layers.
Step 7: Sew buttons to the front crotch panel, aligning with the buttonholes on the back.
Step 8: Weave in all remaining ends. Give the finished romper a final gentle steam to set everything in place.
Helpful Tips for Success
Yarn choice matters. For baby garments, always select yarn that is soft against delicate skin and easy to wash. Check the label for machine washable options. Parents will thank you.
Count your stitches. I know it sounds tedious, but counting at the end of each row catches mistakes early. Much easier to fix one row than to rip back ten.
Try it on as you go. If you have access to the baby or a baby doll of similar size, check the fit periodically. Bodies vary, and a quick check saves disappointment later.
Ruffle placement is forgiving. Do not stress about perfect positioning. The ruffles naturally drape and shift. As long as they overlap nicely, the effect is beautiful.
Gifting and Care Instructions
When gifting this handmade red ruffled romper, include a small care card. Machine wash gentle cycle in cold water. Lay flat to dry. Low heat tumble dry if needed. Do not bleach. Store folded to maintain shape.
Consider pairing your finished romper with a matching headband or booties for a complete gift set. Package in tissue paper with a handwritten note explaining that this piece was made with love, stitch by stitch.
Make This Pattern Your Own
While I adore this romper in classic red, the design works beautifully in countless variations. Try soft blush pink for a delicate look. Work the ruffles in a contrasting color for playful style. Add a small crocheted flower instead of the bow. Make the straps without flutter edging for a simpler silhouette.
This crochet tutorial gives you the foundation. Your creativity makes it unique.
You Did It
Thank you so much for choosing this pattern and trusting me to guide you through the process. I genuinely hope you enjoy every moment of creating this sweet little romper. There is nothing quite like the satisfaction of finishing a handmade baby garment and imagining a tiny human wearing something you made with your own hands.
I would absolutely love to see your finished romper. Tag me on Instagram or share your photos in my Facebook group. Seeing your creations brings me so much joy and inspires other makers to give it a try.
Happy crocheting, friend. You have got this.
