
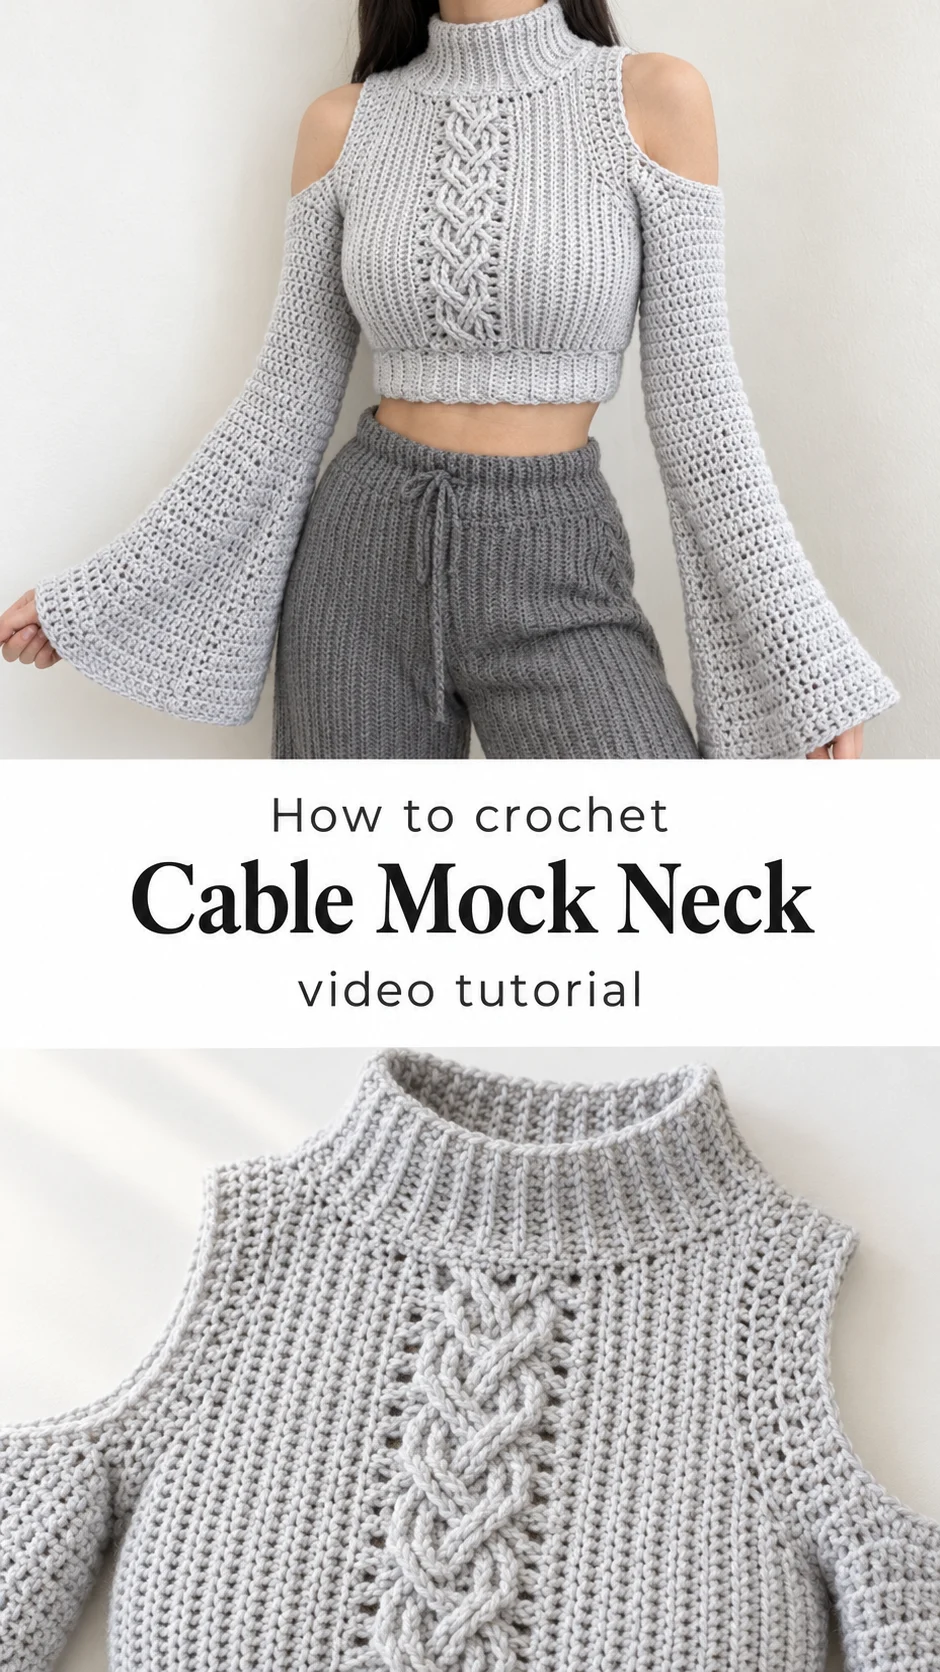
A cropped, high-neck pullover with cold-shoulder cutouts and flared sleeves, built around a raised cable panel that runs up the front of the bodice.
The Crochet Cable Mock Neck
Crochet Cable Mock Neck pieces have a way of stopping people mid-scroll. This one combines a snug, short bodice with a sculpted cable panel down the centre front, open shoulders that leave the collarbones bare, and long, wide sleeves that fall well past the wrist. It is a top that looks like it belongs in a knitwear collection, yet it is worked entirely with a hook.
The cable panel is the first thing the eye lands on. It sits on a ribbed body that lets the braid stand proud of the fabric, so the design reads as three-dimensional rather than flat. Above it, the mock neck rises in a short, firm band, and the cold-shoulder openings frame the shoulders in a clean, deliberate way. Every element is simple on its own, and together they make a sharp, modern silhouette.
This is a piece for cooler days and layered evenings. It works as a standalone top over a skirt or high-waisted trousers, and it reads just as well as a statement layer over a plain bodysuit. Because the body is cropped, it pairs naturally with waist-defining bottoms and anything that sits at the natural waist.
Mock Neck Related Posts:
- Crochet Santa Claus: A Festive Holiday Treasure
- Crochet Tulip Book Cover: A Charming Handmade Trio
- Crochet Knit-Look Mini Bag: A Chic Everyday Accessory
- Crochet Lace Doily: A Timeless Decorative Accent
Materials
A medium-weight acrylic or acrylic-blend yarn in a soft heather grey suits this design well. Its slight halo and smooth drape let the cables stand out without making the bodice stiff, and it holds the fabric’s shape across the ribbed sections. A hook sized to the yarn label, or a half size smaller if you prefer a firmer, more structured fabric around the cable panel, will keep the stitches neat. Choose a yarn with good stitch definition, because the raised braid and the ribbing are the features that carry the design, and a fuzzy or heavily textured yarn would blur them. You will also need a yarn needle for weaving in ends and seaming, plus stitch markers to keep your place in the cable panel and at the shoulder openings. Keep a measuring tape nearby for checking the bodice length against your own torso.
The Signature Cable Panel
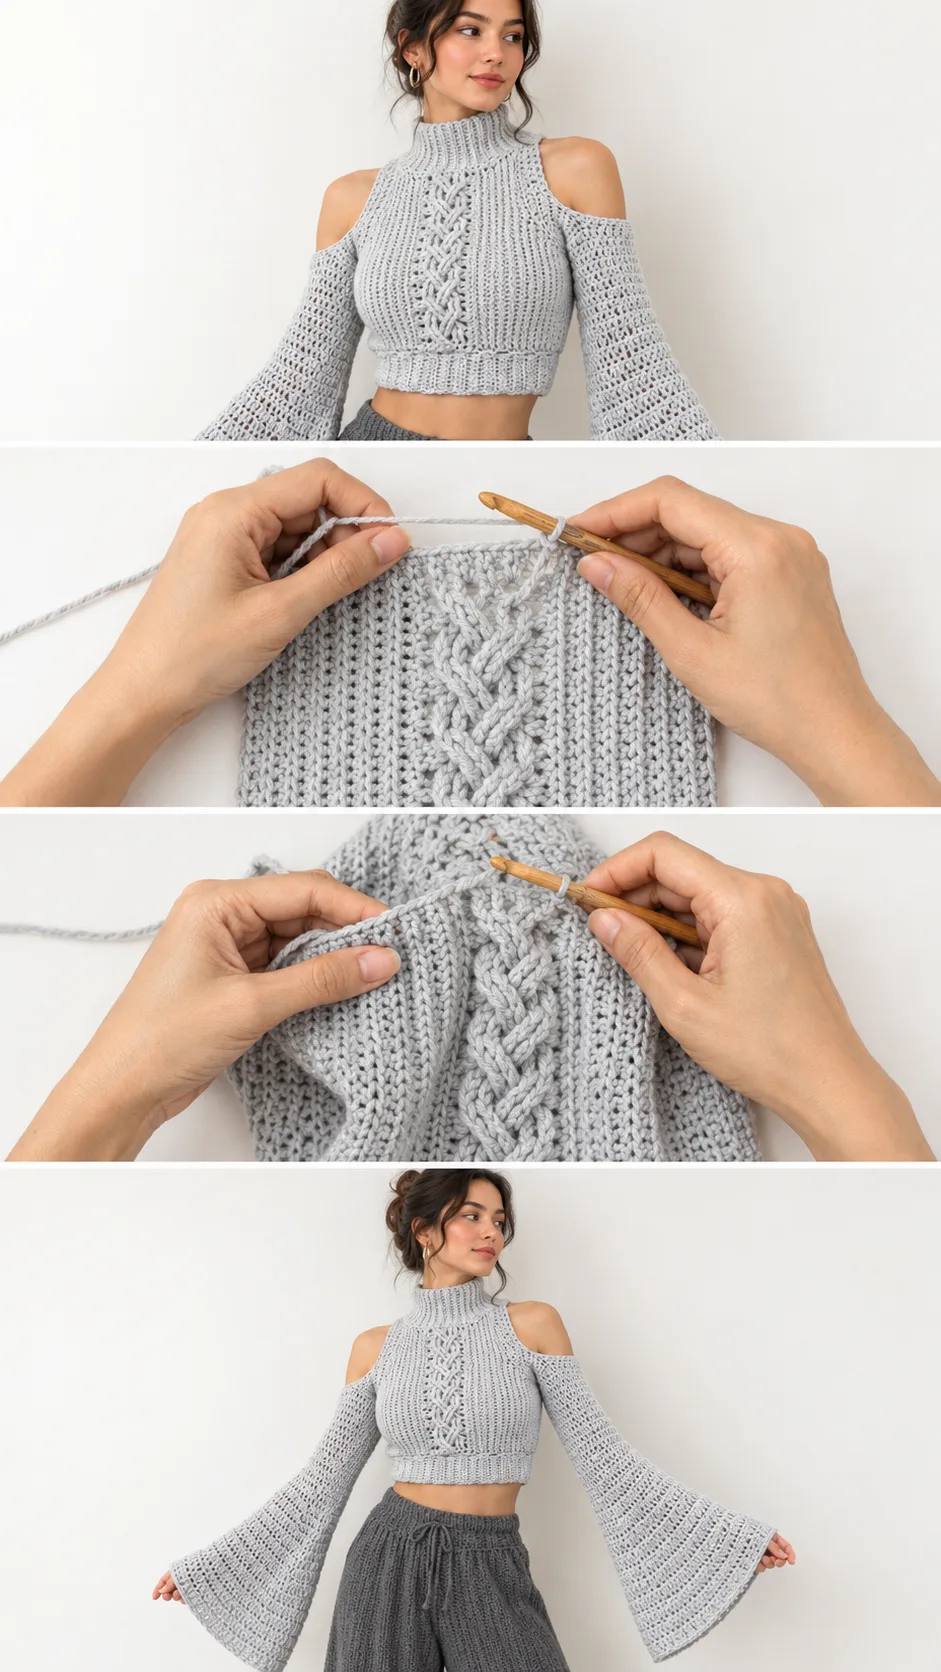
The centre cable is what makes this top unmistakable. It is a braided column that runs from the lower band up toward the neckline, flanked by vertical ribbing that frames it. The main choice you face is how tightly to work the cable stitches. Worked loosely, the braid looks soft and airy but loses its crisp edges. Worked too tightly, the panel pulls the bodice inward and can make the front ruffle. Aim for even tension across the panel and the ribbing beside it, and check the fabric lies flat before you move on.
Keeping the Braid Crisp
Mark the first and last stitch of the cable panel with a contrasting stitch marker so you always know where the braid starts and ends. If the cable edges begin to soften, pause and count your passes across the panel before continuing. Most softening comes from a row where the braid was worked with slack yarn, and catching it early saves you from unpicking a long section.
Shape and Construction
The top is built as a single body with the sleeves and shoulder openings worked as part of the same piece, rather than sewn on afterward. The short bodice is shaped so it stops just above the waist, and the mock neck is worked as a separate band that rises from the top edge. The cold-shoulder openings are formed by working the armhole area in a way that leaves the shoulder bare while the sleeve continues down the arm. The sleeves widen toward the wrist, which gives the flared look seen in the photos. Pay attention to where the shaping begins at each armhole, because it sets the balance of the whole garment.
Choosing Yarn and Colour
Three yarn approaches suit this design. A soft acrylic in heather grey, as shown, gives a cosy, everyday feel and holds the cable definition well. A cotton-blend yarn in a similar weight gives a crisper finish and a cooler drape, which suits warmer months, though it will show less of the cable’s rounded depth. A wool-blend yarn adds warmth and a slight bounce, though it can soften the braid and may pill over time. Avoid very thin yarns, because they will make the cables look flat and the fabric too light for the design.
For colour, the heather grey in the photos reads as calm and modern. Oatmeal and soft charcoal are natural alternatives that keep the same quiet look, while a deep forest green or dusty rose would give the cables more visual punch.
Skill Level and Patience
This is an intermediate project. The stitches are mostly basic, but the cable panel and the shaping at the armholes and neckline demand attention. The hardest part is staying consistent through the cable section, because the braid repeats over many rows and small tension changes show up quickly. Work in short stints and stop when your focus drops; the quality of the cables depends on it.
How to Style a Cable Mock Neck
In the photos the cropped hem sits right at the waistband of a grey high-waisted pair of trousers, a proportion that keeps the top sharp and the look coordinated. Try the same tone-on-tone idea with a pleated midi skirt for a softer, more feminine line. For a casual day, layer it over a fitted long-sleeved tee and wear it with wide-leg jeans. For an evening look, pair it with a black slip skirt; the grey and black sit well together, and the open shoulders stay striking under a simple chain necklace.
Finishing Tips for a Clean Result
Weave in all ends carefully along the wrong side, especially at the cable panel where loose tails show through the braid. Block the finished piece lightly before seaming, pinning the bodice and sleeves to shape and misting them with water. Block gently, since over-stretching the sleeves will drop the flare. When joining seams, match the stitches on each side so the ribbing lines up cleanly down the body. Check the neckline band sits flat; if it rolls, give it a light steam or re-block that section alone.
If the Neckline Rolls
A rolling mock neck usually means the band was worked too tightly or the join is pulling. Lightly steam the band, then gently press it flat without stretching. If the roll persists, unpick the join and reattach with a looser seam.
If the Bodice Feels Too Short
Measure against your own torso before you finish the ribbing. If you want more length, add rows to the plain ribbed section below the cable panel rather than the cable itself, so the braid keeps its proportions.
Caring for Your Cable Top
Hand wash in cool water with a mild detergent, or use a gentle machine cycle inside a mesh bag. Avoid wringing, since that stretches the sleeves and softens the braid. Dry flat on a towel, reshaping the sleeves and neckline as it dries. Store it folded rather than hung, because the weight of the sleeves can pull the shoulders out of shape over time.
Following the Tutorial
Watch the video closely at the cable panel. Pay attention to how the hook moves through the stitches to form the braid, and pause as often as you need to replay the sequence. The creator shows how the armhole shaping begins, so note the moment the openings take form before you start sizing the sleeves. Work in a sensible order: the body first, then the neckline band, then the sleeves, and finish with the seams.
A Bold Handmade Statement
The Crochet Cable Mock Neck is a top that rewards patience. Its strength comes from three things: a braided cable panel that stands out in relief, a clean ribbed body that frames it, and open shoulders that keep the silhouette light. Get the cable tension even, shape the armholes with care, and block the finished piece gently, and the result will look as considered as any knitted sweater.
Video tutorial by TCDDIY: watch the full walkthrough on the creator’s channel and find the pattern at Etsy.com/shop/tcddiy.
Watch the video tutorial below to see the cable panel, the shoulder openings and the sleeve shaping worked step by step. Pause at the cable section and replay it as often as you need.
Follow us on Pinterest and subscribe to the Newsletter so you don’t miss a thing!
Tutorial and photos of this cable mock neck by: TCDDIY.
