
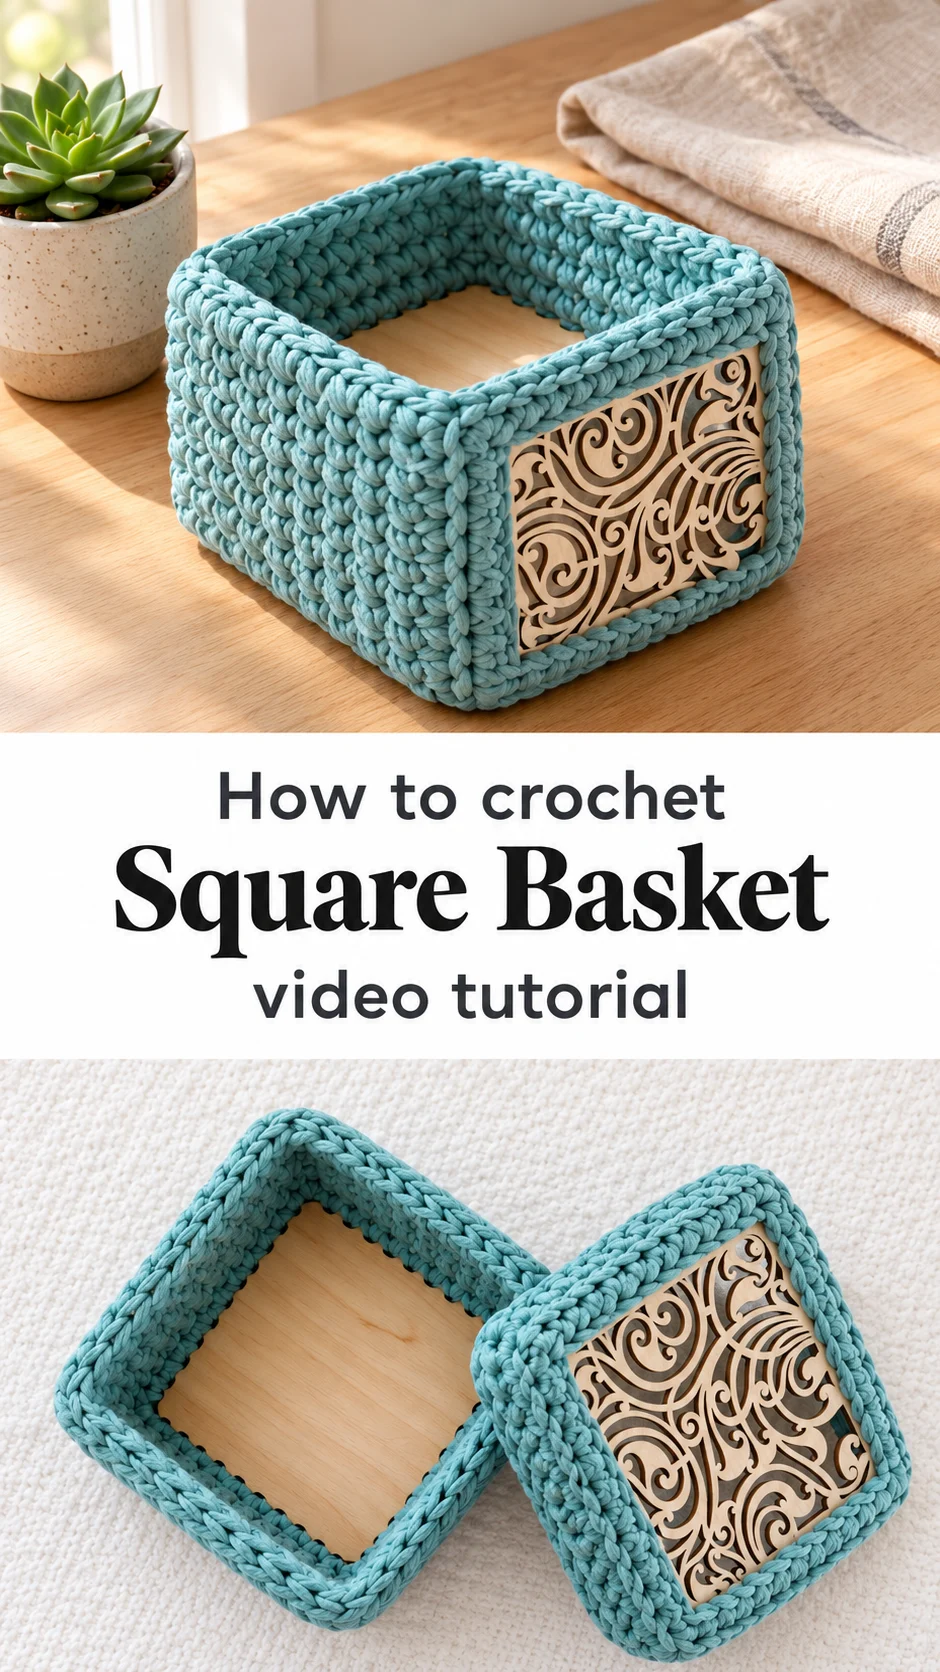
A square crocheted basket in soft turquoise, with a rigid wooden base and an openwork wooden lid, makes a neat home for small things on a dresser or entryway table.
The Crochet Square Basket
Ever wonder how you could give a basket both the warmth of hand-crocheted fabric and the crispness of a hard, flat shape? This square basket does exactly that. The walls are worked in a thick, textured stitch in a clear aqua shade, and they wrap around a sturdy wooden base that holds the form. The lid is set into the same crochet frame and features a laser-cut wooden panel with flowing, filigree scrollwork that shows through as a window of pattern. The contrast is the point. The body is soft and tactile, while the lid reads as delicate and architectural. It is the kind of piece that looks at home on a shelf, a bedside table or a desk without shouting for attention. Because it is so compact, it works well for keys, jewellery, sewing notions or a small plant cutting.
Thick, ribbed stitches run around the rim and the top edge, creating a defined border that frames both the base and the lid. The square silhouette makes the basket easy to stack and easy to line up on a shelf, which is part of its everyday charm.
Square Basket Related Posts:
- Crochet Handbag: A Chic and Timeless Accessory
- Crochet Textured Blanket: A Timeless Handmade Classic
- Crochet Puff Stitch Blanket: A Soft and Dreamy Wrap
- Crochet Tunisian Dishcloth: A Charming Kitchen Essential
Materials
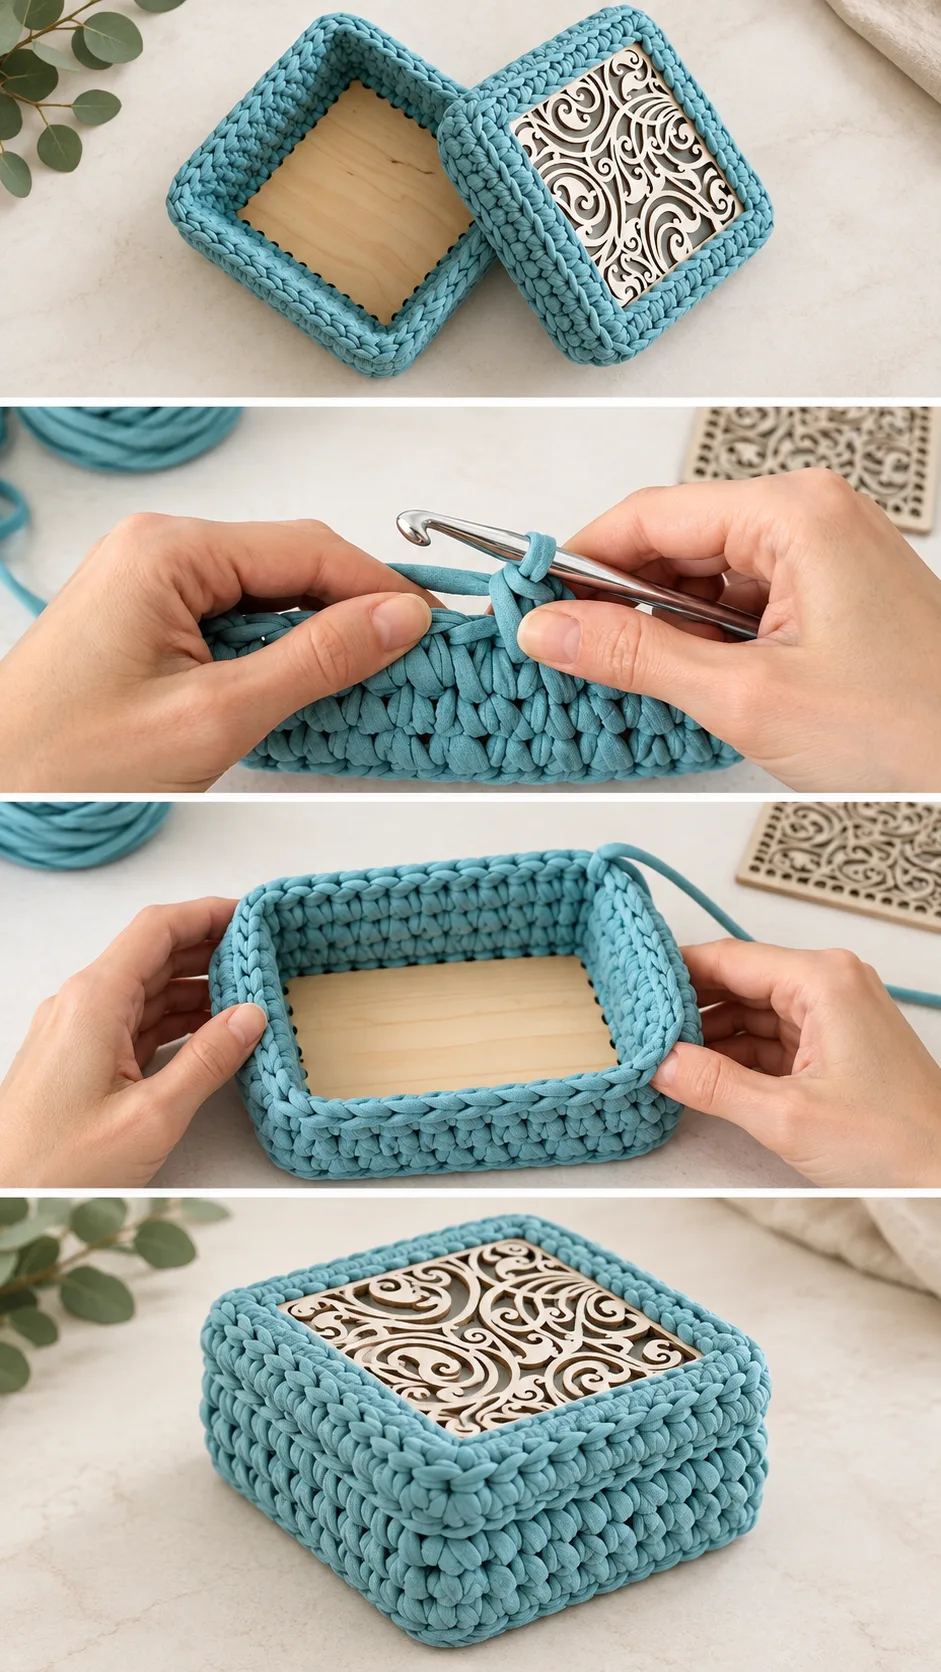
Everything needed here is fairly simple, and the choices you make matter more than the list itself. The body is worked in a thick, flat t-shirt style yarn, sometimes called fabric yarn, because it creates the dense, sturdy walls you see in the photos. A cotton-based version holds its square corners well, while a very soft or stretchy yarn would relax and lose the box shape. Use a hook noticeably larger than the label suggests to keep the stitches firm. A smooth aluminium hook with a comfortable handle makes the work feel less tiring over long sessions. You will also need a laser-cut or pressed wooden base and a matching lid panel with a decorative cut-out pattern, plus a blunt tapestry needle for weaving in ends. A small amount of clear glue can help secure the wooden pieces inside the crochet frame if the fit feels loose. Finally, keep a ruler or measuring tape on hand, since the wooden pieces are the reference size for the whole project.
Choosing the Yarn and Hook
Yarn decides whether this basket stands up on its own or sags. A firm, flat fabric yarn with some body gives straight walls and crisp edges. A thinner or softer yarn may look pretty in a skein, but once worked around a wooden base it tends to slump inward. If your walls bow outward or the corners look soft, the fix is usually a smaller hook, not more stitches. Work a small test square and compare it to the photo. You want the stitches to look tight enough that the wooden base is almost invisible from the outside.
Colour is the other decision. The aqua in the photos is a cool, sea-glass shade that works well against the warm tone of the pale wood. A deep navy or a charcoal would make the lid pattern stand out more dramatically, while an oatmeal or natural colourway suits a rustic interior. Choose a colour that complements your wood tone, and if you want the lid to be the focal point, pick a yarn that is quieter than the lacework.
The Laser-Cut Lid Detail
The lid is the signature element of this project. The filigree panel gives the basket a sense of depth and light, and it is what turns a simple box into a small decorative object. Pay attention to how the crochet frame meets the edge of the wooden panel. The stitches should hug the panel closely so the lid sits flat and doesn’t wobble. The most common mistake is working the rim too loosely, which leaves a gap around the panel and makes the lid look unfinished. If the fit is tight, work the final round in a slightly larger hook size to ease it in.
Keeping the Lid Edge Neat
Mark the four corners of the panel before you begin the final round of the lid frame. Working corner stitches a little deliberately makes the square hold its shape instead of rounding off.
Assembling Your Basket
Build the basket in a sensible order. Start with the base, then work the walls up around the wooden floor, keeping an even number of stitches on each side so the corners line up. Finish the rim, then move on to the lid. Work the lid frame around its panel and check that it fits the basket opening before you weave in any ends. Trying the lid on early saves you from unpicking a whole round later.
Styling and Using Your Basket
In the photos the basket sits as a standalone object, its lid set slightly askew to show the pattern. That casual placement suits most spaces. Try it on a bedside table to hold rings and a watch, on an entry console for keys and sunglasses, or on a craft desk for buttons and pins. It also makes a thoughtful gift for a teacher, a new homeowner or anyone who collects small treasures. Keep the colour palette restrained around it so the aqua and wood tones stand out.
Finishing Tips for a Clean Result
Weave in every tail securely through the back of the stitches, since loose ends will show on the smooth outer surface. Pay attention to tension at the corners, where the fabric yarn wants to pull inward. If your walls ripple, the usual cause is a stitch count that increases unevenly, so check each round against the square. Once finished, press the wooden pieces lightly into place and check that the lid and base seat firmly.
Caring for Your Basket
Spot-clean the crochet with a damp cloth and mild soap, and avoid soaking it, because the wooden base can warp and the yarn may lose its shape. Let it air-dry flat. Keep the basket out of direct sun for long periods, since sunlight can fade the turquoise over time. Store it lid-on to protect the filigree panel from dust.
A Charming Handmade Keepsake
This square basket brings together soft crochet and crisp wood in a piece that is small, useful and quietly special. Its three deciding factors are the firmness of the yarn, a hook size that keeps the walls straight, and a careful fit around the wooden lid. Get those right and you will have a keepsake that holds its shape and its charm for years.
Video tutorial by Vasilya Knits, linked below. Watch closely how the stitches are worked around the wooden base and how the lid frame is finished, and pause as often as you need.
Watch the tutorial to see the wall stitches worked around the base, and pause when the corners start to take shape, since that is where the stitch rhythm matters most.
[Video: Vasilya Knits – Crochet Square Basket Tutorial]
Follow us on Pinterest and subscribe to the Newsletter so you don’t miss a thing!
Tutorial and photos of this square basket by: Vasilya Knits – Вяжем крючком.
