
I don’t know about you, but I absolutely love a good poncho. There’s something about throwing on a cozy layer that feels effortless yet totally put together. No fussing with sleeves, no complicated closures, just wrap yourself up and go.
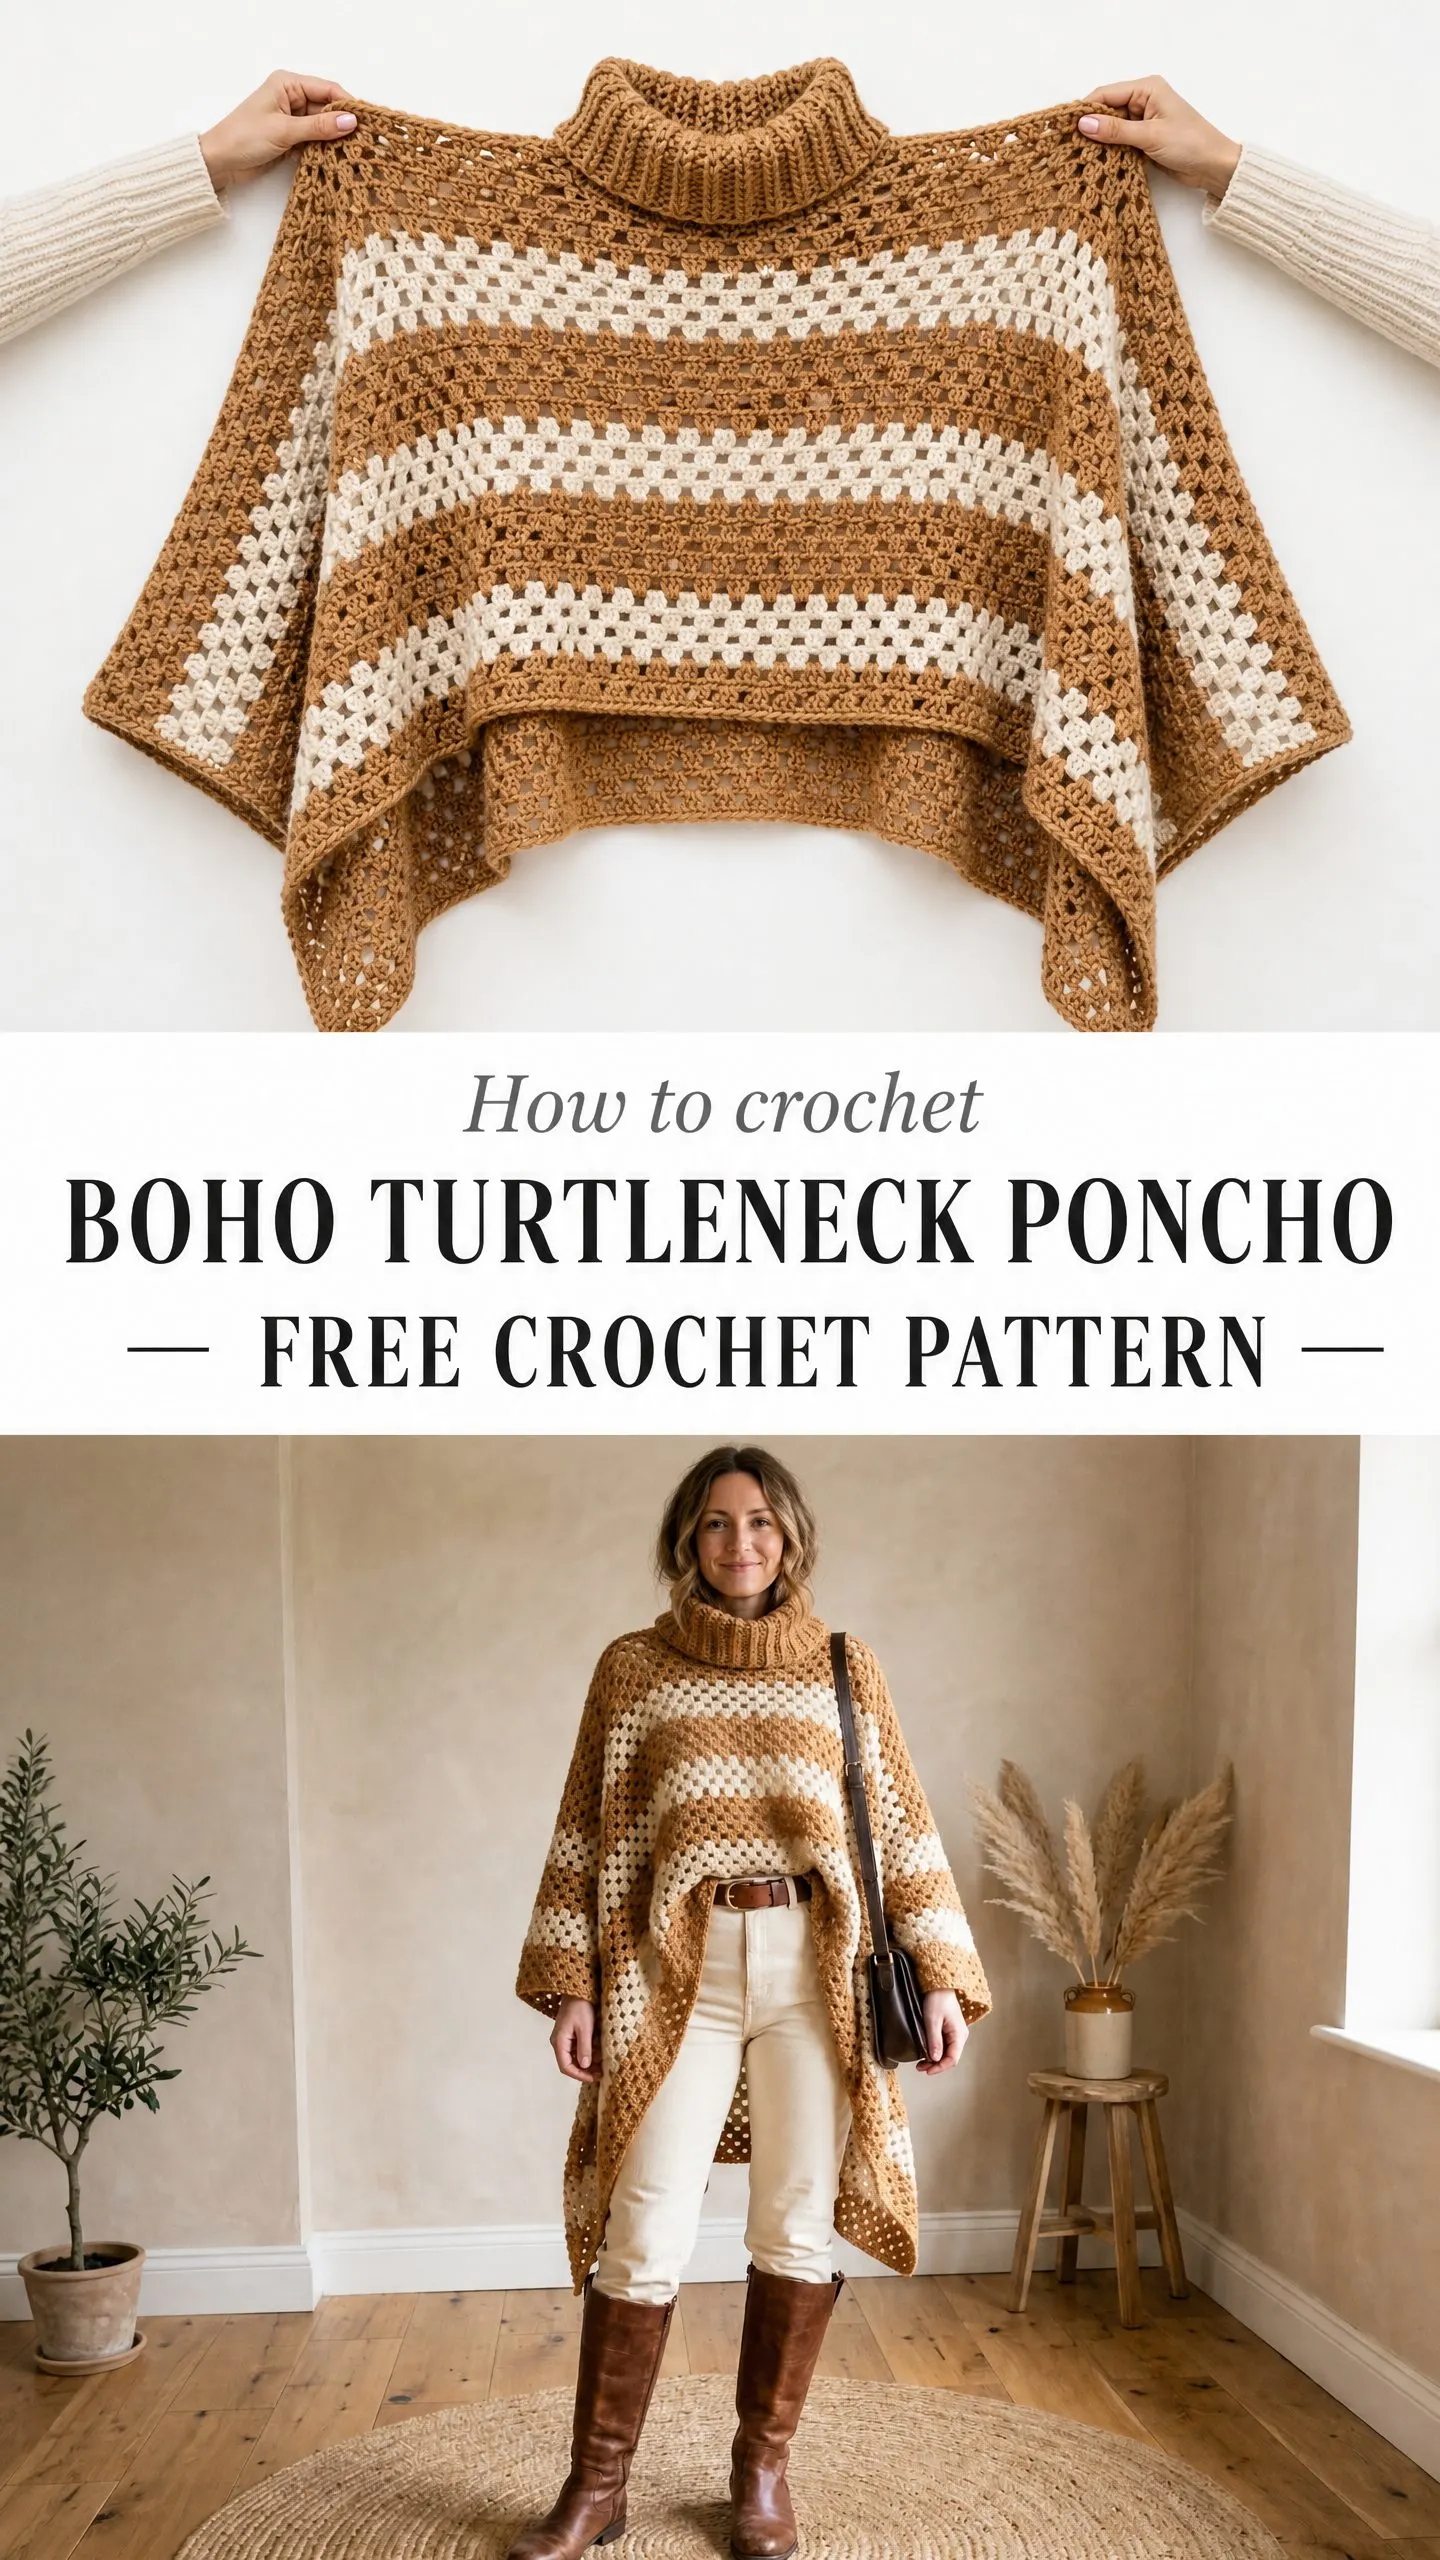
This Boho Turtleneck Poncho delivers all the warmth and style without any of the construction headaches. The chunky ribbed turtleneck keeps your neck toasty, while the open granny stripe body lets you move freely. Plus, that gorgeous drape at the front and back? It comes naturally from how the panels sit when you wear them. No shaping required.
If you’ve been looking for a statement piece that works up faster than you’d expect and looks way more impressive than it actually is to make, this is your pattern. Let’s get into it.
Why You’ll Love This Crochet Poncho Pattern
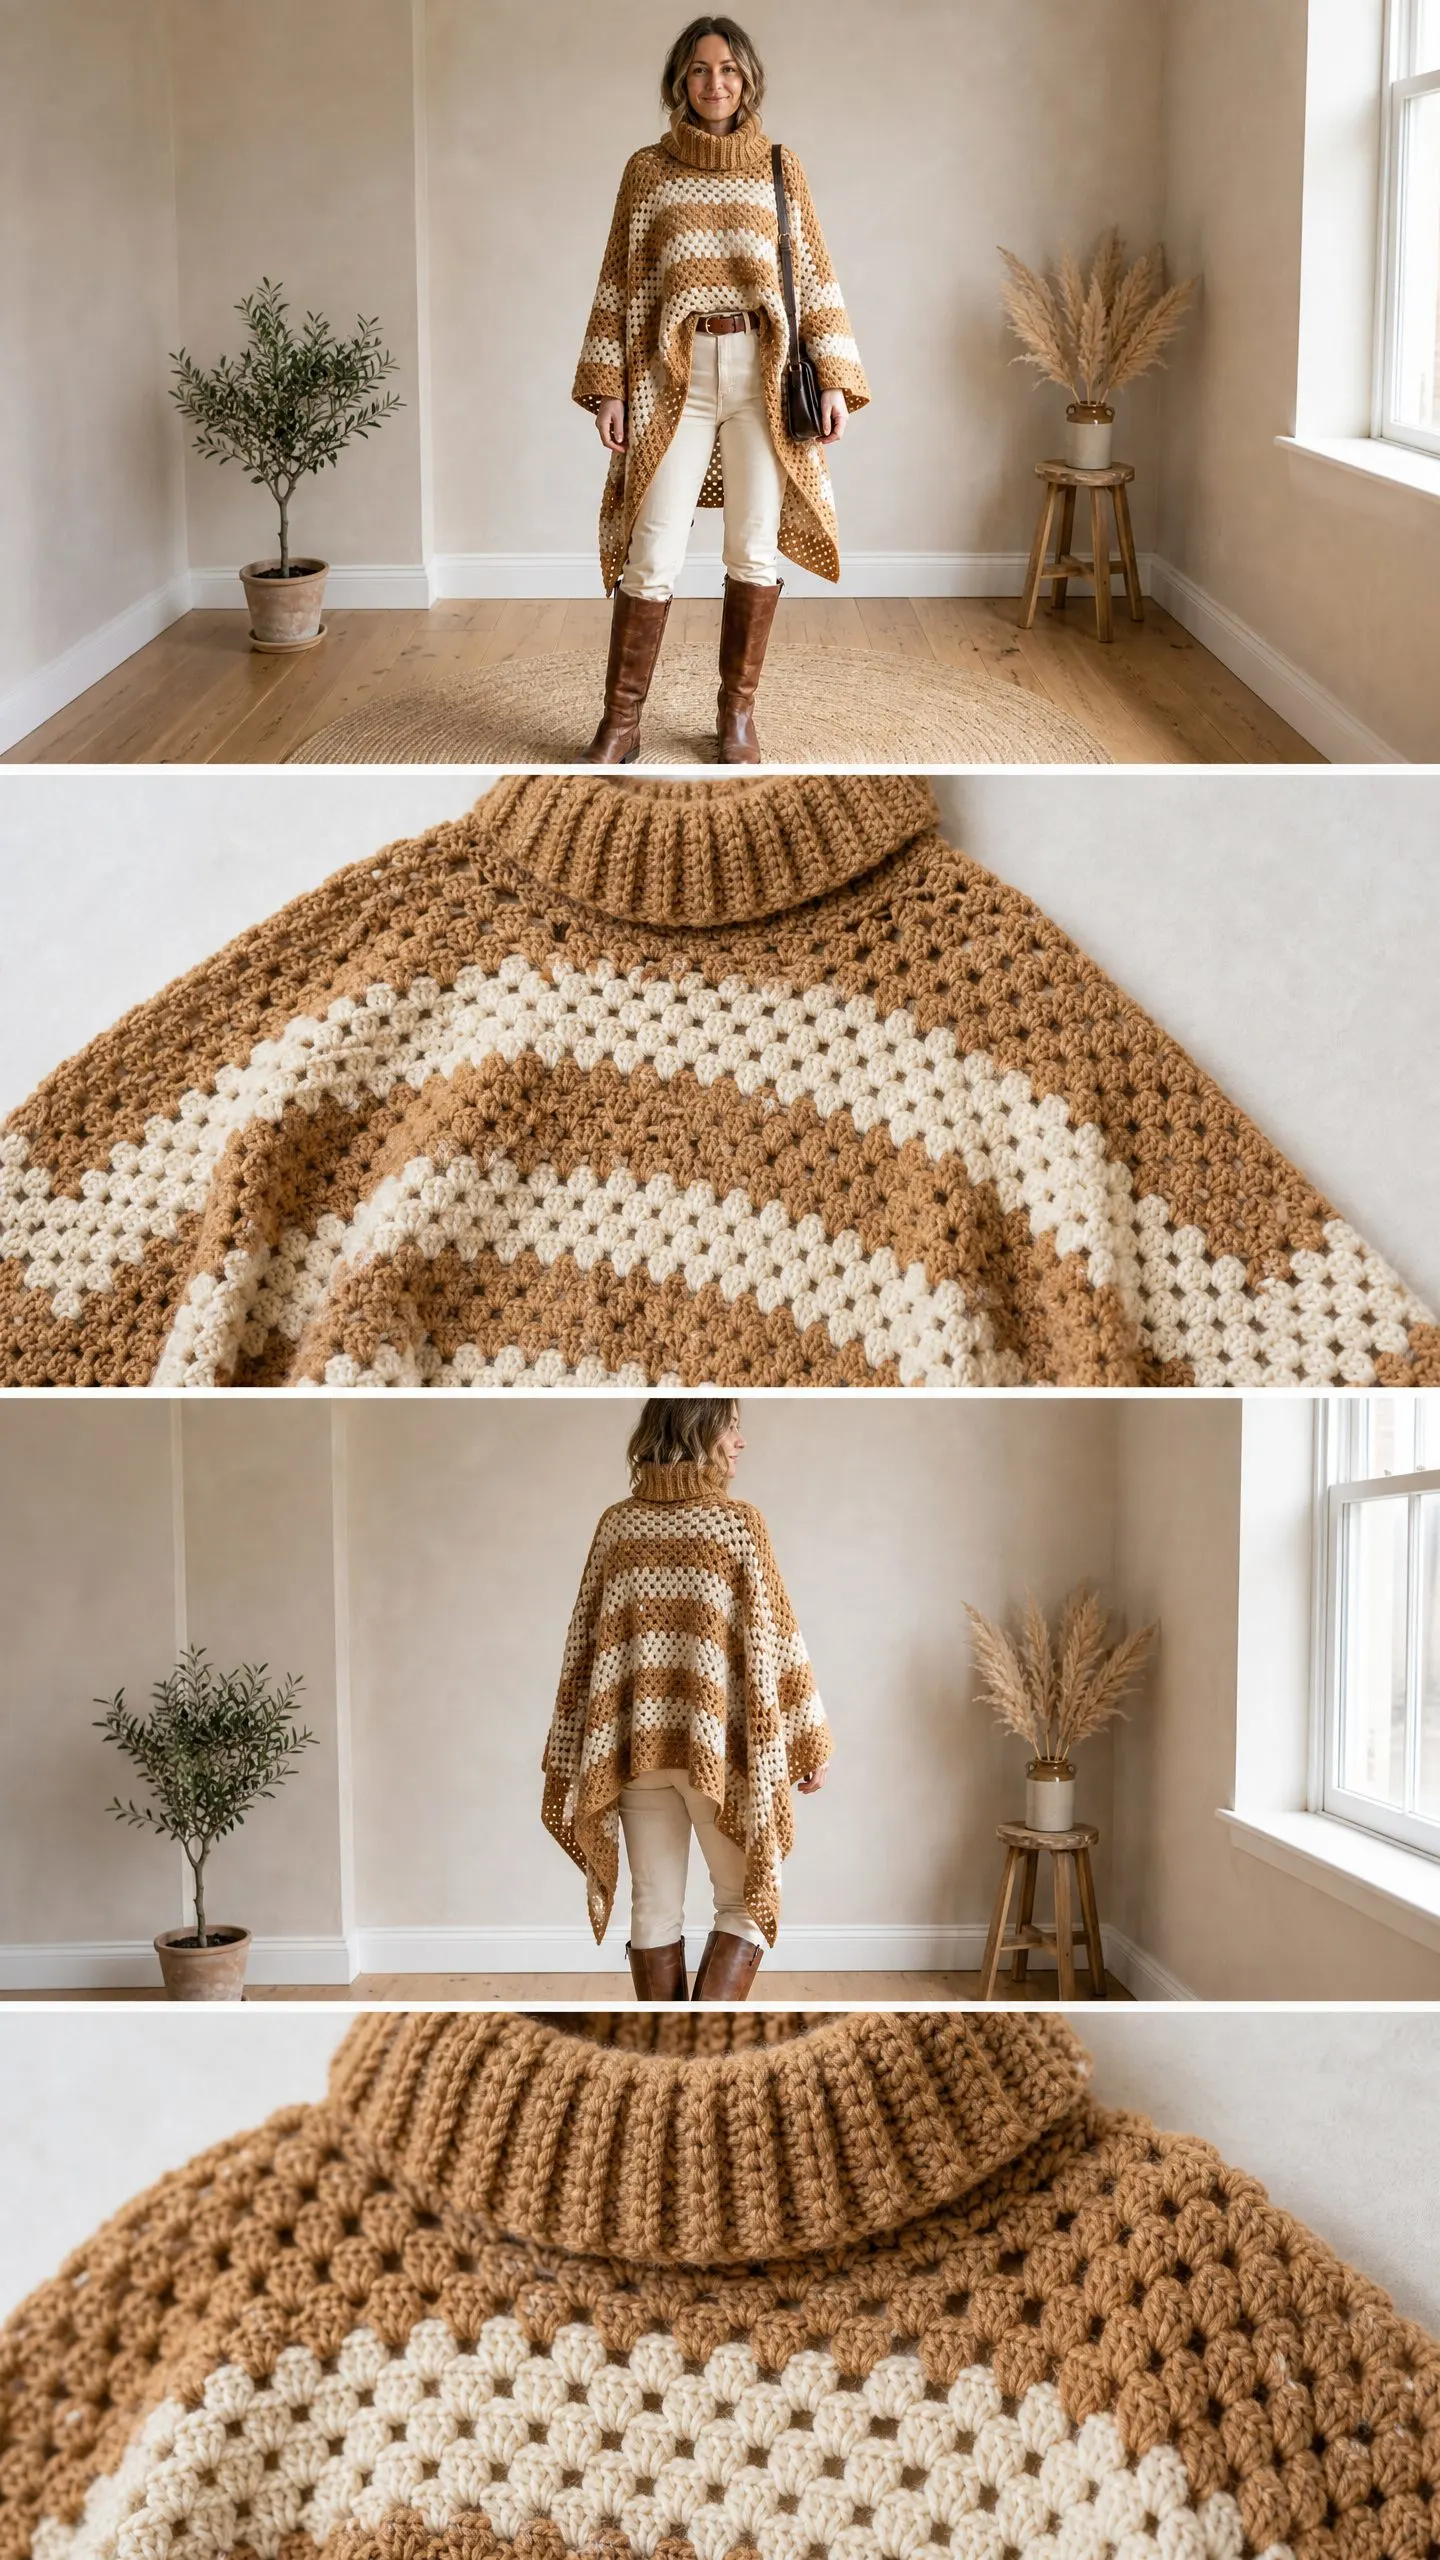
This poncho hits that sweet spot between cozy blanket vibes and actual wearable fashion. The granny cluster stitch creates beautiful horizontal stripes with an open, airy texture that breathes without sacrificing warmth. The alternating camel and cream colors give it that classic boho aesthetic that pairs with everything from jeans and boots to leggings and sneakers.
The construction is surprisingly simple. You’re making two identical rectangles, seaming them at the shoulders, and adding a turtleneck collar. That’s it. The dramatic silhouette with pointed front and back hems? That’s just how the rectangles naturally hang when you wear them. No fancy decreases or complicated shaping to worry about.
This pattern works up in approximately 20 to 30 hours, which makes it perfect for a weekend project or a satisfying week of evening crochet sessions. The bulky weight yarn and large hook mean you’ll see progress quickly, and the repetitive stitch pattern is almost meditative once you get going.
Skill Level
This pattern is rated intermediate. You should be comfortable with basic stitches, joining rounds, and changing colors cleanly at the end of rows. If you’ve made a granny square before, you already know the core technique. The turtleneck ribbing requires working in the back loop only, which is a simple variation that creates that stretchy, textured look.
Don’t let the intermediate rating scare you off if you’re a confident beginner. The granny cluster stitch is straightforward, and I’ll walk you through every step. The main skills you need are consistent tension and patience with color changes.
Finished Measurements
This poncho fits most adults comfortably with these dimensions:
The oversized fit is intentional and part of the boho charm. You can belt it at the waist for a more defined silhouette, as shown in the photos, though the belt is not part of the construction.
Materials Needed
Yarn
Yarn Suggestions
Lion Brand Pound of Love in Caramel and Fisherman works beautifully held double. One skein of each color will cover the entire project with yarn to spare.
Paintbox Yarns Simply Chunky in Mustard Yellow and Paper White gives excellent stitch definition. You’ll need approximately 6 balls of Color A and 3 balls of Color B.
We Are Knitters The Wool in Camel and Ecru creates a gorgeous rustic texture with beautiful drape. Note that this yarn requires hand washing.
When substituting, choose any bulky weight yarn with good drape. Avoid stiff acrylics that don’t relax with blocking, since the open granny cluster stitch looks best in yarn that softens over time.
Hooks
The smaller hook for the collar keeps the ribbing snug and structured.
Notions
Gauge
With US N/P-15 (10 mm) hook and Color A in granny cluster stitch pattern:
Or measured another way: 4 cluster repeats across = approximately 9 inches (22.9 cm).
Gauge matters for this project. If your stitches are too tight, go up a hook size. If they’re too loose, go down. You want a slightly open, drapey fabric. Do not skip the gauge swatch.
How to Make a Gauge Swatch
Chain 22 with Color A. Work the granny cluster pattern for 8 rows. Block the swatch before measuring. This step saves you from heartbreak later.
Abbreviations
Special Stitches
Granny Cluster (cl)
This is the star of the show. A granny cluster is simply 3 double crochets worked into the same stitch or space.
Here’s how: Yarn over, insert hook into the indicated space, yarn over and pull up a loop, yarn over and pull through two loops on your hook. That’s one double crochet (dc). Without turning or moving to a new spot, work two more double crochets into the exact same space. You now have a cluster of 3 dc sitting together.
Granny Cluster Stripe Row
Chain 3 at the start of each row. This counts as your first double crochet. Work 2 more dc into the same space to complete your first cluster. Chain 2. Skip the next chain space from the previous row. Work 1 cluster (3 dc) into the following chain space. Chain 2. Repeat this pattern across the row, ending with a final cluster and a single dc into the turning chain from the row below.
Pattern Instructions
Section 1: Poncho Body Panel (Make 2 Identical Panels)
Each panel is a large rectangle measuring approximately 54 inches wide by 22 inches long before assembly.
Foundation Chain: With Color A and US N/P-15 (10 mm) hook, chain 98.
Row 1 (RS, Color A): Work 3 dc into the 4th chain from hook (this counts as your first cluster, and the skipped ch-3 counts as 1 dc). Ch 2. Skip 3 ch. Work 1 cluster (3 dc) into the next ch. Ch 2. Skip 3 ch. Continue across to the last 4 chains. Work 1 cluster into the 4th-to-last chain. Ch 2. Skip 2 ch. Work 1 dc into the last ch to close the row. Turn.
Stitch count: 24 clusters plus 2 edge dc.
Row 2 (WS, Color A): Ch 3 (counts as dc). Turn. Work 2 dc into the first ch-2 space to complete a cluster. Ch 2. Work 1 cluster (3 dc) into each ch-2 space across, working ch 2 after each cluster. After the last cluster, work 1 dc into the top of the turning ch-3 from Row 1. Turn.
Stitch count: 24 clusters.
At the end of Row 2, change to Color B by pulling Color B through the last two loops of your final dc.
Row 3 (RS, Color B): Ch 3 (counts as dc). Work 2 dc into the first ch-2 space. Ch 2. Work 1 cluster into each ch-2 space across, with ch 2 after each cluster. Work 1 dc into the top of the turning ch-3. Turn.
Stitch count: 24 clusters.
Row 4 (WS, Color B): Ch 3. Work 2 dc into the first ch-2 space. Ch 2. Work 1 cluster into each ch-2 space across, with ch 2 after each cluster. Work 1 dc into the top of turning ch-3. Turn.
Stitch count: 24 clusters.
At the end of Row 4, change back to Color A.
Continue in the established stripe sequence: 2 rows Color A, then 2 rows Color B. Maintain 24 clusters on every row with no increases or decreases.
Rows 5-6 (Color A): Work as Row 3 and Row 4. 24 clusters each row.
Rows 7-8 (Color B): Work as Row 3 and Row 4. 24 clusters each row.
Rows 9-10 (Color A): Work as Row 3 and Row 4. 24 clusters each row.
Rows 11-12 (Color B): Work as Row 3 and Row 4. 24 clusters each row.
Rows 13-14 (Color A): Work as Row 3 and Row 4. 24 clusters each row.
Rows 15-16 (Color B): Work as Row 3 and Row 4. 24 clusters each row.
Rows 17-18 (Color A): Work as Row 3 and Row 4. 24 clusters each row.
Rows 19-20 (Color B): Work as Row 3 and Row 4. 24 clusters each row.
Rows 21-22 (Color A): Work as Row 3 and Row 4. 24 clusters each row. Fasten off.
Checkpoint: Your finished panel should measure approximately 22 inches from foundation edge to final row and approximately 54 inches across. Block each panel flat before assembly.
Section 2: Assembly
You now have two identical panels.
Orientation: Place both panels with the right side facing up and the long 54-inch edges running horizontally. These edges become the top of your poncho at the shoulders.
Mark the neck opening: Find the center of each panel’s top edge and mark 7 inches to the left and 7 inches to the right. This creates a 14-inch center section that will remain open as your neck hole.
Shoulder seam: With Color A, hold both panels with right sides together. Using single crochet, join the top edges from the left edge to your first marker (approximately 18 sc). Skip the marked 14-inch center section. Continue joining with single crochet from the second marker to the right edge (approximately 18 sc). You’ve created one seam with a gap in the middle for your head.
Turn the poncho right side out. The front and back points should now hang at center front and center back.
Checkpoint: Try on your poncho. The neck opening should sit comfortably on your shoulders. The points should hang approximately 27 inches from the shoulder seam.
Section 3: Turtleneck Collar
The collar is worked flat as a ribbed rectangle, then seamed into a tube and attached.
Collar dimensions: approximately 14 inches circumference by 8 inches tall.
Using Color A and US M/N-13 (9 mm) hook:
Foundation: Chain 17.
Collar Row 1 (RS): Sc in the 2nd ch from hook and in each ch across. Turn.
16 sc.
Collar Row 2 (WS): Ch 1. Sc in the back loop only (BLO) of each sc across. Turn.
16 sc.
Repeat Collar Row 2 until the collar strip measures approximately 44 inches long. This creates the stretchy circumference needed to fit around your neck opening.
Seam the collar: Fold the strip so the two short ends meet. Using your tapestry needle and Color A, whipstitch or mattress stitch the short ends together to form a tube. Your tube is now approximately 44 inches around and 8 inches tall.
Attach the collar: With the poncho right side out, position the collar right side out against the neck opening edge. Align the collar seam with center back. Pin in place. Using Color A and your smaller hook, slip stitch the lower edge of the collar to the neck opening, working through both layers. Work approximately one slip stitch per chain space or cluster around the entire opening.
Fold the collar outward as a cowl, or wear it standing up as a true turtleneck.
Section 4: Finishing Edging (Optional)
For a polished look, work one round of slip stitch or single crochet around the entire hem edge using Color A and your larger hook. Work 1 sc per row end along the side edges and 1 sc per chain along the foundation chain edge. This step is optional but gives clean, professional edges.
Blocking Your Crochet Poncho
Wet blocking transforms this piece. Fill a basin with cool water and submerge both panels. Let them soak for 10 to 15 minutes. Gently squeeze out water without wringing. Roll each panel in a clean towel and press to remove excess moisture.
Lay flat on blocking mats and pin to finished dimensions: 54 inches wide by 22 inches tall. Allow to dry completely, which usually takes 24 to 48 hours.
After seaming, lightly mist the finished poncho and let it relax flat or hang from a sturdy hanger to set the drape.
Size Customization Tips
For a wider poncho: Add cluster repeats in multiples of 4 chains to your foundation. Each additional repeat adds approximately 2.25 inches.
For a longer poncho: Work additional rows in the stripe sequence. Each 2-row stripe adds approximately 2 inches to the length.
For a larger or smaller neck opening: Adjust how many clusters you join at the shoulder seam, leaving more or fewer open at center.
For a taller collar: Work more rows on your collar strip. Every 4 additional rows adds approximately 1 inch to the height.
Care Instructions
Care depends on your yarn choice. For acrylic yarns, machine wash on a gentle cycle with cool water and lay flat to dry. For wool or wool-blend yarns, hand wash in cool water with wool wash and lay flat to dry. Never hang wet wool, as it will stretch. Always check your yarn label for specific recommendations.
I really hope you enjoy making this cozy boho poncho as much as I enjoyed designing it. If you give it a try, I’d love to see your finished piece. Tag me on Instagram or share a photo in my Facebook group. It makes my day every single time.
If this pattern is calling to you but you’re not quite ready to start, go ahead and save it to your Pinterest boards so you can find it later. And if you do make one, drop a comment below and tell me which colors you chose. I can’t wait to hear from you!
