
I don’t know about you, but I have a serious soft spot for granny squares. They’re portable, satisfying to make, and endlessly customizable. The problem? I finish a pile of them and then wonder what to do next.
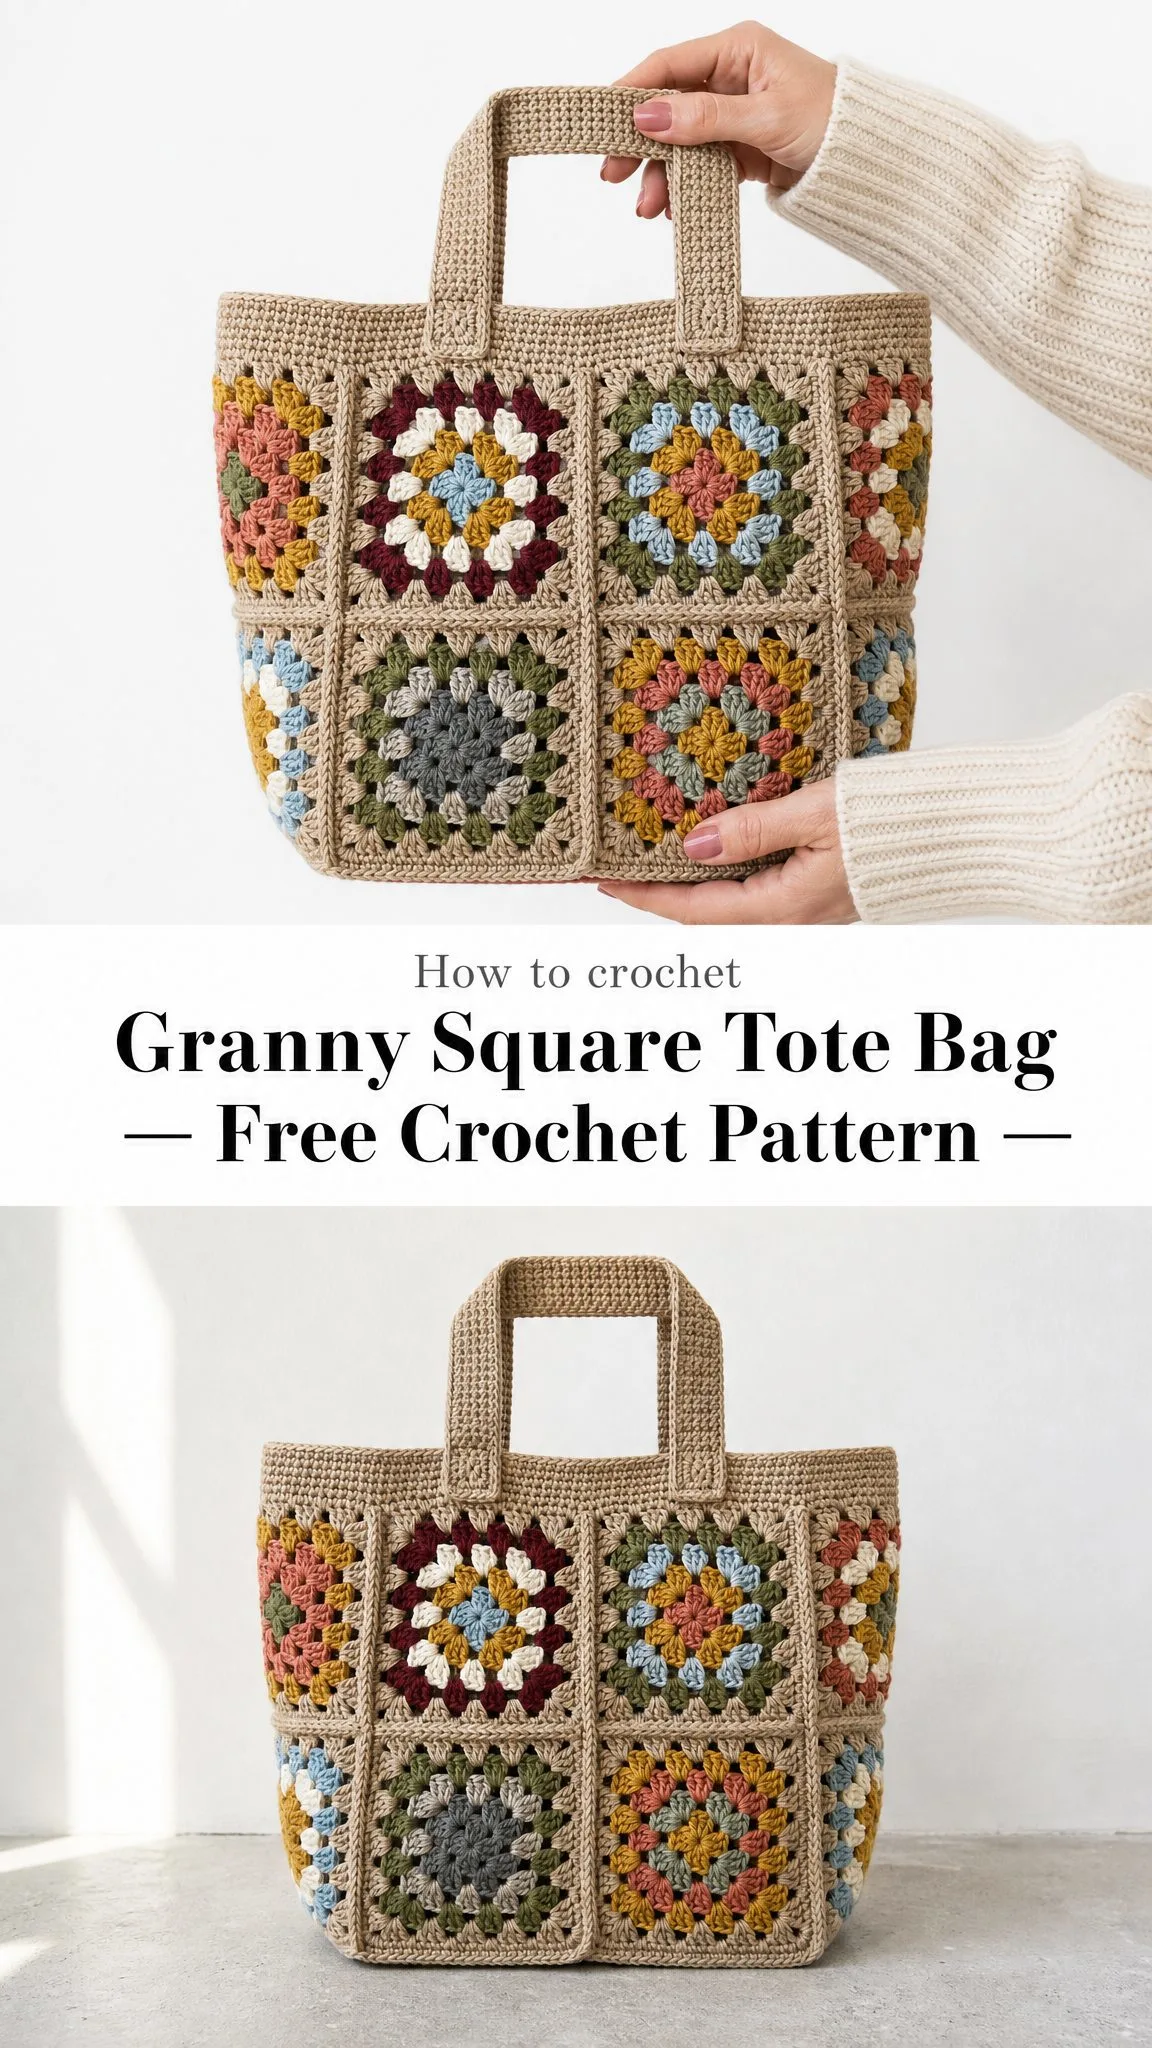
This tote bag solves that perfectly. Twelve cheerful squares get framed in a calm beige border, stitched into a tube, and set on a sturdy base. You end up with a roomy bag that carries everything from farmers market finds to your current work in progress.
The construction is surprisingly straightforward. If you can make a basic granny square and sew pieces together, you can absolutely make this bag. Let me walk you through it.
Why You’ll Love This Granny Square Tote Bag Crochet Pattern
This pattern hits the sweet spot between interesting and doable. You’re not making the same thing over and over for weeks, but you’re also not wrestling with complicated techniques.
Here’s what makes it special:
The granny squares are just four rounds each. Three rounds in your accent colors, one round in beige to frame everything. That beige border is the secret. It ties all your color choices together and makes joining incredibly easy since every square has the same edge.
The finished bag measures 12 × 12 × 6 inches (30 × 30 × 15 cm) with a 5 inch (13 cm) handle drop. That’s big enough to be genuinely useful but not so massive it becomes unwieldy.
Cotton yarn gives the bag structure and durability. It holds its shape, washes well, and won’t stretch out when you load it up with heavy groceries.
Materials You’ll Need
Gather these supplies before you start. Having everything ready makes the project flow so much better.
Yarn:
Suggested yarn brands:
The accent palette shown includes: burgundy, mustard, cream, dusty blue, sage, terracotta, and soft grey. All framed in that unifying beige.
Hook: 5.0 mm (US H-8)
Notions:
Gauge
One finished four round granny square should measure 6 inches (15 cm) square with a 5.0 mm hook.
Gauge isn’t critical here, but matching it keeps your bag at the stated size. If your square runs large, go down a hook size. If it runs small, go up.
Abbreviations and Terms
This pattern uses US crochet terms. If you’re in the UK, the most important swap is that US double crochet (dc) equals UK treble (tr).
Special stitches:
Granny cluster: Three double crochet stitches worked together into one space. This is the building block of every granny square.
Magic ring: An adjustable loop that lets you pull the center closed tight. If you haven’t learned this yet, there are great video tutorials online. You can also chain 4 and slip stitch to join as an alternative.
Pattern notes: The beginning chain 3 counts as the first double crochet throughout. Each square has four rounds: three in accent colors, then one beige frame round. Work all 12 squares first, then join them. Weave in your ends as you go to save time later.
How to Crochet the Granny Square (Make 12)
Work Rounds 1 through 3 in three accent colors of your choice, then Round 4 in beige. Cut and join a new color at the start of each round.
Round 1: Using Colour A, make a magic ring. Ch 3 (counts as dc), 2 dc in ring; [ch 2, 3 dc in ring] 3 times; ch 2, sl st to top of beginning ch-3. Pull ring closed. (12 dc, 4 corner spaces)
Round 2: Join Colour B in any corner ch-2 space. (Ch 3, 2 dc, ch 2, 3 dc) in same space; [ch 1, (3 dc, ch 2, 3 dc) in next corner space] 3 times; ch 1, sl st to top of beginning ch-3. (24 dc, 8 groups)
Round 3: Join Colour C in any corner space. (Ch 3, 2 dc, ch 2, 3 dc) in corner; ch 1, 3 dc in next ch-1 space, ch 1, (3 dc, ch 2, 3 dc) in corner; rep from around; ch 1, sl st to join. (36 dc, 12 groups)
Round 4: Join MC (beige) in any corner space. (Ch 3, 2 dc, ch 2, 3 dc) in corner; [ch 1, 3 dc in next ch-1 space] twice, ch 1, (3 dc, ch 2, 3 dc) in corner; rep from around; ch 1, sl st to join. Fasten off. (48 dc, 16 groups)
Each finished square has four 3-dc groups along every side. This even count makes joining quick and seamless.
Colour Play and Layout Ideas
Here’s the fun part. There’s no wrong combination because that beige frame ties everything together beautifully.
Six combinations to get you started:
Notice how mustard appears in most of these? The pattern suggests letting one color wander through the bag as a quiet connecting thread. It creates visual cohesion without being too matchy.
Tips for arranging your squares:
How the 12 Squares Are Arranged
Joining the Body
Join your squares with right sides together using MC and a tapestry needle. You can use a whip stitch through back loops only or work a single crochet seam on the wrong side. Both methods work well.
Step 1: Build two panels
Make a front panel of 4 squares (2 × 2) and an identical back panel (2 × 2). Join squares side to side first, then seam the two rows together. You now have 2 panels.
Step 2: Add the side columns
Make two side columns of 2 squares each (1 × 2). Seam one column to the right edge of the front panel and the other to the left edge. You now have a 6-square ring.
Step 3: Close into a tube
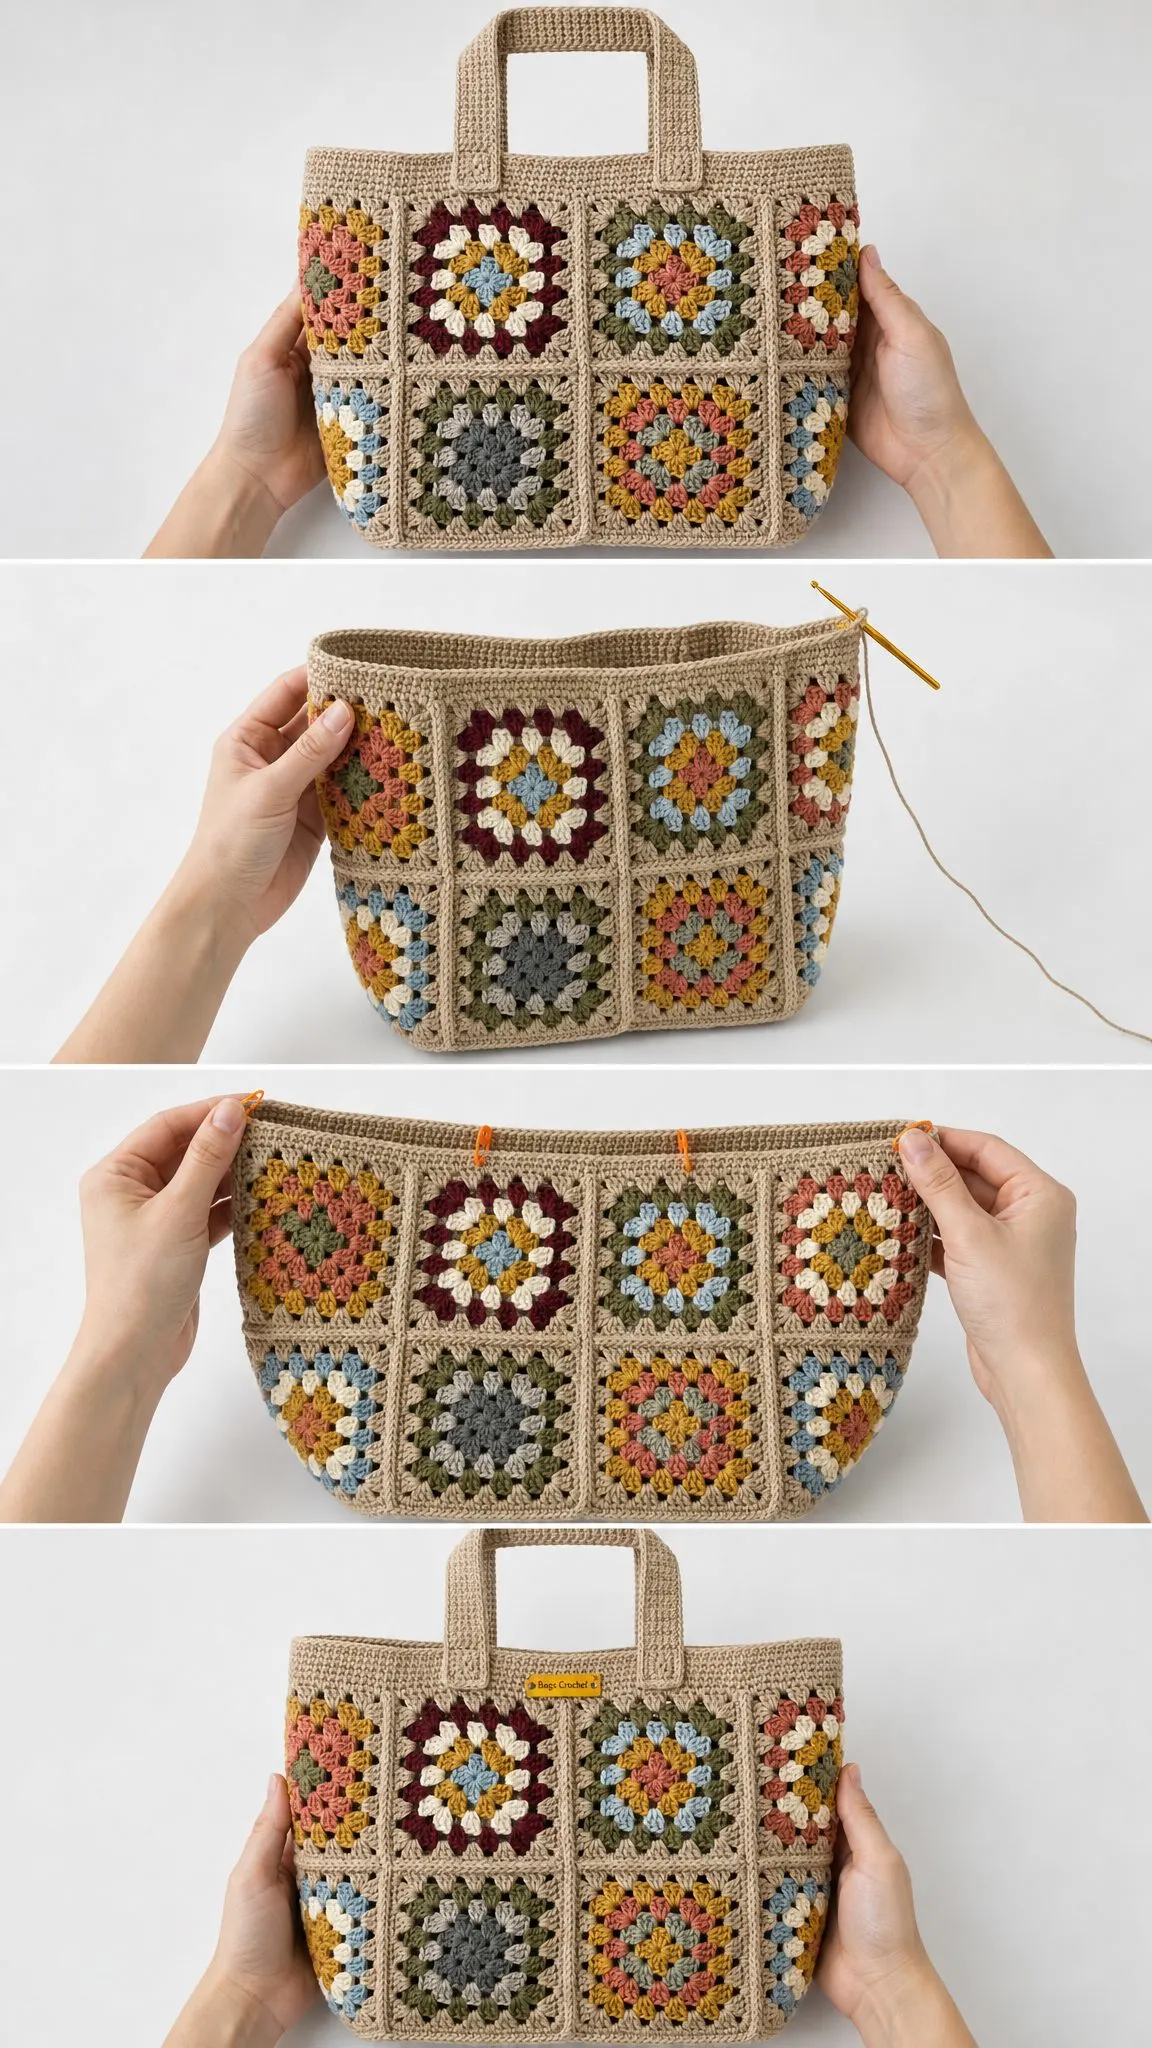
Seam the back panel to the free edges of both side columns. You now have an open-ended tube, 6 squares around and 2 squares tall. The tube measures approximately 36 inches (90 cm) around.
Helpful tip: Keep all seams on the same side so the inside stays neat. Match the beige frame stitch for stitch. Those four 3-dc groups per edge line up exactly.
Crocheting the Flat Base
The base is worked separately as a rectangle, then sewn to the bottom opening of the tube.
Row 1: Ch 49. Hdc in 2nd ch from hook and each ch across. Turn. (48 hdc)
Rows 2-18: Ch 1, hdc in each st across. Turn. Continue until the rectangle measures 6 inches (15 cm) deep. (48 hdc)
Sew the base to the lower tube edge all the way around, easing the corners gently.
Adding the Top Border
Round 1: Join MC at top edge. Sc evenly around the opening, working 3 sc per 3-dc group. Sl st to join. (144 sc)
Rounds 2-3: Ch 1, sc in each st around; sl st to join. Fasten off after Round 3. (144 sc)
Making the Handles (Make 2)
Row 1: Ch 41. Hdc in 2nd ch from hook and each ch across. Turn. (40 hdc)
Rows 2-6: Ch 1, hdc in each st across. Turn. Fasten off, leaving a long tail. (40 hdc)
Fold the handle lengthwise and whip stitch the long edge closed for a firm strap.
Attaching the handles: Pin each handle to the front and back, about 3 inches (8 cm) in from each side seam. Stitch securely through the top border for a 5 inch (13 cm) drop.
Finishing Your Granny Square Tote Bag
Almost done! These final touches make all the difference.
Care Instructions
Ways to Customize Your Tote
Want a bigger bag? Add a round of beige granny to each square (Round 5 = 20 groups / 60 dc) for a 7 inch (18 cm) square, or add a square to each panel.
Want a taller bag? Work side columns and panels 3 squares tall instead of 2.
Prefer a shoulder strap? Lengthen the handles to 24 inches (60 cm) for an over the shoulder carry.
Need a firmer base? Work the base in single crochet instead of half double crochet, or double the fabric lining.
Final Thoughts
This granny square tote bag crochet pattern is one of those projects that looks impressive but is genuinely achievable for adventurous beginners. The construction breaks down into simple, manageable pieces. And there’s something so satisfying about watching those colorful squares come together into something useful.
I hope you love making this as much as I enjoyed designing it. Thank you for being here and for trusting me with your crafting time.
If you make this tote, I would absolutely love to see it! Tag me on Instagram or share a photo in our Facebook group. Seeing your finished projects is honestly the best part of sharing patterns.
Before you go: Save this granny square tote bag pattern to your Pinterest boards so you can find it when you’re ready to start. And if you make one, please come back and leave a comment below. I love hearing how projects turn out and seeing what color combinations you choose!
