
Last summer, I found myself standing in a craft market, admiring a gorgeous granny square bag that cost way more than I wanted to spend. I remember thinking, "I could totally make that." So I went home, pulled out my yarn stash, and started experimenting. Three attempts and a lot of frogging later, I finally nailed the construction. This coastal-inspired tote is the result of that stubborn determination, and honestly, I think it turned out even better than the one I saw at that market.
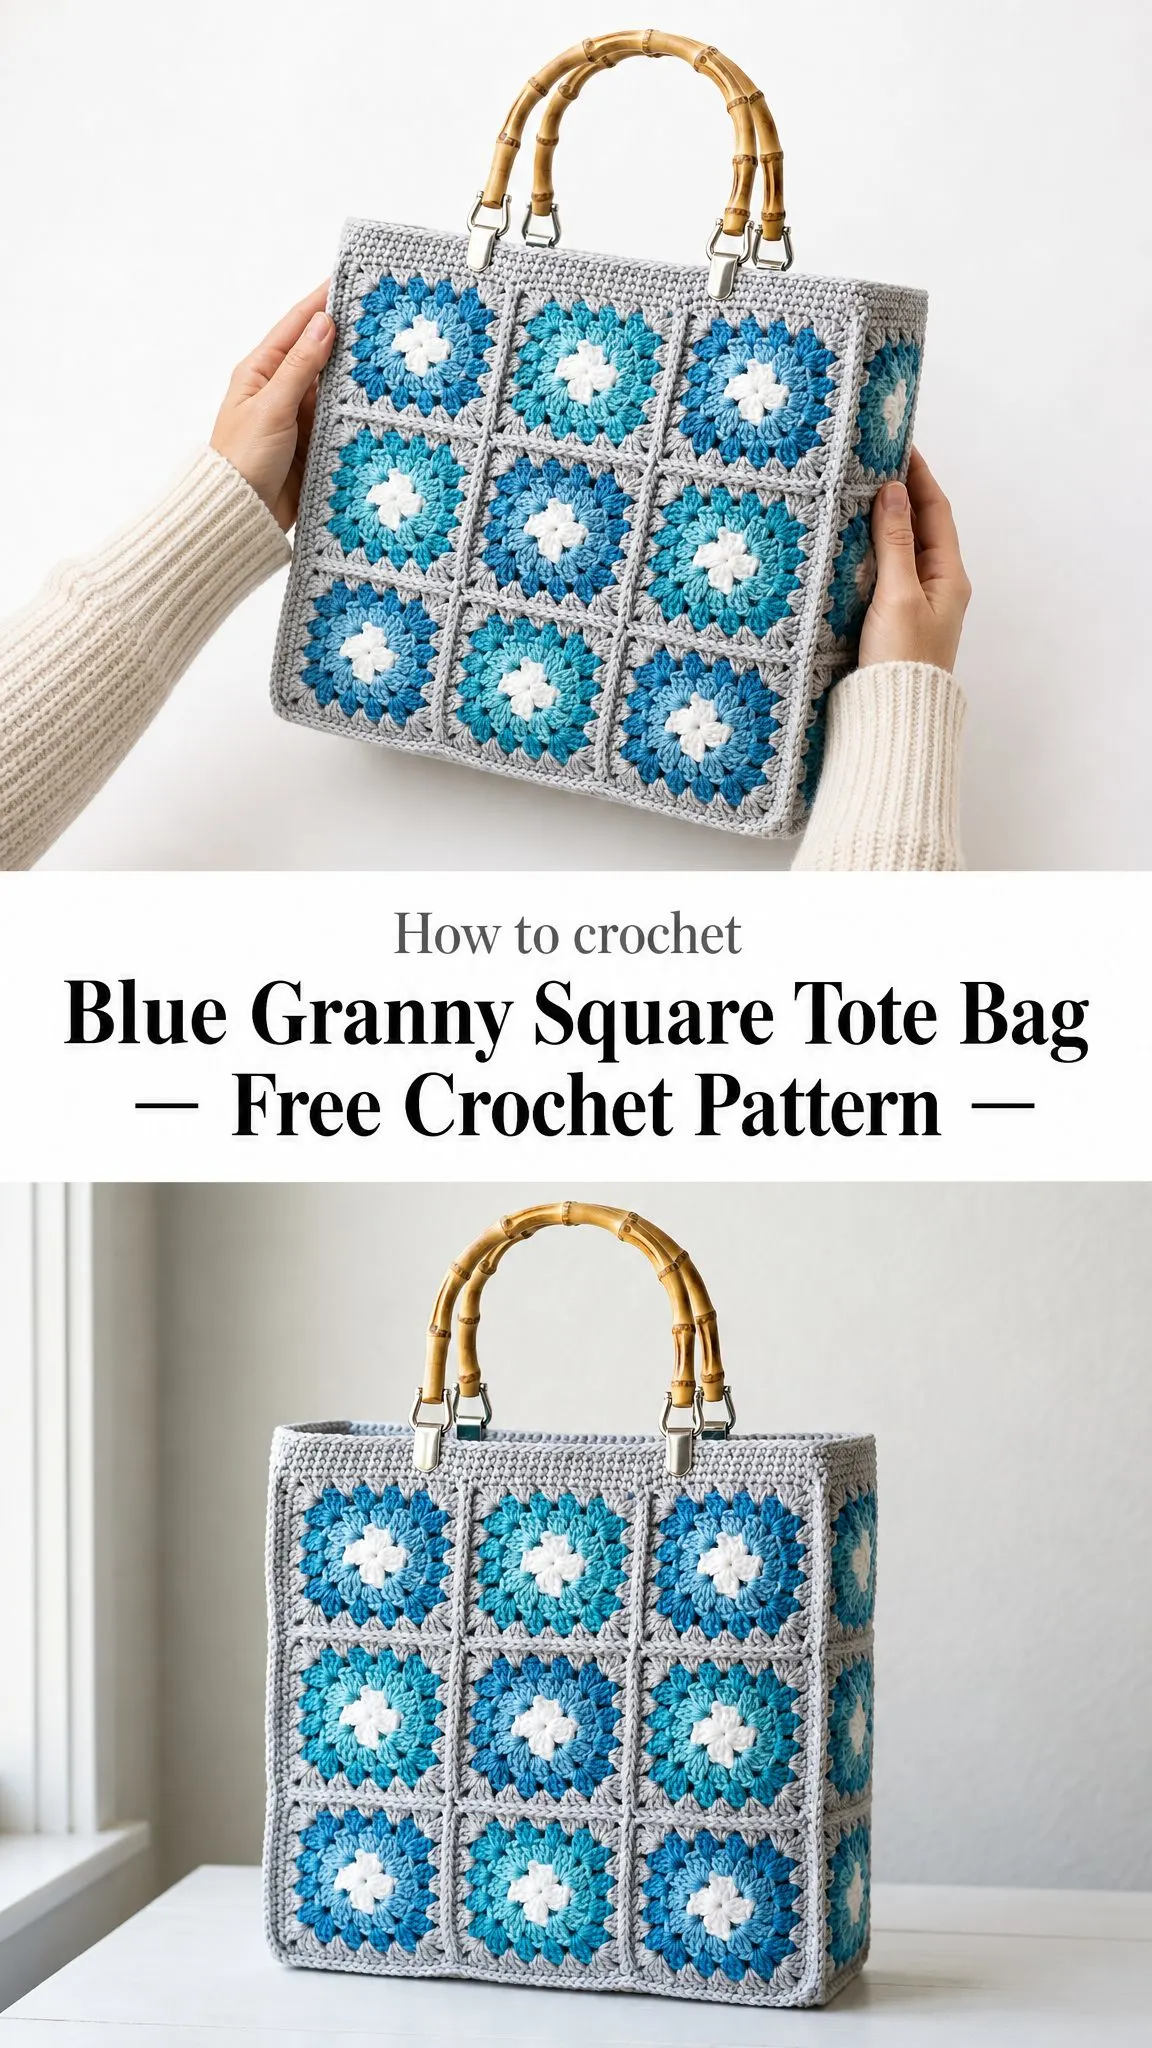
The beautiful thing about this bag is how the grey lattice creates such a striking frame around those ocean blue sunbursts. Every time I carry it, someone asks where I bought it. The look on their faces when I say "I made it" never gets old.
If you have been wanting to try a granny square project but felt intimidated by assembly, this tote is genuinely beginner-friendly. The squares are simple four-round motifs, and the box construction comes together more easily than you might expect. Let me walk you through everything you need to know.
Overview of the Coastal Granny Square Tote
This boxy tote is built entirely from one repeating motif, a four-round sunburst granny square. That means it is endlessly portable to stitch and forgiving to assemble. White flower centers bloom into two rounds of mixed blues, then a grey corner round squares everything off and creates the lattice grid once the pieces are joined.
Skill Level: Confident beginner to Easy-Intermediate
Time Estimate: 16 to 22 hours total (about 25 to 35 minutes per square)
Total Squares: 24 (9 front + 9 back + 3 each side)
Finished Dimensions
| Measurement | Size |
|---|---|
| Width | 13.5 in / 34 cm |
| Height | 14.5 in / 37 cm |
| Depth | 4.5 in / 11.5 cm |
| Each Square | 4.5 in / 11.5 cm |
The finished bag stands up on its own, which makes it perfect for farmers market trips, beach days, or just everyday errands.
Materials You Will Need
Yarn Requirements
This pattern uses worsted weight (#4) cotton yarn. Cotton gives the bag structure and durability, plus it is easy to wash when needed.
| Color | Role | Yardage |
|---|---|---|
| Grey | Main Color (MC) | ~280 yd / 256 m |
| White | Color A | ~60 yd / 55 m |
| Deep Teal | Color B | ~90 yd / 82 m |
| Mid Aqua | Color C | ~90 yd / 82 m |
| Sky Blue | Color D | ~70 yd / 64 m |
Recommended Yarns:
Hook and Notions
Gauge
One blocked square should measure 4.5 in / 11.5 cm. For the border, 16 single crochet stitches and 18 rows should equal 4 in / 10 cm.
Quick gauge tip: Make one complete square and block it before committing to all 24. If your square is too big, go down a hook size. Too small? Go up a hook size. Getting gauge matters for this project because all 24 squares need to match.
Stitch Abbreviations and Special Stitches
This pattern uses US crochet terminology. If you are working from UK terms, remember that US single crochet equals UK double crochet, and US double crochet equals UK treble crochet.
| Abbreviation | Meaning |
|---|---|
| ch | chain |
| sl st | slip stitch |
| sc | single crochet (UK: dc) |
| dc | double crochet (UK: tr) |
| sp | space |
| st(s) | stitch(es) |
| MR | magic ring |
| rep | repeat |
Special Stitches Defined
3-dc group: Work 3 double crochet stitches into the same space. This creates the cluster that forms the sunburst pattern.
Corner: Work (3 dc, ch 2, 3 dc) all into the same space. This is what transforms your circle into a square.
Pattern Notes Before You Begin
The Sunburst Granny Square Pattern
Make 24 squares total. Each square is worked in the round with the right side always facing you. Block each square to 4.5 in / 11.5 cm before assembly.
Round 1 (White, Color A)
Start with a magic ring (MR). This creates a tight, closed center for your flower.
Ch 3 (this counts as your first dc), then work [dc, ch 1] 7 times into the ring, ch 1, join with sl st to the top of ch-3.
Pull the magic ring tight to close the center.
Stitch count: 8 dc, 8 ch-1 spaces
Round 2 (Blue, Color B)
Fasten off white. Join your first blue (Color B) in any ch-1 space.
Ch 3, 2 dc in same sp (this is your first 3-dc group), ch 1, [3-dc group in next ch-1 sp, ch 1] 7 times, join with sl st to top of ch-3.
Stitch count: 8 groups = 24 dc
Round 3 (Blue, Color C)
Fasten off Color B. Join your second blue (Color C) in any ch-1 space.
Ch 3, 2 dc in same sp, ch 1, [3-dc group in next ch-1 sp, ch 1] 7 times, join with sl st to top of ch-3.
Stitch count: 8 groups = 24 dc
Round 4 (Grey, Main Color)
This is where you square off your circle. Fasten off Color C. Join grey (MC) in any ch-1 space. This space becomes your first corner.
Work around as follows: [corner (3 dc, ch 2, 3 dc) in next sp, ch 1, 3-dc group in next sp, ch 1] 4 times, join with sl st.
Every other space becomes a corner (4 corners total). The spaces in between are single side groups.
Stitch count: 4 corners + 4 side groups = 36 dc
Fasten off, leaving a 6 in / 15 cm tail. Weave in your white and color-change tails, but keep the grey tails for seaming later. Each finished side of your square reads as corner, side, corner with even chain spaces, giving you a tidy edge for joining.
Playing with Color
Here is the fun part. Rotate colors B, C, and D between Rounds 2 and 3 from square to square. This creates that scattered, painterly wash of deep teal, aqua, and sky blue across the finished bag.
Some combinations to try:
When you lay out your squares later, just make sure no two identical combinations sit right next to each other.
Assembly Instructions
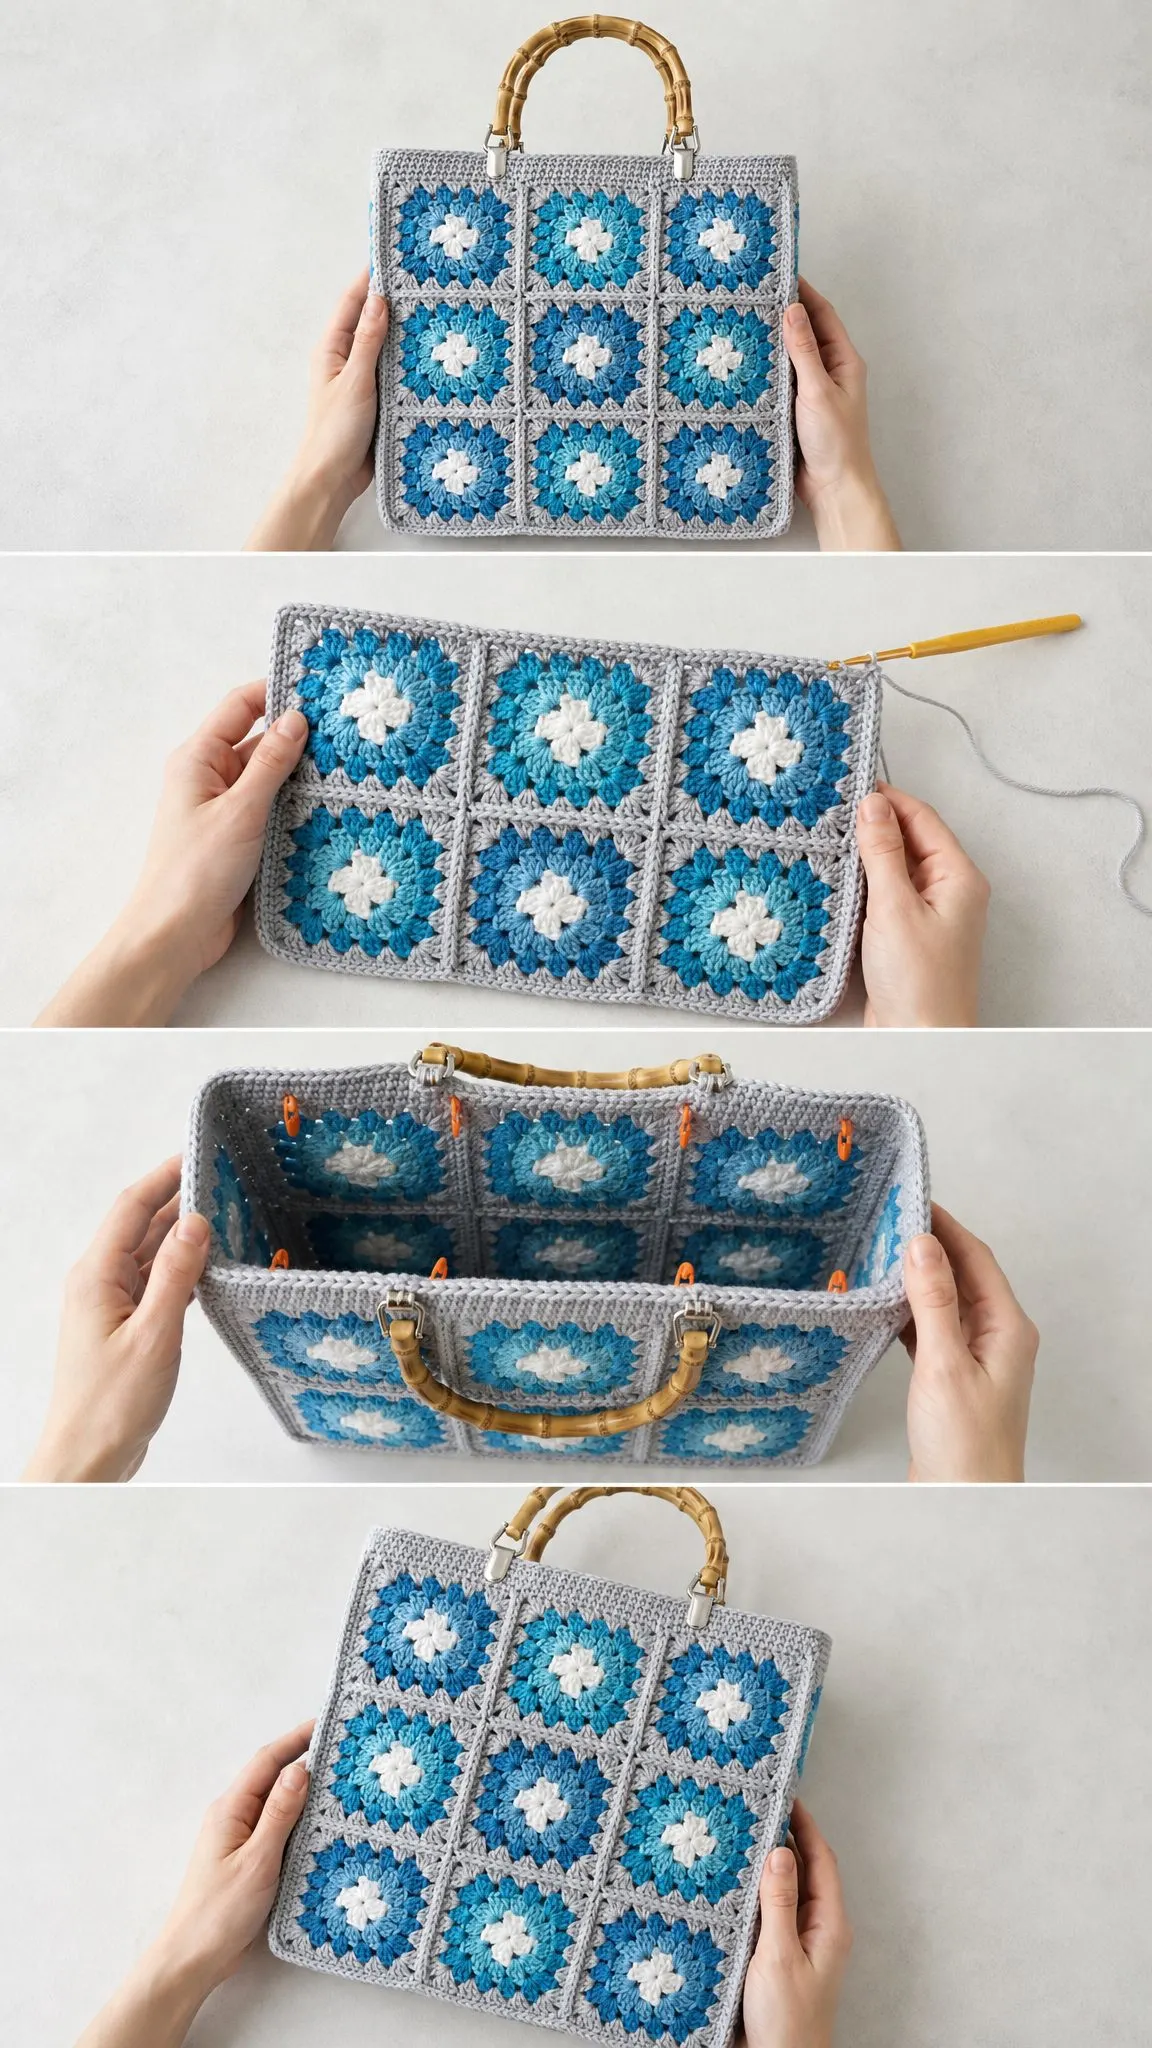
You will build two 3×3 panels (front and back) plus two 1×3 side strips, then join them all into a box shape.
Layout Planning
Front and Back: 9 squares each arranged in a 3×3 grid
Sides: 3 squares each, stacked vertically
Before you start sewing, lay out all your squares and shuffle them until no two touching squares have the same blue combination. This is when your color play really comes together.
Step 1: Join the Squares
Using grey yarn and your tapestry needle, place two squares with right sides together.
Whipstitch through the back loops only, working from corner to corner. Catch each stitch and chain space so the seam lies flat and creates that beautiful lattice effect.
Build each row first (join 3 squares into a strip), then join your completed rows into panels.
Helpful tip: The grey tails you saved from fastening off are perfect for this. Thread one onto your tapestry needle and use it to seam adjacent squares.
Step 2: Box It Up
Once you have your two 3×3 panels and two 1×3 side strips:
1. Whipstitch one side strip between the front and back right edges
2. Whipstitch the second strip on the left side to form a tube
3. Seam the bottom by joining front to back, easing the side strips into the corners
When you are done, the bag should stand up on its own. If it feels a bit floppy at this stage, do not worry. The border and optional lining will add structure.
Grey Top Border
This border finishes the opening and creates a sturdy band for attaching your handles.
Border Round 1
With right side facing, join grey at a top back corner.
Sc evenly around the whole opening. Work about 1 sc per dc and per ch-1 space. At each square-seam junction, work 2 sc to keep everything flat. Join with sl st.
Approximate stitch count: ~132 sc
Border Rounds 2, 3, and 4
Ch 1, sc in each st around, join with sl st. Repeat for three rounds total.
Fasten off and weave in ends.
Stitch count: ~132 sc each round
Important note about counting: Your exact border total depends on how many single crochets you place at the seam junctions. Focus on keeping the band flat without rippling, and let your own stitch count be the guide. Whatever number you land on in Round 1, keep it consistent through all four rounds.
Finishing and Attaching the Handles
The bamboo handles give this tote such a polished, boutique look. Here is how to attach them securely.
Handle Placement
1. Center each handle on the front and back panels, approximately 2.5 in / 6 cm in from each side seam
2. Thread a clip-on tab through the handle ring (or position a sew-on D-tab)
3. Pinch the tab over the border so it grips 2 to 3 grey rows
4. Using doubled grey yarn, sew each tab to the inside of the border with 6 to 8 passes through the tab holes and around the stitches
5. Repeat for all four tabs
Before using your bag, give each handle a good tug to make sure your stitching is secure. Better to reinforce now than have a handle pop off when the bag is full.
Optional Fabric Lining
A lining adds structure and keeps small items from poking through the openwork. Here is the basic process:
1. Measure the inside dimensions of your bag
2. Cut fabric to those dimensions plus 0.5 in / 1.5 cm seam allowance on all sides
3. Back the fabric with fusible interfacing for extra body
4. Sew the lining pieces into a box shape
5. Hand-stitch the lining to the inside of the grey border, tucking raw edges under
A medium-weight cotton canvas or quilting cotton works beautifully for this.
Care Instructions
Your finished tote will last for years with proper care.
Customization Ideas
Want to make this pattern your own? Here are some ideas:
Bigger tote: Make 4×4 front and back panels with 1×4 sides, or use chunkier cotton on a 6.0 mm hook
Slim clutch: Use single-square-deep sides, skip the handles, and add a zipper closure
Different palette: Swap the ocean blues for terracottas and creams, or create an ombré effect from teal at the bottom to sky blue at the top
Yarn estimation: Each square uses approximately 13 to 15 yards of blues plus 2.5 yards of white, with grey needed for joins and border
Why This Crochet Pattern Works So Well
The beauty of granny square construction is that you can take it anywhere. Stitch squares during your lunch break, in waiting rooms, or while watching TV. Because each square is small and self-contained, you never have to worry about losing your place in a complex pattern.
The assembly might seem intimidating if you have never made a bag before, but trust me on this: if you can whipstitch in a straight line, you can build this tote. The box construction is actually easier than trying to crochet a bag in one piece because you can adjust and fix mistakes before everything is joined.
And those bamboo handles? They elevate the whole project from "cute craft" to "I could sell this at a market." Which, by the way, you totally could.
Final Thoughts
I hope this blue granny square tote bag crochet pattern brings you as much joy to make as it brought me to design. There is something deeply satisfying about transforming 24 simple squares into a functional, beautiful bag that gets compliments everywhere you go.
The coastal color palette works for so many occasions, from beach trips to grocery runs to farmers market Saturdays. And once you have made one, you will probably want to make another in different colors. That is exactly what happened to me.
Thank you so much for choosing this pattern for your next crochet project. I genuinely appreciate you being here and trusting me to guide you through.
If you love how your tote turns out, I would be absolutely thrilled if you saved this pattern to your Pinterest boards so you can find it again later and share it with fellow crocheters. And please drop a comment below if you make one. I love seeing your finished projects and hearing which color combinations you chose!
