
Okay, yarn lovers. This is your sign to finally dig into that stash and pull out all those bright, happy colors you have been saving for "something special." This Colorful Granny Square Tote Bag is that something special.
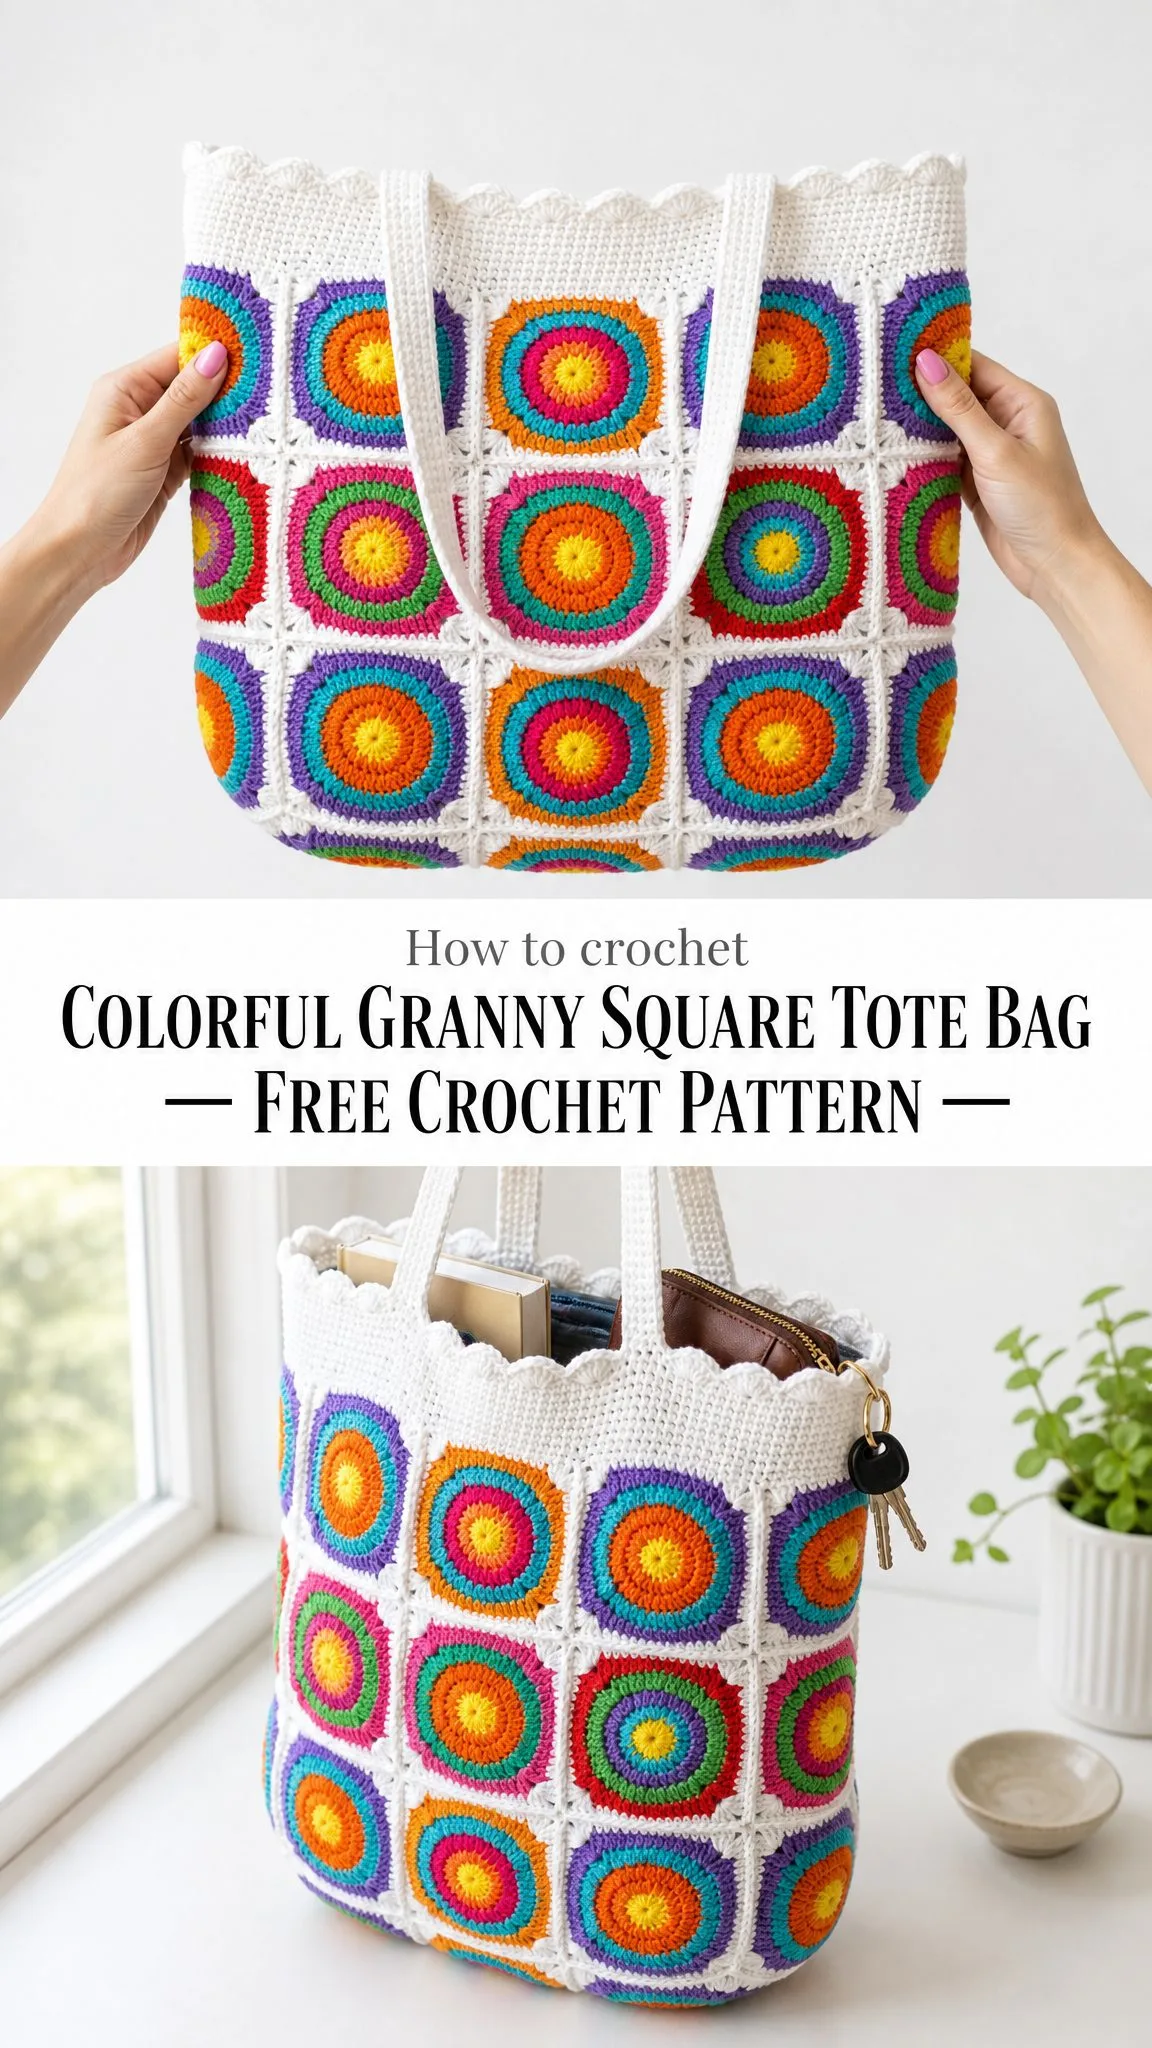
The construction here is genuinely fun. You will work 48 individual circle-in-a-square motifs, each one a tiny burst of sunshine with a yellow center and three rings of whatever colors make your heart sing. Then you join them into a tube, close the bottom, add a crisp white band with scalloped edges, and attach sturdy handles. It sounds like a lot, but each motif is small and portable. Perfect for TV crocheting or waiting rooms.
I will be honest with you. This is an advanced beginner project. If you are comfortable working in the round, joining motifs, and basic seaming, you have got this. If those skills feel a little shaky, this is actually a wonderful project to practice them on because you get 48 chances to nail that circle-in-a-square technique.
Why You Will Love This Tote Bag Pattern
This crochet tote bag pattern hits all the right notes. The finished bag measures 12½ inches wide, 13½ inches tall (not counting the handles), and 2½ inches deep. That is a roomy everyday bag that can hold books, groceries, craft supplies, or whatever else you need to haul around.
The magic is in the color play. Every single motif has a bright yellow center and a white frame, but the three rings in between can be whatever combination you want. Orange to teal to purple. Pink to green to orange. Teal to pink to green. Mix them up so no two squares are exactly the same and the white grid ties everything together into a cohesive, intentional rainbow.
The handle drop is 7 inches, which means you can carry it comfortably over your shoulder or in your hand. And because it is made from cotton yarn, the bag has beautiful structure and holds its shape even when loaded up.
Materials You Will Need
Before you start, gather everything so you are not hunting for supplies mid-project.
Yarn: Worsted weight cotton (weight #4). You will need approximately 550 to 600 grams total, broken down like this:
Yarn suggestions: Lily Sugar’n Cream is budget-friendly with a huge color range. Paintbox Yarns Cotton Aran is smooth and vivid. You could also hold Scheepjes Catona double or use a DK cotton on a 4.5mm hook for a softer drape.
Hook: 4.0mm (US G/6) or whatever size gets you gauge.
Other supplies:
Gauge
Getting gauge right matters here because the motif size drives the entire bag dimensions.
One finished motif should measure 2½ inches (6.5cm) square through Round 5, blocked, using worsted cotton on a 4.0mm hook.
Make one motif first and measure it before committing to all 48. If your motif is too small, go up a hook size. If it is too big, go down a hook size.
Stitch Abbreviations and Terms
This pattern uses US crochet terms throughout. UK crocheters, remember that US single crochet (sc) equals UK double crochet (dc), US half double crochet (hdc) equals UK half treble (htr), and US double crochet (dc) equals UK treble (tr).
Special stitch — Corner Cluster: Work (2 dc, ch 2, 2 dc) all in the same stitch or space. This is what transforms your round circle into a tidy square on Round 4.
Pattern Notes Before You Begin
Read through these notes before you pick up your hook. They will save you confusion later.
Each motif is worked in joined rounds with the right side always facing you. Cut and join a new color each round, then fasten off neatly.
The starting chain 3 at the beginning of a round counts as the first double crochet unless noted otherwise. Join each round with a slip stitch to the top of the first stitch (or the top of the chain 3).
Yellow is always the center (Round 1) and white is always the squaring round (Round 5). Rounds 2 through 4 are your three changing accent colors.
Weave in your ends as you go. With 48 motifs, future you will be so grateful you did not leave 200+ tails for the end.
Every instruction includes a stitch count in parentheses so you can check your work as you go.
The Motif Pattern: Circle in a Square
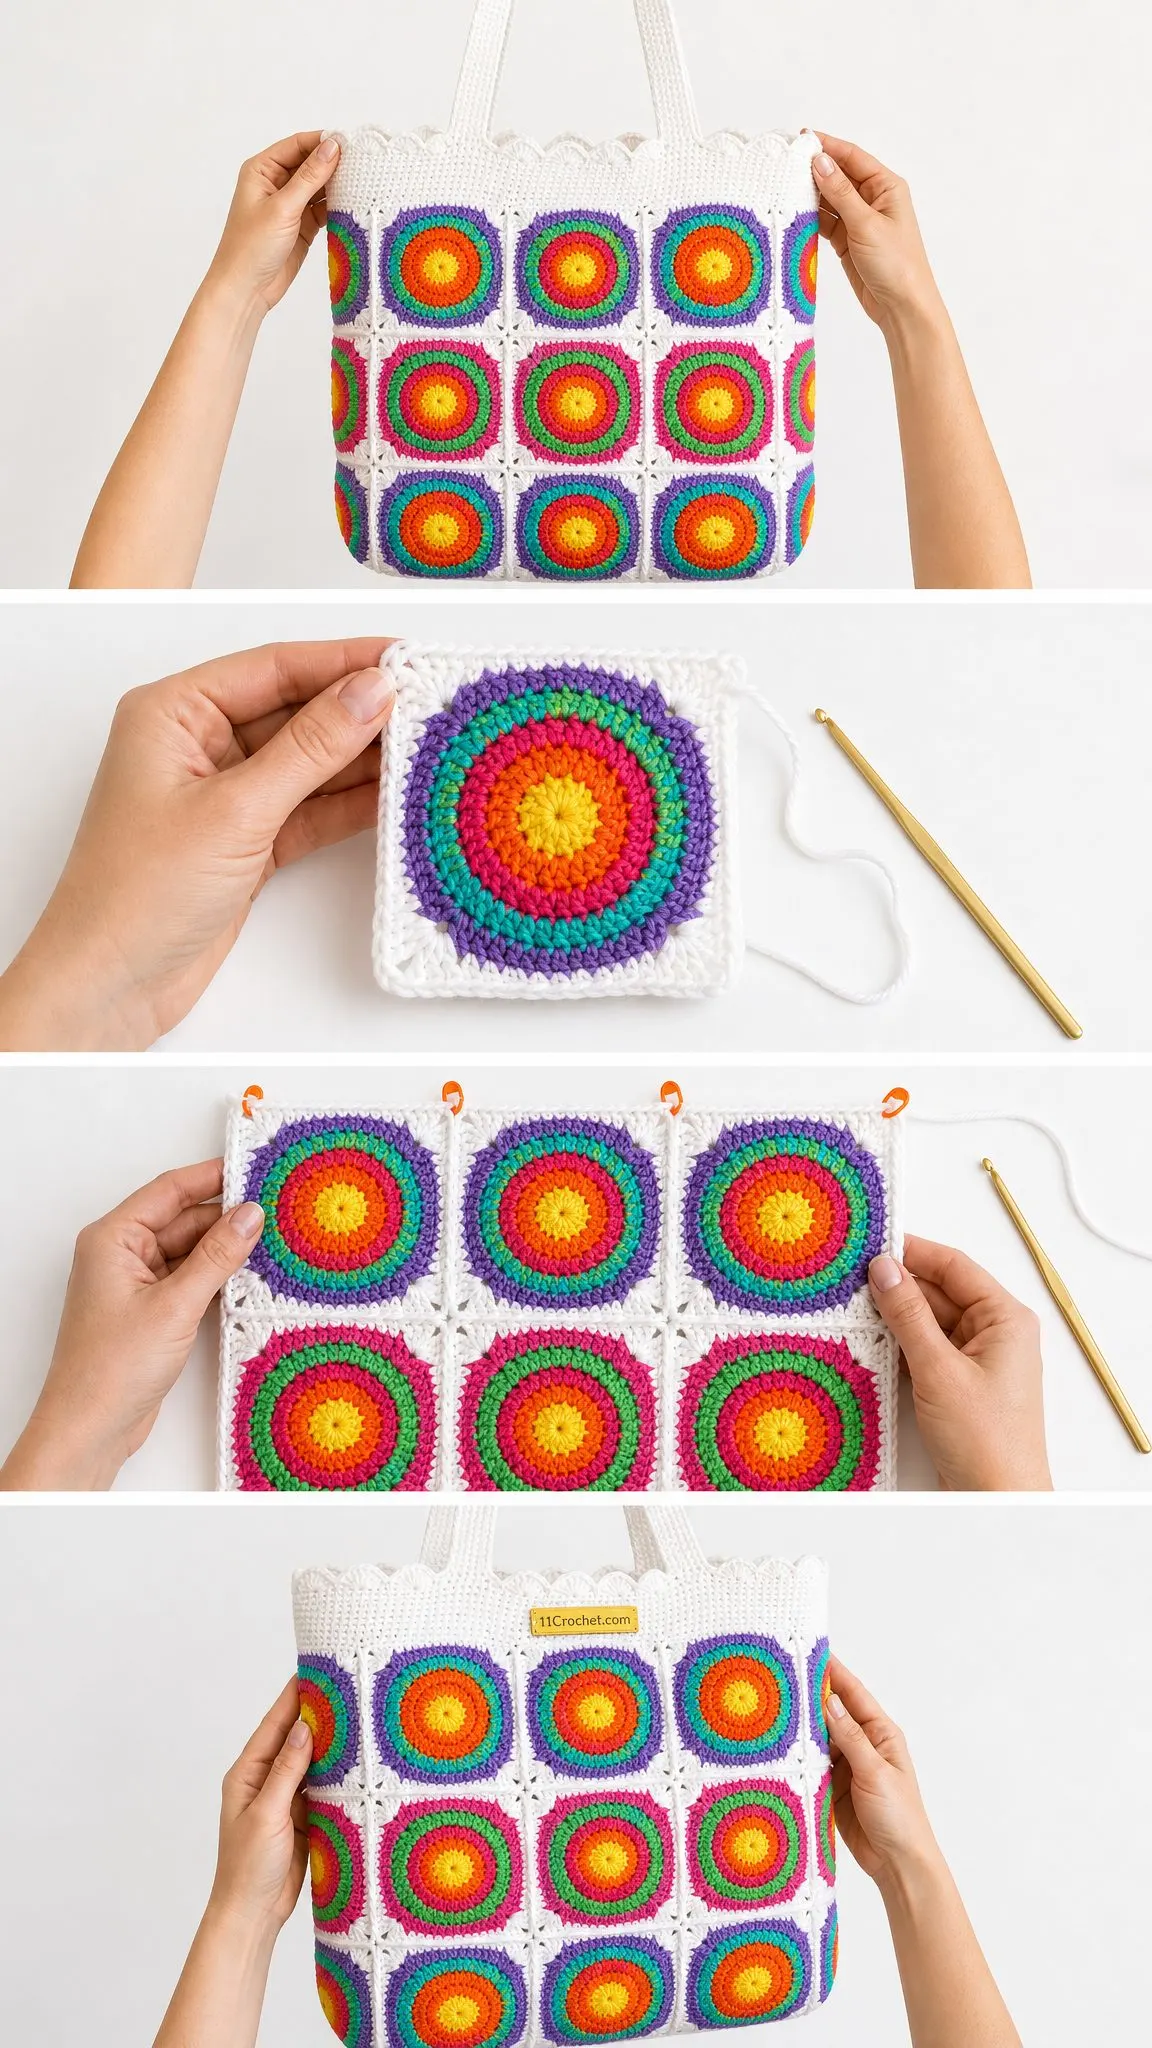
Make 48 motifs total. Start each one with a magic ring. Choose three accent colors per motif for Rounds 2 through 4. Vary the color combinations every time for that beautiful scrappy rainbow effect.
Round 1 — Yellow (12 dc)
Into a magic ring: ch 3 (counts as first dc), work 11 dc in ring. Pull the ring closed tightly. Join with sl st to top of ch-3. Fasten off yellow. (12 dc)
Round 2 — Color A (24 dc)
Join your first accent color in any stitch. Ch 3, dc in same st, 2 dc in each st around. Join with sl st. Fasten off. (24 dc)
Round 3 — Color B (36 dc)
Join your second accent color in any stitch. Ch 3, dc in same st, \dc in next st, 2 dc in next st\; rep \ \ around. Join with sl st. Fasten off. (36 dc)
Round 4 — Color C, Square Off (48 dc)
Join your third accent color. \Dc in next 8 sts, then work a corner (2 dc, ch 2, 2 dc) in next st\; rep \ \ 4 times total. Join with sl st. Fasten off. (48 dc with four ch-2 corner spaces)
Round 5 — White Frame (56 sc)
Join white in any stitch. Sc in each st around, working (sc, ch 2, sc) in each corner ch-2 sp. Join with sl st. Fasten off, leaving a long tail for joining. (56 sc total, 12 sc along each side)
Check yourself: After Round 5, your motif should sit completely flat as a square. If it cups inward, your tension is too tight. Relax your grip or go up a hook size. If it ruffles or waves, your tension is too loose. Go down a hook size.
Color Layout and Arrangement
Before you start joining, lay out all 48 motifs in a grid: 12 motifs across and 4 motifs down.
Shuffle them around until no two touching squares share the same outer color (the Round 4 color). The white frames will pull everything together visually, so do not stress about perfect placement. Just avoid putting two purple outer rings right next to each other.
Read your layout left to right as: front (5 motifs), side (1 motif), back (5 motifs), side (1 motif). This wraps into a continuous loop.
Joining the Motifs
Join with white yarn so your seams disappear into the grid. You have two options:
Whip stitch through back loops only keeps the join flat and nearly invisible. Hold two motifs side by side with right sides facing up, then whip stitch through the back loops of corresponding stitches.
Single crochet join through both loops gives a slightly raised ridge if you prefer more texture. Hold two motifs with right sides together.
Step 1: Build the Rows
Seam one edge at a time. Each edge is 12 stitches plus the corner ch-2 spaces. Match stitch for stitch. Continue until you have four long strips of 12 motifs each.
Step 2: Stack the Strips
Seam the four strips together along their long edges to form one large panel that is 12 motifs wide and 4 motifs tall. Match every corner junction carefully.
Step 3: Close Into a Tube
Fold the panel so the two short ends meet. Seam them together to form a continuous loop of 12 motifs around.
Pro tip: At each corner junction where four motifs meet, add a tiny extra stitch crossing through all four corners. This locks the grid square and prevents gaps from opening when the bag is full.
Shaping the Body
Your tube now becomes a bag by closing one end and finishing the other.
Step 1: Find the Base Edge
One open end of the tube becomes the bottom. Flatten the tube so the front 5 motifs sit against the back 5 motifs, with one side motif folding to each side.
Step 2: Seam the Base
With white yarn, whip stitch the bottom edge closed straight across. Work through both layers, stitch for stitch.
Step 3: Box the Corners (Optional)
For a flatter standing base, pinch each bottom corner into a small triangle about 1½ inches (4cm) deep and tack it down with a few stitches. This gives your tote more structure.
Step 4: Turn and Shape
Turn the bag right side out and gently shape the body with your hands. The top opening stays open for the band.
Top Band and Scalloped Edge
The white band tidies the opening, adds height, and sets up those pretty scallops. Work in continuous joined rounds with white around the top edge.
Band Set-Up (144 sc)
Join white at the top opening. Sc evenly around, working into each stitch and into each motif junction so your count is a multiple of 6. Join with sl st.
Band Body (144 sc per round)
Ch 1, sc in each st around. Join with sl st. Repeat this round until the band measures about 3 inches (7.5cm). That is roughly 12 rounds.
Scallop Edge (24 scallops)
\Skip 2 sts, 5 dc in next st, skip 2 sts, sl st in next st\; rep \ \ around. Fasten off. You will have 24 shells forming a beautiful picot-scalloped rim.
Even rim tip: If your set-up count is not a clean multiple of 6, simply add or skip a stitch or two in the first band round. The solid band rows hide small adjustments completely.
Handles
You will make two firm white straps. Work them flat, then edge them so they hold their shape under a full bag.
Strap Rows (5 sc per row)
With white, ch 6.
Row 1: Sc in 2nd ch from hook and each ch across. Turn. (5 sc)
Remaining rows: Ch 1, sc in each st across. Turn. Continue until the strap measures 15 inches (38cm).
Strap Edging
Do not fasten off. Ch 1 and sc evenly all the way around the strap, working 1 sc in each row-end and 3 sc in each corner. Join and fasten off.
Make 2 straps.
Attaching the Handles
On the front of the bag, pin the strap ends to the inside of the band above the 2nd and 4th motifs. The ends should be about 5 inches (13cm) apart. Mirror this placement on the back.
Sew each end firmly to the inside of the band with a square of whip stitches. Go back over it once more for extra strength. Each handle has two ends, so you will secure 4 attachment points total.
Extra support tip: For a heavy everyday tote, slip a length of cotton webbing inside each strap before edging. Or work the strap doubled and seam it into a tube for extra sturdiness.
Finishing and Care
Weave and Block
Weave in every remaining tail on the wrong side and trim. Spray-block or gently steam the body so the motifs sit flat and square and the band stands crisp. Let it dry fully shaped. Stuffing it with a towel helps hold the form while drying.
Optional Lining
For everyday use, cut a fabric pouch to fit the inside, hem the top edge, and hand-stitch it just below the band. A lining stops small items from slipping through the stitchwork and lets you add an interior pocket or magnetic snap.
Care Instructions
Make It Your Size
The motif is your building block, so resizing is just simple math. Every motif you add or remove changes a dimension by 2½ inches (6.5cm).
Bigger market tote: Use 14 motifs around (front 6, back 6, sides 1 each) times 5 tall. That is 70 motifs total. Add 2 to 3 band rounds for extra height.
Mini bucket bag: Use 10 motifs around (front 4, back 4, sides 1 each) times 3 tall. That is 30 motifs total. Shorten handles to 11 inches (28cm).
Deeper sides: Make the side panels 2 motifs wide instead of 1 for a boxier, more structured base. Adjust the band set-up count to a new multiple of 6.
Softer drape: Drop to DK cotton on a 4.5mm hook. Your motifs will shrink slightly, so remeasure gauge and recalculate the width.
Whatever size you choose, always finish the band on a multiple of 6 so the scallop repeat lands evenly with no awkward partial shell.
You Did It!
Forty-eight little suns, one cheerful bag. This crochet tote bag pattern gives you a project that is as fun to make as it is to carry. Every motif is a tiny accomplishment, and when you join them all together and see that rainbow grid come to life, it is genuinely satisfying.
Whether you are hauling farmers market finds, packing a beach day bag, or just want something bright to carry your current crochet project in, this tote delivers. The cotton construction means it will hold up beautifully with use, and those sturdy handles can take whatever you throw at them.
I hope you love making this as much as I loved putting this pattern together for you. Thank you so much for being here and for trusting me with your crafting time.
If you make this colorful granny square tote bag, I would absolutely love to see it! Tag me on Instagram or share a photo on Facebook. Seeing your finished projects is honestly the best part of sharing patterns.
Save this pattern to your Pinterest boards so you can find it when you are ready to start. And if you have any questions or want to share how yours turned out, drop a comment below. Happy crocheting, friend!
