
I don’t know about you, but I have a serious weakness for a good tote bag. Something about throwing everything into one cheerful, handmade carryall just makes running errands feel a little more like an adventure.
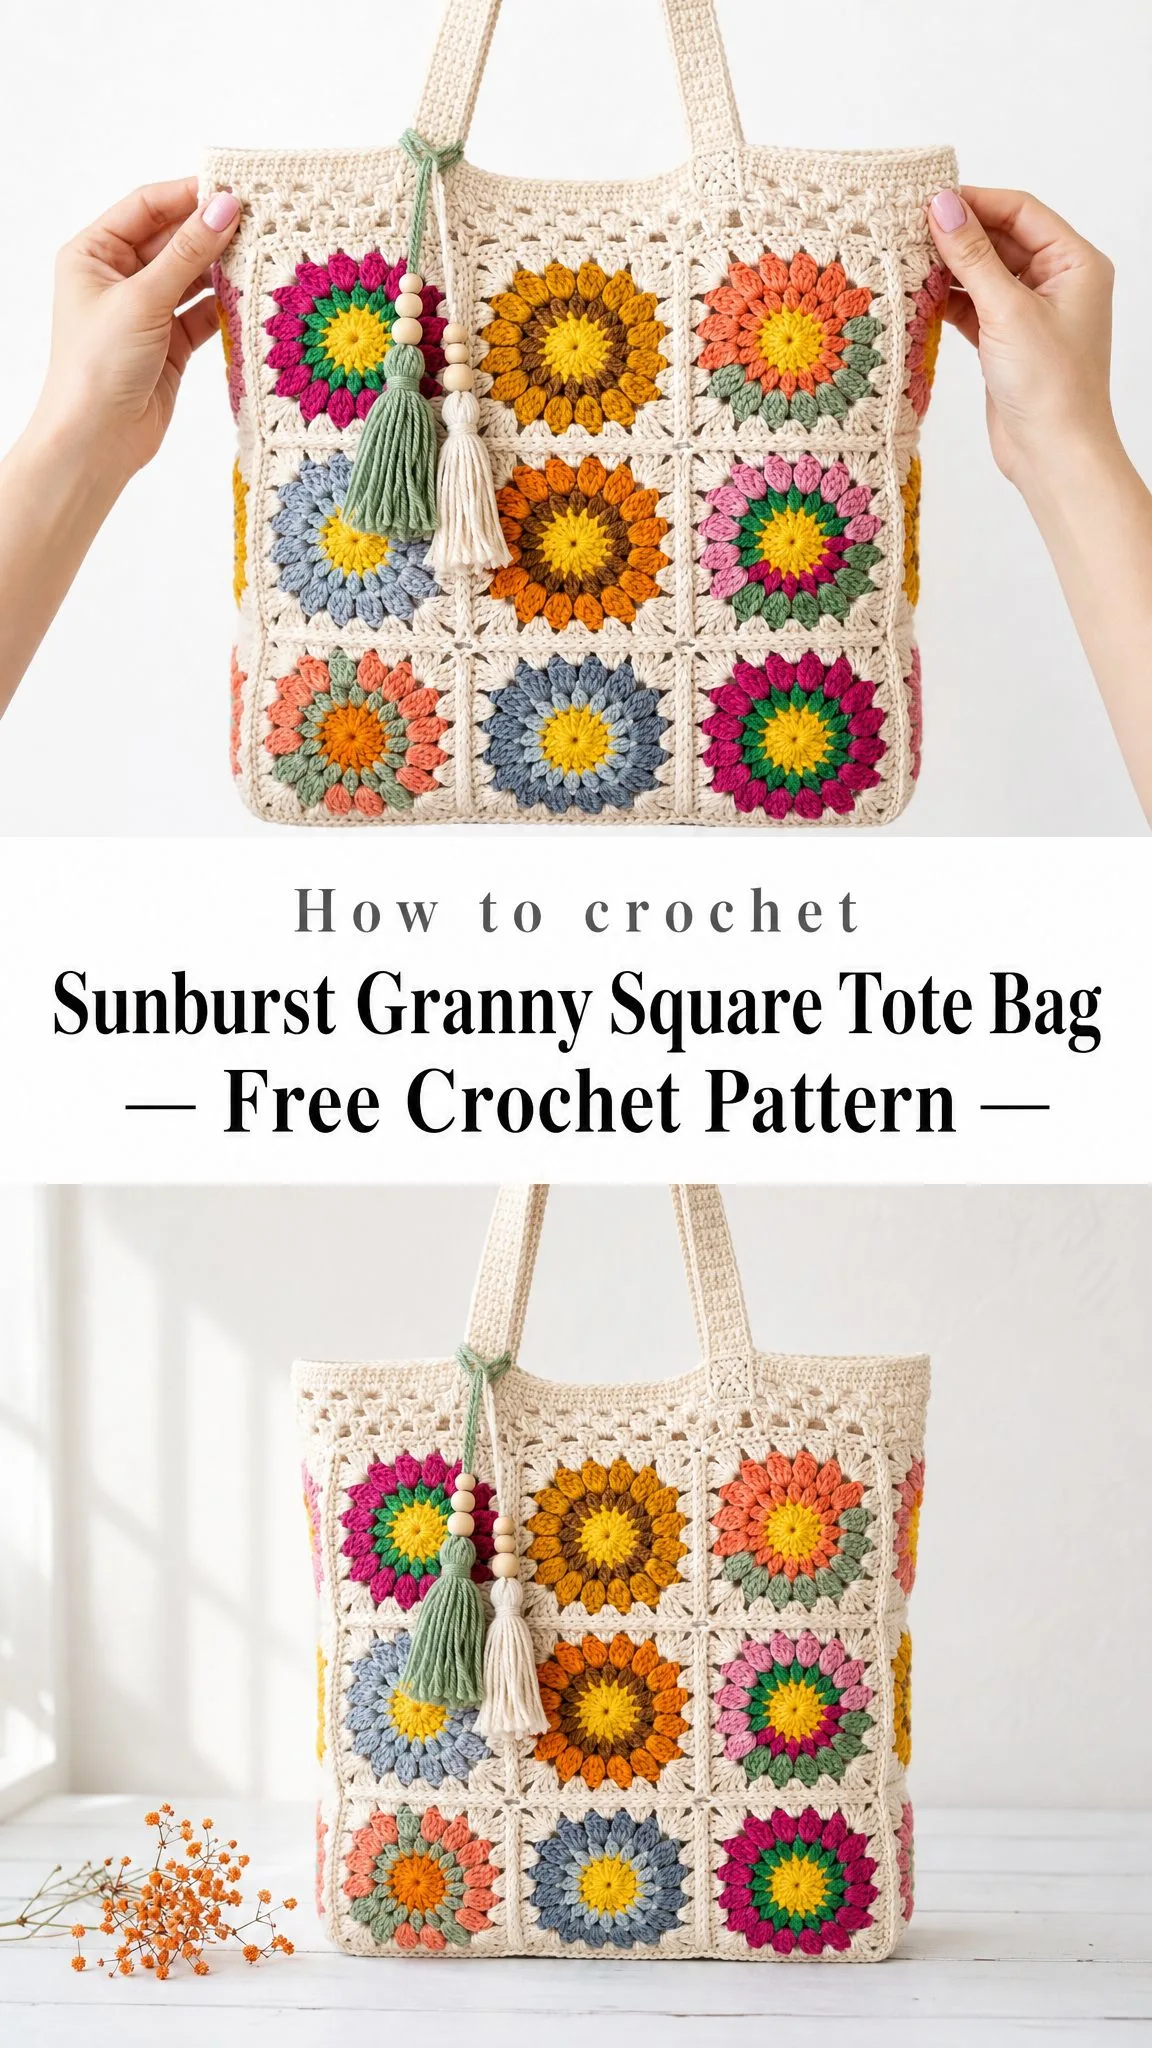
This Sunburst Granny Square Tote Bag is exactly the kind of project that scratches that itch. It combines the classic charm of granny squares with a modern, scrappy aesthetic that lets you use up all those beautiful leftover yarns you have been hoarding.
The best part? Each square works up quickly, so you get that satisfying sense of progress every time you finish one. Before you know it, you will have a stunning, sun-soaked bag ready for the farmers market, the beach, or just your daily life.
Why You Will Love This Crochet Pattern
This tote bag pattern hits all the right notes for crafters who want a project with visual impact but manageable complexity. The construction breaks down into bite-sized pieces. You make 24 individual sunburst squares, join them into panels, add a sturdy base, and finish with comfortable shoulder handles and an adorable beaded tassel.
The sunburst granny square at the heart of this design features a golden center surrounded by two rounds of colorful petals, all framed in cream. This consistent structure means you can mix and match your accent colors freely while maintaining a cohesive look across the entire bag.
If you have ever wanted to try a granny square tote bag crochet pattern, this is a fantastic choice. The squares themselves use only basic stitches plus one special technique, the puff stitch, which creates those soft, dimensional petals.
Skill Level
This pattern is rated Confident Beginner. If you can work double crochet stitches, chain, slip stitch, and are comfortable working in the round, you have all the foundational skills you need.
The puff stitch might be new to you, but do not let that worry you. It sounds fancier than it is, and I will walk you through it completely. Once you make your first square, the rest will fly off your hook.
Finished Dimensions
The completed tote measures approximately:
This gives you a roomy bag that holds plenty without becoming unwieldy. The long shoulder handles let you carry it comfortably over your shoulder or across your body.
Materials Needed
Yarn
You will need worsted weight cotton yarn (weight category #4) for this project:
| Color | Amount | Purpose |
|---|---|---|
| Cream (main color) | ~280 g | Borders, base, handles, top edge |
| Gold | ~40 g | All square centers |
| Accent colors | 10-15 g each in 8-12 shades | Petal rounds (scrap-friendly!) |
Recommended yarns:
Cotton yarn works beautifully here because it holds its shape, washes easily, and develops a lovely drape with use.
Hooks and Tools
Extras
Gauge
One finished sunburst square should measure 4 inches (10 cm) square when worked with a 4.0 mm hook.
Three squares joined together equal 12 inches (30 cm) across.
Gauge matters here. If your squares are too big, your bag will be floppy. Too small, and it will be stiff and undersized. Make one test square first, block it, and measure. Adjust your hook size up or down until you hit that 4 inch target.
Abbreviations and Stitch Definitions
Before we dive into the pattern, let me walk you through every abbreviation you will encounter:
Special Stitches Explained
Puff Stitch (puff): This creates the soft, rounded petals that give the sunburst its signature look. Here is how to work it:
[Yarn over, insert hook in stitch, yarn over and pull up a loop level with your hook] 3 times in the same stitch. You will have 7 loops on your hook. Yarn over and draw through all 7 loops at once, then chain 1 to close and secure the puff.
The key is pulling up those loops to the same height so your puff is plump and even. Do not worry if your first few look a bit wonky. You will find your rhythm quickly.
Magic Ring (MR): This technique gives you a tidy, gap-free center for your flowers. Loop the yarn over itself, work the first round of stitches into the loop, then pull the tail to cinch the center completely closed. If you prefer, you can substitute ch 4 and sl st to join, though the magic ring looks neater.
A Note for UK Crocheters
This pattern uses US terminology throughout. To convert: US single crochet (sc) equals UK double crochet (dc), and US double crochet (dc) equals UK treble (tr). The puff stitch and magic ring work the same way in both systems.
Pattern Notes
A few things to keep in mind before you start:
How to Crochet the Sunburst Square (Make 24)
Each square is worked in 4 rounds. Here is the color key:
Round 1 (Gold – C1)
Make a magic ring. Ch 3 (this counts as your first dc), work 11 dc into the ring. Sl st to the top of the ch-3 to join. Pull the ring closed tightly.
(12 dc)
Round 2 (Inner Petal Color – C2)
Join C2 in any stitch. Ch 2, work a puff st in the same stitch, ch 1. [Puff st in the next stitch, ch 1] 11 times around. Sl st to the top of the first puff to join.
(12 puff sts, 12 ch-1 spaces)
Round 3 (Outer Petal Color – C3)
Join C3 in any ch-1 space. Ch 3 (counts as dc), 2 dc in the same space, ch 1. [3 dc in next ch-1 space, ch 1] 11 times around. Sl st to the top of ch-3 to join.
(36 dc, 12 ch-1 spaces)
Round 4 (Cream – C4) – Squaring the Circle
This round transforms your circle into a square. Join cream in any ch-1 space.
Ch 3 (counts as dc), work (2 dc, ch 2, 3 dc) all in the same space. This creates your first corner.
Work the pattern around:
[2 dc in next ch-1 space] twice; (3 dc, ch 2, 3 dc) in next ch-1 space (corner)
Repeat from * twice more, then [2 dc in next ch-1 space] twice. Sl st to the top of ch-3 to join. Fasten off.
(40 dc, 4 corner ch-2 spaces)
Counting Tip
The 12 spaces from Round 3 become 4 corners (every 3rd space) and 8 side spaces. Each finished side has 10 dc between corners. This count helps when you are lining up squares for seaming.
Color Combination Ideas
Every square keeps a gold center (C1) and a cream frame (C4). Only the two petal rounds change, giving you endless possibilities for a scrappy, personalized look.
Here are the color pairings shown in the sample bag:
Feel free to invent your own combinations! This is a perfect stash-busting project. Pull out all those partial skeins and play with unexpected pairings. The cream frame ties everything together beautifully.
Assembling the Panels
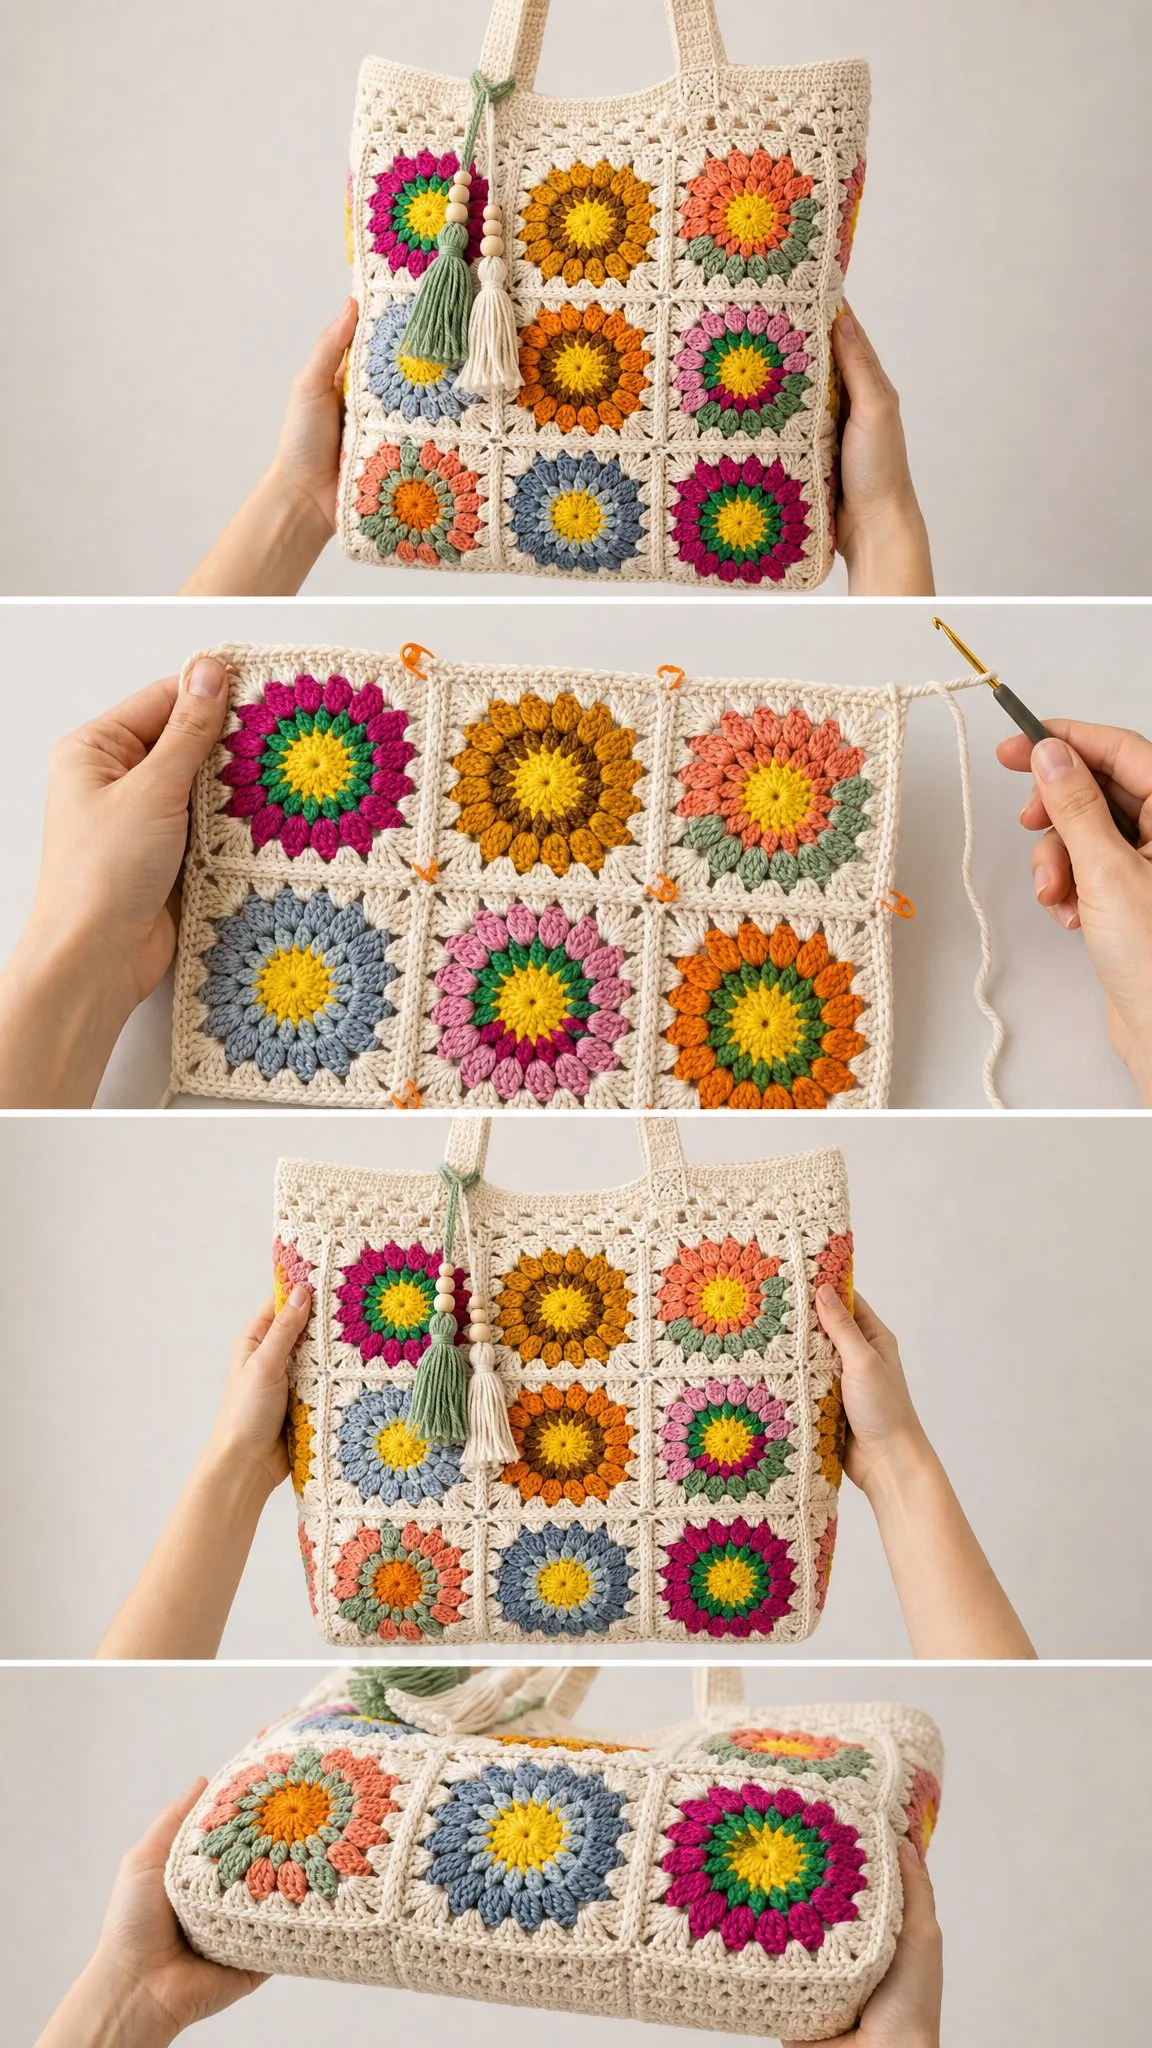
Once you have all 24 squares made and blocked, it is time to put them together. The squares form a tube with a 3-square-wide front and back, plus single-square sides.
Square Layout
| Panel | Dimensions | Squares Needed |
|---|---|---|
| Front panel | 3 wide × 3 tall | 9 squares |
| Back panel | 3 wide × 3 tall | 9 squares |
| Side panels | 1 wide × 3 tall (×2) | 6 squares |
| Total | 24 squares |
Step-by-Step Assembly
Step 1: Lay out all your squares and arrange the colors until you are happy with how they look across the front, sides, and back. Take a photo so you remember your layout!
Step 2: Using cream yarn and a tapestry needle, whip stitch the squares together through the back loops. Match the 10 dc per side stitch-for-stitch for clean, even seams.
Step 3: Join the four panels in a ring: front → side → back → side → back to front. You now have an open-topped tube, three squares tall.
Step 4: Keep seams flat and tension even so corners meet neatly. Press lightly with steam if needed.
Creating the Base
The base is worked flat as a firm rectangle to fit the tube opening, approximately 12 × 4 inches (30 × 10 cm).
Base Instructions (Cream)
Row 1: With cream, ch 49 (48 ch). Dc in 3rd ch from hook and in each ch across. Turn. (47 dc)
Rows 2-14: Ch 2, dc in each st across. Turn. (47 dc each row)
Do not fasten off. Sc evenly around all four edges to firm the base. (approximately 120 sc)
Joining the Base to the Body
Hold the base to the lower edge of the tube with right sides together. Single crochet through both layers all the way around. Match each square edge to roughly 11 base stitches, easing as needed at the corners.
Fasten off and turn the bag right side out.
Adding the Top Border
The top border gives your bag a crisp, finished edge and provides structure for attaching the handles.
Top Border Instructions (Cream)
Join cream at a back corner.
Round 1: Sc evenly around the opening, working a multiple that lies flat.
Rounds 2-4: Ch 1, sc in each st around. Sl st to join.
Pro tip: Switch to the 3.5 mm hook for these rounds. The slightly smaller hook creates a crisper, sturdier rim that holds its shape better.
Making the Handles
You will make two identical long, firm shoulder straps in cream. The back loop only technique keeps them dense and non-stretchy, perfect for carrying heavier loads.
Handle Instructions (Make 2)
Row 1: With cream and the 3.5 mm hook, ch 9 (8 ch). Sc in 2nd ch from hook and in each ch across. Turn. (8 sc)
Row 2 and onward: Ch 1, sc in BLO (back loop only) of each st across. Turn. (8 sc each row)
Repeat until the strap measures 22 inches (56 cm), or your preferred drop length. Fasten off, leaving a long tail for attaching.
Make a second strap to match.
Attaching the Handles
Pin handle ends to the inside of the top border, about 3 inches (7.5 cm) in from each side seam. Make sure the front and back handles align.
Whip stitch each end down securely, stitching through several rows for strength. A few extra passes at the join points will help the handles carry heavier loads with ease.
The Finishing Flourish: Tassel and Beads
This adorable beaded tassel charm adds personality and a handmade touch to your finished bag.
Making the Tassels
1. Wrap sage yarn (and a second wrap in cream if desired) around a 4-inch card 30-40 times.
2. Tie the top loops together securely.
3. Cut the bottom loops.
4. Wrap and knot a neck about ½ inch down from the top.
5. Trim the ends level.
Adding the Beads
Thread a doubled cream strand through 4-6 wooden beads, knotting above and below the bead cluster to secure them. Attach the tassels beneath the beads and loop the whole charm onto a front handle.
Finishing Checklist
Before you call your bag complete, run through these final steps:
Care Instructions
Your handmade tote deserves proper care to stay beautiful for years:
Customizing Your Tote Bag
Want to make this pattern your own? Here are some ideas:
Bigger tote: Use a 4-wide front and back (16 squares per round) and/or add a 4th row of squares for extra height.
Mini bag: Use a 3.0 mm hook and DK weight cotton for approximately 3-inch squares, keeping the same layout.
Deeper bag: Make the sides 2 squares wide and widen the base rectangle to match.
Shorter drop: Stop the straps at 16-18 inches (40-46 cm) for a shoulder-tuck fit instead of a crossbody length.
Yarn Math for Adjustments
Every additional square needs roughly 12-14 g of yarn across its colors. Scale your cream amount up by about 40 g for each extra row of height you add.
Time Investment
Expect this project to take approximately 14-20 hours from start to finish. The squares themselves work up quickly once you get into a rhythm, and many crafters enjoy making them as a portable project. The assembly and finishing take a bit more focused time, but the results are absolutely worth it.
Final Thoughts on This Crochet Tutorial
This Sunburst Granny Square Tote Bag crochet pattern brings together everything I love about handmade accessories. It is colorful without being chaotic, structured without being stiff, and practical enough for everyday use while still turning heads.
The step-by-step construction makes this project approachable even if you have never made a bag before. And the modular nature of granny squares means you can work on it anywhere, anytime, picking up a square whenever you have a spare moment.
Whether you are making this for yourself or as a gift for someone who appreciates handmade treasures, I hope you enjoy every stitch. There is something deeply satisfying about carrying a bag you made with your own two hands, filled with little crocheted suns.
I would love to see your finished tote! If you make this pattern, please save it to your Pinterest boards so you can find it again later and share the inspiration with other crafters. And if you have a moment, drop a comment below to let me know how your bag turned out. Your photos and stories always make my day!
