This one is SUPER satisfying to make, and the finished backpack looks absolutely stunning! I am SO excited to share this pattern with you because it combines easy stitches with impressive results. You only need to know chain, double crochet, single crochet, and slip stitch to create this gorgeous granny mesh rucksack. The whole project takes about 12 to 18 hours, and trust me, every minute is worth it when you see those monarch butterflies scattered across that warm peach cotton. This makes an incredible gift or the perfect treat for yourself!
Get the Ad-Free PDF Pattern
You can find the free pattern below, or you can purchase the ad-free printable PDF from my shop.
Get the Printable PDF →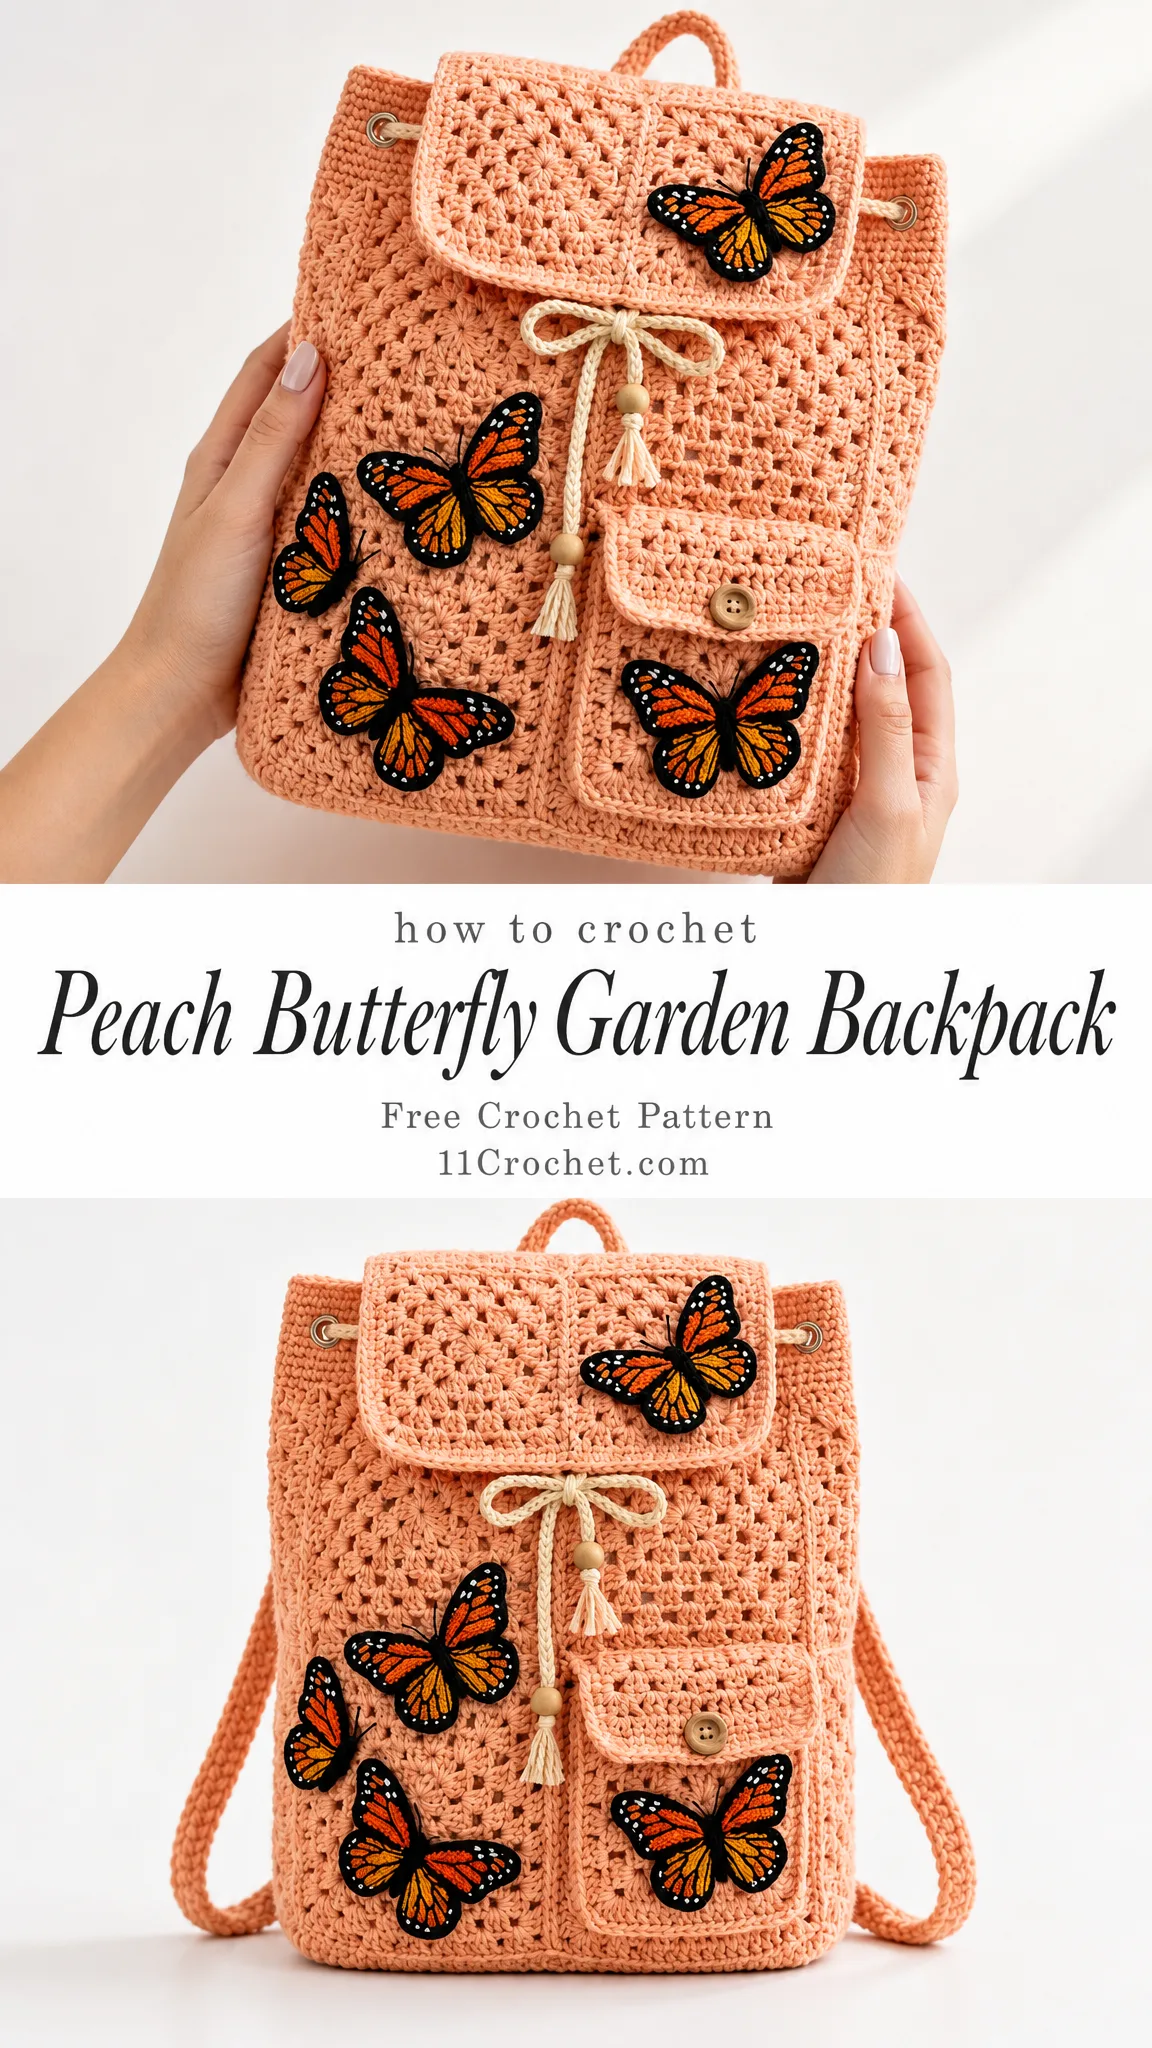
About This Peach Butterfly Garden Backpack Pattern
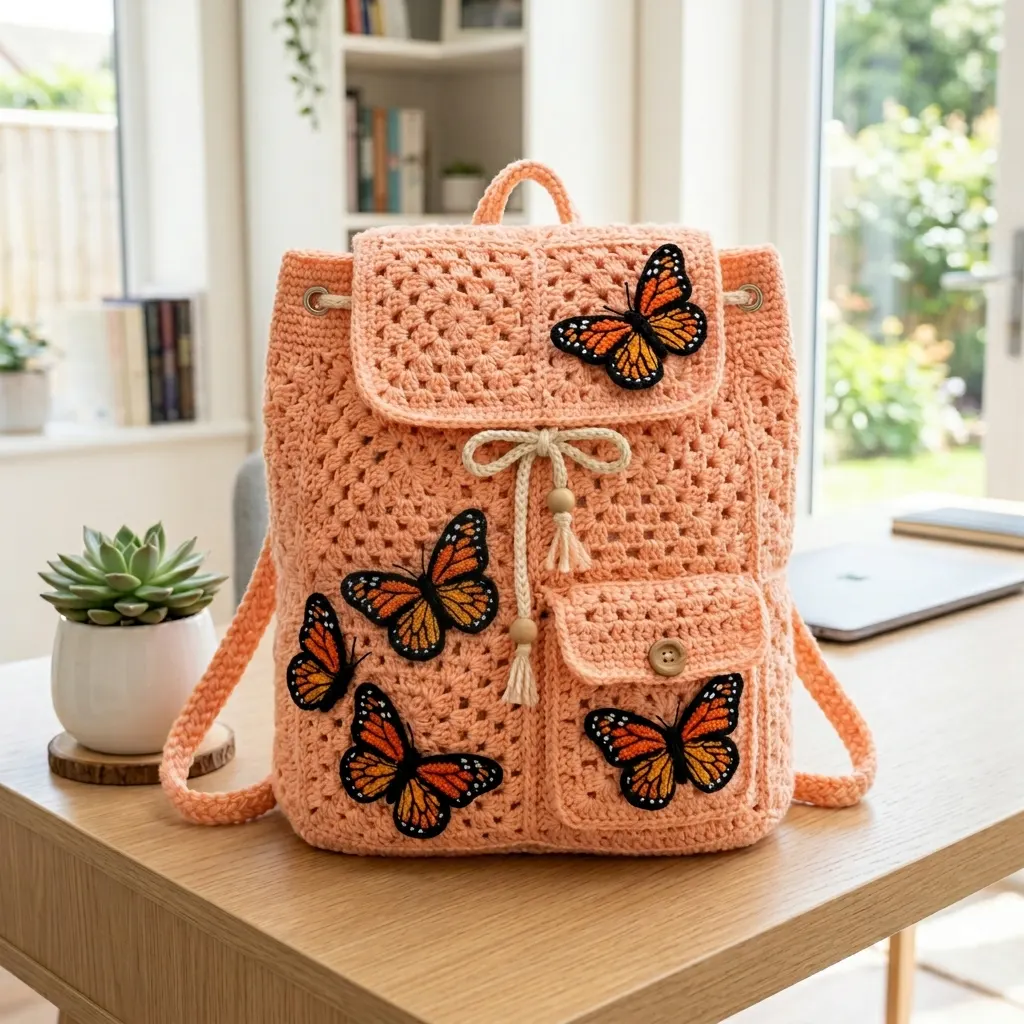
This structured everyday backpack is roomy enough for all your essentials while keeping that soft, handmade feel. The granny mesh construction gives the fabric lovely drape, but the doubled base and single crochet edged openings keep everything nice and crisp. A foldover flap drops over a beaded drawstring, a buttoned pocket sits front and center, and five monarch butterfly patches add that whimsical garden fresh touch.
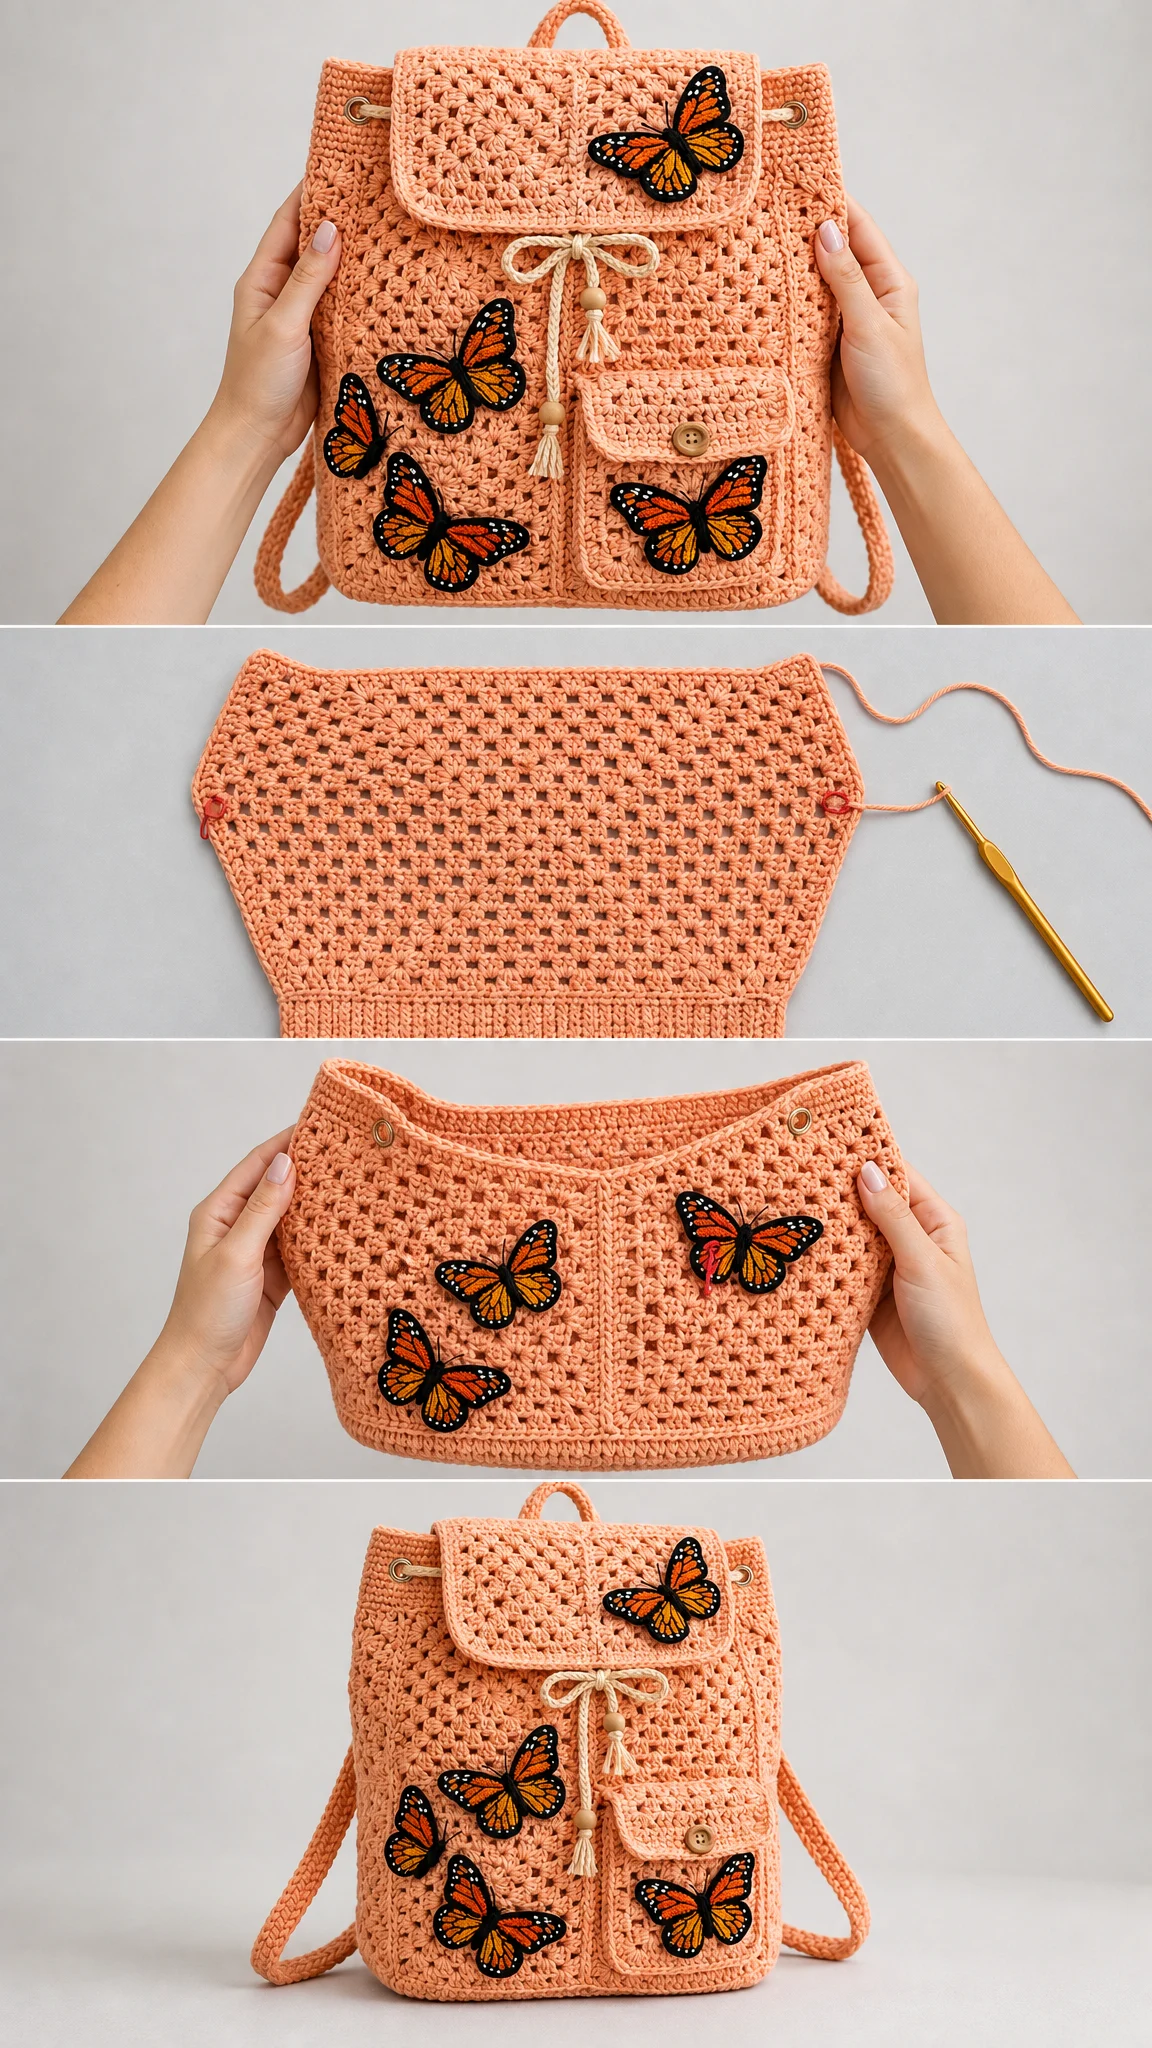
The finished size comes out to approximately 10 inches wide by 12 inches tall by 4 inches deep, with the straps excluded from that measurement. Each strap runs about 22 inches long, though you can adjust that length to fit your preference. The construction method is straightforward: you work bottom up in one piece, add the flap and pocket, sew on the straps and handle, then appliqué the butterflies last.
Skill level: Advanced beginner to easy intermediate. The craft here is really in the assembly rather than complicated stitches. You will learn base to body pickup, an eyelet round, and how to attach all the lovely details.
Materials You Will Need
Yarn
Suggested yarns: Lily Sugar’n Cream Solids in a peach tone, Paintbox Yarns Cotton Aran, or Hobbii Rainbow 8/8 Cotton all work beautifully for this project.
Substitution note: Any worsted cotton or cotton blend that matches gauge will work. Cotton is strongly recommended because it gives the bag its structure and crisp stitch definition. Acrylic will work in a pinch, but it drapes softer and holds shape less effectively.
Tools and Notions
Gauge
In granny mesh: 4 clusters plus 4 chain 1 spaces equals 4 inches (10 cm) across. 7 cluster rounds equals 4 inches (10 cm) tall. One cluster equals 3 double crochet stitches.
Please swatch and match gauge before starting. This sets your bag’s finished size, so taking time here saves frustration later.
Abbreviations (US Terms)
Before we dive into the pattern, let me walk you through each abbreviation:
Special Stitches Explained
Granny Cluster (cl)
Work 3 double crochet stitches into the indicated chain space, then chain 1 to create the space before the next cluster. The 3 dc plus ch 1 together form one repeat of the mesh. This creates that beautiful open, airy texture you see in the photos.
Corner (Base Perimeter)
At each base corner, work (cluster, chain 2, cluster) into the same space. The chain 2 turns the corner without adding to your working cluster count. This keeps your corners sharp and your stitch count consistent.
Button Loop
At the pocket flap center, chain 8, skip the matching width, slip stitch to anchor, then single crochet over the loop to firm it up. This creates a sturdy loop that will hold up to regular use.
Pattern Instructions
The Base (Worked Flat in Double Crochet)
Row 1: Chain 31. Double crochet in the 3rd chain from hook and in each chain across. (30 dc)
Row 2: Chain 2, turn. Double crochet in each stitch across. (30 dc)
Rows 3 through 12: Repeat Row 2 until you have 12 rows total. Your base should measure approximately 10 inches by 4 inches (25 cm by 10 cm). (30 dc by 12 rows)
Checkpoint: Before moving on, make sure your base is a firm rectangle about 10 inches long and 4 inches wide. This foundation determines your entire bag’s structure, so take a moment to verify your measurements.
Pick Up Round
Round 1: Working around the base edge, space clusters evenly. Work approximately 15 clusters along each long side and approximately 7 clusters along each short side. At the 4 corners, work (cluster, chain 2, cluster). End with 28 clusters around, plus corner chain 2 spaces.
Body (Joined Rounds of Mesh)
Rounds 1 through 21: In each chain 1 space around, work (cluster, chain 1). At each corner space, work (cluster, chain 1, cluster, chain 1). Join with slip stitch at the end of each round. Maintain 28 clusters every round.
Checkpoint: After approximately 21 rounds, your body should stand about 12 inches (30 cm) tall and measure approximately 28 inches (71 cm) around the top edge. Feel free to adjust your round count if you want a taller or shorter bag.
Eyelet Round (For the Drawstring)
Round 1: Work 1 round of double crochet evenly around the top. (approximately 84 dc)
Round 2: *Double crochet in next 9 stitches, chain 2, skip 2 stitches.* Repeat around for 8 eyelets, spaced roughly evenly.
Round 3: Single crochet 1 round to neaten the edge.
Flap (Worked Off the Back Top Edge)
Row 1: Join yarn to the back top edge across 14 clusters (this is the back half of your bag opening). Work mesh rows, turning at the end of each row. (14 clusters per row)
Rows 2 through 7: Continue working mesh for a total of 7 rows.
Edging: Single crochet evenly around all 3 free edges to finish. Your flap should drop approximately 5 inches (13 cm).
Front Pocket
Row 1: Chain 27. Double crochet across. (26 dc)
Body: Switch to mesh pattern and work 10 clusters wide by 5 rows.
Flap: Add a small flap of 3 rows, work a button loop at the center, then single crochet edge all around. (10 clusters)
Shoulder Straps (Make 2)
Row 1: Chain 90. Single crochet in the 2nd chain from hook and across. (89 sc)
Rows 2 through 3: Work 2 more rows of single crochet for a firm strap approximately 22 inches (56 cm) long. Fasten off, leaving a long tail for sewing.
Top Handle
Row 1: Chain 18. Single crochet across. (17 sc)
Rows 2 through 3: Work 2 more rows of single crochet. Fold and seam into a loop.
Drawstring
Chain a cord approximately 36 inches (91 cm) long. Alternatively, you can twist or braid a length of yarn for a different look. Weave through the 8 eyelets, thread a wooden bead onto each tail, knot to secure, and tie in a bow.
Assembly Instructions
Follow this order for the best results:
1. Weave in all ends throughout your project before assembly.
2. Attach the straps: Sew the two straps to the back of the bag. The tops should sit just under the flap, and the bottoms should anchor at the base corners. Sew the handle centered at the top back.
3. Attach the pocket: Sew the pocket to the front center of the bag. Attach the wooden button under the loop.
4. Thread the drawstring: Add the beads, then tie the bow.
5. Add butterflies last: Sew or iron on 5 monarch patches. Place one on the flap (upper right), three clustered on the lower left front, and one on the pocket. Feel free to mirror the photo or scatter them your own way!
Butterfly Placement Tips
The butterfly placement is completely customizable, but here is how I arranged mine for that garden scattered look. One large butterfly sits on the upper right of the flap as a focal point. Three butterflies cluster together on the lower left front of the bag body, creating visual interest. The fifth butterfly lands on the pocket. Play around with placement before you commit. I like to pin them in place first and step back to see how they look from a distance.
Blocking and Care
Steam block or wet block the flat pieces before assembly so edges sit straight. Be careful not to over stretch the mesh fabric.
To wash: Hand wash in cool water, reshape while damp, and dry flat. Spot clean around the patches to keep them looking their best.
Troubleshooting Common Issues
Bag too wide or narrow: Re swatch and adjust your base chain while keeping clusters even.
Top flares out: Tighten the eyelet and single crochet rounds, or drop a hook size at the top.
Straps stretch: Work straps in back loop only single crochet, or add an extra row for more stability.
Size Customization
Want a bigger bag? Add base chains and rows in even amounts, then add body rounds. Keep your top cluster count divisible so your eyelets stay evenly spaced.
For a mini version, halve the base measurements and work approximately 14 body rounds instead of 21.
Pattern Notes to Remember
Final Thoughts on This Crochet Backpack Pattern
This Peach Butterfly Garden Backpack has become one of my absolute favorite projects. The combination of that warm peach cotton, the airy granny mesh texture, and those cheerful monarch butterflies creates something truly special. It is structured enough to hold everything you need but soft enough to feel handmade and personal.
I hope you love making this crochet backpack pattern as much as I loved designing it. The construction teaches you so many useful skills, from working a sturdy base to creating eyelets to assembling all those lovely details. And when you are finished, you have a beautiful, functional piece you will reach for again and again.
Thank you so much for choosing this pattern! If you make this backpack, I would absolutely love to see your finished project. Tag me on Instagram or share it in my Facebook group. Seeing your creations always makes my day!
If you enjoyed this pattern, go ahead and save it to your Pinterest boards so you can find it whenever you are ready to start. And please leave a comment below if you make one. I love hearing which color combinations you choose and how you arrange your butterflies!
Want a Quick & Easy Printable Version?
Get a clean, beautifully formatted PDF of this pattern — easy to follow step by step, ready to print or save on any device. No scrolling, no distractions, just the pattern.
Get the Printable PDF →