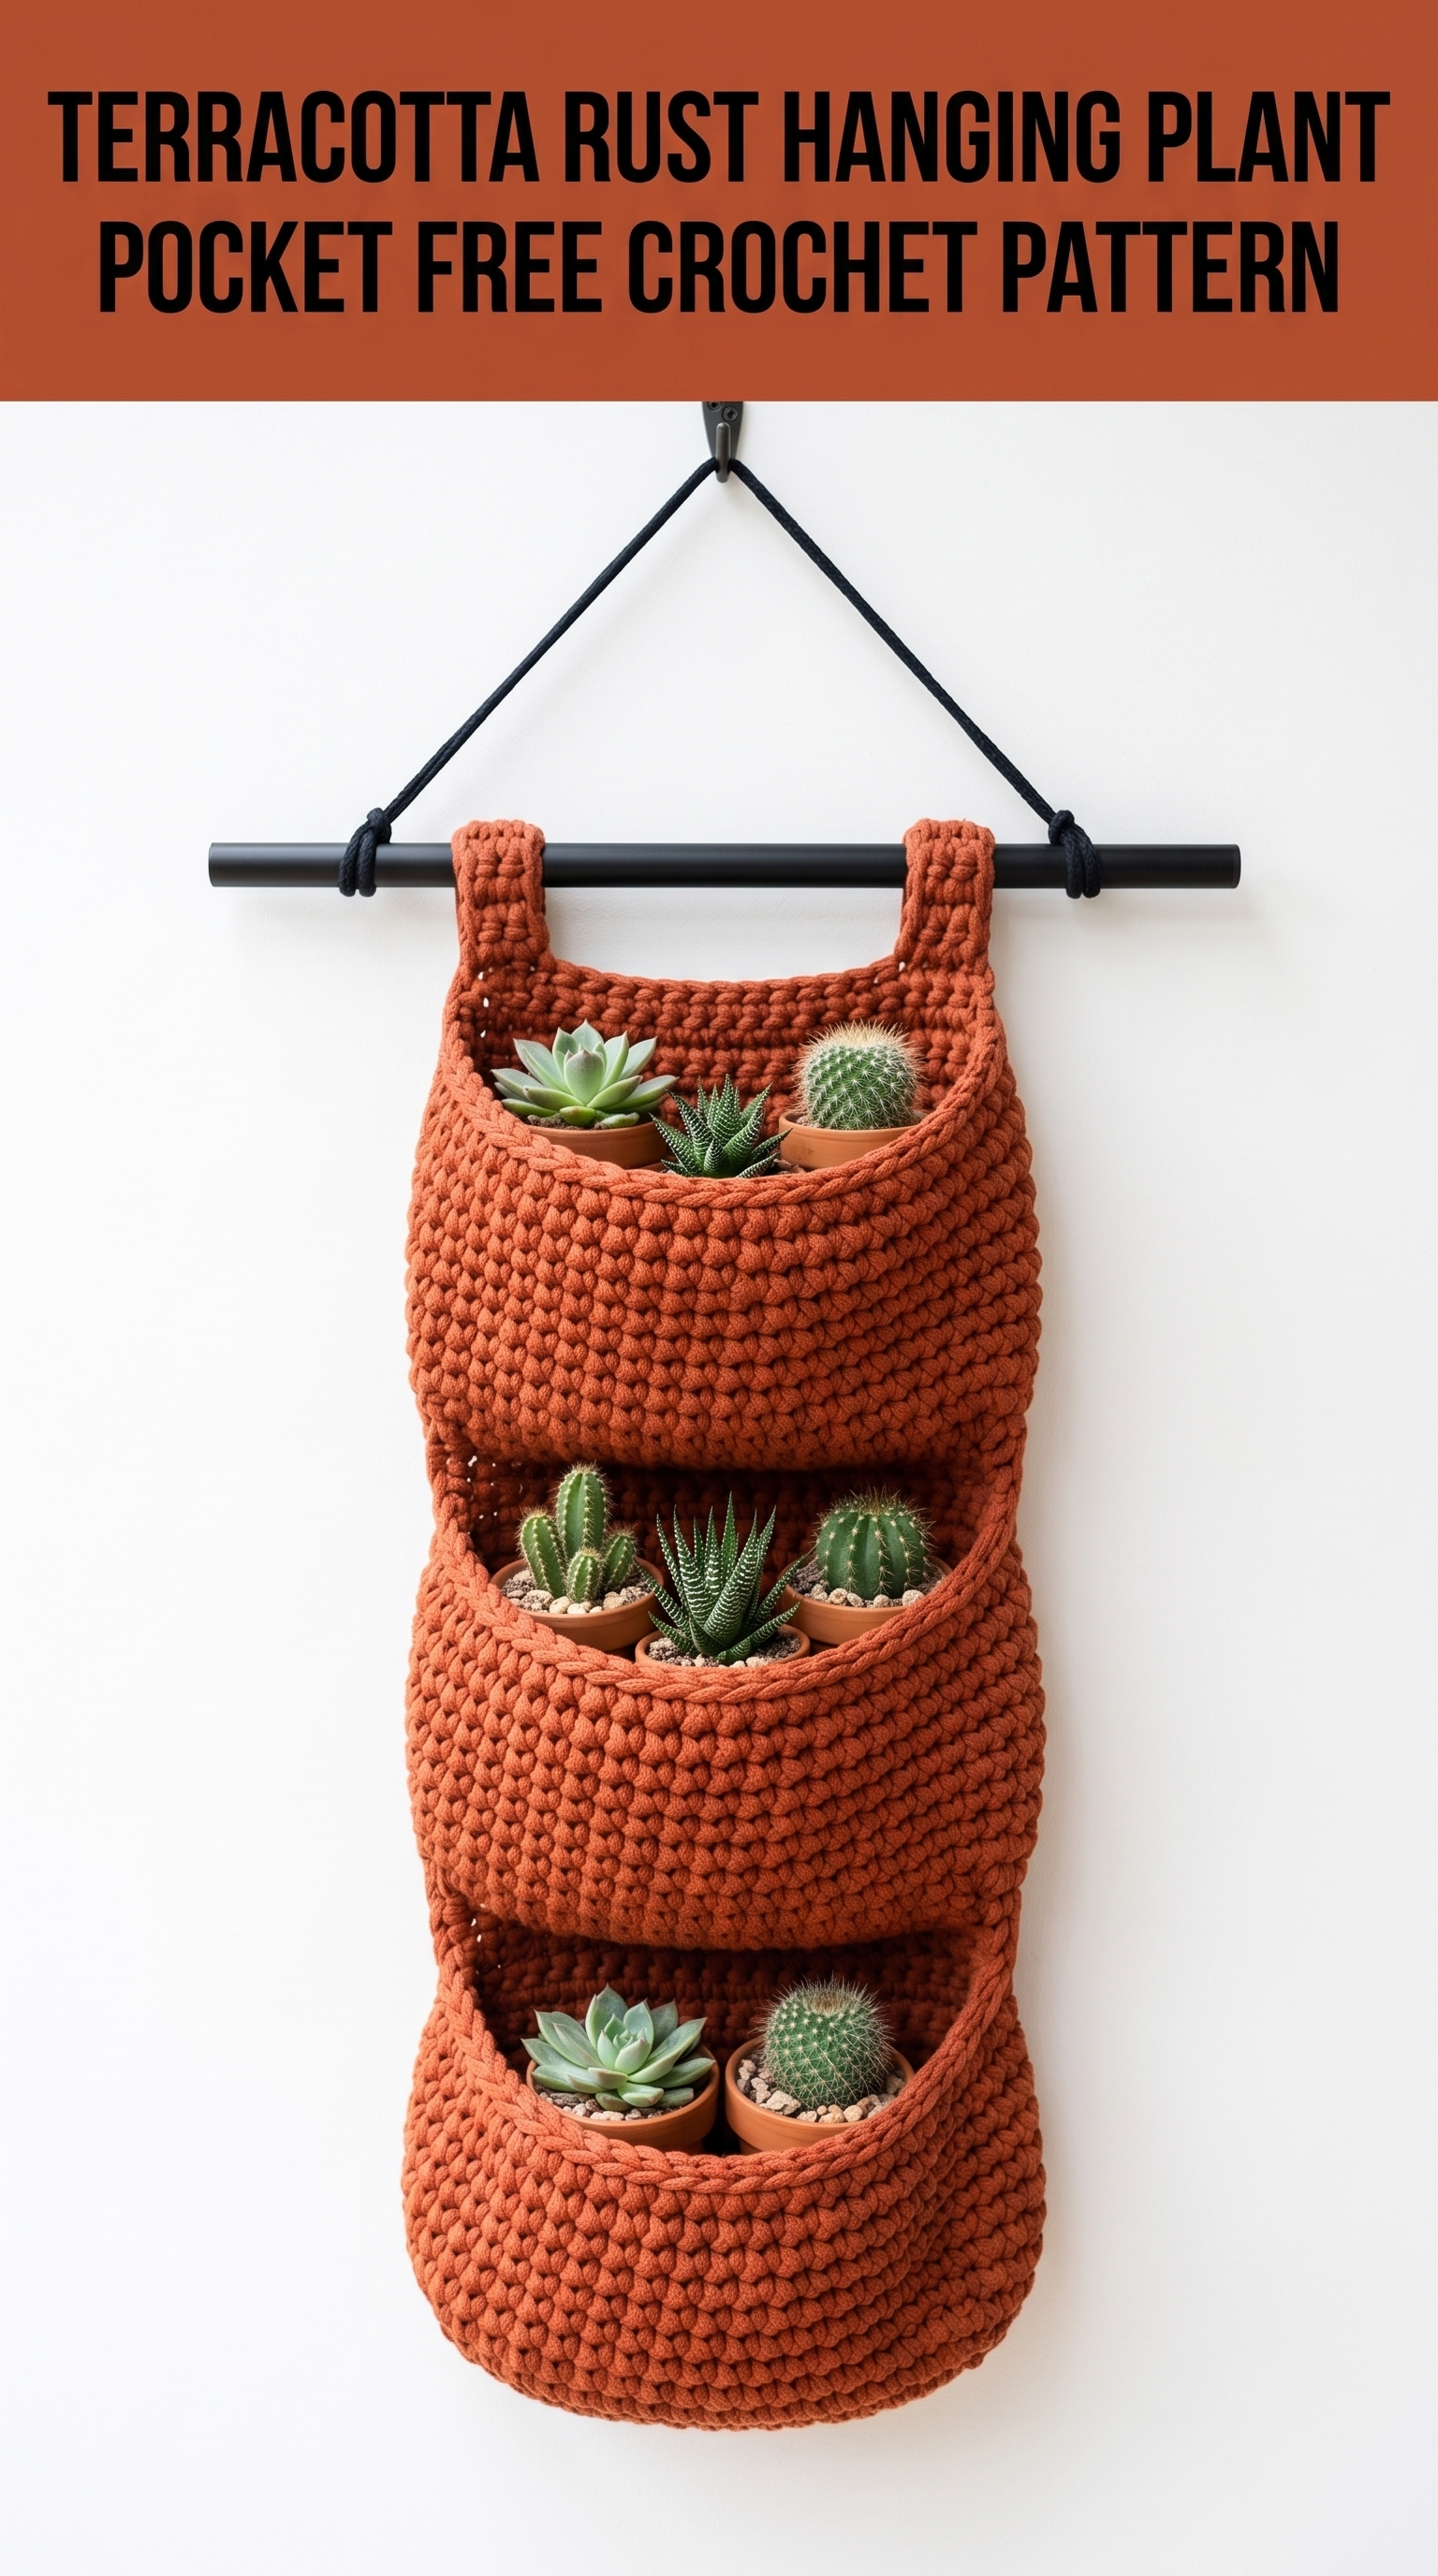
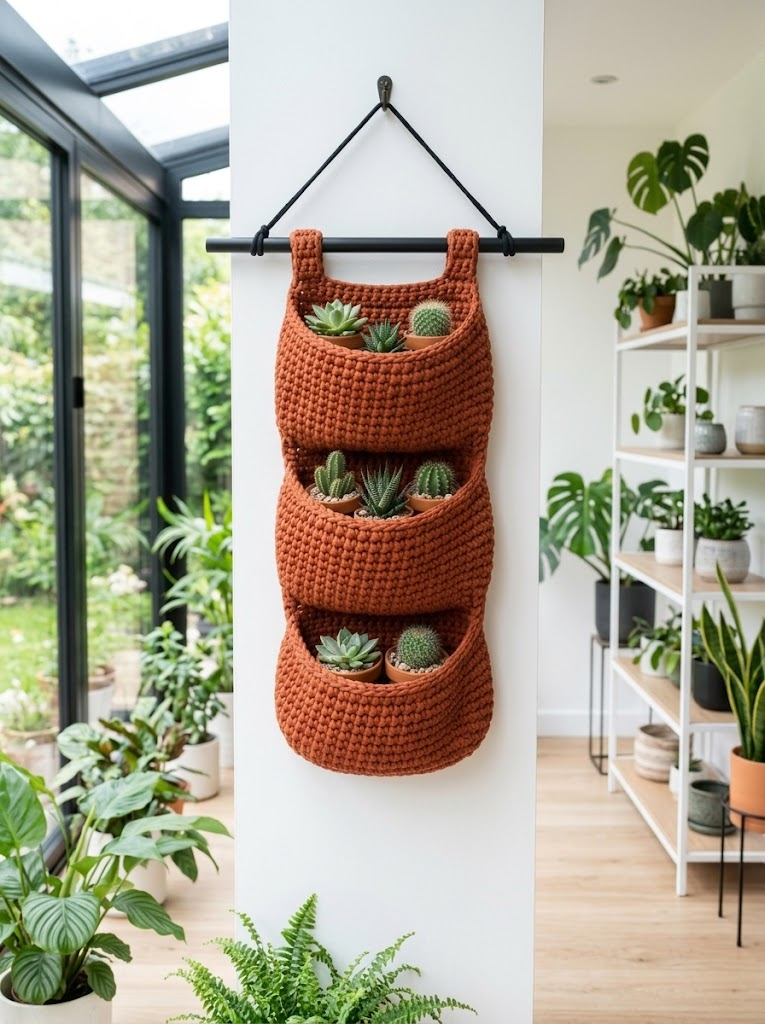
I absolutely love this project. This hanging plant pocket organizer is one of those makes that looks so much harder than it actually is. Three cozy pockets stacked vertically, all crocheted in a gorgeous terracotta rust color, perfect for displaying your favorite succulents or tiny cacti. And yes, you can totally do this even if you consider yourself a beginner.
This crochet pattern uses basic stitches throughout. If you can single crochet and work in the round, you have everything you need. The construction is straightforward, and I will walk you through every step so you end up with a beautiful wall hanging for your home or an incredible handmade gift.
Let me show you exactly how to make this stunning crochet plant pocket wall organizer from scratch.
Why You Will Love This Crochet Tutorial
This hanging planter hits that sweet spot between functional and decorative. The chunky texture from the thick yarn gives it that modern boho vibe that looks amazing in any room. Each pocket is deep enough to hold small potted plants securely while still showing off the greenery peeking over the top.
The terracotta rust color works beautifully with natural wood tones, white walls, and of course, green plants. But you could absolutely make this in cream, sage, mustard, or any color that fits your space.
What I really appreciate about this design is the simplicity. No complicated stitch patterns. No confusing shaping. Just solid, satisfying crochet that builds up quickly thanks to the bulky yarn weight.
Skill Level
Confident Beginner to Intermediate
You should be comfortable with:
If any of those feel unfamiliar, do not worry. I explain everything as we go.
Finished Dimensions
These measurements may vary slightly based on your tension and the specific yarn you choose.
Materials Needed
Yarn
Hook
Additional Supplies
Gauge
10 single crochet stitches and 11 rows = 4 inches / 10 cm in single crochet worked in the round
Gauge matters here because you want the pockets sturdy enough to hold weight without sagging. Take a few minutes to check your gauge before starting. If your stitches are too loose, go down a hook size. Too tight? Go up a size.
Abbreviations and Stitch Definitions
Let me break down every stitch and term you will encounter in this pattern:
ch = chain: Wrap yarn over hook, pull through loop on hook. This creates the foundation for most crochet projects.
sl st = slip stitch: Insert hook into stitch, yarn over, pull through both the stitch and the loop on your hook in one motion. Used for joining and moving across stitches without adding height.
sc = single crochet: Insert hook into stitch, yarn over and pull up a loop (two loops on hook), yarn over and pull through both loops. This is the main stitch for the entire project.
inc = increase: Work two single crochet stitches into the same stitch. This makes your work wider or creates shaping.
dec = decrease (also called sc2tog or single crochet two together): Insert hook into first stitch, pull up a loop, insert hook into next stitch, pull up a loop (three loops on hook), yarn over and pull through all three. This reduces your stitch count.
BLO = back loop only: Instead of inserting your hook under both loops of the stitch, insert it only under the back loop (the one farthest from you). This creates a ridge and is used for shaping the base of the pockets.
st(s) = stitch(es)
rnd(s) = round(s)
Pattern Notes Before You Begin
Step by Step Crochet Pattern
Part 1: Make the Pocket (Make 3)
Each pocket starts with an oval base worked flat, then you build up the sides by working in the round.
The Base (Oval)
Row 1: Ch 16. Starting in the 2nd ch from hook, sc in each ch across. (15 sts)
Row 2: Ch 1, turn. Sc in each st across. (15 sts)
Rows 3 through 8: Repeat Row 2. (15 sts each row)
You now have a small rectangle. This is the bottom of your pocket.
Building the Sides
Now we work around the entire edge of this rectangle to create the pocket walls.
Rnd 1: Do not turn. Working along the short edge, sc 8 sts evenly across. Working along the long edge (your starting chain), sc 15 sts across the bottom. Working along the next short edge, sc 8 sts evenly. Working along the top edge (your last row), sc 15 sts across. Place marker to note beginning of round. (46 sts total)
Rnd 2: Working in BLO only for this round, sc in each st around. (46 sts)
This back loop only round creates a nice defined edge at the base of your pocket. It makes the bottom sit flat.
Rnd 3 through 12: Sc in each st around, working through both loops as normal. (46 sts per round)
Rnd 13: Sc in the next 23 sts only. Leave remaining 23 sts unworked.
This creates the back half of your pocket opening. Slip stitch to secure if desired.
Fasten off and weave in your end.
Repeat to make two more pockets (three total).
Part 2: Make the Back Panel
The back panel connects all three pockets and provides the structure for hanging.
Row 1: Ch 16. Starting in the 2nd ch from hook, sc in each ch across. (15 sts)
Row 2: Ch 1, turn. Sc in each st across. (15 sts)
Rows 3 through 70: Repeat Row 2. (15 sts each row)
Your back panel should measure approximately 25 to 26 inches / 64 to 66 cm long.
Fasten off, leaving a long tail for seaming.
Part 3: Make the Hanging Tabs (Make 2)
These loops attach to the dowel at the top.
Row 1: Ch 6. Starting in the 2nd ch from hook, sc in each ch across. (5 sts)
Rows 2 through 12: Ch 1, turn. Sc in each st across. (5 sts)
Fasten off, leaving a long tail.
Fold each tab in half to create a loop.
Part 4: Assembly
This is where everything comes together. Take your time here.
Attach the Pockets to the Back Panel
1. Lay your back panel flat on a table, right side facing up.
2. Position your first pocket near the bottom of the panel. The open side of the pocket should face outward (away from the back panel). The unworked back section of the pocket gets sewn directly to the back panel.
3. Using your yarn needle and matching yarn, whip stitch or mattress stitch the back of the pocket to the panel. Sew along both sides and the bottom edge, leaving the front open.
4. Position your second pocket approximately 2 inches / 5 cm above the first. Attach in the same manner.
5. Position your third pocket approximately 2 inches / 5 cm above the second. Attach the same way.
Attach the Hanging Tabs
1. Fold each tab in half to form a loop.
2. Position one tab at the top left corner of your back panel, with the loop pointing upward and the raw edges aligned with the panel edge.
3. Sew the raw edges securely to the back of the panel.
4. Repeat with the second tab at the top right corner.
Add the Dowel and Hanging Cord
1. Slide your wooden dowel or metal rod through both hanging tabs.
2. Cut your hanging cord to your desired length (I recommend about 24 inches / 61 cm for a nice visual balance).
3. Tie each end of the cord securely to each end of the dowel.
4. Adjust so the dowel hangs level.
Finishing Touches
Weave in all remaining ends using your yarn needle. For extra security on a project that will hold weight, weave each end through several stitches in different directions.
Give your finished piece a light steam block if desired. This helps even out any uneven stitches and gives a polished look. Do not press hard, just hover the steam over the fabric.
If you find your pockets do not hold their shape as well as you would like, you can add a piece of cardboard or plastic canvas cut to size inside each pocket bottom for extra structure. This is totally optional.
Tips for Success
Yarn choice matters. Cotton and cotton blends work best because they do not stretch. Acrylic can work but may sag over time when holding weight.
Keep consistent tension. Try to maintain the same tightness throughout each pocket so they all match.
Count your stitches. At the end of each round, do a quick count. It is much easier to fix a mistake right away than to unravel later.
Use quality hardware. A sturdy dowel and strong cord ensure your hanging planter stays secure on the wall, especially when holding terra cotta pots with soil.
Start with plastic pots. Lightweight plastic nursery pots are safer than heavy ceramic ones until you know how your planter handles weight.
How to Style Your Finished Hanging Plant Pocket
This piece looks incredible displayed on a narrow wall space, next to a window, or in a bright corner. The vertical design takes advantage of wall space without eating up floor or shelf real estate.
Fill each pocket with small succulents, air plants, or trailing pothos. The pockets accommodate standard 3 to 4 inch nursery pots perfectly. You can also use it for non-plant storage like mail, sunglasses near the door, or crafting supplies.
For outdoor use on a covered porch, choose a yarn specifically designed for outdoor use or accept that sun and weather will fade the color over time.
Customization Ideas
Change the size. Want bigger pockets? Start with a longer foundation chain and add more rounds to the pocket walls.
Add more pockets. Simply lengthen the back panel and make additional pockets.
Use multiple colors. Make each pocket a different shade for an ombre effect or color block look.
Add texture. Swap some rounds of single crochet for half double crochet or add a round of reverse single crochet at the top of each pocket for a decorative edge.
Skip the dowel. Attach a large metal ring at the top instead for a different aesthetic.
Common Questions
Can I wash this?
Yes, but hand washing is safest. Remove the plants, gently wash in cool water with mild soap, reshape, and lay flat to dry.
How much weight can it hold?
When made with cotton yarn and hung from a secure wall hook, this can safely hold three small potted plants (under 2 pounds each). Always anchor to a stud or use appropriate wall anchors.
What if my pockets are not perfectly even?
That is the beauty of handmade. Small variations add character. If the difference bothers you, blocking helps even things out.
You Did It
I hope you love making this terracotta rust hanging plant pocket as much as I do. There is something so satisfying about creating functional home decor with your own hands. Every time you walk past it, you get that little spark of pride knowing you made that.
Thank you so much for choosing to make this project. It means the world to me that you spent your time and creativity here.
I would absolutely love to see your finished crochet plant pocket wall organizer. Tag me on Instagram or share in our Facebook group so I can cheer you on. Seeing your versions is honestly the best part of sharing patterns.
Now go grab your hook and that beautiful terracotta yarn. You have got this.
Happy crocheting, friend.
