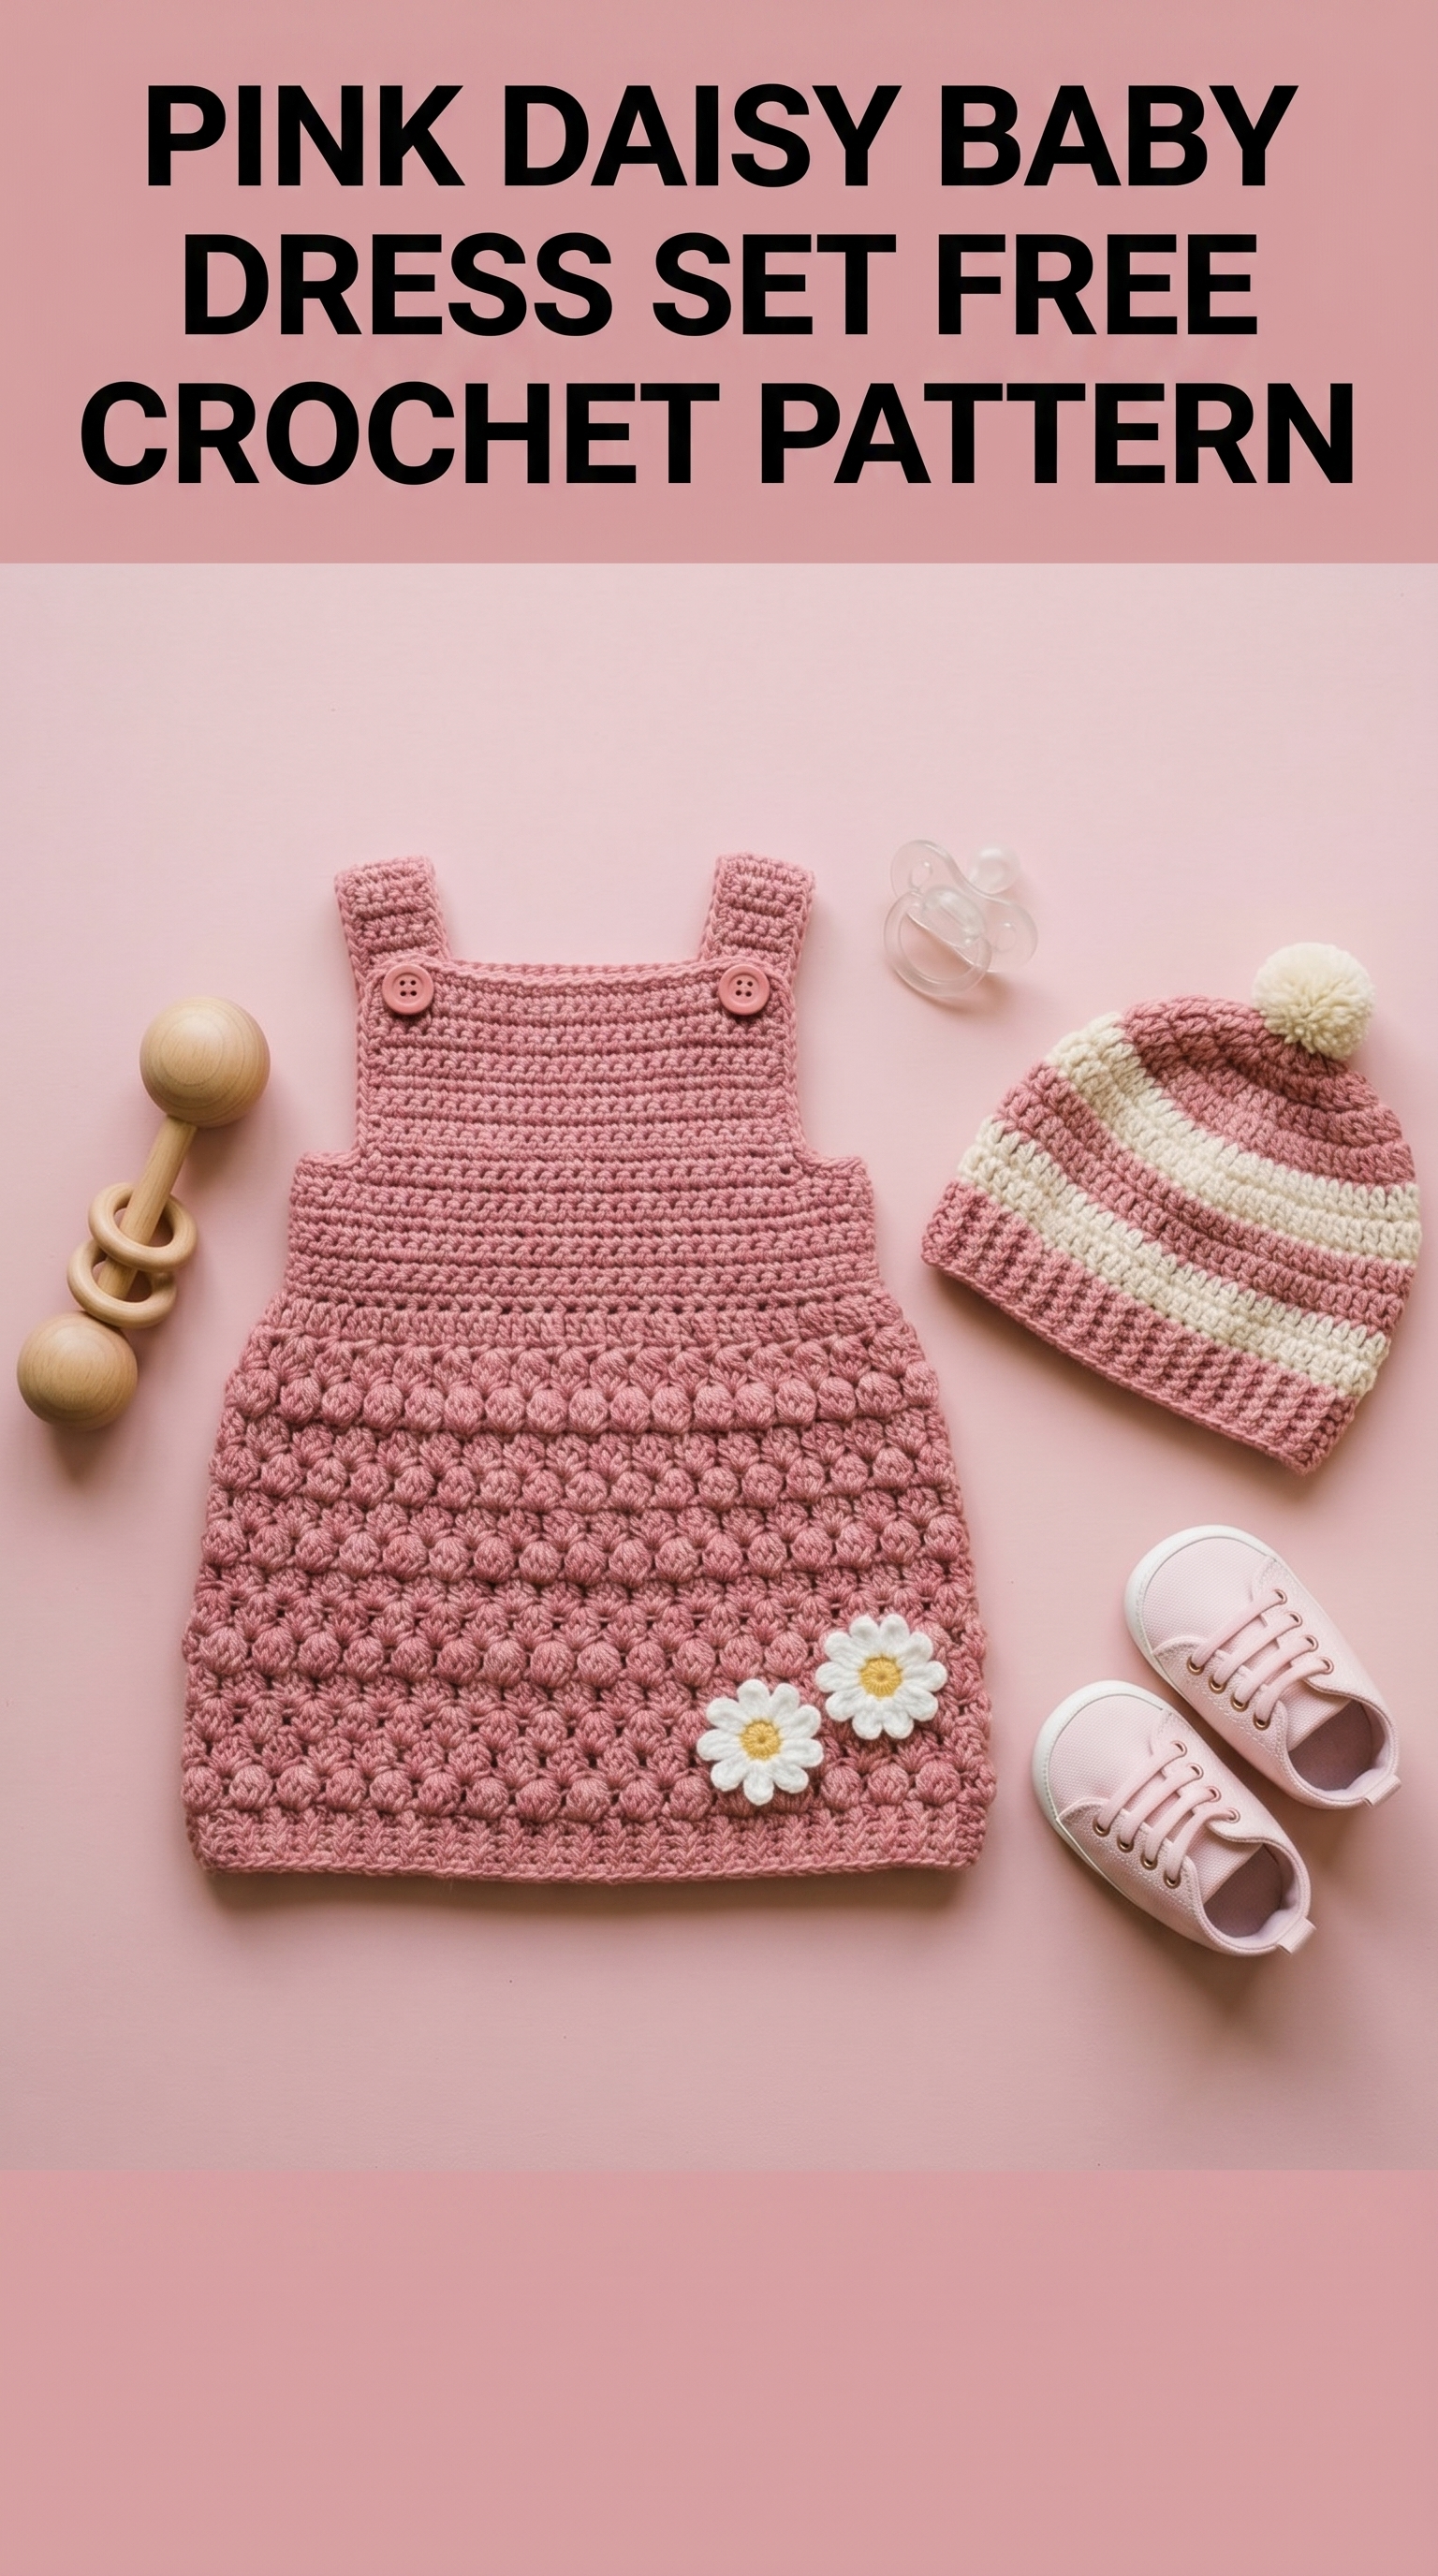
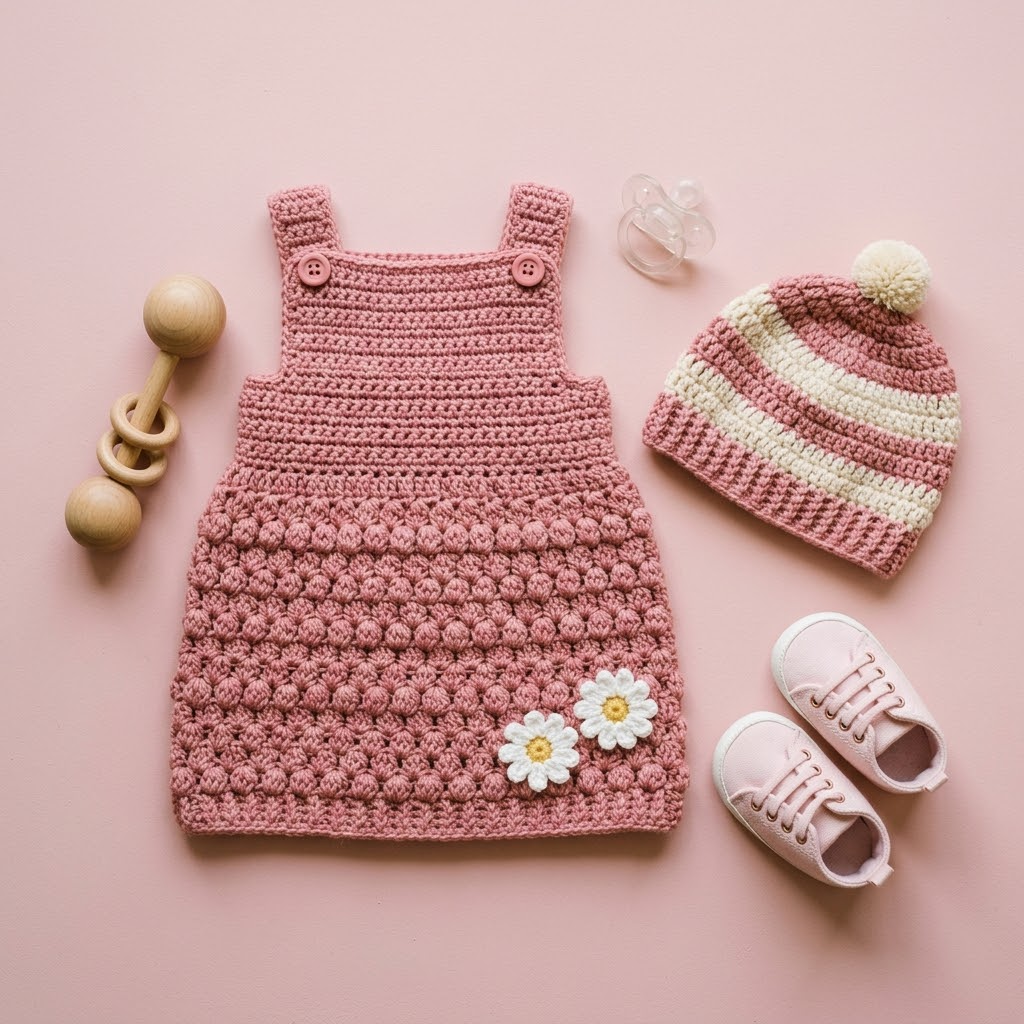
This adorable pink baby dress set is exactly the kind of project that makes you fall in love with crochet all over again. The combination of a textured bobble skirt, sweet daisy appliqués, and a matching striped beanie creates a gift set that looks far more complicated than it actually is. I promise you can make this.
If you can work basic stitches and follow a simple pattern repeat, you have everything you need. The bobble stitch might look intimidating, but I will walk you through every single step. By the end, you will have a complete baby outfit that looks like it came from a boutique.
This pink daisy baby dress crochet pattern includes the pinafore-style dress with button straps and a coordinating pompom beanie. Perfect for baby showers, first birthdays, or just because a tiny human deserves something handmade with love.
Why This Baby Dress Set Works So Well
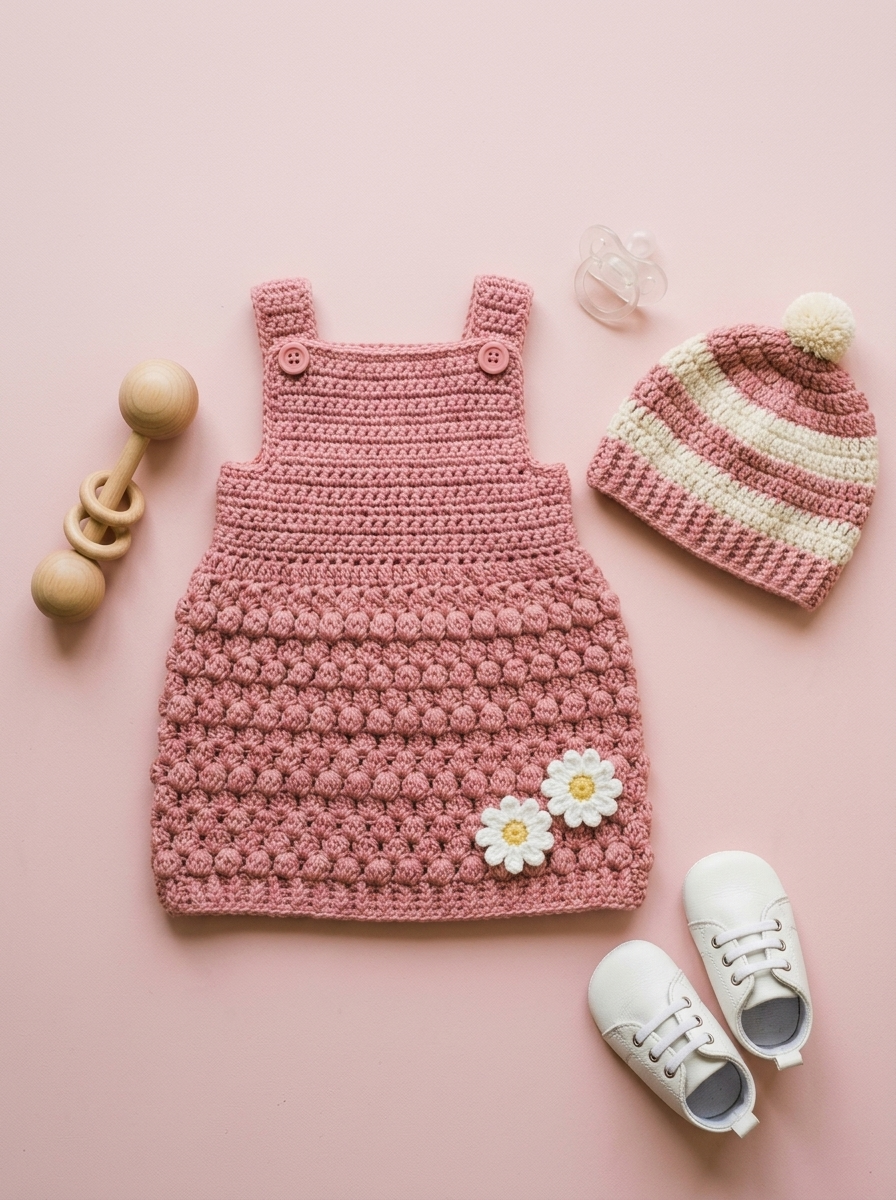
The design uses smart construction choices that make your life easier. The dress body works from the top down in rows, so you can try it on as you go. The bobble texture adds visual interest without complicated colorwork. And those daisy appliqués? They attach at the very end, which means you can place them exactly where you want.
The striped beanie works in the round from the brim up. Simple alternating stripes create a classic look that coordinates beautifully without matching too perfectly.
Both pieces use worsted weight yarn, which works up quickly and holds its shape through washing. That matters a lot for baby items.
Materials You Will Need
Yarn:
I recommend a soft acrylic or cotton blend for easy washing. Look for yarn labeled baby-safe or machine washable.
Hook:
Notions:
Gauge:
14 stitches and 16 rows = 4 inches in single crochet with 5.0 mm hook
Always check your gauge. A dress that is too small helps nobody.
Finished Measurements
This pattern is written for size 6 to 12 months.
Abbreviations and Stitch Definitions
Let me explain every stitch before we begin. Read through these once so nothing surprises you later.
Ch = Chain. Wrap yarn over hook, pull through loop on hook. This creates the foundation for most crochet work.
Sl st = Slip stitch. Insert hook, yarn over, pull through both loops at once. Used for joining and moving across stitches without adding height.
Sc = Single crochet. Insert hook into stitch, yarn over and pull up a loop (2 loops on hook), yarn over and pull through both loops. The shortest basic stitch.
Hdc = Half double crochet. Yarn over, insert hook, yarn over and pull up a loop (3 loops on hook), yarn over and pull through all 3 loops. Slightly taller than single crochet.
Dc = Double crochet. Yarn over, insert hook, yarn over and pull up a loop (3 loops on hook), yarn over and pull through 2 loops, yarn over and pull through remaining 2 loops. Creates a taller, more open fabric.
Bobble = A cluster of stitches worked into the same stitch and joined at the top to create a 3D bump. For this pattern: yarn over, insert hook, yarn over and pull up a loop, yarn over and pull through 2 loops. Repeat this sequence 4 more times in the same stitch (6 loops on hook). Yarn over and pull through all 6 loops. This pushes the bobble to the front of your work.
Inc = Increase. Work 2 stitches into 1 stitch.
Sk = Skip. Miss the indicated stitch and work into the next one.
BLO = Back loop only. Work into just the back loop of the stitch instead of both loops.
Part One: The Baby Dress Pattern
This pinafore-style dress starts at the bodice and works down to the hem. The straps are added last.
Bodice Section
Foundation Row: With main color (pink) and 5.0 mm hook, ch 65.
Row 1: Sc in 2nd ch from hook and in each ch across. Turn. (64 sts)
Row 2: Ch 1, sc in each st across. Turn. (64 sts)
Rows 3 through 12: Repeat Row 2. (64 sts)
You now have a rectangular bodice panel approximately 4.5 inches tall. This creates the front and back of the dress bodice worked flat.
Joining for the Skirt
Row 13: Ch 1, sc in first 16 sts, ch 8 (this creates the armhole), sk next 16 sts, sc in next 16 sts, ch 8, sk next 16 sts. Join to first sc with sl st to form a tube. (32 sc + 16 ch)
From this point, you will work in continuous rounds. Place a stitch marker in the first stitch of each round and move it up as you go.
Transition Round
Round 14: Ch 1, sc in each sc and in each ch around. Do not join. (48 sts)
Rounds 15 through 18: Sc in each st around. (48 sts)
Bobble Skirt Section
Now comes the fun part. The bobble pattern creates that beautiful textured effect you see in the photo. Take your time with the first round. Once you get the rhythm, it goes quickly.
Round 19 (Bobble Round): *Sc in next st, bobble in next st*. Repeat from * around. (24 bobbles, 24 sc)
Round 20: Sc in each st around, including the top of each bobble. (48 sts)
Round 21: *Bobble in next st, sc in next st*. Repeat from * around. (24 bobbles, 24 sc)
This offsets the bobbles from the previous bobble round, creating that staggered texture.
Round 22: Sc in each st around. (48 sts)
Rounds 23 through 42: Repeat Rounds 19 through 22 five more times.
Rounds 43 and 44: Sc in each st around. (48 sts)
Round 45: Sl st in each st around. Fasten off.
The dress body is complete. Set aside while you make the straps.
Dress Straps (Make 2)
Row 1: With main color, ch 25. Sc in 2nd ch from hook and in each ch across. Turn. (24 sts)
Rows 2 through 4: Ch 1, sc in each st across. Turn. (24 sts)
Fasten off, leaving a long tail for sewing.
Attaching the Straps
Position the straps on the inside back of the bodice, approximately 2 inches from each side edge. Sew securely using the yarn tail.
On the front of the bodice, sew 2 buttons on each side, spaced to align with the strap width. The straps will button over the front, creating the classic pinafore look.
Part Two: The Striped Beanie Pattern
This coordinating hat works from the brim up in joined rounds.
Ribbed Brim
Foundation: With main color (pink) and 5.0 mm hook, ch 11.
Row 1: Sc in 2nd ch from hook and in each ch across. Turn. (10 sts)
Row 2: Ch 1, sc BLO in each st across. Turn. (10 sts)
Rows 3 through 50: Repeat Row 2. (10 sts)
This creates a stretchy ribbed band. Join the short ends together with sl st or whip stitch to form a circle.
Hat Body
Turn the brim so you are working along the long edge.
Round 1: With main color, join with sl st to edge of brim. Ch 1, work 50 sc evenly around the edge. Join with sl st to first sc. (50 sts)
Rounds 2 and 3: Ch 1, sc in each st around. Join. (50 sts)
Round 4: Change to contrast color (cream). Ch 1, sc in each st around. Join. (50 sts)
Rounds 5 and 6: Continue with cream. Ch 1, sc in each st around. Join. (50 sts)
Round 7: Change to main color. Ch 1, sc in each st around. Join. (50 sts)
Rounds 8 and 9: Continue with main color. Ch 1, sc in each st around. Join. (50 sts)
Rounds 10 through 18: Continue alternating 3 rounds of each color.
Crown Shaping
Continue with whichever color you are on.
Round 19: Ch 1, *sc in next 8 sts, sc2tog*. Repeat from * around. Join. (45 sts)
Round 20: Ch 1, *sc in next 7 sts, sc2tog*. Repeat from * around. Join. (40 sts)
Round 21: Ch 1, *sc in next 6 sts, sc2tog*. Repeat from * around. Join. (35 sts)
Round 22: Ch 1, *sc in next 5 sts, sc2tog*. Repeat from * around. Join. (30 sts)
Round 23: Ch 1, *sc in next 4 sts, sc2tog*. Repeat from * around. Join. (25 sts)
Round 24: Ch 1, *sc in next 3 sts, sc2tog*. Repeat from * around. Join. (20 sts)
Round 25: Ch 1, *sc in next 2 sts, sc2tog*. Repeat from * around. Join. (15 sts)
Round 26: Ch 1, *sc in next st, sc2tog*. Repeat from * around. Join. (10 sts)
Round 27: Ch 1, sc2tog around. (5 sts)
Fasten off, leaving a long tail. Thread through remaining stitches and pull tight. Secure on the inside.
Pompom
Make a pompom approximately 2 inches in diameter using cream yarn. Attach securely to the top of the hat.
Part Three: Daisy Appliqués
These sweet little flowers add the perfect finishing touch. Make 2 for the dress.
Daisy Center
Round 1: With yellow yarn and smaller hook, make a magic ring. Ch 1, work 6 sc into ring. Join with sl st. (6 sts)
Fasten off yellow.
Daisy Petals
Round 2: Join cream yarn to any stitch. *Ch 3, dc in same st, ch 3, sl st in same st, sl st in next st*. Repeat from * around. (6 petals)
Fasten off, leaving a tail for sewing.
Attaching the Daisies
Position daisies on the lower right section of the dress skirt, overlapping slightly as shown. Sew in place using the yarn tail, securing through the center of each flower.
Finishing Your Baby Dress Set
Weave in all ends using your yarn needle. For baby items, I recommend weaving through several stitches and then doubling back for extra security.
Block both pieces gently if needed. Lay flat to dry.
Care Instructions
Machine wash cold on gentle cycle. Tumble dry low or lay flat to dry. The bobble texture may flatten slightly after washing but will bounce back once dry.
Tips for Success with This Crochet Pattern
Bobble troubles? The bobble stitch always looks messy until you finish it. Trust the process. That final yarn over that pulls everything together is where the magic happens.
Dress too big or small? Adjust the foundation chain in multiples of 2 for the bodice. Add or subtract 2 stitches at a time.
Not sure about button placement? Lay the dress flat and position the straps before sewing anything. Use pins to test different placements.
First time working in the round? Use a contrasting stitch marker so you never lose your place. Moving it up each round takes two seconds and saves so much frustration.
You Did It
Thank you so much for choosing this pink daisy baby dress set crochet pattern for your next project. I truly hope the little one who receives this handmade gift feels as loved as you intended.
If you make this set, I would absolutely love to see your version. Tag me on Instagram or share in our Facebook group. Seeing your finished projects is genuinely the best part of sharing patterns.
Happy hooking, friend. You have got this.
